Table of Contents
Advertisement
Quick Links
Advertisement
Table of Contents

Related Manuals for Harman Martin ERA 800 Performance


Summary of Contents for Harman Martin ERA 800 Performance
- Page 1 Performance Safety and Installation Manual...
- Page 2 ©2018-2019 HARMAN PROFESSIONAL DENMARK ApS. All rights reserved. Features, specifications and appearance are subject to change without notice. HARMAN PROFESSIONAL DENMARK ApS and all affiliated companies disclaim liability for any injury, damage, direct or indirect loss, consequential or economic loss or any other loss occasioned by the use of, inability to use or reliance on the information contained in this document.
-
Page 3: Table Of Contents
Contents Safety Information ..............4 Introduction . -
Page 4: Safety Information
The latest software, manuals and other documentation for all Martin products are available for download at www.martin.com Technical Support If you have questions about how to install or operate the fixture safely, please contact Harman Professional Technical support: • For technical support in North America, please contact: HProTechSupportUSA@harman.com Phone: (844) 776-4899 •... - Page 5 P R O T E C T I O N F R O M E L E C T R I C S H O C K • Do not expose the fixture to rain or moisture. • Do not remove any cover from the fixture except as described under “Service and maintenance” on page 16.
- Page 6 • Do not modify the fixture in any way not described in this manual or the fixture’s User Guide or install other than genuine Martin parts. Do not stick filters, masks or other materials onto any lens or other optical component.
- Page 7 • Block access below the work area and work from a stable platform whenever installing, servicing or moving the fixture. • Allow enough clearance around the head to ensure that it cannot collide with a person or object such as another fixture when it moves.
-
Page 8: Introduction
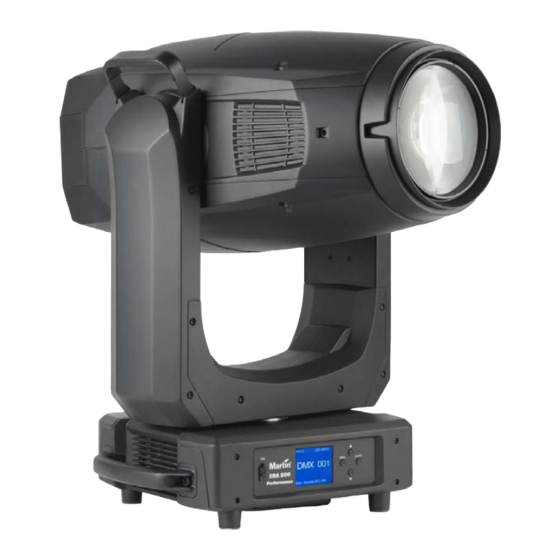
Introduction Thank you for selecting the ERA 800 Performance from Martin®. This moving-head spotlight offers the following features: • Bright 800 W, 6500 K LED light source • 34 000 lumens output • Crisp optics with flat field • 1:8 fast zoom •... -
Page 9: Packing
Tilt lock Check that the tilt lock is released before applying power to the fixture. See Figure 1. Release the tilt lock by sliding the tilt lock button (arrowed) to the Unlocked position. You can reapply the tilt lock by first checking that the power is off and then sliding the tilt lock button back to the Locked position. -
Page 10: Physical Installation
Physical installation Warning! The ERA 800 Performance has a powerful pan motor. The torque reaction when the head is panned suddenly can cause the base to move if the fixture is standing unsecured on a surface. Do not apply power to the ERA 800 Performance unless the base is securely fastened to a stable surface or structure. - Page 11 The mounting points in the base allow omega brackets and rigging clamps to be fastened as shown in Figure 3. Figure 3: Clamp bracket positions Clamping the fixture to a truss 1. Check that all rigging hardware is undamaged and can bear at least six (6) times the weight of the fixture or as required by locally applicable regulations.
- Page 12 3. See Figure 3 on page 11. Align the first clamp and bracket with 2 mounting points in the base, and engage both the clamp bracket’s quarter-turn fasteners in corresponding sockets in the base. See Figure 4. Turn the levers on the quarter-turn fasteners a full 90°...
-
Page 13: Ac Power
AC power Warning! Read “Safety Information” on page 4 before connecting the fixture to AC mains power. Note in particular that you must not connect any fixture or device to the MAINS OUT/THRU socket when operating on less than 200 V mains power, and you must not connect more than one ERA 800 Performance fixture to the MAINS OUT/THRU socket when operating on 200 - 240 V mains power. - Page 14 If you connect two fixtures to power as described above, we recommend that you draw power from a circuit that is protected by a type D MCB (Miniature Circuit Breaker). This will avoid the breaker tripping unnecessarily because of inrush current. Connecting to power Warning! The ERA 800 Performance does not have a power On/Off switch.
-
Page 15: Data Links
Data links Important! Shut down power to the fixture before connecting to or disconnecting from data. DMX and RDM The ERA 800 Performance has 5-pin locking XLR sockets for DMX and RDM input and output (see A in Figure 8). The default pin-out on both sockets is: •... -
Page 16: Service And Maintenance
Service and maintenance Warning! Read “Safety Information” on page 4 before servicing the ERA 800 Performance. Warning! Disconnect the fixture from AC mains power and allow to cool for at least 30 minutes before handling. Do not stare into the light output. Be prepared for the fixture to light and move suddenly when connected to power. -
Page 17: Lubrication
• Presence of cigarette smoke. • Airborne dust (from stage effects, building structures and fittings or the natural environment at outdoor events, for example). If one or more of these factors is present, inspect fixtures within their first few hours of operation to see whether cleaning is necessary. - Page 18 • Avoid touching the other gobos when removing a gobo from a rack: the sharp edge of one gobo can scratch the others. • Keep gobos perfectly clean to reduce the risk of heat damage. • When cleaning gobos, use a repeated dabbing action rather than a rubbing action. When rinsing, use distilled or even better deionized water to avoid residue that will appear as drying marks.
- Page 19 Replacing a rotating gobo Important: Different screw sizes and types are used on the modules and components inside the head. Make sure that you do not mix them up. Apply a small quantity of Loctite 222 to the threads of all the screws mentioned in this section when you reinstall them.
- Page 20 6. See Figure 13. Rotate the head through 180° so that you are looking at the top of the head. Remove the six screws (arrowed) from the effects module retaining plates and keep the plates and screws for re-use. Figure 13: Removing the effects module retaining plates 7.
- Page 21 9. See Figure 15. Note the position of the reference marks in the gobo drive wheel A and goboholder B. Note also the position of the goboholder positioning magnet C and gobo wheel positioning magnet D. Each time you remove a goboholder from the wheel, turn the drive wheel (twice if necessary) until the marks exactly line up.
- Page 22 Installing a gobo in a goboholder All the rotating gobos in the ERA 800 Performance are held in their holders by springs and can be removed from their holders as described below. Note that the fused glass gobo Limbo (Crystal) has a specially designed goboholder and spring to cater for the extra thickness of the gobo.
- Page 23 In the ERA 800 Performance: • The side of the goboholder with the gobo retaining spring faces towards the LED light source. • The side of the goboholder with the teeth faces towards the front glass. With the goboholder placed teeth down on a clean surface and the gobo retaining spring facing upwards as shown in Figure 18, gobos in the ERA 800 Performance must be installed as follows: •...
- Page 24 3. Holding the new gobo by its edges, insert it into the goboholder with the alignment marks on gobo and goboholder oriented correctly and with the shiny side facing upwards (see Figure 18). Check that the gobo is fully seated in the holder. 4.
-
Page 25: Using The Fixture
Using the fixture Before using the fixture, download and read the latest version of the ERA 800 Performance User Guide from the ERA 800 Performance area of the Martin website at www.martin.com. The User Guide contains details • The effects available in the fixture. •... -
Page 26: Troubleshooting
Troubleshooting Problem Probable cause(s) Remedy Check that power is switched on and cables are No power to fixture. plugged in. Contact Martin Service or authorized service partner. Do not remove base or yoke covers, One or more of the fixtures is attempt to replace a fuse or carry out any repairs or completely dead. -
Page 27: Specifications
Specifications Physical Length (head) ............608 mm (24.0 in.) Width (base) . - Page 28 Gobos External diameter....... . 30.0 mm +0 / -0.2 mm (1.181 in. +0 / -0.008 in.) Maximum image diameter .
- Page 29 Supplier’s Declaration of Conformity Harman Professional, Inc. have issued an FCC Supplier’s Declaration of Conformity for this product. The Declaration of Conformity is available for download from the ERA 800 Performance area of the Martin website at www.martin.com Canadian Interference-Causing Equipment Regulations - Règlement sur le Matériel Brouilleur du Canada...
- Page 30 Intellectual Property Rights Martin® ERA 800 products are covered by one or more of these patents: CN101430080; CN102713425; CNZL200810128720.0; CNZL200810128776.6; CNZL200810144668.8; CNZL201080025103.3; CNZL201180014884.0; CNZL201380004370.6; CZ17567; EP2058586; EP2113714; EP2117284; EP2136136; EP2326150; EP2443381; EP2536974; EP2550686; EP2828577; EP2881650; US6971770; US7,703,948; US7,789,543; US7,905,630; US7,942,535; US7,990,673; US7222997; US7498756; US8,449,141; US8,708,535; US8,770,762; US9217551; US9217559; and/or one or more of these patent applications: CN104696882;...
- Page 32 www.martin.com...
Need help?
Do you have a question about the Martin ERA 800 Performance and is the answer not in the manual?
Questions and answers