Table of Contents
Advertisement
Available languages
Available languages
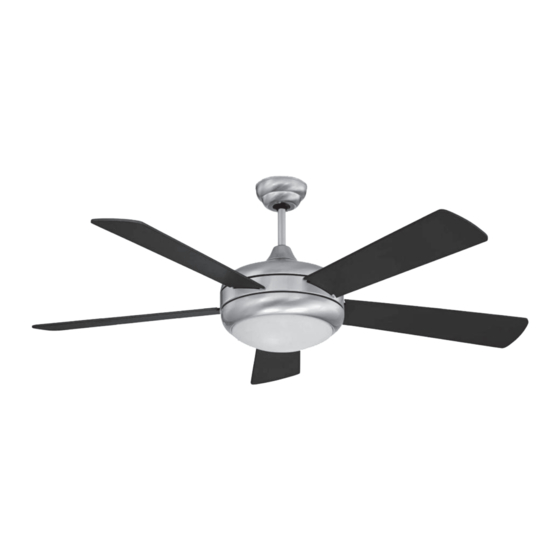
Miles 52" Ceiling Fan
model no . 052-9339-8
Total weight of fan plus light kit are 8.6.kgs
Instruction Manual
Toll Free: 1-866-827-4985
IMPORTANT: Please read and under
beginning assembly of product, make sure all parts are present. Compare parts
with exploded view. If any part is missing, or if you have any questions, contact
customer service at 1-866-827-4985 (toll free).
stand this manual before any assembly. Before
Advertisement
Chapters
Table of Contents

Related Manuals for NOMA 052-9339-8


Summary of Contents for NOMA 052-9339-8
- Page 1 Miles 52" Ceiling Fan model no . 052-9339-8 Total weight of fan plus light kit are 8.6.kgs Instruction Manual Toll Free: 1-866-827-4985 IMPORTANT: Please read and under stand this manual before any assembly. Before beginning assembly of product, make sure all parts are present. Compare parts with exploded view.
-
Page 2: Table Of Contents
Toll Free : 1-866-827-4985 model no. 052-9339-8 Exploded view ............................ 3 Important safety instructions ....................4 Rules for safe installation .......................4 Tools required for assembly ......................5 Assembly ..............................5 Operation ..............................9 Maintenance ..............................10 Care and cleaning ............................10 Troubleshooting ............................ 10 Environmental protection ....................11 Warranty ..............................12... -
Page 3: Exploded View
EXPLODED VIEW Description Description Mounting bracket Glass shade Downrod Blades Canopy Bulbs(A19X6W LED) Flange cover Remote control Receiver Motor... -
Page 4: Important Safety Instructions
Toll Free: 1-866-827-4985 model no. 052-9339-8 IMPORTANT SAFETY INSTRUCTIONS Please retain this manual for future reference. Note: Always turn the power off before servicing the ceiling fan. · A dry dust cloth is suitable for most cleanings. · Should the ceiling fan become wet, have a qualified electrician inspect it before next use. -
Page 5: Tools Required For Assembly
TOOLS REQUIRED FOR ASSEMBLY This manual is designed to make it as easy as possible for you to assemble, install, operate and maintain the ceiling fan. The following tools listed are required for assembly and intallation: 1 stepladder 1 star-head screwdriver 1 flat screwdriver 1 wire stripper/pliers 1 electrical tape... - Page 6 Toll Free: 1-866-827-4985 model no. 052-9339-8 ASSEMBLY Installation: The installation is to be in accordance with the National Electric Code, ANSI/NFPA 70 and local codes. 1. Mounting bracket Note: The mounting bracket depicted will vary depending on the model. . Remove the four sets of side screws from mounting Mounting bracket and save for future use.
- Page 7 ASSEMBLY Carefully lift the fan assembly onto the mounting bracket. Rotate the fan until the notch (b) on the aluminum ball fits against the ridge (a) on the mounting bracket (see Fig. 7a). With the mounting bracket holding the fan assembl y, follow wiring instructions (step 4).
- Page 8 Toll Free: 1-866-827-4985 model no. 052-9339-8 aluminum ball Receiver Downrod Antenna: DO NOT CUT OR SPLICE WARNING: Be sure no bare wire or wire strands are visible after making connections. Place green and white connections on opposite side of box from the black and blue (if applicable) connections.
-
Page 9: Operation
6. Install the light kit and install the glass shade onto the light kit by turning the glass shade clockwise (see Fig. 10). OPERATION Remove the battery cover from the back of remote control and insert 2AA (fig.a) or 9V batteries (fig.b) (included). Replace the battery cover. -
Page 10: Maintenance
Toll Free: 1-866-827-4985 model no. 052-9339-8 MAINTENANCE Because of the fan’s natural movement, some connections may become loose. Check the support connections, brackets and blade attachments twice a year. Make sure they are secure. There is no need to oil your fan. The motor has permanently lubric ated bearings. -
Page 11: Environmental Protection
3. Drop-mount and hands-free wiring TROUBLESHOOTING Problem Possible reason Solution Light does . Wires are not properly connected. . Ensure wire connector in switch not work housing is connected. . Unscrew light bulb and discard . Light bulb is faulty. properly. -
Page 12: Warranty
This Noma product carries a limited (1) year warranty against defects in workmanship and materials. Noma agrees to replace the defective product free of charge within the stated warranty period, when returned by the original purchaser with proof of purchase. This product is not guaranteed against wear or breakage due to misuse and/or abuse. - Page 13 Ventilateur de plafond de 52 po Miles N° de modèle : 052-9339-8 Poids total du ventilateur et de l'ensemble éclairage est de 8,6 kg Mode d’emploi Sans frais : 1 866 827-4985 IMPORTANT : Veuillez lire ce guide et bien le comprendre avant de commencer l’assemblage.
- Page 14 Sans frais : 1 866 827-4985; modèle no 052-9339-8 Vue éclatée ............................ 3 Consignes de sécurité importantes ..................4 Règles relatives à l’installation sécuritaire ................4 Outils requis pour l’assemblage ....................5 ..............................5 Assemblage Utilisation ..............................9 Entretien ..............................10 Entretien et nettoyage ..........................10 Dépannage...
-
Page 15: Vue Éclatée
VUE ÉCLATÉE Description Qté Description Qté Support de fixation Abat-jour en verre Tige Lames Toit Ampoules (DEL A19X6W) Couvercle de bride Télécommande Moteur Récepteur... -
Page 16: Consignes De Sécurité Importantes
Toll Free: 1-866-827-4985 model no. 052-9339-8 CONSIGNES DE SÉCURITÉ IMPORTANTES Veuillez conserver ce manuel pour référence ultérieure. Note: Always turn the power off before servicing the ceiling fan. Remarque : Toujours éteindre l’appareil avant de faire l’entretien du ventilateur de plafond. -
Page 17: Outils Requis Pour L'assemblage
OUTILS REQUIS POUR L’ASSEMBLAGE Ce manuel est conçu pour faciliter le plus possible l’assemblage, l’installation, l’utilisation et l’entretien du ventilateur de plafond. Les outils ci-dessous sont requis pour l’assemblage et l’installation : 1 escabeau 1 tournevis cruciforme 1 tournevis à tête plate 1 coupe-fil / pince 1 ruban isolant 1 clé... - Page 18 Toll Free: 1-866-827-4985 model no. 052-9339-8 ASSEMBLAGE Installation : L’installation doit être conforme au Code national de l’électricité, ANSI/NFPA 70 et avec les codes locaux. 1. Support de fixation Remarque : Le support de montage illustré peut varier selon le modèle.
- Page 19 ASSEMBLAGE Soulevez le ventilateur soigneusement et placez-le sur le support de montage. Tournez le ventilateur jusqu’à ce que la fente (b) sur le dôme en aluminium s’ajuste à la crête (a) sur le support de montage (voir figure 7a). Suivez les directives de câblage une fois que le support de montage retient le ventilateur (étape 4).
- Page 20 Toll Free: 1-866-827-4985 model no. 052-9339-8 Entre le ventilateur et le récepteur : Branchez le fil noir portant la mention « L » du ventilateur au fil noir portant la mention « AU MOTEUR L » sur le récepteur. Branchez le fil bleu portant la mention « LUMIÈRE » à partir du ventilateur fil bleu portant la mention «...
- Page 21 6. Installez l’ensemble d’éclairage. Installez deux ampoules de 6 W à DEL. Éteignez le ventilateur et la lampe et installez l’abat-jour en verre sur l’ensemble d’éclairage en tournant l’abat-jour dans le sens horaire (voir la figure 10). FONCTIONNEMENT Retirez le couvercle du compartiment à piles au verso de la télécommande et insérez 2 piles AA (figure a) comprises ou une pile 9 V (figure b) comprise.
-
Page 22: Entretien
Toll Free: 1-866-827-4985 model no. 052-9339-8 ENTRETIEN En raison du mouvement naturel du ventilateur, certaines connexions peuvent devenir lâches. Vérifiez les connexions de soutien, les supports et les pales deux fois par année. Assurez-vous qu’ils sont bien fixés. Nul besoin d’huiler votre ventilateur. Le moteur est doté de roulements lubrifiés en permanence. -
Page 23: Protection De L'environnement
3. Drop-mount and hands-free wiring DÉPANNAG Problème Cause possible Solution La lumière . Les fils ne sont pas correctement . Assurez-vous que le connecteur de fils dans le boîtier de l’interrupteur connectés. est connecté. fonctionne . L’ampoule est défectueuse. pas. . -
Page 24: Garantie
Toll Free: 1-866-827-4985 model no. 052-9339-8 GARANTIE Cet article Noma est couvert par une garantie de un (1) an contre tous les défauts de matériaux et de fabrication. Noma consent à remplacer l’article défectueux sans frais au cours de la période de garantie convenue lorsque l’article, accompagné...
Need help?
Do you have a question about the 052-9339-8 and is the answer not in the manual?
Questions and answers