
Related Manuals for NOMA ASHTON


Summary of Contents for NOMA ASHTON
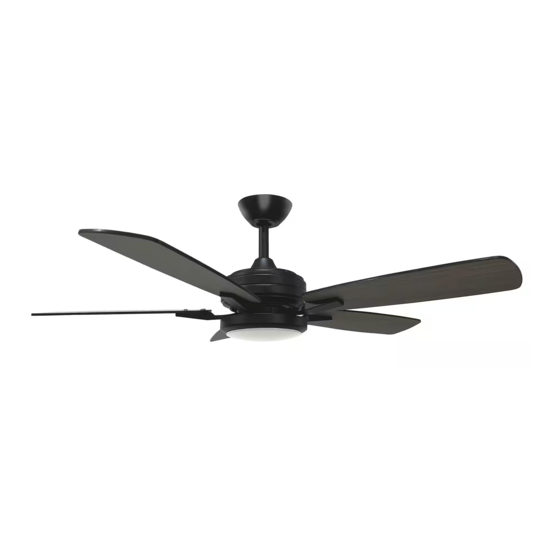
- Page 1 ASHTON 44” LED CEILING FAN PRODUCT NO. 052-9603-8 USER MANUAL READ AND SAVE THESE INSTRUCTIONS...
- Page 2 TABLE OF CONTENTS...
-
Page 3: Table Of Contents
01. SAFETY/CAUTIONS 02. TOOLS REQUIRED 03. EXPLODED VIEW 04. ELECTRICAL SAFETY 05. ASSEMBLY 06. OPERATION 07. TROUBLESHOOTING 08. DYNAMIC BLADE BALANCING KIT 09. MAINTENANCE 10. WARRANTY & DISPOSAL 11. IC STATEMENT... -
Page 4: Safety/Cautions
SAFETY / CAUTIONS SAFETY CONCERNS • TO REDUCE THE RISK OF ELECTRIC SHOCK, ENSURE ELECTRICITY HAS BEEN TURNED OFF AT THE CIRCUIT BREAKER OR FUSE BOX BEFORE BEGINNING. • ALL WIRING MUST BE IN ACCORDANCE WITH NATIONAL AND LOCAL ELECTRICAL CODES. ELECTRICAL INSTALLATION SHOULD BE PERFORMED BY A QUALIFIED LICENSED ELECTRICIAN. - Page 5 • WARNING: TO REDUCE THE RISK OF FIRE, ELECTRIC SHOCK AND PERSONAL INJURY, MOUNT FAN TO OUTLET BOX MARKED “ACCEPTABLE FOR FAN SUPPORT” WITH THE SCREWS PROVIDED WITH THE OUTLET BOX. • WARNING: TO AVOID RISK OF PERSONAL INJURY, DO NOT BEND THE BLADE ARMS (ALSO REFERRED TO AS FLANGES) OR THE BRACKETS WHILE BALANCING THE BLADES OR CLEANING THE FAN.
-
Page 6: Tools Required
TOOLS REQUIRED INSTALLATION PREPARATION Flat-head Cross-head Safety glasses Pliers screwdriver screwdriver Wire cutters Electrical tape Stepladder Wire strippers This fan can be mounted with a To prevent personal injury and downrod on a regular (no-slope) or damage, ensure that the hanging vaulted ceiling, such as flush mount. -
Page 7: Exploded View
EXPLODED VIEW PACKAGE CONTENTS X 16 X 16... - Page 8 EXPLODED VIEW PACKAGE CONTENTS LIGHT PLATE HANGER BRACKET CANOPY 18 W LED ASSEMBLY CANOPY COVER REMOTE CONTROL DOWNROD STAND COVER REMOTE CONTROL HOLDER DOWNROD, HANGER PIN 12 V BATTERY & LOCK PIN BLADE BALANCING KIT FAN MOTOR ASSEMBLY FAN BLADES (5 PCS) INSTALLATION INSTRUCTIONS BLADE BRACKETS (5 PCS) PARTS PACK CONTAINING:...
- Page 9 EXPLODED VIEW DETAIL HANGER BRACKET FAN BLADE BLADE BRACKET HANGER BALL LIGHT PLATE CANOPY CANOPY COVER 18 W LED ASSEMBLY DOWNROD DOWNROD STAND COVER HANGER PIN LOCK PIN COLLAR FAN MOTOR ASSEMBLY...
-
Page 11: Electrical Safety
ELECTRICAL SAFETY Instructions Read all safety information and installation instructions before • you begin to install the fan and save instructions. All set screws of the fan must be checked and re-tightened where necessary before installation. To reduce the risk of personal injury, do not bend the blade brackets when installing the brackets, balancing the blades or cleaning the fan. - Page 12 • mount the outlet box marked “ACCEPTABLE FOR FAN SUPPORT” and use mounting screws provided with the outlet box. • The installation must be in accordance with the national electrical code, ANSI/NFPA 70-1999 and local codes. If you are unfamiliar with the methods of installing electrical wiring, •...
-
Page 13: Assembly
ASSEMBLY INSTRUCTIONS Outlet Hanger Outlet Box Bracket Screw Fig. 1 Fig. 2 Turn OFF the electric circuit at the main Securely attach the hanger bracket to an outlet box marked "ACCEPTABLE FOR fuse of circuit breaker box (Fig. 1). FAN SUPPORT" using the supplied outlet box screws with spring washers (Fig. - Page 14 Safety Cable Hanger Ball Downrod Collar Screws Canopy Motor Wires Canopy Cover Hanger Lock Pin Downrod Stand Cover Collar Hanger Lock Pin Fig. 5 Fig. 6 Insert and tighten the two collar screws. Slide downrod cover, canopy cover Slide lock pin into hanger pin until it is and canopy over the downrod as locked into position (Fig.
- Page 15 ASSEMBLY Flat Washer Star Washer Safety Wood Cable Screw Fig. 9 The safety cable prevents the fan from falling. Secure the safety cable to the ceiling joist with a wood screw, star washer and flat washer (Fig. 9). Wiring Instructions IMPORTANT: If you are not sure if the electrical outlet box and fan are •...
- Page 16 Between Fan & Mains NOTE: Fan must be installed at a maximum distance of 40’ (12.2 m) from the transmitting unit for proper signal transmission between the transmitting unit and the fan’s receiving unit. • Fan to House Supply Wires Electrical Connections: Connect the WHITE wire (Neutral) from the outlet box to the WHITE wire marked “AC in N”...
- Page 17 ASSEMBLY Hanger Bracket blade screws Hanger Bracket Screw fiber washer Blade Canopy Fig. 11-2 Fig. 11-1 Hole Slot Blade Canopy Screw Canopy Cover Fig. 10 Blade Bracket Remove 1 of the 2 screws from the bottom of the hanger bracket and loosen the other Fig.
- Page 18 Screw Retainers (This will help keeping the screws in place for ease of assembly) Blade Motor Assembly Assembly Blade Bracket Screw Fig. 13 Attach two blade bracket screws to the Light Plate blade brackets by using the screw retainer to keep the screws in place. Repeat for all Round light kit screws Hole...
-
Page 19: Operation
OPERATION Remote Control Operation Instructions Install a 12 V battery into the remote control. Fasten the battery cover screw after installation. To prevent damage to the remote control, remove the battery if not used for long periods of time. WARNING: Do not short-circuit, disassemble, heat up, connect improperly, or dispose of used batteries in fire. - Page 20 NOTE: On start-up your ceiling fan will oscillate back and forth. This is NORMAL OPERATION for DC ceiling fan as it goes through its calibration cycle. The fan is NOT DEFECTIVE. 1. Fan button. Press and release the button to turn the fan on or off. •...
-
Page 21: Troubleshooting
TROUBLESHOOTING COMMON PROBLEMS PROBLEM SOLUTIONS • Check main and branch circuit fuses or circuit breakers. • Make sure that the wall switch is turned “ON”. • CAUTION: Make sure the power is turned off before performing the following steps. Fan does not start. •... - Page 22 PROBLEM SOLUTIONS Refer to page 23-DYNAMIC BLADE BALANCING KIT. • Warning: If any of the blades are bent or damaged, • do not use the unit any further. All blades are weighed and grouped by weight. Natural woods vary in density which could cause the fan to wobble even though all blades are weight-matched.
-
Page 23: Dynamic Blade Balancing Kit
DYNAMIC BLADE BALANCING KIT INSTRUCTIONS Ruler Balancing Weight Centre Line Measuring Point Plastic Clip Counter- Clockwise Preface • Your ceiling fan may sometimes have wobbling problems when operating due to irregularity in the blades or the blade holders. Improper assembly in the mounting system may cause some additional problems. - Page 24 • Turn the fan off. Select one blade and place the plastic clip on it; where the plastic clip locates is halfway between the blade holder and the blade tip on the edge of the blade. CAUTION: The plastic clip should be placed on the windward or leading •...
-
Page 25: Maintenance
MAINTENANCE CARE OF YOUR FAN Suggested Maintenance Because of the fan’s natural movement, some connections may become loose. Check the support connections, brackets, and blade attachments twice a year. Make sure they are secure. It is not necessary to remove fan from ceiling bracket. -
Page 26: Warranty & Disposal
ENVIRONMENTALLY FRIENDLY LIMITED WARRANTY 1 YEAR LIMITED WARRANTY This Noma® product carries a limited one (1) year warranty against defects in workmanship and materials. Noma Canada agrees to replace the defective product free of charge within the stated warranty period, when returned by the original purchaser with proof of purchase. -
Page 27: Ic Statement
IC STATEMENT This device contains license-exempt transmitter(s)/receiver(s) that comply with lnnovation, Science and Economic Development Canada’s license-exempt RSS(s). Operation is subject to the following two conditions: 1. This device may not cause interference. 2. This device must accept any interference, including interference that may cause undesired operation of the device. - Page 28 Imported by/Importé par Noma Canada, Toronto, Canada M4S 2B8 Made in China | Fabriqué en Chine 1-866-827-4985...
- Page 29 Ventilateur de plafond à DEL de 44 po Ashton Nº DE MODÈLE : 052-9603-8 GUIDE D’UTILISATION LISEZ ET CONSERVEZ CES INSTRUCTIONS...
- Page 30 TABLE DES MATIÈRES...
- Page 31 01. SÉCURITÉ/MISES EN GARDE 02. OUTILS REQUIS 03. VUE ÉCLATÉE 04. SÉCURITÉ ÉLECTRIQUE 05. VENTILATEUR 06. FONCTIONNEMENT 07. DÉPANNAGE 08. MASSELOTTES D’ÉQUILIBRAGE DYNAMIQUE POUR PALE 09. ENTRETIEN 10. GARANTIE ET MISE AU REBUT 11. DÉCLARATION D’IC...
-
Page 32: Sécurité/Mises En Garde
SÉCURITÉ / MISES EN GARDE •POUR RÉDUIRE LE RISQUE DE DÉCHARGE ÉLECTRIQUE, ASSUREZ-VOUS QUE L’ÉLECTRICITÉ A ÉTÉ COUPÉE AU NIVEAU DU TABLEAU DE DISTRIBUTION À FUSIBLES OU DISJONCTEURS AVANT DE COMMENCER. •LE CÂBLAGE DOIT ÊTRE EN CONFORMITÉ AVEC LES CODES DE L’ÉLECTRICITÉ NATIONAUX ET LOCAUX. - Page 33 •AVERTISSEMENT : POUR RÉDUIRE LES RISQUES D’INCENDIE, DE DÉCHARGE ÉLECTRIQUE ET DE BLESSURE, FIXEZ LE VENTILATEUR SUR UNE BOÎTE DE SORTIE PORTANT UNE MENTION SELON LAQUELLE ELLE PEUT SUPPORTER UN VENTILATEUR AVEC LES VIS FOURNIES AVEC LA BOÎTE DE SORTIE. •AVERTISSEMENT : POUR ÉVITER LE RISQUE DE BLESSURE, NE PLIEZ PAS LES SUPPORTS DE PALE (ÉGALEMENT APPELÉS BRIDES) OU LES SUPPORTS LORS DE L’ÉQUILIBRAGE DES PALES OU DU NETTOYAGE DU VENTILATEUR.
-
Page 34: Outils Requis
OUTILS REQUIS PRÉPARATION DE L’INSTALLATION Tournevis à tête Tournevis Lunettes de sécurité Pince plate à tête cruciforme Coupe-fils Ruban isolant Escabeau Pince à dénuder Ce ventilateur peut être monté au Pour éviter les blessures et des moyen d’une tige de suspension sur dommages, assurez-vous que un plafond régulier (sans pente) ou l’emplacement de de suspension... -
Page 35: Vue Éclatée
VUE ÉCLATÉE CONTENU DE L’EMBALLAGE X 16 X 16... - Page 36 VUE ÉCLATÉE CONTENU DE L’EMBALLAGE PLAQUE DE LUMIÈRE SUPPORT DE SUSPENSION SOCLE ENSEMBLE À DEL DE 18 W COUVERCLE DU SOCLE TÉLÉCOMMANDE COUVERCLE DE SUPPORT DE PORTE-TÉLÉCOMMANDE LA TIGE BATTERIE 12 V SUSPENSION ET ERGOT D’ARRÊT BLOC-MOTEUR MASSELOTTES D’ÉQUILIBRAGE POUR PALE FAN MOTOR ASSEMBLY PALES DE VENTILATEUR (5 PIÈCES) CONSIGNES D’INSTALLATION...
- Page 37 VUE ÉCLATÉE DÉTAILS SUPPORT DE SUSPENSION PALES DE VENTILATEUR SUPPORT POUR PALE BOULE DE SUSPENSION PLAQUE DE LUMIÈRE SOCLE COUVERCLE DU SOCLE ENSEMBLE À DEL DE 18 W TIGE COUVERCLE DE SUPPORT DE LA TIGE GOUPILLE DE SUSPENSION GOUPILLE DE VERROUILLAGE COLLIER BLOC-MOTEUR...
-
Page 39: Sécurité Électrique
SÉCURITÉ ÉLECTRIQUE Instructions Lisez toutes les consignes de sécurité et les instructions d’installation • avant d’entamer l’installation du ventilateur et conservez ces instructions. 01. Toutes les vis de fixation du ventilateur doivent être vérifiées et resserrées si nécessaire avant l’installation. 02. - Page 40 • Afin de réduire le risque d’incendie, de choc électrique ou de blessure, fixez à la boîte de sortie portant portant la mention « ACCEPTABLE FOR FAN SUPPORT » (peut supporter un ventilateur) et utilisez les vis de montage fournies avec la boîte de sortie. •...
- Page 41 INSTRUCTIONS D'ASSEMBLAGE Boîte de sortie Support de Vis de boîte montage de sortie Fig. 1 Fig. 2 Coupez l’alimentation au tableau de Fixez solidement le support de montage à distribution (Fig. 1). une boîte de sortie portant la mention « ACCEPTABLE FOR FAN SUPPORT » (peut supporter un ventilateur), au moyen des vis et rondelles de blocage fournies avec la boîte de sortie (Fig.
- Page 42 Câble de Boule de sécurité suspension Tige de suspension Vis pour collier Socle Fils du Plaque de moteur Goupille recouvrement Goupille de du socle bêta suspension Couvercle de la tige de suspension Goupille de suspension Goupille bêta Collier Fig. 5 Fig.
- Page 43 ASSEMBLAGE Rondelle plate Rondelle en étoile Câble de Vis à bois sécurité Fig. 9 Le câble de sécurité empêche le ventilateur de tomber. Fixez le câble de sécurité à la solive du plafond avec une vis à bois, une rondelle en étoile et une rondelle plate (Fig. 9). Instructions de câblage IMPORTANT : Si vous ne savez pas si la boîte de sortie et le ventilateur •...
- Page 44 Entre le ventilateur et le secteur REMARQUE : Le ventilateur doit être installé à une distance maximale de 40 pi (12,2 m) de l’unité de transmission pour une bonne transmission du signal entre l’unité de transmission et l’unité de réception du ventilateur • Connexions électriques des fils d’alimentation du ventilateur à...
- Page 45 ASSEMBLAGE Support de Vis de pale montage Vis du Rondelle en fibre support de montage Pale Fig. 11-2 Fig. 11-1 Socle Pale Fente piriforme Vis de montage Couvercle du socle Fig. 10 Support pour pale Retirez 1 des 2 vis du bas du support de suspension et desserrez l’autre d’un demi- Fig.
- Page 46 Pièce de retenue des vis (pour maintenir les vis en place afin de faciliter l’assemblage.) Ensemble Pale ventilateur moteur Vis de support de pale Fig. 13 Fixez deux vis de support de pale aux Plaque de supports de pale en utilisant la pièce de lumière retenue de vis pour maintenir les vis en Trou...
-
Page 47: Fonctionnement
FONCTIONNEMENT Instructions d’utilisation de la télécommande Installez une pile 12 V dans la télécommande. Fixez la vis du couvercle du compartiment à piles après l’installation. Afin d’éviter tout dommage à la télécommande, retirez la pile si la télécommande n’est pas utilisée pendant une longue période. - Page 48 REMARQUE : Au démarrage, votre ventilateur de plafond oscillera d’avant en arrière. Il s’agit d’un FONCTIONNEMENT NORMAL pour le ventilateur de plafond CC pendant son cycle d’étalonnage. Le ventilateur n’est PAS DÉFECTUEUX. 1. Bouton du ventilateur. Appuyez brièvement sur le bouton pour allumer ou éteindre le ventilateur.
-
Page 49: Dépannage
DÉPANNAGE PROBLÈMES COMMUNS PROBLÈME SOLUTIONS • Vérifiez le circuit principal et le circuit de dérivation des fusibles ou des disjoncteurs. • Assurez-vous que le commutateur mural est en position « ON ». • ATTENTION : Assurez-vous que l’alimentation est coupée avant d’effectuer les étapes suivantes. Le ventilateur ne démarre pas. - Page 50 PROBLÈME SOLUTIONS • Reportez-vous à la page 23 – MASSELOTTES D’ÉQUILIBRAGE DYNAMIQUE DES PALES. • Avertissement : Si l’une des pales est tordue ou endommagée, n’utilisez plus l’appareil. Toutes les pales ont été pesées et sont groupées par poids. La densité du bois naturel peut varier, ce qui peut faire osciller le ventilateur même si le poids de toutes les pales est le même.
-
Page 51: Masselottes D'équilibrage Dynamique Pour Pale
MASSELOTTES D’ÉQUILIBRAGE DYNAMIQUE POUR PALE INSTRUCTIONS Règle Masselotte d’équilibrage Ligne centrale Point de mesure Clip en plastique Sens antihoraire Préface • Des problèmes d’oscillation peuvent parfois survenir lors du fonctionnement de votre ventilateur de plafond en raison d’irrégularité des pales ou des supports de pale. - Page 52 • Éteint le ventilateur. Sélectionnez une pale et mettez le clip en plastique sur une des pales, au milieu entre le support de pale et le bout de pale et sur le bord de la pale. ATTENTION : Le clip en plastique doit être placé sur le bord de la pale qui •...
-
Page 53: Entretien
ENTRETIEN ENTRETIEN DE VOTRE VENTILATEUR Entretien suggéré 01. En raison du mouvement naturel du ventilateur, des connexions peuvent se desserrer. Vérifiez les connexions, les supports et les raccordements des pales deux fois par an. Assurez-vous qu’ils sont bien serrés. Il n’est pas nécessaire de retirer le ventilateur du support de plafond. -
Page 54: Garantie Et Mise Au Rebut
Cet article Noma comprend une garantie limitée de un (1) an contre les défauts de fabrication et de matériau(x). Noma Canada consent à remplacer l’article défectueux sans frais au cours de la période de garantie convenue s’il est retourné au magasin où vous l’avez acheté... -
Page 55: Déclaration D'ic
DÉCLARATION D’IC Cet appareil contient des émetteurs/récepteurs exempts de licence qui sont conformes aux RSS exempts de licence d’Innovation, Sciences et Développement économique Canada. L’utilisation de cet appareil est autorisée seulement aux conditions suivantes : 1. Cet appareil ne peut pas causer d’interférence. 2. - Page 56 Imported by/Importé par Noma Canada, Toronto, Canada M4S 2B8 Made in China | Fabriqué en Chine 1-866-827-4985...
Need help?
Do you have a question about the ASHTON and is the answer not in the manual?
Questions and answers