Table of Contents
Advertisement
Quick Links
Advertisement
Table of Contents

Related Manuals for Ozone MAGMAX 2


Summary of Contents for Ozone MAGMAX 2
- Page 1 Pilots Manual...
-
Page 2: Table Of Contents
CONTENTS Thank You Warning Team Ozone Your MagMax 2 Risers Limitations Preparation Basic Flight Techniques Rapid Descent Techniques Incidents Caring and Maintenance Ozone Quality Technical Specifications Drawing/Riser lengths Line diagram Materials EN v1.1 July 2019... -
Page 3: Thank You
Confidence and belief in your paraglider is a far greater asset than any small gains in performance - ask any of the Ozone pilots on your local hills, or those who have taken our gliders on ground-breaking adventures or stood on podiums around the world. All our research and development is concentrated on creating the best handling/performance characteristics possible with optimum security. -
Page 4: Warning
Flying an Ozone paraglider is undertaken with the full knowledge of the involved risks. • As the owner of an Ozone paraglider you take exclusive responsibility for all risks associated with its use. Inappropriate use and or abuse of your equipment will increase these risks. -
Page 5: Team Ozone
TEAM OZONE Everyone at Ozone continues to be driven by our passion for flying, our love of adventure and our quest to see Ozone’s paraglider development create better, safer and more versatile paragliders. The design team consists of David Dagault, Luc Armant, Fred Pieri, Russell Ogden, Honorin Hamard, Emilia Plak and Alex Mateos. -
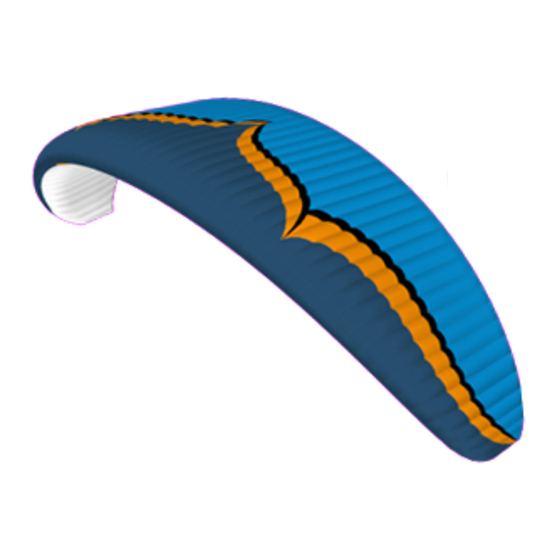
Page 6: Your Magmax
MagMax 2’s landing is simple. Designed primarily for foot launched tandem paramotoring, the MagMax 2 can also be used with lightweight trike units. Certified EN B in both 38 and 41 sizes the MagMax 2 is suitable for experienced qualified tandem pilots. -
Page 7: Risers
A risers for easy identification. The risers do not have a foot operated accelerator. Trimmers The MagMax 2 is certified with trim risers that can be adjusted in flight to maximise thermalling IMPORTANT or gliding efficiency or to compensate for wing loading/conditions depending on personal In thermic or turbulent taste. - Page 8 Adjustable Brake Pulley Position The height of the brake line pulley can be adjusted according to pilot preference and to suit the power unit’s hang points height. Higher settings are for low hang point motors/trikes whilst a middle or lower setting are for units with higher hang points. IMPORTANT If you adjust the The factory setting may not be suitable for your particular power unit.
- Page 9 Spreader bars / Accessories The MagMax 2 is delivered as standard without any special equipment for tandem flying. All suitable accessories such as tandem spreader bars, tandem roll bar etc are specific to a paramotor / trike unit and needs to be provided by the paramotor / trike manufacture.
-
Page 10: Limitations
Ozone wings are designed and tested to the highest standards by a dedicated team of professionals. The MagMax 2 has passed the EN load test and flight tests, certified EN B with a the chest strap set to 55cm. It also holds DGAC certification. - Page 11 Modifications Your Ozone MagMax 2 was designed and trimmed to give the optimum balance of performance, IMPORTANT handling and safety. Any modification means the glider loses its certification and will also be Do not modify your more difficult to fly. We strongly recommend that you do not modify your glider in any way.
-
Page 12: Preparation
PREPARATION Wing To familiarise yourself with the glider it is a good idea to perform practice inflations and ground handling both with and without the motor/trike unit. As with all new equipment, only fly in conditions that you would normally fly in and on a familiar site. Fly the wing in a progressive manner and be aware that wing loading has a direct effect on the wing’s flying characteristics. -
Page 13: Basic Flight Techniques
BASIC FLIGHT TECHNIQUES Trike Launching Make sure there is enough clear space upwind to launch and climb out safely, avoiding trees, power lines and any other obstacles that may affect you should you have a power failure. Always fly with a safety margin so that power failures do not leave you compromised. You should always be able to glide to a suitable landing place. - Page 14 Reverse Launch -Light to Strong Winds IMPORTANT Lay out your MagMax 2 as you would for the forward launch. However, this time face the Never take off with wing, and attach the risers in the correct manor (half a turn in each riser, and crossed in a glider that is not the direction you want to turn).
- Page 15 Avoid low turns downwind with insufficient airspeed. The MagMax 2 is well damped in roll but under certain circumstances it is possible for the pilot to induce oscillations. This is caused by a combination of the engine/propeller torque and pilot weight shift and/or brake inputs and hang point height.
- Page 16 To familiarize yourself with the MagMax 2 your first turns should be gradual and progressive. IMPORTANT To make efficient and coordinated turns with the MagMax 2 first look in the direction you Never initiate a turn at want to go and check that the airspace is clear. Then smoothly apply the brake until the minimum speed (i.e.
- Page 17 If the wind is very strong, and you feel you might be dragged, stall the glider with the C risers. This stalls the MagMax 2 in a very quick and controllable way and will drag you less than if you use the brakes.
-
Page 18: Rapid Descent Techniques
Smaller, heavily loaded wings are more dynamic than larger wings. Big Ears Folding in the wing tips of the MagMax 2 increases its sink rate. This is useful for staying out of cloud or descending quickly. To pull big ears on the MagMax 2 take hold of the outermost A-line on each side whilst keeping the brake handles in your hand. - Page 19 Spiral Dives If you turn your MagMax 2 in a series of tightening 360’s it will enter a spiral dive. This will result in rapid height loss. To initiate a spiral dive, look to the direction you want to turn and then smoothly apply the inside brake.
-
Page 20: Incidents
INCIDENTS IN FLIGHT Deflations Due to the flexible form of a paraglider, turbulence may cause a portion of the wing suddenly to collapse. This can be anything from a small 30% (asymmetric) collapse to a complete (symmetric) collapse. If you have a collapse, the first thing to do is to control your direction. You should fly away from the ground or obstacles and other pilots, or at least not to fly into them. - Page 21 Cravats If the tip of your wing gets stuck in the lines, this is called a ‘cravat’. This can make your glider go into a spiral, which is difficult to control. The first solution to get out of this situation is to stabilise the glider into normal flight, i.e get control of your direction and then pull down the stabilo line until the wing tip frees itself.
-
Page 22: Caring And Maintenance
Ozone recommends to use the concertina packing method exactly as shown so that all of the cells rest alongside each other and the plastic reinforcements are not unnecessarily bent. Using an Ozone Saucisse or Saucisse light pack will help preserve the life of the wing and aid with the speed and ease of packing. - Page 23 Step 4. Group together the middle/trailing edge of the wing by sorting the folds near the B, C and D tabs. If using a Saucisse pack go to Step 8. Step 5. Once the LE and rear of the wing have been sorted, turn the whole wing on its side.
- Page 24 Step 8. If using the Saucisse Pack, carefully zip it up without trapping any material. Step 9. Turn the Saucisse on its side and make the first fold just after the LE reinforcements. Do not fold the plastic reinforcements, use 3 or 4 folds around the LE. IMPORTANT: Do NOT lay the wing flat on the ground before packing the glider, this will cause abrasion damage...
- Page 25 • Your Ozone wing has an opening closed using Velcro on the trailing edge of the tip called the ‘Butt hole’. This has been designed to easily empty all the things which have been...
- Page 26 When cutting out the patches allow ample overlap of the tear and make sure both sides are different sizes. Make sure to round off each corner of the patches. You can find more information about repairing your wing on the Ozone website, including step by step instructions with pictures.
- Page 27 If you damage a line: Any line that is visually damaged MUST be replaced. Use a reputable paragliding service centre to make the replacement lines. Alternatively you can order them from your local Ozone dealer or directly from our website http://www.flyozone.com/paragliders/en/shop/lines.php It is important that replacement lines are made from the correct materials and diameters.
- Page 28 The tearing resistance of the cloth - A non-destructive test following the TS-108 standard which specifies minimum tear strength for sky diving canopies should be made using a Bettsometer. (B.M.A.A. Approved Patent No. GB 2270768 Clive Betts Sails). Strength of the lines - An upper, middle and lower A line, along with a lower B line should be tested for strength.
-
Page 29: Ozone Quality
OZONE QUALITY GUARANTEE At Ozone we take the quality of our products very seriously, all our gliders are made to the highest standards in our own manufacturing facility. Every glider manufactured goes through a stringent series of quality control procedures and all the components used to build your glider are traceable. -
Page 30: Technical Specifications
TECHNICAL SPECIFICATIONS No. of Cells Projected Area (m 32.1 34.7 Flat Area (m 38.2 41.2 Projected Span (m) 11.4 Flat Span (m) 14.1 14.7 Projected Aspect Ratio Flat Aspect Ratio Root Chord (m) 3.37 Weight (kg) 7.26 7.69 EN Certified Weight Range (kg) 110-185 130 -220 DGAC weight Range (kg) -
Page 31: Drawing/Riser Lengths
TECHNICAL DRAWINGS Riser Trailing Lower Surface Edge Riser Leading Upper Surface Edge Riser Riser Riser Launch assist system attachment Upper Cell Lines Openings Brake Non Accelerated trims pulled Lines Butt Hole 340mm 333mm Middle Trim tab 327mm Lines 320mm Riser Stabilo Line Lines Accelerated... -
Page 32: Line Diagram
MagMax 2 LINE DIAGRAM Individual and linked line lengths can be found online. A Riser B Riser B1 B2 B3 B4 B5 B6 B7 B8 B9 B10 B11 B13 B14 D18 D17 DMU4 KMU6 EMU4 EMU3 DMU2 DMU3 KMU5 EMU2... -
Page 33: Materials
MATERIALS All Ozone gliders are made from the highest quality materials available. Cloth Upper Surface Dominico DOKDO N30D MF / N20D MF Lower Surface Porcher 9018 E65 Internal Ribs Porcher 9017 E29 / Dominico DOKDO 2044D FM Leading Edge Reinforcement 2.5/1.8mm Plastic pipe... - Page 34 1258 Route de Grasse Le Bar sur Loup 06620 France...
Need help?
Do you have a question about the MAGMAX 2 and is the answer not in the manual?
Questions and answers