golmar 7W/G2+ User Manual
Hide thumbs
Also See for 7W/G2+:
- Quick manual (10 pages) ,
- User manual (34 pages) ,
- Quick manual (4 pages)

Related Manuals for golmar 7W/G2+


Summary of Contents for golmar 7W/G2+
- Page 1 TECHNOLOGY 0 -04-2020 Tues 09 : 27 Door panel Intercom Recordings Settings Art 7W /G2+ monitor Wi-Fi connectivity 2-wire installation Cód. 50122463 TART 7W /G2+ REV.0120...
-
Page 2: Table Of Contents
- Do not place in humid, dusty or smoky locations, or near sources of heat. - Before connecting the device to the mains, check the connections between the door panel, power supply unit, distributors monitors, se the Golmar RAP-GTWIN/HF cable (2x1mm²). -
Page 3: Characteristics
KIT: S5110 ART 7W) If you have the “S5110 ART 7W” villa kit with Soul door panel download “TS5110 ART 7W (cód. 50122126)” h ps://doc.golmar.es/search/manual/50122126 user manual from the next QR o n r i the link Golmar web: TS5110 ART 7W MANUAL... -
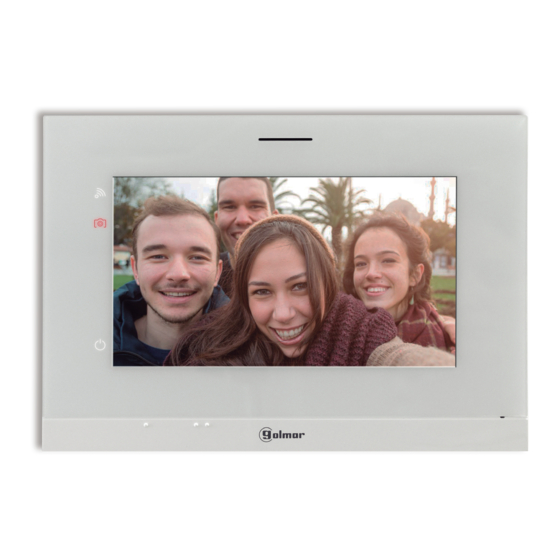
Page 4: Art 7W/G2+ Monitor
7W/G2+ MONITOR ART 7W/G2+ MONITOR Description 12210710 Product Version: MONITOR 7” WIFI ART 7W/G2+ GOLMAR S.A. CAUTION C/ Silici, 13 TO PREVENT ELECTRIC SHOCK, 08940 - SPAIN WARNING DO NOT REMOVE COVER. NO TO PREVENT FIRE OR ELECTRIC USER SERVICEABLE PARTS SHOCK, DO NOT EXPOSE THIS INSIDE. -
Page 5: Installation
Villa (Soul Door Panel) If you have the “S5110 ART 7W” villa kit with Soul door panel download “TS5110 ART 7W (cód. 50122126)” user manual from the next QR o n r i the link Golmar web: h ps://doc.golmar.es/search/manual/50122126 TS5110 ART 7W MANUAL... -
Page 6: Main Menu
7W/G2+ MONITOR ART 7W/G2+ MONITOR Main menu 07-04-2020 Tues 09:27 Door panel Intercom Recordings Settings If the device is in standby (screen off), touch any part of the screen to activate it and bring up the main menu. The device will return to standby mode after 20 seconds without activity. Display the image from the door panels and cameras connected to the system. -
Page 7: Settings Menu
7W/G2+ MONITOR ART 7W/G2+ MONITOR Settings menu Settings Language Time & Date Ringtone Screen Do not disturb Storage WiFi About Use icon to return to the main menu. Select one of the 16 languages available for the user interface. Once selected, confirm by pressing icon , and the monitor returns to the settings menu. - Page 8 7W/G2+ MONITOR ART 7W/G2+ MONITOR Settings menu Set the date and time of the system, and the presentation format. Change the values by sliding up or down, and use the arrows to change the formats. Validate the changes made with icon , and the monitor will return to the settings menu.
- Page 9 7W/G2+ MONITOR ART 7W/G2+ MONITOR Settings menu In the 'Do not disturb' settings, you can set a period of time during which the monitor will not sound when receiving calls. To do so, select the do not disturb function and choose the time period. From the main menu, you can enable and disable the 'Do not disturb' function regardless of the timer status.
- Page 10 Access the call Activate Wi-Fi transfer modes: Call transfer No answer Instant SSID - network Golmar WiFi Do not divert vpks9mfkrpxk The 'About' screen provides information about the device, such as the monitor firmware version and its address. Press 'Instructions manual' or 'Apps' to display the QR code that will take you to the updated downloads of this instruction manual and the G2Call app for your mobile phone.
-
Page 11: Door Panel Call Screen
7W/G2+ MONITOR ART 7W/G2+ MONITOR Door panel call screen 07-04-2020 11:17:10 Door panel 1 This screen is displayed when receiving a call or pressing icon of the main menu. During a call, icon displayed on the screen will blink green (during the call process). In the top centre of the screen, the date and time are shown and, on the right, the source of the image is displayed. -
Page 12: Communication Screen
7W/G2+ MONITOR ART 7W/G2+ MONITOR Communication screen 07-04-2020 11:17:10 Door panel 1 This screen is displayed during a communication process. In the top centre of the screen, the date and time are shown and, on the right, the source of the image is displayed. End audio communication with the door panel displayed and then show the main menu. -
Page 13: Image And Communication Settings
7W/G2+ MONITOR ART 7W/G2+ MONITOR Image and communication settings During the display or call process, it is possible to adjust the image parameters (brightness, contrast and colour). Press icon and use the slider bars to adjust the settings. By pressing the icon again, the settings window will disappear. -
Page 14: Intercom Menu
7W/G2+ MONITOR ART 7W/G2+ MONITOR Intercom menu From this menu, you can contact other monitors in your apartment (internal intercom) or building (external intercom). To do so, your monitor and the monitor called must have the intercom function activated from the 'Do not disturb' menu (see p. - Page 15 7W/G2+ MONITOR ART 7W/G2+ MONITOR Intercom menu Intercom External intercom. Enter the code of the apartment with which you wish to communicate using the keypad. To make a call, press icon , and the 'Call in progress' message will appear on the screen. The master monitor of the apartment called will display the 'Incoming call' message, followed by the monitor making the call.
-
Page 16: Recordings Menu
7W/G2+ MONITOR ART 7W/G2+ MONITOR Recordings menu This menu displays the list of images saved in the monitor or on the SD card if inserted. Press icon to access the video recordings saved on the SD card and icon to return to the images list. There are 10 recordings per page and the number of pages is shown at the bottom of the screen. - Page 17 7W/G2+ MONITOR Continued from previous page. ART 7W/G2+ MONITOR Recordings menu Press icon to access the video recordings. Video 20-04-2020 18:12:23 11-04-2020 20:27:25 20-04-2020 12:27:22 08-04-2020 11:17:10 17-04-2020 16:41:33 04-04-2020 15:43:50 15-04-2020 09:55:42 01-04-2020 22:11:00 12-04-2020 23:00:00 22-03-2020 08:07:06 01 / To delete one or more recordings from the list, use icon .
- Page 18 7W/G2+ MONITOR Continued from previous page. ART 7W/G2+ MONITOR Recordings menu To view an image recording, select it in the list. The recording will be displayed full screen. Use the scroll arrows to display the next or previous recording. From this screen, you can also delete the recordings individually, which always requires your confirmation.
-
Page 19: G2Call App
7W/G2+ MONITOR G2Call APP Initial registering of a monitor to a Wi-Fi network To register the monitor with the Wi-Fi network of your apartment, you will need to download and install the G2Call ® app on your phone. The app is available for Android and iOS operating systems and you can download it free from Google Play and the Apple Store respectively. - Page 20 7W/G2+ MONITOR G2Call APP Initial registering of a monitor to a Wi-Fi network Enter the network access password. If you are registering on a device with an iOS operating system, manually enter the SSID identifier of the network. By pressing 'Next', the pairing process will start and can take up to two and a half minutes.
- Page 21 7W/G2+ MONITOR G2Call APP Registering of a monitor connected to the network Make sure your phone has connectivity, either Wi-Fi or through your telephone service provider. Pulse sobre la opción “Añadir monitor” o sobre el icono para añadir un nuevo monitor. Seguidamente pulse sobre la opción “Monitor conectado a la red”.
- Page 22 7W/G2+ MONITOR G2Call APP Advanced settings of a registered monitor To access the advanced settings of a monitor registered in the app, press the preview screen of that monitor and then icon in the top right part of the screen. Even if the monitor is not connected at that time, you can adjust the settings.
- Page 23 7W/G2+ MONITOR G2Call APP Advanced settings of a registered monitor Wi-Fi. Change the Wi-Fi network that the monitor is connected to with another one available in your environment. Note: Due to iOS operating system restrictions, it is not possible to display the list of available networks, with it being necessary to manually enter the SSID identifier of the network.
-
Page 24: Main Screen
. From here, you can select if you want the phone to ring and/or vibrate when receiving a call. By clicking on icon , you can view the version of this app and Golmar's privacy policy. In the case of Android devices, exit the app using icon , or force its closure: it will continue receiving calls and the app will not consume battery. -
Page 25: Communication Screen
7W/G2+ MONITOR G2Call APP Communication screen If you activated call transfer on the monitor and the notifications are activated on the app, you will receive calls made on the street panel. A pop-up screen will show you the origin of the call. You can accept the call using icon , or reject it by pressing . - Page 26 7W/G2+ MONITOR G2Call APP Communication screen Home 201 - 9 12 6 17:45:39 Door panel 1 Activate the lock release or device connected to the relay 1 output of the door panel. You will need to enter a password for activation if one was defined on p. 2 . Activate the lock release or device connected to the relay output of the door panel.
-
Page 27: Special Codes
7W/G2+ MONITOR SPECIAL CODES The enabling of some functions, as well as the modification of some factory parameters, can be carried out by entering special codes. To do so, the installer menu must be accessed from the monitor. Go to the 'About' screen in the settings menu (p. - Page 28 7W/G2+ MONITOR Continued from previous page. SPECIAL CODES Video sources available on a monitor (configure only on the master monitor). Visible Not visible Factory setting Door panel 1 0111 0110 0111 Door panel 2 0121 0120 0120 Door panel 3 0131 0130 0130...
-
Page 29: Cleaning The Monitor
7W/G2+ MONITOR CLEANING THE MONITOR - Do not use solvents, detergents or cleaning products that contain acids, vinegar or abrasive components. - Use a soft damp cloth (not wet) that sheds no fibres. - Always wipe the monitor in the same direction, from top to bottom. - After cleaning the monitor, remove any moisture with a soft dry cloth that sheds no fibres. -
Page 30: Compliance
C/ Silici, 13 08940- Cornellá de Llobregat SPAIN Golmar se reserva el derecho a cualquier modificación sin previo aviso. Golmar se réserve le droit de toute modification sans préavis. Golmar reserves the right to make any modifications without prior notice.
Need help?
Do you have a question about the 7W/G2+ and is the answer not in the manual?
Questions and answers