Table of Contents
Advertisement
Quick Links
- 1 System Operation
- 2 Connection Terminals
- 3 Receiving a Call from the Door Panel
- 4 Doctor Mode' Function (Automatic Door Opening)
- 5 Do Not Disturb Mode
- 6 Divert Call Mode (no Function)
- 7 About (Information, 'Restore' Default Setting and Access to Installer Menu)
- 8 Settings (Ringtone, Ring Volume, Auto Switch-On Time and Language Selection)
- Download this manual
Advertisement
Table of Contents

Related Manuals for golmar VESTA SE GB2


Summary of Contents for golmar VESTA SE GB2
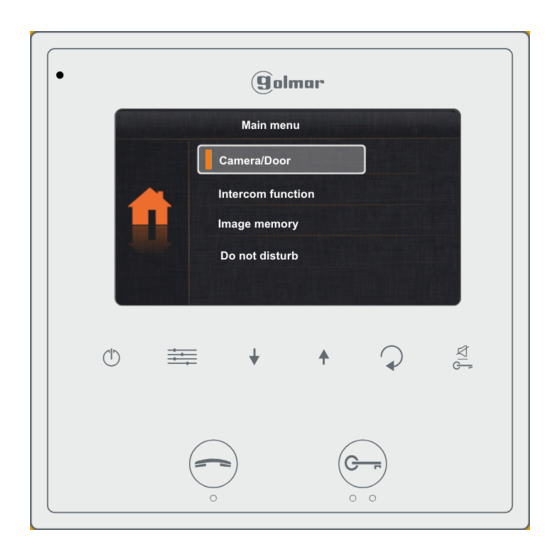
- Page 1 TECHNOLOGY Main menu Camera/Door Intercom function Image memory Do not disturb VESTA SE GB2 M ONITOR Code 50120514 REV.0119 TVESTA SE G 2 EN...
-
Page 2: Table Of Contents
VESTA2 SE GB2 MONITOR INTRODUCTION First of all, we thank and congratulate you for purchasing this product. Our commitment to achieving the satisfaction of customers like you is manifested through our ISO-9001 certification and the manufacture of products like the one you have just purchased. Its advanced technology and strict quality control will ensure that customers and users enjoy the numerous features that this device offers. -
Page 3: Characteristics
VESTA2 SE GB2 MONITOR CHARACTERISTICS Hands-free monitor. 4.3” TFT colour screen. Monitor with simple installation (non-polarised 2 wire BUS). The VESTA2 SE GB2/H monitor interacts with hearing aids equipped with T-mode, making conversation between apartment and door panel easier. Capacitive buttons to access and select menu functions: User menu: Displaying door panel images. -
Page 4: Description Of The Monitor
VESTA2 SE GB2 MONITOR DESCRIPTION OF THE MONITOR Function button door 1 activation. Microphone. Communication with hearing aids (Vesta2 SE GB2/H). In standby: Press for 10 seconds to Set the hearing aid switch to the T position, see page 8. activate/deactivate the 'doctor mode' function 4.3”... -
Page 5: Setting The Monitor's Address Codes
VESTA2 SE GB2 MONITOR DESCRIPTION OF THE MONITOR Setting the monitor's address codes (addresses 0 to 31): DIP 6: Configures the end of line. Leave in the ON position in monitors where the bus cable terminates. Set to OFF in intermediate monitors only. -
Page 6: Installing The Monitor In A Wall Mounting Connector
VESTA2 SE GB2 MONITOR INSTALLING THE MONITOR IN A WALL MOUNTING CONNECTOR Avoid dusty or smoky environments or locations near sources of heat. Positioning the wall mounting connector: The top of the connector must be positioned at a height of 1.60m. The minimum distance between the sides of the connector and the closest object must be 5cm. -
Page 7: Installing The Monitor In An Embedding Box
VESTA2 SE GB2 MONITOR INSTALLING THE MONITOR IN AN EMBEDDING BOX Avoid dusty or smoky environments or locations near sources of heat. Location of the embedding box: Make a hole in the wall to position the top of the universal embedding box at a height of 1.60 m from the ground. The minimum distance between the sides of the embedding box and the closest object must be 5cm. -
Page 8: Operation
VESTA2 SE GB2 MONITOR OPERATION Monitor description when receiving a call and during communication: Communication activated. Door 1 activated. Door 2 activated. Recording activated (M-IP GB2 memory module required). Call/communication time elapsed. 00:30 Record DS-1 Door panel that made the call. Outside light activated (SAR-GB2 required). -
Page 9: Call Not Answered (Missed Call)
VESTA2 SE GB2 MONITOR OPERATION Continued from previous page. Call not answered (missed call): When a call is received, the monitor(s) will play a melody and show the door panel image on the master monitor without alerting the visitor. If the call is not answered within 40 seconds the monitor returns to standby mode. If there is an M-IP GB2 memory module, it will automatically take a photo or record video (for video, a 16GB Class 10 MicroSD card is not supplied required,... -
Page 10: Answering A Call From The Door Panel (Activating Light Sar-Gb2 And Displaying Cameras Dq-Cam-Gb2)
VESTA2 SE GB2 MONITOR OPERATION Continued from previous page. Answering a call from the door panel (activating light SAR-GB2 and displaying cameras DQ-CAM-GB2): When a call is received, the monitor(s) will play a melody and show the door panel image on the master monitor without alerting the visitor. - Page 11 VESTA2 SE GB2 MONITOR MONITOR SCREEN AND VOLUME SETTINGS MENU To adjust the contrast, the monitor must be in communication or auto switch-on mode. Then press button display the 'Contrast' option on screen. Using menu buttons , select the required contrast level. Press button to change the next option 'Brightness' or press to exit the settings menu.
-
Page 12: User Menu
VESTA2 SE GB2 MONITOR USER MENU Description of the menu buttons: Menu access and function selection button. Main menu Main menu Menu scroll down button. Camera Door Menu scroll up button. Intercom function Intercom function Menu back button. Image memory Do not disturb Status LED:... -
Page 13: Displaying Door Panel/Camera Images
VESTA2 SE GB2 MONITOR USER MENU Continued from previous page. Displaying door panel/camera images: To display the image from one of the installed door panels, use buttons to go to option 'Camera/Door' and press button . The following selection screen will be displayed. Go to the option corresponding to door panel 'Door' whose image needs to be displayed. -
Page 14: Displaying Images From The Cameras (Dq-Cam-Gb2 Module Required)
VESTA2 SE GB2 MONITOR USER MENU Continued from previous page. To display the image from one of the installed cameras (DQ-CAM-GB2 module required), use buttons to go to option 'Camera/Door' and press button . The following selection screen will be displayed. Use buttons to go to the option corresponding to camera 'Camera' whose image needs to be displayed. -
Page 15: Intercom Function
VESTA2 SE GB2 MONITOR USER MENU Continued from previous page. Intercom function: Use buttons to go to option 'Intercom' and press button . The following selection screen will be displayed. Selection screen 1st menu screen Main menu Select Residents list Camera Door Dial Intercom function... -
Page 16: Intercom 'Dial' Between Apartments (No Function)
VESTA2 SE GB2 MONITOR USER MENU Continued from previous page. In the called apartment, the monitor(s) will emit a melody indicating an intercom call and display the address of the apartment making the call. Press button to accept the call and establish communication or press option cancel it. -
Page 17: Calling The Surveillance Monitor
VESTA2 SE GB2 MONITOR USER MENU Continued from previous page. To make a call to the building's surveillance monitor (if any), use buttons to go to option 'Call Guard Unit' and press button . The following call screen will be displayed indicating the address 'GU' of the surveillance monitor to be called. -
Page 18: Intercom Calls Within The Same Apartment
VESTA2 SE GB2 MONITOR USER MENU Continued from previous page. To access the intercom calls within an apartment function, use buttons to go to option 'Inner call' and press button . The following call screen will be displayed, a long audible tone will confirm that the call is being made or short tones will indicate that a monitor in the apartment is already communicating with the door panel and the call will not be made. -
Page 19: Image Memory
VESTA2 SE GB2 MONITOR USER MENU Continued from previous page. Image memory (M-IP-GB2 module required): To view photos/videos of door panel calls, use buttons and to go to option 'Image memory' and press button The following selection screen will be displayed. Use buttons to select the photo/video to view (for video, a not supplied 16GB Class 10 MicroSD card is required,... -
Page 20: Do Not Disturb Mode
VESTA2 SE GB2 MONITOR USER MENU Continued from previous page. Do not disturb mode: Use buttons to go to the 'Do not disturb' option and press button . The following selection screen will be displayed. 1st menu screen Selection screen Main menu Do not disturb Normal... -
Page 21: Divert Call Mode (No Function)
VESTA2 SE GB2 MONITOR USER MENU Continued from previous page. To activate do not disturb mode for '8 hours', use buttons and to go to the '8 hours' option and press button Status LED will turn on and icon will be displayed on the menu screen indicating that the function has been activated. -
Page 22: Turning On The Outside Light
VESTA2 SE GB2 MONITOR USER MENU Continued from previous page. Turning on the outside light (SAR-GB2 module required). Use buttons to go to the 'Light' option and press button . The following selection screen will be displayed. Selection screen 2nd menu screen Main menu Light options Turn on... -
Page 23: Settings (Ringtone, Ring Volume, Auto Switch-On Time And Language Selection)
VESTA2 SE GB2 MONITOR USER MENU Continued from previous page. Settings (ringtone, ring volume, auto switch-on time and language selection): Use buttons to go to the 'Settings' option and press button . The 1st selection screen will be displayed 2nd menu screen 1st selection screen Main menu Settings... - Page 24 VESTA2 SE GB2 MONITOR USER MENU Continued from previous page. To access the ring volume, use buttons to go to the 'Ring volume' option and press button . The following selection screen will be displayed. Use buttons to select the required ring volume. Press option to exit and return to the 1st selection screen.
- Page 25 VESTA2 SE GB2 MONITOR USER MENU Continued from previous page. Press option to go to the 2nd menu screen. 1st selection screen 2nd menu screen Settings Main menu Ringtone Divert Ring volume Light Auto switch-on time Settings Language About About (information, default settings and installer menu): Use buttons to go to the 'About' option and press button .
- Page 26 VESTA2 SE GB2 MONITOR USER MENU Continued from previous page. Use buttons to enter the first function code number and then press button to enter the next function code number; repeat the previous steps until the complete function code number is entered. Confirm the function code entered by pressing button .
-
Page 27: Cleaning The Monitor
VESTA2 SE GB2 MONITOR CLEANING THE MONITOR Do not use solvents, detergents or cleaning products that contain acids, vinegar or abrasive components. Use a soft damp lint-free cloth with water. Always wipe the monitor in the same direction, from top to bottom. After cleaning the monitor, remove any moisture with a soft dry lint-free cloth. - Page 28 C/ Silici, 13 08940- Cornellá de Llobregat SPAIN Golmar se reserva el derecho a cualquier modificación sin previo aviso. Golmar se réserve le droit de toute modification sans préavis. Golmar reserves the right to make any modifications without prior notice.
Need help?
Do you have a question about the VESTA SE GB2 and is the answer not in the manual?
Questions and answers