Bard MULTI-TEC W18AAPA Service Instructions Manual
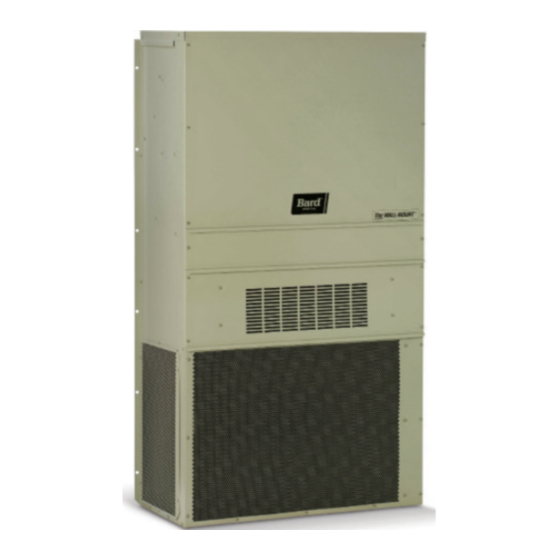
Wall-mount air conditioner part of the bard free cooling system
Hide thumbs
Also See for MULTI-TEC W18AAPA:
- Installation and service instructions manual (51 pages) ,
- Service instructions manual (26 pages) ,
- Installation instructions manual (26 pages)
Table of Contents
Advertisement
Quick Links
Literature Assembly
911-0747
Contains the following:
2100-665(G)
2100-676(D)
2100-677(D)
2110-1442(E)
7960-735
2100-479
2100-034(F)
7960-420
Wall Mount PKG A/C Manual
Multi-Tec A/C Install Instruct
Multi-Tec Quick Start Guide
Replacement Parts Manual
Supplemental 50HZ Instructions
Leak Test, Evacuation, Charging
User's Guide
Warranty Form
Advertisement
Table of Contents
Troubleshooting

Related Manuals for Bard MULTI-TEC W18AAPA


Summary of Contents for Bard MULTI-TEC W18AAPA
- Page 1 Literature Assembly 911-0747 Contains the following: 2100-665(G) Wall Mount PKG A/C Manual 2100-676(D) Multi-Tec A/C Install Instruct 2100-677(D) Multi-Tec Quick Start Guide 2110-1442(E) Replacement Parts Manual 7960-735 Supplemental 50HZ Instructions 2100-479 Leak Test, Evacuation, Charging 2100-034(F) User’s Guide 7960-420 Warranty Form...
- Page 3 SERVICE INSTRUCTIONS MULTI-TEC ® WALL-MOUNT AIR CONDITIONER Part of the Bard Free Cooling System Models: W18AAPA W42AAEA W60AAEA W72ABEA W18LAPA W60LAPA W24AAPA W42AAEB W60AAEB W72ABEB W24LAPA W60LAPB W24AAPB W42AAEC W60AAEC W72ABEC W24LAPB W60LAPC W24AAPC W42AAPA W60AAEQ W72ABEQ W30LAPA W60LAPQ W30AAPA...
-
Page 4: Table Of Contents
CONTENTS Temperature Control ........14 General Information ...........3 Cooling Sequence – Economizer Available .. 14 Free Cooling Unit System ........3 Cooling Sequence – Wall-Mount Air Conditioner Units ......3 Economizer Not Available ...... 14 General ..............3 Shipping Damage ..........4 Heating Sequence ......... 15 Additional Publications ..........4 Free Cooling .......... -
Page 5: General Information
GENERAL INFORMATION Free Cooling System MULTI-TEC units are available with electric heat and dehumidification options. The Bard free cooling unit system is composed of MULTI-TEC wall-mounted air conditioners matched General with an LC6000 supervisory controller or Bard th- The equipment covered in this manual is to be installed Tune stand-alone controller. -
Page 6: Shipping Damage
ANSI Z535.5 Definitions: Sizing of systems for proposed installation should be based on heat loss and heat gain calculations made DANGER: Indicate[s] a hazardous situation which, if according to methods of Air Conditioning Contractors not avoided, will result in death or serious injury. The of America (ACCA). - Page 7 WARNING Electrical shock hazard. Have a properly trained individual perform these tasks. Failure to do so could result in electric shock or death. WARNING Fire hazard. Maintain minimum 1/4" clearance between the supply air duct and combustible materials in the first 3' feet of ducting. Failure to do so could result in fire causing damage, injury or death.
-
Page 8: Using The Tec-Eye Tm
USING THE TEC-EYE FIGURE 2 TEC-EYE (Bard P/N 8301-059) Display and Interface (Status Screen Shown) UP KEY ALARM KEY MENU KEY ENTER KEY ESCAPE KEY DOWN KEY ALARM KEY UP KEY Allows viewing of active alarms Steps to next screen in the display menu... -
Page 9: Tec-Eye Menu Structure
(see Figure 4). Press the ENTER key when during installation to ensure that the latest the desired icon is displayed. version has been installed. Current software versions, change log and installation instructions are available on the Bard website at http://www.bardhvac.com/software-download/ Manual 2100-665G Page 7 of 28... -
Page 10: Information
FIGURE 7 Quick Menu Last 24 Hour Tracking Setpoints If at any time the unit(s) loses communication with the LC6000 controller, the unit(s) will go to stand alone mode. The setpoints are synced with the LC6000 when communication is established. The unit will save and control to these values until communication is re- established. -
Page 11: Menu Screens And Password Levels
TABLE 2 NOTE: Each unit must have a unique address for the LC1000/TEC-EYE Passwords (Defaults) communication to work properly. Bard also recommends physically labeling each unit for User 2000 ease in identification. Technician 1313 FIGURE 10 Engineer 9254 Unit Configuration... -
Page 12: Parameter Description
3. Press UP or DOWN keys to scroll to Sys Config; 8. Electric Heat Stage 1 press ENTER key. 9. Electric Heat Stage 2 4. Press UP or DOWN keys to scroll to Run Test (A11) 10. Heating Off screen. 11. -
Page 13: Alarms
ALARMS NOTE: Screenshots shown in this manual reflect Clearing Alarms default settings (when applicable). After an alarm condition has been corrected, the alarm can be cleared/reset. Acknowledging/Clearing Alarms To clear alarms, press the ALARM key and the UP or Alarm conditions activate a red LED indicator that DOWN keys to scroll to the alarm reset screen (see backlights the ALARM function key. -
Page 14: Clearing Alarm Logs
Clearing Alarm Logs To adjust these values: To clear the alarm logs: 1. Press MENU key to go to the Main Menu screen. 1. Press MENU key to go to the Main Menu screen. 2. Press UP or DOWN keys and ENTER key to enter USER password 2000. -
Page 15: Refrigerant High Pressure
4. Press UP or DOWN keys to scroll to Alarm Config Freezestat (A7); press ENTER key. When the coil temperature is below 30°F, the unit will 5. Press ENTER key to scroll to desired value OAT, generate a Freeze alarm on the TEC-EYE and a Freeze Diff, Del, LDel or Two Count Del (see Figure 15). -
Page 16: Control Operation
CONTROL OPERATION NOTE: Screenshots shown in this manual reflect Temperature Control default settings (when applicable). When the unit is connected to the LC controller, it will receive all of its heating, cooling and ventilation On/Off Control commands from the controller. The wall-mount unit can be turned on and off with the When the unit is in stand alone operation, it will TEC-EYE. -
Page 17: Heating Sequence
To adjust these parameters: electric heat stage 2. If the control value is below 56°F (Setpoint + Stage 3 Diff On), the unit will enable 1. Press MENU key to go to the Main Menu screen. electric heat stage 3. 2. -
Page 18: Free Cooling
Free Cooling Enthalpy 1. Outdoor air temperature is below the Outdoor Set, If the unit is equipped with an economizer, and outdoor temperature setpoint, listed within the Sys. conditions are acceptable for economizer operation, Config. menu. (Outdoor Set temperature setpoint is the MULTI-TEC wall-mount unit will utilize free cooling 70°F by default.) See Figure 22. -
Page 19: Compressor
3. Press UP or DOWN keys to scroll to Sys Config; have a minimum delay of 120 seconds. The 2nd stage press ENTER key. will also have a minimum on time of 120 seconds. When communicating with the LC, the delay between 4. -
Page 20: Mechanical Dehumidification
For a more detailed operation description, see the 2100- When the dehumidification command is first received 669 LC6000 Service Instructions manual. both cooling and reheat will be activated. The cooling will shut off when the return air Mechanical Dehumidification temperature is 62°F to prevent the unit from causing Mechanical dehumidification is only available as a the system to go into heating mode (see Figure 25). -
Page 21: General Refrigerant Information
Topping Off System Charge of refrigerant listed on the serial plate. AHRI capacity and efficiency ratings were determined by testing with If a leak has occurred in the system, Bard this refrigerant charge quantity. Manufacturing recommends reclaiming, evacuating (see criteria above) and charging to the nameplate The pressure table found on page 20 shows nominal charge. - Page 22 TABLE 4 MULTI-TEC Cooling Pressures Air Temperature Entering Outdoor Coil °F Return Air Temp Model Pressure (DB/WB) Low Side 75/62 High Side Low Side W18A/L 80/67 High Side Low Side 85/72 High Side Low Side 75/62 High Side Low Side W24A/L 80/67 High Side...
-
Page 23: Componentry
COMPONENTRY Phase Monitor WARNING Used only on 3-phase equipment, the phase monitor is a compressor protection device that will prohibit operation of the compressor if the device senses a possible Electrical shock hazard. reverse-rotation situation due to incorrect phasing. On a call for compressor (and only compressor), the device Disconnect VAC power supply before servicing. -
Page 24: Compressor Control Module
Compressor Control Module Short Cycle Protection/Delay-on-Break An anti-short cycle timer is included to prevent short The compressor control module (CCM) is standard on cycling the compressor. This is adjustable from 30 all models covered by this manual. seconds to 5 minutes via the adjustment knob. Once Features a compressor call is lost, the time period must expire Delay-on-Make Timer... -
Page 25: Pressure Service Ports
Pressure Service Ports The conditions needed for the unit to enter test mode are as follows: POT must start at a time less than or High and low pressure service ports are installed on equal to the 40 second mark. The POT must then be all units so that the system operating pressures can be rapidly rotated to a position greater than or equal to observed. - Page 26 TABLE 5A MULTI-TEC Optional Accessories – Right Hand EHW2TA-A05 EHW2TA-A08 EHW2TA-A10 EHWA24-A04B EHW2TA-B06 EHWH24B-C06 EHW3TA-A05 EHW3TA-A08 EHW3TA-A10 EHW3TA-A15 EHW30A-B06 EHW3TA-B06 EHW3TA-B09 EHW3TA-B15 EHW3TA-C06 EHW3TA-C09 EHW3TA-C12 EHW3TA-C15 EHW4TA-A05 EHWA05-A10B EHWA05-A15B EHWA05-A20B EHW4TA-B06 EHWA05-B09B EHW6TA-B06 EHWA05-B15B EHW5TA-B18 EHW4TA-B18 EHW4TA-C09 EHW4TA-C15 EHW5TA-A05 EHW60A-B09B EHW70A-B09B EHW6TA-B18 EHW72A-A10B...
- Page 27 TABLE 5B MULTI-TEC Optional Accessories – Left Hand EHW2TA-A05L EHW2TA-A08L EHW2TA-A10L EHW2TA-B06L EHW3TA-A05L EHW3TA-A08L EHW3TA-A10L EHW3TA-A15L EHW3TA-B09L EHW3TA-B15L EHW3TA-C09L EHW3TA-C15L EHW4TA-A05L EHWA05-A10LB EHWA05-A15LB EHW4TA-B06L EHWA05-B09LB EHW6TA-B06L EHWA05-B15LB EHW4TA-C09L EHW4TA-C15L EHW6TA-A05L EHWA60-B09LB EHW70A-B09LB EHW72A-A10LB EHW72A-A15LB WMCB-01B WMCB-02A WMCB-02B WMCB-03A WMCB-04B WMCB-05A WMCB-05B WMCB-06B WMCB-08A...
-
Page 28: Maintenance And Troubleshooting
MAINTENANCE AND TROUBLESHOOTING Standard Maintenance Procedures 4. Manually spin fan and blower motors to ensure they turn freely. All motors are permanently lubricated, so no oil is necessary. WARNING 5. Inspect free cooling damper actuator and linkage. 6. Install new air filter; check for additional filter grilles internal to the structure. -
Page 29: Troubleshooting Nidec Selectech Ecm Motors
If the Motor Is Running higher than allowed, additional duct work is NOTE: Bard Models PA13242; PA13302; PA13362-A, -B; PA13422-A, -B, -C; PA13482-A, -B, -C; PA13602-A, -B, -C needed. 1. It is normal for the motor to rock back and forth contain the X13-Series Motors. -
Page 30: Figure 30 Motor Connections
TROUBLESHOOTING GE X13-SERIES ECM2.3 MOTORS ™ CONT’D. 2. Initiate a demand from the thermostat and check the Model X13 Communication Diagnostics 2. If the motor has proper high voltage and ground at A. If the low voltage communication is not voltage between the common and the appropriate motor The X13 motor is communicated through 24 VAC low voltage the L/L1, G and N/L2 connections, continue with... - Page 32 INSTALLATION INSTRUCTIONS Bard Air Conditioning System LC6000-200 MULTI-TEC ® Supervisory Wall-Mount Controller Air Conditioner Bard Manufacturing Company, Inc. Manual: 2100-676D Bryan, Ohio 43506 Supersedes: 2100-676C www.bardhvac.com Date: 3-18-19 Page 1 of 45...
- Page 33 CONTENTS Emergency Off, Emergency Vent and General Information ............3 Generator Run Connections ......27 List of Necessary Materials/Tools ......6 Communication Wiring ........28 Site Preparation ............7 Supply Wiring ..........33 Model Identification ..........7 System Set Up .............36 New Shelter Installation vs. Retrofit Installation ..7 TEC-EYE Hand-Held Diagnostic Tool .......
-
Page 34: General Information
(one sensor per zone) will need to be purchased and installed in the additional zones. One additional temperature-only sensor (Bard P/N 8301-058) may also be used in Zone 1 but will also need to be purchased separately. Additional temperature/humidity sensors require field-supplied 5-wire 18 gauge shielded cable. - Page 35 TUNE stand-alone controller operation. The th-TUNE Standard for Warm Air Heating stand-alone controller and TEC-EYE diagnostic tool and Air Conditioning Systems ....ANSI/NFPA 90B are available as a kit (Bard P/N 8620-264). Load Calculation for Residential Winter General and Summer Air Conditioning ..... ACCA Manual J...
- Page 36 ANSI Z535.5 Definitions: DANGER: Indicate[s] a hazardous situation which, if not avoided, will result in death or serious injury. The signal word “DANGER” is to be limited to the most extreme situations. DANGER [signs] should not be used for property damage hazards unless personal injury risk appropriate to these levels is also involved.
-
Page 37: List Of Necessary Materials/Tools
LIST OF NECESSARY MATERIALS/TOOLS Additional hardware and miscellaneous supplies are needed for installation. These items are field supplied and must be sourced before installation. This list also includes tools needed for installation. List of Materials/Tools • Personal protective equipment/safety devices/anti- •... -
Page 38: Site Preparation
(left side compressor and controls) for the left unit and W**A is unique and may require special accommodations and (right side compressor and controls) for right unit. modifications. Although Bard Manufacturing follows a See Specifications Sheet S3532. long-established tradition of manufacturing equipment... - Page 39 FIGURE 2 Dimensions of Basic Unit for Architectural and Installation Requirements (Nominal) SUPPLY RETURN WIDTH DEPTH HEIGHT MODEL W18** 33.300 17.125 74.563 7.88 19.88 11.88 19.88 35.00 10.88 29.75 20.56 30.75 32.06 33.25 31.00 2.63 34.13 26.06 10.55 4.19 12.00 9.00 W24** W30**...
-
Page 40: Wall-Mount Unit Mounting
WALL-MOUNT UNIT MOUNTING Mounting the Units 5. If desired, hook top rain flashing (attached to front- right of supply flange for shipping) under back bend of top. WARNING 6. Position unit in opening and secure with fasteners sufficient for the application such as 5/16" lag/ anchor/carriage bolts;... - Page 41 Manual 2100-676D Page 10 of 45...
- Page 42 Manual 2100-676D Page 11 of 45...
- Page 43 Manual 2100-676D Page 12 of 45...
- Page 44 Manual 2100-676D Page 13 of 45...
- Page 45 FIGURE 5 Electric Heat Clearance FIGURE 6 Wall Mounting Instructions WALL STRUCTURE See FIGURE 2 – Mounting Instructions FACTORY SUPPLIED RAIN FLASHING. MOUNT ON UNIT BEFORE INSTALLATION SUPPLY AIR SUPPLY AIR SUPPLY AIR DUCT OPENING OPENING RETURN AIR RETURN AIR RETURN AIR OPENING OPENING...
- Page 46 FIGURE 7 Wall Mounting Instructions SEE UNIT DIMENSIONS, FIGURE 2, SEE UNIT DIMENSIONS, FIGURE 1.2, FOR ACTUAL DIMENSIONS. FOR ACTUAL DIMENSIONS E + 1.000 ATTACH TO TOP PLATE OF WALL 1.000 1.000" CLEARANCE ALL AROUND DUCT SUPPLY DUCT OPENING INTERIOR FINISHED WALL OVER FRAME 1.000"...
- Page 47 FIGURE 8 Common Wall Mounting Installations SUPPLY DUCT MAY BE LOCATED IN AN ATTIC OR BELOW CEILING RAFTERS AS SHOWN RAIN RAIN FLASHING RAFTERS FLASHING RAFTERS FINISHED CEILING SURFACE SUPPLY AIR DUCT SUPPLY AIR DUCT W/GRILLE FINISHED CEILING SURFACE WALL SLEEVE RETURN AIR RETURN AIR OPENING W/ GRILLE...
-
Page 48: Wall-Mount Unit Wiring
3/17/2014 3/17/2014 DATE The unit rating plate and Tables 1, 2 and 3 list fuse SCALE DRAWN BY Bard Mfg. Co. and wire sizes (75°C copper) for all models including Bryan, Ohio 3/17/2014 ADDED FRENCH VERSION 11182 BD SD RP... - Page 49 TABLE 1 Electrical Specifications – W**A*P Series Single Circuit Multiple Circuit Rated Minimum Maximum No. Field Volts Maximum Field Circuit External Fuse or Field Power Ground MODEL Power Minimum & External Power Ground Ampacity Ckt.
- Page 50 TABLE 2 Electrical Specifications – W**L*P Series Single Circuit Dual Circuit Minimum Maximum Rated Field Maximum Circuit External Fuse or Field Power Ground MODEL Volts & Minimum Field Power External Ground Ampacity Ckt.
- Page 51 TABLE 3 Electrical Specifications – W**A*E Series Single Circuit Dual Circuit Rated Minimum Maximum Field Power Wire Ground Field Minimum Maximum Field Ground Model Volts & Circuit External Fuse or Size Wire Size Power Circuit External...
-
Page 52: Preliminary Start Up
To turn the unit on or off with TEC-EYE: other unit still operating. Once the first of the Bard MULTI-TEC wall-mount units is installed, orphan mode 1. Connect the TEC-EYE diagnostic tool to the control can be enabled early in the installation—keeping the... -
Page 53: Lc6000 Controller Installation
LC6000 CONTROLLER INSTALLATION FIGURE 12 Typical LC6000-200 Component Location RJ11 Cable to Display Transformer Control Board Ethernet Cable Connection USB Male A to Micro Male Four Fused B Cable Power Supply Terminals Emergency Off Alarm Jumper Emergency Vent Alarm Jumper Generator Run Alarm Jumper Terminal Block... -
Page 54: Lc6000 Controller
IMPORTANT: When working with circuit board connecting wires to the terminal block, confirm that the components, Bard recommends the use of fuse in each of the four fuse holders is in the proper an anti-static wrist strap to prevent static position (active) as shown in Figure 13. -
Page 55: Installing Remote Indoor Temperature/Humidity Sensor(S)
Installing Remote Indoor Temperature/Humidity Sensor(s) One remote indoor temperature/humidity sensor and 35' of 18 gauge 5-conductor shielded cable is included with the controller. This sensor must be installed for proper operation. Mount the temperature/humidity sensor in a location least likely to be affected by open doors, rack-mounted fans, radiant heat sources, etc. Locating the sensor between both return grilles is often the best location, but every installation is unique. - Page 56 For proper operation, the remote indoor temperature/humidity sensor (and any additional sensors) must be configured properly with the controller as shown in Step 2 on page 24. An additional remote indoor temperature- only sensor can be purchased and installed in Zone 1. If the site in which the LC6000 controller will be used has more than one zone (maximum three zones per LC6000), additional remote temperature/humidity sensors (one per zone) will need to be purchased and installed in the additional zones.
- Page 57 Installing Optional Outdoor Temperature/Humidity Sensor One optional outdoor temperature/humidity sensor (8301-090) can be installed. Follow the manufacturer's mounting instructions. Use 18 gauge 5-conductor shielded cable to connect to controller. FIGURE 16 Remote Outside Temperature/Humidity Sensor Installation Connect wires from the 18 gauge shielded cable to terminals #65, #66, #67, #70 and #71. Wire Sensor Description...
-
Page 58: Generator Run Connections
Emergency Off, Emergency Ventilation and Generator Run Connections The LC6000-200 controller is shipped with emergency off, emergency ventilation and generator run contacts. There are factory-installed jumpers across terminals #6 and #7 (emergency off), #8 and #9 (emergency ventilation) and #10 and #11 (generator run). Remove the factory-installed jumpers before making the connections. FIGURE 17 LC6000-200 Series Connection for Emergency Off, Emergency Ventilation and Generator Run (If Applicable) Generator Run*... -
Page 59: Communication Wiring
Communication Wiring Connect the communication wiring from the wall-mount units to the controller in the manner shown in Figures 18, 19 or 20. The daisy chain does not need to follow the addressing order. The communication wire should be 2-wire, 18 gauge shielded cable with drain. - Page 60 FIGURE 20 Placement of Communication Wire Filters (Daisy Chain and Alternate Methods) Daisy Chain Wiring Place filter here Place filter here (end unit) LC6000 ... up to 14 units Unit 1 Unit 2 Unit 3 Unit 4 Unit 5 Alternate Wiring Place filter here Place filter here (end unit)
- Page 61 The steps outlined on the following pages show how to connect the communication wiring using the daisy chain method shown in Figure 18. If using the alternate method (as shown in Figure 19), the connections to the controller and each wall-mount unit will be the same but the filters need to be placed in the positions shown in Figure 20. FIGURE 21 Communication Wiring: Termination at the Controller Using the field-provided shielded cable, make a small service loop after entering the controller and attach the provided...
- Page 62 FIGURE 22 Communication Wiring: Termination at the First Wall-Mount Unit Wall-Mount Unit 1 R+T+ / R-T- RS485 PLAN Control Board From LC6000 Controller From the controller, extend the shielded cable through a separate conduit and route to the provided terminal block next to the wall-mount control board.
- Page 63 FIGURE 23 Communication Wiring: Termination at Additional Wall-Mount Units Wall-Mount Unit 2 – 14 R+T+ / R-T- RS485 PLAN Control Board From Wall-Mount Route the cable from the first wall-mount unit to the Unit 1 RS485 terminal block of the second wall-mount unit. If this is the last unit to be connected, make a small service loop and attach EMI filter as shown.
-
Page 64: Supply Wiring
Supply Wiring The LC6000 controller is powered by 120, 208 or 240 volts from the shelter. Field-supplied supply wiring should be minimum 16 gauge, maximum 14 gauge (see Figure 24). A reliable earth ground must be connected in addition to any grounding from conduit. Grounding bolts and nuts are included with the controller for this purpose; a 2 hole grounding lug must be field supplied. - Page 65 Bard Guard Alarm Signal Common Signal for Outdoor Temperature Sensor Humidifier 2 Ground for Outdoor Temperature Sensor Common Ground for Bard Guard Alarm Signal Humidifier 3 Orange Power Connector Common 24 VAC+ 24 VAC Supply Emergency Off Alarm Orange Power Connector...
- Page 66 FIGURE 26 LC6000-200 Wiring Diagram TB 61 YELLOW LC6000 BLUE TB 64 TERMINAL BLOCK (L1) 120V IN 120V IN WHITE 120V/208V/230VAC (L1) 208V IN 208V IN TRANSFORMER (L1) 230V IN 230V IN ORANGE 24VAC (L2 OR N) COMMON IN COMMON IN BLACK POWER GND GREEN...
-
Page 67: System Set Up
RJ11 modular connector as shown in Figure 27. The LC6000 controller and TEC-EYE hand-held diagnostic tool will both be used to set up the Bard air When not being used, the TEC-EYE hand-held conditioning system (the TEC-EYE is only used to set diagnostic tool should be stored inside or near the up the wall-mount units). -
Page 68: Tec-Eye Status Screen
Current software versions, change log and installation 1) Press MENU key to access the Main Menu instructions are available on the Bard website at screen. http://www.bardhvac.com/software-download/ 2) Press UP or DOWN keys and ENTER key to enter USER password 2000. -
Page 69: Clear Unit Alarm Logs On Each Unit
5) Press ENTER key to scroll to Run Test Enable 3. Clear Unit Alarm Logs on Each Unit parameter (see Figure 30). Units may have alarms logged due to testing. Unit 6) Press UP or DOWN key to change value to ON. alarm logs must be cleared at time of installation. -
Page 70: Configure Sensors
3) Press the UP or DOWN keys to scroll to the Additional combination sensors may be purchased Settings menu; press ENTER key. or alternatively, temperature-only sensors may be purchased instead. The LC is capable of utilizing 4) Press UP or DOWN keys to scroll to Date/Time five temperature sensors and four humidity sensors. - Page 71 To enable/disable Zone 2 Indoor Humidity: 6) Press UP or DOWN key to change value to ON to enable sensor (or change value to OFF to 1) Press MENU key to go to the Main Menu disable sensor). screen. To enable/disable Zone 1 Indoor Temperature: 2) Press UP or DOWN keys and ENTER key to enter USER password 2000.
- Page 72 FIGURE 38 6) Press UP or DOWN key to change value to ON Enable/Disable Zone 1 Remote Temperature Sensor to enable sensor (or change value to OFF to disable sensor). FIGURE 40 Enable/Disable Zone 3 Remote Temperature Sensor To enable/disable Zone 2 Remote Temperature: 1) Press MENU key to go to the Main Menu screen.
-
Page 73: Enter Total Number Of Units
4) Press UP or DOWN keys to scroll to Outdoor 7. Verify Units Are Online Air Temp C12. Once a unit is uniquely addressed, communication 5) Press ENTER key to scroll to Enable (see can be verified at the LC controller. Figure 42). -
Page 74: Clear Controller Alarm Logs
FIGURE 44 10. Complete Installation Selecting Economizer Type Once all the installation steps have been completed, all alarms and alarm logs have been cleared and system verification and run test results were satisfactory, the installation can now be considered “complete". Additional programming information can be found in MULTI-TEC Service Instructions 2100-665 and LC6000 Service Instructions 2100-669. -
Page 75: Additional Information
ADDITIONAL INFORMATION Menu Screens and Password Levels Parameter Config: Engineer (9254) Alarm Export: User (2000) MULTI-TEC Wall-Mount Units Logout: Used to log out of the current password System Config: User (2000) level. Entering back into the menu requires Adv Sys Config: Technician (1313) password. - Page 76 TABLE 6 TABLE 7 MULTI-TEC Wall-Mount Unit Status Messages LC6000 Status Messages Message Description Message Description Stand Alone Orphan Mode Standby The system is on th-TUNE Online th_TUNE Standby The system has a major fault and is Off by Alarm LC Online LC Standby disabled...
- Page 78 2. Press ENTER key to scroll to Run Test Enable IMPORTANT: When working with circuit board parameter. components, Bard recommends the use of an anti-static wrist strap to prevent static 3. Use UP or DOWN key to change value to ON. The run electricity shorts to electronic controls.
- Page 79 6. Press UP or DOWN keys to change the value. Verify units are online (LC Controller) 7. Press ENTER key to save. Once a unit is uniquely addressed, communication can be verified at the LC controller. 8. Press the ESCAPE key several times to return to Main Menu screen.
- Page 81 REPLACEMENT PARTS MANUAL MULTI-TEC WALL-MOUNT AIR CONDITIONER ® Part of the Bard Free Cooling Unit System Models: W30AAPA W36AAEA W36AAPC W30AAPB W36AAEB W36AAPD W30AAPC W36AAEC W36AAPE W30AAPD W36AAPA W36AAPF W30AAPF W36AAPB Contents Description Page Description Page Cabinet Components Freecooling Air Hood ...
- Page 82 CABINET COMPONENTS SEXP-878 Manual 2110-1442E Page 2 of 11...
- Page 83 CABINET COMPONENTS Part Number Description S127-523 Lower Base S127-568 k Lower Base 125-081 Fan Shroud 125-083 k Fan Shroud S501-977-* Right Side Right Side S501-1032 k S501-1014 Right Side S501-934-* Left Side S501-995 k Left Side S501-940 Left Side Control Panel Cover (Outer) S533-228 ...
- Page 84 FUNCTIONAL COMPONENTS SEXP-177 A Manual 2110-1442E Page 4 of 11...
- Page 85 FUNCTIONAL COMPONENTS Part Number Description 8000-346 Compressor 8000-347 Compressor 8000-348 Compressor 8000-301 Compressor 8000-309 Compressor 8000-310 Compressor 8000-311 Compressor 8000-312 Compressor S900-231 Blower Assembly S900-232 Blower Assembly 8200-001 Fan Motor Mount 8200-050 Stainless Steel Fan Motor Mount 5151-045 Fan Blade 5151C045 ...
- Page 86 CONTROL PANEL SEXP-880 Manual 2110-1442E Page 6 of 11...
- Page 87 Replacement part will have a letter attached to the end of the part number to designate software version (Example: 8301-068- 001A). A software upgrade of all PLCs onsite (units and controllers) should accompany any PLC replacement. Latest revisions of software, change log and instructions are available on the Bard website at http://www.bardhvac.com/software-download/ Circuit breakers listed are for units without electric heat, “0Z”...
- Page 88 BLOWER ASSEMBLY Dwg No. Part Number Description 151-111 Housing 144-174 Diffuser 8105-029 Blower Motor (230/208) 8105-033 Blower Motor (460) 8552-002 Capacitor 8200-031 Motor Mount 5451-011 Grommets 105-870 Back Brace 103-401 Front Brace 5152-090 Wheel CW 5152-091 Wheel CCW Manual 2110-1442E Page 8 of 11...
- Page 89 FREECOOLING COMPONENTS SEXP-859 A Dwg. No. Part Number Description 137-738 Lower Front Partition 137-745 Lower Rear Fill S101-979 Right Side S137-865 Upper Rear Partition S101-978 Left Side S105-1344 Blade Seal Angle S139-324 Blade S137-867 Upper Front Partition S137-740 Lower Rear Partition 141-430 Blade Support 8602-044...
- Page 90 FREECOOLING AIR HOOD SEXP-752A Dwg. No. Part Number Description 115-284-* Hooded Front Door 115-291 k Hooded Front Door 115-290 Hooded Front Door 113-538-* Bottom Divider Bracket Bottom Divider Bracket 113-568 k 113-571 Bottom Divider Bracket S127-495-* Hood Bottom 7003-079 Mist Filter 36-1/4"...
- Page 91 FREECOOLING DAMPER MOTOR WASHER SEXP-879 Dwg. No. Part Number Description 141-466 Actuator Support Plate 8602-067 Direct Coupled Actuator 8602-008 Ball Joint 8602-068 Belimo Actuator Crank Arm 1/2" 1012-174 1/4" - 20x3 - 1/4 Hex Cap Screws 1012-201 1/4-20 Steel Keps Hex Nut Zinc 141-464 Actuator Support Bar 113-655...
- Page 92 Adjustment Factors when more than three conductors are in a raceway. IMPORTANT: While this electrical data is presented as a guide, it is important to electrically connect properly sized fuses and conductor wires in accordance with all existing local codes. Bard Manufacturing Company, Inc. Manual:...
- Page 93 INDOOR BLOWER PERFORMANCE 50 HZ – CFM DRY/WET Speed Single High High High Inch H20 Dry Coil Wet Coil Dry Coil Wet Coil Dry Coil Wet Coil Dry Coil Wet Coil Dry Coil Wet Coil Dry Coil Wet Coil Dry Coil Wet Coil (Pa) 1200 1145...
- Page 94 SERVICING PROCEDURE R-410A LEAK TEST EVACUATION CHARGING Bard Manufacturing Company, Inc. Manual No.: 2100-479 Supersedes: NEW Bryan, Ohio 43506 File: Volume I, Tab 1 Since 1914...Moving ahead, just as planned. Date: 03-08-07 Manual 2100-479 Page 1 of 11...
- Page 95 CONTENTS General Troubleshooting the Mechanical System Recovery Equipment Rated for R-410A ....3 Air Conditioning & Heat Pump - Cooling .....9 Leak Detectors ............3 Gauge Manifold ............3 Low Suction — Low Head Pressure ......9 High Suction — Low Head Pressure ......9 Attaching Gauge Manifold ........3 Low Suction —...
-
Page 96: General
GENERAL GAUGE MANIFOLD WARNING WARNING The oils used with R-410A refrigerant are hydroscopic and absorb water from the Gauge manifold must be suitable for use atmosphere readily. Do not leave systems with R-410A refrigerant and POE oils. open to the atmosphere for more than 5 minutes. -
Page 97: Attaching Manifold Hose To Schrader Valve
ATTACHING MANIFOLD HOSE TO 3. Close drum valve and disconnect from center port. Release nitrogen or CO2 into the atmosphere through SCHRADER VALVE suction line of gauge manifold. WARNING 4. Correct any leaks and recheck. When leaks, if any, have been repaired, system is ready to be evacuated and charged. -
Page 98: Charging
CHARGING THE SYSTEM BY WEIGHT R-410A System Charging Even though R-410A has a very small fractionation potential, 1. Connect manifold as instructed. it cannot be ignored completely when charging. To avoid fractionation, charging of an air conditioner or heat pump 2. - Page 99 FIGURE 1 TYPICAL AIR CONDITIONING SYSTEM COOLING CYCLE MIS-369 Manual 2100-479 Page 6 of 11...
- Page 100 FIGURE 2 TYPICAL HEAT PUMP SYSTEM COOLING CYCLE MIS-368 Manual 2100-479 Page 7 of 11...
- Page 101 WARNING To speed refrigerant flow, it may be necessary to place refrigerant drum in a pan of warm water (not greater than 130ºF). Remember to either consider the total weight of the pan of water or remove the drum for weighing frequently to keep track of the charging process.
-
Page 102: Air Conditioning & Heat Pump - Cooling
roubleshooTing The echanical ysTeM AIR CONDITIONING AND HEAT PUMP — COOLING LOW SUCTION — LOW HEAD LOW SUCTION — HIGH HEAD PRESSURE PRESSURE 1. Restricted ��� over indoor coil. 1. Partial restriction and then overcharged. 2. Defective indoor fan motor. HIGH SUCTION — HIGH HEAD 3. - Page 103 Manual 2100-479 Manual 2100-479 Page 10 of 11 Page 10 of 11...
- Page 104 Manual 2100-479 Manual 2100-479 Page 11 of 11 Page 11 of 11...
- Page 106 USER’S GUIDE For all Packaged Systems (Air Conditioners and Heat Pumps) WA & WL - Series Air Conditioners IH - Series Air Source Heat Pumps WH & SH - Series Air Source Heat Pumps PA - Series Air Conditioners PH - Series Air Source Heat Pumps QA - Series Air Conditioners QH - Series Air Source Heat Pumps MANUAL 2100-034 REV.
- Page 107 TABLE OF CONTENTS General Information Air Filters Page 3 Outdoor Coil Page 3-4 Routine Equipment Outdoor Maintenance Page 4 Basic Operating Principles Air Conditioners Page 4-5 Heat Pump (Air-to-Air) Page 5-6 Heat Pump (Water-to-Air) Page 6 Ventilation Page 7 Dehumidification Circuits Page 7 Automatic Control Systems Thermostats...
-
Page 108: General Information
This manual is generic in nature and covers a wide range of heating and cooling products manufactured by Bard Manufacturing Company. It is intended to be a general guide for care and operation of typical systems and covers the most important features you should be aware of and are responsible for as the user of the equipment. -
Page 109: Routine Equipment Outdoor Maintenance
Depending on the specific equipment involved, the surface that can accumulate debris can be on the opposite side that is exposed to view when standing in front of the machine. Closely review the machine when operating to see which direction or path that the airflow moves through the machine, and if the air inlet side of the coil is hidden, try to observe the back (hidden) side by looking into the side grilles, using flashlight if necessary. -
Page 110: Heat Pump (Air-To-Air)
stream in the process. It may take several hours to pull down a hot, moist building or structure on initial startup, or anytime the system has been turned off for a long period of time. It is generally best to set the thermostat at a comfortable temperature and let it control the system as needed, rather than turning it on and off. -
Page 111: Heat Pump (Water-To-Air)
The length of the defrost cycle will vary depending upon actual outdoor temperature, humidity levels and amount of accumulated frost. It could range from 1-2 minutes up to but not exceeding 10 minutes. When the defrost cycle terminates, the reversing valve will shift back to heating mode and the outdoor fan will restart. -
Page 112: Ventilation
User’s Guide. Many installers also install thermostats other than those offered by Bard, and must determine proper compatibility prior to installation. -
Page 113: Insufficient Cooling Or Heating
50 and 60% Relative Humidity (RH) and typically affords acceptable human comfort conditions for most individuals, and under no circumstances should be set lower than 40% as overcooling of the conditioned space and/or freeze-ups of the indoor coil may occur. INSUFFICIENT COOLING OR HEATING In extremely hot or cold weather your system will continue to deliver its normal supply of conditioned air. -
Page 114: Helpful Hints & Operating Practices
HELPFUL HINTS AND GOOD OPERATING PRACTICES The following information will help you enjoy the full comfort and benefits of your Bard cooling and heating system, maximize the performance and efficiency, and help extend the life of your system: 1. Always keep the equipment in peak operating condition with routine scheduled maintenance, especially for the air filters and to assure clean outdoor coil. - Page 115 If you can not show us the actual date of purchase, the time periods in this warranty will start on the date that we shipped your Bard product from our factory.
- Page 116 Factory coated coils have a “5” year warranty in corrosive environments that are listed as approved. Internet Resources Recognized as a leader in the HVAC industry, Bard combines quality products and outstanding service with innovation and technological advances to deliver high- performance heating and cooling products around the world. Please visit www.bardhvac.com...
Need help?
Do you have a question about the MULTI-TEC W18AAPA and is the answer not in the manual?
Questions and answers