Bard W18AAPA Installation Instructions Manual
Multi-tec/th-tune free cooling unit system
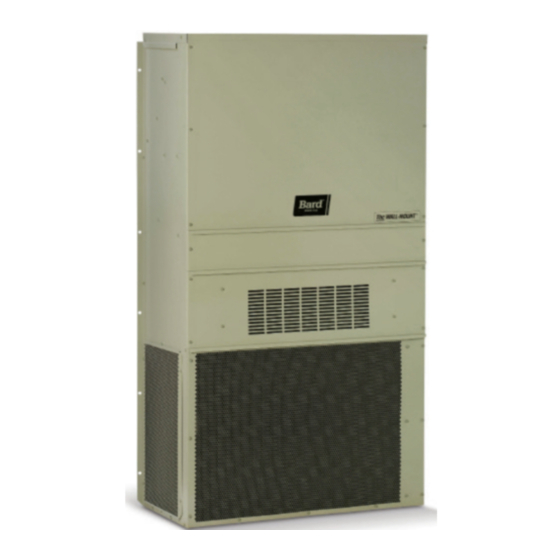
multi-tec wall-mount air conditioner/
th-tune single unit controller.
the th-tune can be used as a replacement for the lc6000
controller for operation when a single multi-tec unit is used.
Hide thumbs
Also See for W18AAPA:
- Service instructions manual (116 pages) ,
- Installation and service instructions manual (51 pages) ,
- Installation instructions manual (24 pages)
Table of Contents
Advertisement
Quick Links
INSTALLATION INSTRUCTIONS
MULTI-TEC
MULTI-TEC
W18AAPA
W42AAEA
W24AAPA
W42AAEB
W24AAPB
W42AAEC
W24AAPC
W42AAPA
W30AAPA
W42AAPB
W30AAPB
W42AAPC
W30AAPC
W48AAEA
W48AAEB
W36AAEA
W36AAEB
W48AAEC
W36AAEC
W48AAEQ
W36AAMA
W48AAMA
W36AAMB
W48AAMB
W36AAMC
W48AAMC
W36AAPA
W48AAPA
W36AAPB
W48AAPB
W36AAPC
W48AAPC
W48AAPQ
NOTE: The th-TUNE can be used as a replacement for the LC6000
controller for operation when a single MULTI-TEC unit is used.
/th-TUNE Free Cooling Unit System
®
Wall-Mount Air Conditioner/
®
th-TUNE Single Unit Controller
Wall-Mount Unit Models:
W60AAEA
W60AAEB
W60AAEC
W60AAEQ
W60AAMA
W60AAMB
W60AAMC
W60AAPA
W60AAPB
W60AAPC
W60AAPQ
Bard Manufacturing Company, Inc.
Bryan, Ohio 43506
www.bardhvac.com
W72ABEA
W18LAPA
W72ABEB
W24LAPA
W72ABEC
W24LAPB
W72ABEQ
W30LAPA
W72ABMA
W30LAPB
W72ABMB
W30LAPC
W72ABMC
W36LAPA
W36LAPB
W72ABPA
W72ABPB
W36LAPC
W72ABPC
W42LAPA
W72ABPQ
W42LAPB
W42LAPC
W48LAPA
W48LAPB
W48LAPC
W48LAPQ
Manual:
Supersedes: 2100-678B
Date:
W60LAPA
W60LAPB
W60LAPC
W60LAPQ
W72LBPA
W72LBPB
W72LBPC
W72LBPQ
2100-678C
8-14-18
Page
1 of 26
Advertisement
Table of Contents

Related Manuals for Bard W18AAPA


Summary of Contents for Bard W18AAPA
- Page 1 W48LAPC W36AAPC W48AAPC W48LAPQ W48AAPQ NOTE: The th-TUNE can be used as a replacement for the LC6000 controller for operation when a single MULTI-TEC unit is used. Bard Manufacturing Company, Inc. Manual: 2100-678C Bryan, Ohio 43506 Supersedes: 2100-678B Date: 8-14-18 www.bardhvac.com...
-
Page 2: Table Of Contents
CONTENTS General Information ...........3 FIGURES AND TABLES List of Necessary Materials/Tools ....5 Figure 1 MULTI-TEC Model Nomenclature .....5 Wall-Mount Unit Site Preparation ....6 Figure 2 Dimensions ..........7 Model Identification .......... 6 Figure 3 Outdoor Sensor Installation ...... 8 New Shelter Installation vs. Retrofit Installation .. 6 Figure 4A W18A, W18L, W24A, W24L Minimum Clearance .......... -
Page 3: General Information
Free Cooling Unit System These instructions explain the recommended method to install the air cooled self-contained unit and the This Bard Free Cooling Unit System is composed of electrical wiring connections to the unit. MULTI-TEC wall-mounted air conditioners matched These instructions and any instructions packaged with... - Page 4 American National Standards Institute (ANSI) WARNING 11 West Street, 13th Floor New York, NY 10036 Telephone: (212) 642-4900 Fax: (212) 302-1286 Electric shock hazard. American Society of Heating, Refrigeration and Air Conditioning Engineers, Inc. (ASHRAE) Have a properly trained individual perform 1791 Tullie Circle, N.E.
-
Page 5: List Of Necessary Materials/Tools
LIST OF NECESSARY MATERIALS/TOOLS Additional hardware and miscellaneous supplies are needed for installation. These items are field supplied and must be sourced before installation. This list also includes tools needed for installation. LIST OF MATERIALS/TOOLS • Personal protective equipment/safety devices/anti- •... -
Page 6: Wall-Mount Unit Site Preparation
(left side compressor and controls) for the left unit and is unique and may require special accomodations and W**A (right side compressor and controls) for right unit. modifications. Although Bard Manufacturing follows a See Specifications Sheet S3532. long-established tradition of manufacturing equipment... -
Page 7: Dimensions
FIGURE 2 Dimensions of Basic Unit for Architectural and Installation Requirements (Nominal) SUPPLY RETURN WIDTH DEPTH HEIGHT MODEL W18** 33.300 17.125 74.563 7.88 19.88 11.88 19.88 35.00 10.88 29.75 20.56 30.75 32.06 33.25 31.00 2.63 34.13 26.06 10.55 4.19 12.00 9.00 W24** W30**... -
Page 8: Wall-Mount Unit Installation
WALL-MOUNT UNIT INSTALLATION Mounting the Units 6. Position unit in opening and secure with fasteners sufficient for the application such as 5/16" lag/ anchor/carriage bolts; use 7/8" diameter flat washers WARNING on the lag bolts. It is recommended that a bead of silicone caulking be placed behind the side mounting flanges. -
Page 9: Mounting Instructions
Manual 2100-678C Page 9 of 26... -
Page 10: W30A, W30L, W36A, W36L Mounting Instructions
Manual 2100-678C Page 10 of 26... -
Page 11: W42A, W42L, W48A, W48L Mounting Instructions
Manual 2100-678C Page 11 of 26... -
Page 12: W60A, W60L, W72A, W72L Mounting Instructions
Manual 2100-678C Page 12 of 26... -
Page 13: Electric Heat Clearance
FIGURE 5 Electric Heat Clearance FIGURE 6 Wall Mounting Instructions WALL STRUCTURE See FIGURE 2 – Mounting Instructions FACTORY SUPPLIED RAIN FLASHING. MOUNT ON UNIT BEFORE INSTALLATION SUPPLY AIR SUPPLY AIR SUPPLY AIR DUCT OPENING OPENING RETURN AIR RETURN AIR RETURN AIR OPENING OPENING... -
Page 14: Wall Mounting Instructions
FIGURE 7 Wall Mounting Instructions SEE UNIT DIMENSIONS, FIGURE 2, SEE UNIT DIMENSIONS, FIGURE 1.2, FOR ACTUAL DIMENSIONS. FOR ACTUAL DIMENSIONS E + 1.000 ATTACH TO TOP PLATE OF WALL 1.000 1.000" CLEARANCE ALL AROUND DUCT SUPPLY DUCT OPENING INTERIOR FINISHED WALL OVER FRAME 1.000"... -
Page 15: Common Wall Mounting Installations
FIGURE 8 Common Wall Mounting Installations SUPPLY DUCT MAY BE LOCATED IN AN ATTIC OR BELOW CEILING RAFTERS AS SHOWN RAIN RAIN FLASHING RAFTERS FLASHING RAFTERS FINISHED CEILING SURFACE SUPPLY AIR DUCT SUPPLY AIR DUCT FINISHED CEILING SURFACE W/GRILLE WALL SLEEVE RETURN AIR RETURN AIR OPENING W/ GRILLE... -
Page 16: Wall-Mount Unit Supply Wiring
DATE 3/17/2014 3/17/2014 The unit rating plate and Tables 1, 2 and 3 list fuse SCALE DRAWN BY Bard Mfg. Co. and wire sizes (75°C copper) for all models including Bryan, Ohio 3/17/2014 ADDED FRENCH VERSION 11182 BD SD RP... -
Page 17: Electrical Specifications - W**A*P Series
TABLE 1 Electrical Specifications – W**A*P Series Single Circuit Multiple Circuit Rated Minimum Maximum No. Field Volts Maximum Field Circuit External Fuse or Field Power Ground MODEL Power Minimum & External Power Ground Ampacity Ckt. -
Page 18: Electrical Specifications - W**L*P Series
TABLE 2 Electrical Specifications – W**L*P Series Single Circuit Dual Circuit Minimum Maximum Rated Field Maximum Circuit External Fuse or Field Power Ground MODEL Volts & Minimum Field Power External Ground Ampacity Ckt. -
Page 19: Electrical Specifications - W**A*E Series
TABLE 3 Electrical Specifications – W**A*E Series Single Circuit Dual Circuit Rated Minimum Maximum Field Power Wire Ground Field Minimum Maximum Field Ground Model Volts & Circuit External Fuse or Size Wire Size Power Circuit External... -
Page 20: Wall-Mount Unit Preliminary Start Up
R-T-/R+T+/GND on the control board located in the wall-mount unit. Be sure to reconnect the plug before operating the wall-mount unit as part of the Bard Free Cooling Unit System. Additionally, should the MULTI-TEC wall-mount unit lose communication with the th-TUNE stand- alone controller (such as during maintenance), it will continue to serve the shelter’s needs until a repair can... -
Page 21: Th-Tune Controller Installation
TH-TUNE CONTROLLER INSTALLATION The Bard th-TUNE single unit controller can be used in 4. To remove cover A1 (Figure 13), unscrew screw, press the point of attachment and separate cover place of the LC-6000 controller when only one MULTI- from base. -
Page 22: Power And Communication Wiring
Power and Communications Wiring TUNE connect to terminal blocks mounted on the right side of the control board on the wall unit control panel. See Figures 15, 16 and 17 for guidance with Make connections according to the terminal block label connecting the power and communications wires. -
Page 23: Configuration
If the th-TUNE is not wired correctly, it will display “Cn”. FIGURE 18 MULTI-TEC Status Screen FIGURE 19 th-TUNE Configuration FIGURE 20 TEC-EYE (Bard P/N 8301-059) Display and Interface (Status Screen Shown) UP KEY ALARM KEY MENU KEY ENTER KEY ESCAPE KEY DOWN KEY... -
Page 24: Operation
OPERATION Changing the Clock See Figure 22 and Figure 23 (page 26) for overviews of th-TUNE buttons and icons. The time and date displayed on the th-TUNE will On/Off automatically sync to the wall-mount unit controller time and date settings. To change time and date, use Press and hold power button for 2 seconds to turn th- the TEC-EYE to change settings in the MULTI-TEC wall- TUNE on or off. -
Page 25: Alarms And Troubleshooting
6. Press UP or DOWN keys to adjust value. 7. Press ENTER key to save. Alarms and Troubleshooting Alarms If any alarm is triggered on the unit, the Bell icon will flash for 10 seconds accompanied by an audible tone alarm. -
Page 26: Th-Tune Icons Overview
FIGURE 23 th-TUNE Icons Overview * Rotating Display Area This area displays the following information in the following order and rotates through them every 5 seconds: Clock/Day Indoor Temperature Setpoint Indoor Humidity Outdoor Temperature Outdoor Humidity Manual 2100-678C Page 26 of 26...
Need help?
Do you have a question about the W18AAPA and is the answer not in the manual?
Questions and answers