Table of Contents
Advertisement
Advertisement
Table of Contents
Troubleshooting

Subscribe to Our Youtube Channel
Related Manuals for Fisher & Paykel SmartLoad DE62T27GW1


Summary of Contents for Fisher & Paykel SmartLoad DE62T27GW1
-
Page 1: Installation Instructions
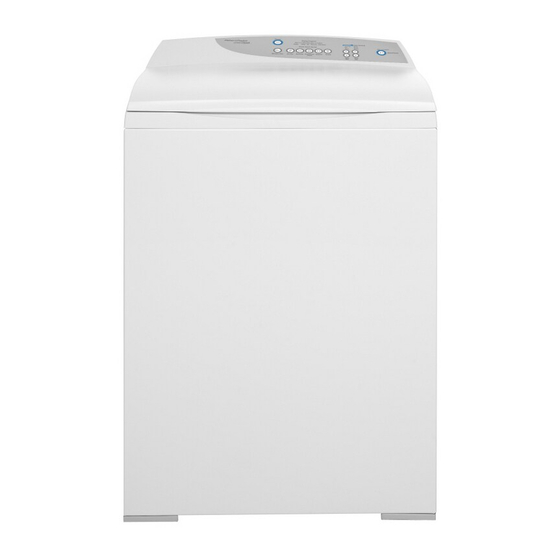
Installation instructions and User guide Smartload™ clothes dryer US CA (EN) -
Page 2: What To Do If You Smell Gas
WARNING: information in this manual must be followed to minimize the risk of fire or explosion damage, personal injury or death. —Do not store or use gasoline or other flammable vapors and liquids in the vicinity of this or any other appliance. —WHAT TO DO IF YOU SMELL GAS not use any phone in your building. -
Page 3: Table Of Contents
Drying Progress Lights Lid Lock Care Labels Drying Special Items Cleaning If Your Dryer Beeps for Help Trouble Shooting Limited Warranty Important! SAVE THESE INSTRUCTIONS The models shown in this User Guide may not be available in all markets and are subject to change at any time. - Page 4 Thank you for buying a Fisher & Paykel Smartload™ dryer. We hope you enjoy using the Smartload™ dryer as much as we have enjoyed designing it. We’ve developed this dryer to treat your clothes with the utmost care, drying them gently so they will look better for longer.
-
Page 5: Dryer Safety
It is important to always act with caution and use common sense when operating your dryer. Use only as per instructed by the User Guide. -
Page 6: Important Safety Instructions
This dryer must be properly grounded to conform with all governing codes and ordinances. Follow details in Installation Instructions. Do not install or store the dryer where it will be exposed to water or exposed to the weather. Connect to a properly protected, rated and sized power supply circuit to avoid electrical overload. -
Page 7: Fire Hazard
To Reduce the Risk of Fire in a Tumble Dryer the Following Should be Observed: Do not place items in a tumble dryer that have previously been cleaned in, washed in, soaked in, or spot cleaned with flammable liquids or solids. They are a fire or explosion hazard. Highly... -
Page 8: Warranty
Do not reach into the appliance if the drum is moving. Close supervision is necessary if this dryer is used by or near children. Do not allow children to play inside, around or with this dryer or any other appliance. -
Page 9: Installation Instructions
Duct tape Parts Supplied 2 feet inserts for front feet. A power supply cord is supplied already connected to the gas dryer (Gas models only) Check to make sure all parts have been supplied. Accessories Mobile Home Installation Kit Part No 395488... -
Page 10: Installer Responsibilities, Location Requirements
Before installing the dryer ensure that there is sufficient height to fully open the lid. Allow sufficient room behind the dryer for the exhaust. The air intake is at the rear of the dryer. Ensure that there is a sufficient air passage on each side of the dryer for intake air. -
Page 11: Alcove Or Closet Installation
Location Requirements The area in which the dryer is located must be kept clear and free from combustible materials, gasoline and other flammable vapors and liquids. A dryer produces combustible lint so the area around the dryer must be cleaned regularly to keep it free of lint. -
Page 12: Dimensions
Dimensions Lid Clearance Check that there is enough clearance for the lid to fully open. 27 9⁄16” (700mm) Exhaust Outlet Location 13 7⁄8” (352mm) 27” (685mm) Exhaust outlet 13 1⁄8” (333mm) Does not include foot height... -
Page 13: Mobile Home Installation
Mobile Home Construction and Safety, Title 24 HUD (Part 280), 1975} for the United States or Standard CAN/CSA – Z240MH for Canada. When installing a dryer in a mobile home, provisions for anchoring the dryer to the floor must be made. -
Page 14: Venting
Venting The dryer exhaust must be vented to the outdoors. This will prevent the build up of lint and moisture in the room in which it is located and reduce the risk of fire. Exhaust ducting products can be purchased from your local Appliance store or Hardware store. - Page 15 Static pressure in the exhaust ducting does not exceed 1 inch of water column (250Pa), or is not less than 0 inches of water column (ie. negative pressure), when measured with a manometer in the 6 inches of the duct nearest the dryer, with the empty dryer running on Air Dry (no heat) setting.
-
Page 16: Maximum Length Of Exhaust Duct
Exhaust duct systems longer than specified will: Accumulate lint creating a potential fire hazard. Shorten the life of the dryer. Reduce performance, resulting in longer drying times and an increased energy usage. Determine the number of elbows/bends you will need. - Page 17 Maximum Length of Exhaust Duct Number of 90˚ elbows/bends 64ft 54ft 44ft 35ft 27ft When you have a 2 ½” (6cm) Hood Number of 90˚ elbows/bends 58ft 48ft 38ft 29ft 21ft For exhaust systems not covered by the exhaust duct length charts (such as multiple unit hook-ups, plenums, and power-assist fans), call our Customer Care Center: TOLL FREE 1.888.9.FNP.USA (1.888.936.7872).
-
Page 18: Alternative Installation For Close Clearances
2 ½”(6.3cm) exhaust hood is 8ft (2.4m). Refer to the venting system kit manufacturers instructions. sections separate, fittings can face same or opposite swivel collar Extra long band–clamp for dryer connection swivel collar wall connection telescoping sections beveled edges allow corner... -
Page 19: Exhaust Venting
Never use plastic or thin metal foil flexible exhaust material. The exhaust outlet is located close to the center of the rear of the dryer. Make sure you join the exhaust duct to the dryer with duct tape only. This will prevent lint and dust from escaping from the dryer and exhaust system. -
Page 20: Installation
Unpacking Make sure dryer is in a suitable location for installation. Consider installing the dryer before the washing machine in a side by side installation, this will allow better access to electrical and exhaust connections. Remove Packaging 1. - Page 21 Note: Dryer is usually supplied with feet fitted and protruding the correct distance. Tilt the dryer back using a hand trolley and making sure the trolley and dryer are secure. Fit a rubber insert to each plastic foot as shown.
-
Page 22: Grounding Instructions
Grounding Instructions for Gas and Electric Dryers Grounding for a Cord-Connected Appliance This appliance must be grounded. In the event of malfunction or breakdown, grounding will reduce the risk of electric shock by providing a path of least resistance for electric current. When this appliance is equipped with a cord having an equipment-grounding conductor and a grounding plug, the plug must be plugged into an appropriate outlet that is properly installed and grounded in accordance with all local codes and ordinances, or in their absence, with the... -
Page 23: Electrical Requirements
This dryer is supplied with the cabinet grounded through the neutral on the terminal block. If the dryer is to be installed in (1) a new branch circuit installation, (2) a mobile home, (3) a recreational vehicle, (4) an area where local codes do not permit grounding through the neutral conductor, the appliance grounding link must be removed and a 4-wire power cord/cable or a separate grounding wire must be used. -
Page 24: For Electric Models Only
120/240 V min, 30 A and marked with use for clothes dryers shall be used. This shall have ring terminals to connect to the dryer. The UL-rated strain relief included with it shall be suitable for a 1 1/8”... - Page 25 Electric models of the dryer are manufactured for a 3-wire connection system. The dryer frame is grounded by a link to the neutral conductor on the dryer terminal block. If local codes do not permit grounding through the neutral, the grounding link from the terminal block must be removed and a separate ground wire must be used.
- Page 26 Connect the other wires to the upper and lower terminal block screws marked with the letter L. Tighten screws. Refit terminal block cover by inserting the two tabs first on the rear panel of the dryer. Secure cover with securing screw.
- Page 27 Connect the other wires to the upper and lower terminal block screws marked with the letter L. Tighten screws. Refit terminal block cover by inserting the two tabs first on the rear panel of the dryer and secure cover with securing screw.
- Page 28 Connect the red wire and black wire to the upper and lower terminal block screws marked with the letter L. Tighten screws. Refit terminal block cover by inserting the two tabs first on the rear panel of the dryer and secure cover with securing screw.
-
Page 29: Gas Requirements
LP Gas Conversion If the dryer is to be operated on LP (Liquid Propane or Butane) Gas, the dryer must be converted. To do so, use only the approved Fisher & Paykel conversion kit listed in Accessories on page 9. -
Page 30: Connecting To The Gas Supply
The dryer must be disconnected from the gas supply system during any pressure testing. Gas Ignition This dryer has an automatic ignition system to ignite the burner. There is no pilot flame burning in this dryer. Connecting to the Gas Supply The gas supply line should be ½... - Page 31 Disconnect and discard old flexible tubing. The gas pipe that comes out of the rear of your dryer has on it a 3⁄8” NPT male thread. Remove the protective cap and apply sealing compound or tape to the thread. Thread sealant should be appropriate for the type of gas to be used.
-
Page 32: Level Machine, Final Installation Checklist
Failure to do so can result in death, electric shock, fire or injury to persons. Close supervision is necessary if this dryer is used by or near children. Do not allow children to play inside, around or with this dryer or any other appliance. -
Page 33: Features
Features Smart Loading The new ergonomic design of this dryer means less bending. Simply move clothes from the washer to the dryer with minimal effort. Superior Clothes Care Superior clothes care is accomplished by an efficient high airflow fan and careful heat control. The SmartLoad™ dryer provides the right heat for temperature sensitive delicate articles while still efficiently drying more robust regular and denim loads. -
Page 34: Operating Instructions
(Refer to page 40). F. Smart Touch Cycles Choose the Smart Touch cycle that most represents the items in your load. Your dryer defaults to the REGULAR cycle, to change it press any of the other cycle buttons. -
Page 35: Control Panel
H. Drying Progress These lights show the drying progress so you can see at a glance where the dryer is at. I. Time Dry SmartLoad™ has three timed cycles. These cycles have set drying times of either 20, 40 or 80 minutes and include a COOL DOWN function. -
Page 36: Quick Start
Do not use heat to dry articles containing foam rubber or similarly textured rubber-like materials. Dry on the Air Dry cycle. A clothes dryer produces combustible lint and must be exhausted outdoors. Take care to prevent the accumulation of lint around the exhaust opening and in the surrounding area. -
Page 37: Using Your Dryer
(see care label section). 1. Sorting It is best that you sort your garments before placing them into the dryer. Sort into loads of similar types, and loads that take similar times to dry. Heavier items (e.g. towels, t-shirts and flannel sheets) are best dried separately from lightweight items (e.g. -
Page 38: Lint Bucket
It is important that you run your dryer with the lint bucket in place at all times. 4. Power To turn on your dryer, press the POWER button located at the top left-hand corner of the control panel. -
Page 39: Selecting A Cycle
Using Your Dryer 5. Selecting a Cycle Your dryer has a number of SMART TOUCH CYCLES that can be used to dry different types of garments: Select a drying cycle that matches the type of load you are drying. Different fabrics have different drying requirements, so it is important to choose the cycle that best describes the load. -
Page 40: Wrinkle Free
WRINKLE FREE uses very little power and will continue for up to 24hrs or until the dryer is turned off. After completing each tumble SmartLoad™ will give an ‘End of Cycle’ beep to remind you that the load is dry and can be removed. -
Page 41: Selecting The Drying Process
Using Your Dryer 7. Selecting the Drying Process There are two ways in which your dryer is able to dry clothes; by using AUTO SENSING or by using TIME DRY. AUTO SENSING When AUTO SENSING is selected SmartLoad™ automatically senses the dryness level of the load and turns off when the clothes are dry. -
Page 42: Stopping Your Dryer
12. Beeps At the end of the cycle, the dryer will beep to let you know that the load is finished. The drum will automatically come to rest in the open position, allowing you to open the lid and remove your load. -
Page 43: Drying Progress Lights
There are five progress lights located above the SMART TOUCH CYCLES that let you monitor the progress of your load so you can tell at a glance where the dryer is up to. When the dryer is started, the DRYING light appears, letting you know that the dryer is in the process of drying the load. -
Page 44: Lid Lock
When the power is restored the dryer will automatically resume operating. However if it does not automatically open, first close the lid and start the dryer in the usual manner, after 5 seconds press START/PAUSE. This will cause SmartLoad™ to open correctly with the lid unlocked. -
Page 45: Care Labels
Below is a selection of care label symbols that garment manufacturers use to show how their garments should be dried. We’ve converted these symbols into the cycles and heat settings that we recommend you use in the SmartLoad™ dryer. By following our recommendations, you can ensure that your clothes will retain their appearance over time. -
Page 46: Drying Special Items
Foam rubber Rubber-backed products Special Instructions Check the care label – can the pillow be dried in the dryer? Do not dry foam rubber pillows. It is important that before placing a pillow in the dryer you check for weak seams where feathers or fillings could escape. -
Page 47: Drying Times
Heat used (electric, natural gas or LP gas) Condition of exhaust ducts Special Instructions Check the care label – can item be dried in the dryer? Use a low heat setting. We recommend the DELICATE cycle and AUTO SENSING. Select the DRY/EXTRA DRY Dryness Level. -
Page 48: Cleaning
Do not use pre-treatment sprays or liquids on or near your dryer as they can damage your machine’s control panel as well as any of its plastic parts. Damage to your dryer caused by pre- treatment products will not be covered by your warranty. -
Page 49: Troubleshooting
Your lint bucket is too full. Remove the lint from the lint bucket, then run the dryer on any cycle for a few minutes with no load to remove any lint still trapped in the dryer. Empty the lint bucket again. -
Page 50: Trouble Shooting
Pressing START/PAUSE does not start the dryer Is the lid open? Shut the lid and press START/PAUSE. Is there a fault displayed on the panel? Refer to page 42 – If Your Dryer Beeps For Help. Dryer is taking a long time to dry Is the lint bucket full? If so empty it to improve performance. - Page 51 Has the correct temperature been used to dry the garment? Check the care label. Loads are wrinkled Does the load sit higher than the lint bucket? Your dryer is over-loaded, decrease the load size. Did you remove your clothes as soon as the dryer was finished? Use the WRINKLE FREE option, if you cannot return to the dryer in time.
-
Page 52: Limited Warranty
Limited Warranty When you purchase any new Fisher & Paykel whiteware product for personal or consumer use you automatically receive a one year limited warranty covering parts and labor for servicing within the 48 mainland United States, Hawaii, Washington DC and Canada. In Alaska the limited warranty is the same except that you must pay to ship the product to the service shop or the service technician’s travel to your home. - Page 53 Limited Warranty This Warranty Does Not Cover Service calls that are not related to any defect in the product. The cost of a service call will be charged if the problem is not found to be a defect of the product. For example: 1.
-
Page 54: How To Get Service
Limited Warranty How to get Service Please read your User Guide. If you then have any questions about operating the product, need the name of your local Fisher & Paykel Authorized Service Agent, or believe the product is defective and wish service under this limited warranty, please contact your dealer or call us at: USA and Canada TOLL FREE 1.888.9.FNP.USA (1.888.936.7872) - Page 56 You should therefore check with our Customer Care Center to ensure this booklet correctly describes the product currently available. www.usa.fisherpaykel.com www.fisherpaykel.ca US CA Smartload™ clothes dryer Installation instructions and user guide Published 02/2009 Part No. 395776...
Need help?
Do you have a question about the SmartLoad DE62T27GW1 and is the answer not in the manual?
Questions and answers