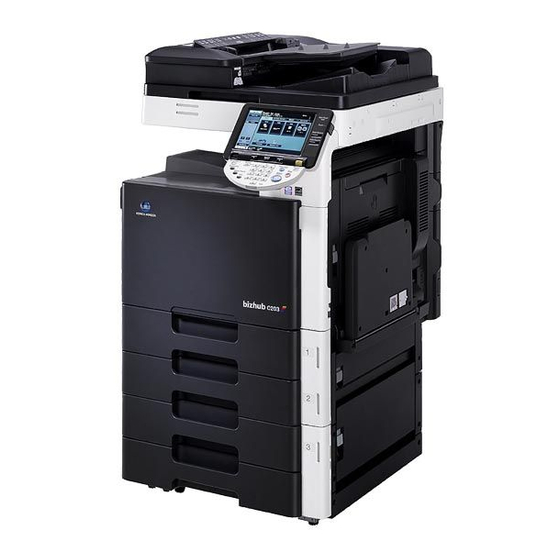
Konica Minolta Bizhub 250 Shortcut Manual
Hide thumbs
Also See for Bizhub 250:
- Service manual (770 pages) ,
- User manual (390 pages) ,
- Ssd support solutions (153 pages)
Table of Contents
Advertisement
Quick Links
Advertisement
Table of Contents

Related Manuals for Konica Minolta Bizhub 250


Summary of Contents for Konica Minolta Bizhub 250
- Page 1 Bizhub 250/350 C203/253/353 Shortcut Manual...
- Page 3 Touch Panel Main Power Power Mode Memory Utility/Counter Reset Interrupt Stop Proof Copy 10. Start 11. Panel 12. “C” Clear 13. Keypad 14. Help 15. Enlarge Display 16. Accessibility 17. Power Save 18. Access 19. Brightness 20. User Box 21. Fax / Scan 22.
- Page 4 Basic (I) -- Color Mode Auto Color – This setting to automatically detect the documents are in color or black and white Full Color – The copy in full color Black – The copy in black and white 2 Color – Print all areas of the document determined to be in color with the specified color, and print all areas determined to be black in black Single Color –...
- Page 5 Basic (II) -- Paper Change Bypass Tray Setting Touch Basic, Touch Paper Select Bypass Tray Touch Change Tray Settings Select Paper Type Input paper size Touch Standard Size Touch Custom Size input (Length) X and (width) Y,e.g. 90mm please input 0900 (If stored paper size,...
- Page 6 Basic (III) -- Zoom Touch ZOOM Select fixed zoom size Touch default zoom ratios e.g.︰A3 A4 default zoom ratio is 0.707 Touch- + to change zoom ratio Touch XY Zoom Using the keypad,type in the desired zoom ratio then touch OK Sort / Group Touch Finishing Touch Sort or Group...
- Page 7 (Optional Function) Staple 1. Touch Finishing 2. At Staple select Corner or 2position 3. Touch position Setting 4. Press Start Punch 1. Touch Finishing 2. At Staple select 2 Hole or 4 Hole 3. Touch position Setting 4. Press Start Fold/Bind 1.
- Page 8 Basic (IV) --Duplex/Combine Combine Select 1. Touch 2 in 1 or 2. Touch 4 in 1/ 8 in 1 To reduce the size from 2 / 4 / 8 sheets originals into 1 sheet of copy Original > Copy a. 1-sided > 2-sided Single-sided Original to Double-sided Copy b.
-
Page 9: Original Setting
Original Setting 1. Touch Mixed Original automatically detect the documents size and automatically choose paper tray 2. Touch Z-Folded Original (Optional Function) 3. Touch Binding Direction -- copy-binding direction 4. Touch Original Direction – select original direction 5. Touch Original Size -- select original size Quality/Density 1. -
Page 10: Ohp Interleave
Application - OHP Interleave 1. Touch Application 2. Touch Sheet /Cover /Chapter Insert 3. Touch OHP Interleave 4. Select inserting paper tray 5. Load OHP transparencies into the bypass tray 6. Touch OK 7. Press Start... -
Page 11: Cover Mode
- Cover Mode Touch Application Touch Sheet /Cover /Chapter Insert Touch Cover Mode Select Front Cover or Back Cover Select Front or Back Cover paper tray Touch Ok Press Start - Insert Sheet 1. Touch Application 2. Touch Sheet /Cover /Chapter Insert 3. -
Page 12: Insert Image
- Insert Image 1. Touch Application 2. Touch Sheet /Cover /Chapter Insert 3. Touch Insert Image 4. Select inserted image pages number 5. Touch Ok 6. Press Start 7. Final,Touch Finish then press Start - Chapter (Duplex Only) 1. Touch Application 2. -
Page 13: Edit Color
- Edit Color Touch Application Touch Edit Color Touch Neg. Pos. Reverse Touch Mirror Image Touch Background Color - Book Copy Touch Application Touch Book Copy / Repeat Touch Book Copy Then touch Separation,select Front Cover/Back Cover Open book,Touch Start Scan whole book pages then press Finish Press Start If select Front Cover, scan︰... - Page 14 - Image Repeat Touch Application Touch Book Copy / Repeat Touch Image Repeat Select With Margin / Without Margin Touch Set Range Touch Custom Size ,Input X (Length) and Y(Width) Touch OK Press Start - Poster Mode 1. Touch Application 2.
-
Page 15: Booklet Original
- Booklet Original Optional Function Touch Application Touch Book Copy/Repeat Touch Booklet Original Touch OK Press Start - Page Margin Touch Application Touch Page Margin Select Top, Left or Right Adjust Value input width Touch OK Press Start - Frame Erase Touch Application Touch Frame Erase Input width... -
Page 16: Image Adjustment
- Booklet Touch Application Touch Booklet Select Left Binding /Right Binding Press Start - Image Adjustment Touch Application Touch Image Adjust Select Full Size Center Zoom or Centering Press Start... -
Page 17: Copy Protect
- Date / Time Touch Application Touch Stamp/Composition Touch Date / Time Touch Print Position -- print to different position Touch OK Press Start - Page # Touch Application Touch Stamp/Composition Touch Page Number Starting Page Number input starting page number Touch Print Position –... - Page 18 Delete the copy jab in the Waiting List Touch Job Details Touch Print and then touch Current Jobs Select the job you want to delete Touch Delete Touch Yes to delete printing job...
- Page 19 Abbreviated Destinations E-mail / Fax 1. Press Utility/Counter 2. Touch 1. One Touch/User Box Registration 3. Touch 1. Create One Touch Destination 4. Touch 1.Address Book 5. Touch E-mail / Fax 6. Touch New 7. Touch Name,Input name,Touch OK 8. Touch Address input e-mail address or Fax number,Touch OK 9.
-
Page 20: Group Registration
Group Registration 1. Press Utility/Counter 2. Touch 1. One Touch/User Box Registration 3. Touch 1. Create One Touch Destination 4. Touch 1.Group 5. Touch New 6. Touch Name,Input group name,Touch OK 7. Touch Select Group (If fax, select Fax) Touch OK... - Page 21 Scan To Email / Send Fax Press Fax/Scan Touch Address Book Select one-touch Index and Name Touch Scan Settings Original Type select original type Simplex/Duplex select original single-sided or double-sided C. Resolution D. File Type Density Quality Adjustment Touch check following setting Destination Settings Check Scan Settings...
-
Page 22: Remove Jammed Paper
Remove Jammed Paper 1. Pull up the upper right side door release lever, and then open the upper right side door 2. Open the door of the automatic duplex unit 3. Open the door of the Bypass Tray... - Page 23 Replace Toner *If toner near empty,Screen will show toner empty message - Toner Cartridge (Y) = Yellow - Toner Cartridge (M) = Magenta - Toner Cartridge (C) = Cyan - Toner Cartridge (K) = Black Open the machine’s upper front door, pull out empty toner cartridge toner then insert the new toner...
- Page 24 Display the Job History List Touch Job Details Touch Send Touch Job History Touch Comm. List Select report Type Activity Report TX Report C. RX Report Press Start...
- Page 25 After print,FAX to 2565 2128 Touch Utility / Counter Touch Check Details Touch Print List Select paper tray Press Start...
-
Page 26: Printer Driver Setting
Konica Minolta Color Copier Banner Print C451 Visual PCL Driver (version2.58) Banner Paper Printing User Guide Banner paper size: (Width) 210 - 296mm / (Length) 457.3 –1200mm Prepare printing on Banner Paper 1. Press [Utility/ Counter] 2. Touch [6 Banner Printing] 3. - Page 28 Fax: 2565 7613 (Toners, Paper etc) Financial Division Statement Enquiries Tel: 2856 4710 Fax: 2516 9177 Administration Division Other Suggestions & Comments Tel: 2565 8181 then press “ 0 ” Online Customer Services http://konicaminolta.com.hk/bt/chi/form http://konicaminolta.com.hk Konica Minolta Business Solutions (HK) Limited...
Need help?
Do you have a question about the Bizhub 250 and is the answer not in the manual?
Questions and answers