
Related Manuals for Kenwood KDC-U5049DAB


Summary of Contents for Kenwood KDC-U5049DAB
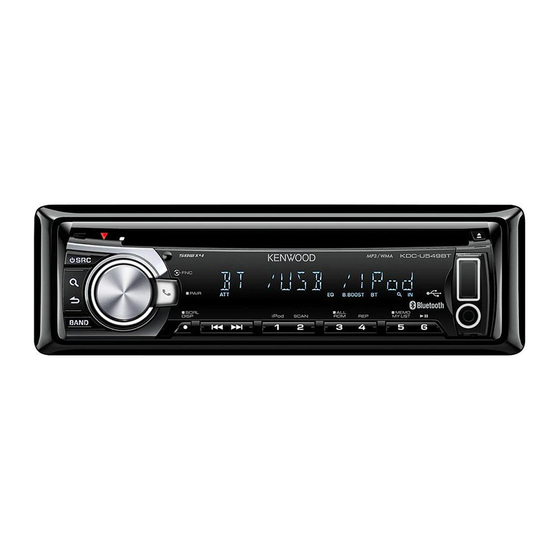
- Page 1 KDC-U5049DAB CD-RECEIVER INSTRUCTION MANUAL © 2011 Kenwood Corporation All Rights Reserved. B64-4835-00/01 (MW)
-
Page 2: Table Of Contents
CONTENTS Safety My Playlist for iPod iPod control by Hand mode Maintenance Adjust [SETTINGS] mode settings The marking of products using lasers Operation of Hands-Free Phoning 20 Preparation Getting Started How to attach/detach the faceplate Making a Call How to reset your unit Receiving a Call How to prepare the remote controller During a Call... -
Page 3: Safety
If you experience problems during installation, consult your Kenwood dealer. ■ When you purchase external components, check with your Kenwood dealer to make sure that they work with your model and in your area. Maintenance Cleaning the unit: Wipe off the dirt on the panel with a dry silicon or soft cloth. -
Page 4: Preparation
Preparation How to attach/detach the faceplate How to prepare the remote controller (RC-405) When you use the remote controller for the first time, pull out the insulation sheet. Insulation sheet ■ Do not expose the faceplate to direct sunlight, excessive heat, or humidity. Also avoid places with too much dust or the If the effectiveness of the remote possibility of water splashing. - Page 5 Apple Inc., registered in the U.S. and other countries. This symbol mark indicates that Kenwood manufactured this product so as to decrease harmful influence on the environment. English...
-
Page 6: Basic Operations
Basic Operations Loading slot Remote sensor ■ Do not expose to bright sunlight. Ejects the disc LIST UPDATE Volume knob Display window Detaches the faceplate The following indicator lights up when... ST: A stereo broadcast is received. D: DAB service is received. Flashes when changed to Radio Data System service. - Page 7 When you press or hold the following button(s)... Remote Main unit General operation controller ■ Turns on. — ■ Turns off if pressed and held. Selects the available sources (DAB, TUNER, USB or iPod, CD, AUX, STANDBY), if the power is turned on. •...
-
Page 8: Getting Started
Getting Started Canceling the display Adjusting the clock demonstration Press the volume knob to enter The display demonstration is always turned [FUNCTION] mode. on unless you cancel it. Turn the volume knob to select [SETTINGS], then press to enter. When you turn on the power (or after you Turn the volume knob to select [CLOCK], reset the unit), the display shows: then press to enter. - Page 9 The current firmware version is displayed. UPDATE Press the volume knob to update DAB or system firmware. YES: Starts upgrading the firmware. ; NO *: Cancels (upgrading is not activated). UPDATE For details on how to update the firmware, see: www.kenwood.com/cs/ce/ English...
-
Page 10: Listening To The Dab
Listening to the DAB Hold to turn on or off the Traffic Information function. LIST UPDATE ■ Hold for about 2 seconds to memorize the current ■ Changes to DAB source if other service or the selected Program Type. (Refer to [PTY than DAB source has been selected. -
Page 11: Updating Service List Information
Using the remote controller (RC-405) Updating Service List information #FM+ : Selects band. Press and hold DAB to start Service list 4 / +¢ : Selects service. update. 1 – 6 : Selects preset service. ■ Press and hold DAB to cancel service list update. -
Page 12: Listening To The Radio
Item Selectable setting (Preset: *) PTY WATCH After registering a desired programme type, when the programme in the registered type starts in the Ensemble being received, the Service is automatically switched. PTY WATCH OFF: Cancels (does not change) ; Selects the available Program Type (page 12). (except SPEECH and MUSIC) •... -
Page 13: Adjust [Settings] Mode Settings
RADIO TEXT+ * ; RADIO TEXT ; CLOCK Adjust [SETTINGS] mode settings AM: FREQUENCY ; CLOCK While listening to the radio... • *1 Information of Radio text plus is displayed. Press the volume knob to enter [FUNCTION] mode. Using the remote controller (RC-405) Turn the volume knob to select #FM+ / *AM–... -
Page 14: Listening To A Disc/Usb Device/ Ipod
Listening to a Disc/ USB device/ iPod Ejects the disc. Detach the faceplate (“NO DISC” appears and “IN” indicator goes off.) LIST UPDATE ■ Press to select track/file. USB terminal ■ Hold to fast-forwards/reverses. Press to pause. Press again to resume playback. ■... -
Page 15: Selecting Repeat Play
(page 17) the normal mode starting. This operation is effective only for the iPod Audio File/ iPod : or Kenwood Music Editor media. ALL RANDOM, RANDOM OFF ■ To return to the root folder (audio file), top ■... -
Page 16: Alphabet Search For Ipod
Press and hold number button • Not available if Random Play, Scan Play, 5 (MEMO MY LIST) to register. KENWOOD Music Editor media, iPod playback “## STORED” (registration number) appears. is selected. You can register up to 10 songs. “MEMORY Press DIRECT to enter Direct Music FULL”... -
Page 17: Ipod Control By Hand Mode
Playing a song on the playlist Adjust [SETTINGS] mode settings Press number button While listening to an iPod or KENWOOD Music 5 (MEMO MY LIST) to display the playlist. Editor media ... “MY PLAYLIST” appears. Press the volume knob to enter Turn the volume knob to select the song [FUNCTION] mode. - Page 18 ■ Do not stick tape etc. on the disc, or use a www.kenwood.com/cs/ce/audiofile/ disc with tape stuck on it. ■ Do not use any accessories for the disc. About USB device ■...
- Page 19 In this case, “RESUMING” is displayed without displaying a folder name, etc. Changing the browse item will display a correct title, etc. ■ You cannot operate iPod if “KENWOOD” or “✓” displayed on iPod. About “KENWOOD Music Editor” ■ This unit supports the PC application “KENWOOD Music Editor Light ver1.1”...
-
Page 20: Operation Of Hands-Free Phoning
Operation of Hands-Free Phoning Preparation : Only with the optional accessory KCA-BT300 or KCA-BT200 connected. LIST UPDATE ■ Press and hold for about 2 seconds to memorize the ■ Press and hold to enter current phone number. Bluetooth mode. ■ Press briefly to recall memorized phone number. -
Page 21: Making A Call
■ The category items in the Phone Book are Making a Call displayed as follows. Press and hold the volume knob to enter GE: General ; HM: Home ; OF: Office ; Bluetooth mode. MO: Mobile ; OT: Other Turn the volume knob to select a dialing method, then press to enter. -
Page 22: Receiving A Call
Registering to the Preset Dial Number Receiving a Call (Preset Memory) Answering a Phone Call Enter the phone number with reference Press the volume knob. to the following: Rejecting an Incoming Call Dial a number/ Calling a number in the call Press SRC. -
Page 23: Downloading The Phone Book
Using the remote controller (RC-405) Downloading the Phone Book Making a call: To download automatically : Enter Bluetooth mode. If the cell-phone supports a phone book 5 / ∞ : Selects a dialing method. synchronization function, the phone ENT 38 : Enter dialing mode book is downloaded automatically after DIRECT : Make a call Bluetooth connection. -
Page 24: Bluetooth Setup
Bluetooth Setup Preparation : Only with the optional accessory KCA-BT300 or KCA-BT200 connected. Registering Bluetooth Device Input the PIN code ■ (Pairing) Turn the volume knob to select the number. Registering from Bluetooth devices To move to the next digit, press ¢. ■... -
Page 25: Selecting The Bluetooth Device
Turn the volume knob to select [PB Selecting the Bluetooth Device NAME REG], then press to enter. Press and hold the volume knob to enter ■ To select “PB NAME CHK”, play the Bluetooth mode. registered voice. Turn the volume knob to select ■... -
Page 26: Bluetooth Setup
“ENTER 2” is displayed. When a beep is Bluetooth Setup heard, say the same voice tag as that you Press and hold the volume knob to enter said in step 7 within 2 seconds. Bluetooth mode. “COMPLETE” is displayed. Turn the volume knob to select Press the volume knob to return to step [SETTINGS], then press to enter. - Page 27 OPP (Object Push Profile) PBAP (Phone book Access Profile) SYNC (Synchronization Profile) For the cell-phones verified for compatibility, access the following URL: www.kenwood.com/cs/ce/bt/ ■ The units supporting the Bluetooth function have been certified for conformity with the Bluetooth Standard following the procedure prescribed by Bluetooth SIG.
-
Page 28: Sms (Short Message Service)
SMS (Short Message Service) Preparation : Only with the optional accessory KCA-BT300 or KCA-BT200 connected. LIST UPDATE Press and hold to enter Bluetooth mode. Display the SMS Downloading the SMS ¤ Press and hold the volume knob to enter Bluetooth mode. To prevent car accidents, the driver should Turn the volume knob to select not read the SMS while driving. -
Page 29: Listening To The Other External Components
■ To exit Bluetooth mode, press SRC. ■ The unopened message is displayed at the beginning of the list. Other messages are displayed in the order of reception. ■ The SMS that has arrived when the cell- phone is not linked with Bluetooth cannot be displayed. -
Page 30: Function Settings
Function settings Press SRC to select a source other than “STANDBY”. Press the volume knob to enter [FUNCTION] mode. Turn the volume knob to select [AUDIO CONTROL] or [SETTINGS], then press to enter. Turn the volume knob to make a selection, then press to confirm. ■... - Page 31 Item Selectable setting (Preset: *) VOLUME OFFSET –8 — 0 * — +8 (for AUX) ; –8 — 0 * (for other sources): Presets the volume adjustment level of each source. The volume level will automatically increase or decrease when you change the source. (Before making an adjustment, select the source you want to adjust.) ■...
-
Page 32: Installation/Connection
Installation/connection Part list: circuit, do not remove the caps on the ends A Faceplate ..............(×1) of the unconnected wires or the terminals. B Escutcheon ..............(×1) ■ Be sure to ground this unit to the car’s C Mounting sleeve ...........(×1) chassis again after installation. D Wiring harness ............(×1) ■... - Page 33 ■ Mounting and wiring this product requires skills and experience. For safety’s sake, leave this work to professionals. If you experience problems during installation, consult your Kenwood dealer. About Bluetooth unit (Optional) ■ This unit supports KCA-BT300 or KCA-BT200. ■...
- Page 34 Connect to the terminal that is grounded when either MUTE (Mute control wire) the telephone rings or during conversation. To connect the Kenwood navigation system, consult your navigation manual. Light Blue/Yellow To use the steering wheel remote control feature, you...
- Page 35 Installing the unit Connect the wiring harness to the unit. Other wiring connection has been completed earlier. (page 34) Before attaching, make sure the direction of the escutcheon is correct. Dashboard of (Wider hooks on the your car bottom side.) Bend the appropriate tabs to hold the mounting sleeve firmly in place.
- Page 36 Installation the DAB antenna CAUTION Installation overview This film antenna is exclusively for use inside ■ the vehicle. Do not install at the following locations: DAB antenna F/ G ■ – Where it may block driver’s view – Where it may obstruct operation of safety devices such as air bags –...
- Page 37 Determining the antenna installation location When installing the antenna on the left side When installing the antenna on the right side Front pillar Amplifier G Earth sheet 150 mm 150 mm Earth sheet 70 mm * Antenna film F Antenna film F 70 mm * Amplifier G Where the earth sheet of Amplifier G can be pasted on the metal part of the front pillar.
- Page 38 Match the protrusion of the amplifier G Wire the antenna cables. Use cord clamper H to secure the with the 5 on the antenna film F and ■ antenna to the pillar at several locations. paste. Do not touch the feeder terminal or the ■...
-
Page 39: Troubleshooting
Troubleshooting Symptom Remedy/Cause Sound cannot be heard. Adjust the volume to the optimum level. / Check the cords and connections. “PROTECT” appears and no operations can Check to be sure the terminals of the speaker leads are covered with insulating tape be done. - Page 40 Symptom Remedy/Cause Correct characters are not displayed (e.g. This unit can only display letters (upper case), numbers, and a limited number of album name). symbols. Bluetooth Symptom Remedy/Cause The hands-free talk volume is low. The hands-free talk volume can be adjusted independently. Adjust it during hands- free talk.
- Page 41 Symptom Remedy/Cause The sound from the Bluetooth audio player is ■ Another Bluetooth device is affecting the Bluetooth communication. Turn off discontinuous. another Bluetooth device. Move another Bluetooth device away from this unit. ■ Another Bluetooth device or profile is used for communication. The downloading of the Phone book or the SMS disconnects the sound.
-
Page 42: Specifications
Specifications DAB tuner section USB interface USB standard: USB1.1/ 2.0 (Full speed) Frequency range: L Band: 1452.960 MHz — 1490.624 MHz Maximum supply current: 500 mA Band III: 174.928 MHz — 239.200 MHz File system: FAT16/ 32 Sensitivity: -100 dBm MP3 decode: Compliant with MPEG-1/2 Audio Signal-to-Noise ratio: 80 dB Layer-3... - Page 43 English...
Need help?
Do you have a question about the KDC-U5049DAB and is the answer not in the manual?
Questions and answers
Will an android phone work with this radio, or is it for Iphone only?
The provided information mentions that the Kenwood KDC-U5049DAB is "Made for iPod" and "Made for iPhone," indicating compatibility with Apple devices. However, there is no mention of Android compatibility. Therefore, it cannot be determined if it will work with an Android phone.
This answer is automatically generated