Table of Contents
Advertisement
Quick Links
SHERWOOD INDUSTRIES IS AN ENVIRONMENTALLY RESPONSIBLE COMPANY. THIS MANUAL IS PRINTED ON RECYCLED PAPER.
PLEASE KEEP THESE INSTRUCTIONS FOR FUTURE REFERENCE
PELLET STOVE
Maxx-M
OWNER'S MANUAL
PLEASE READ THIS ENTIRE MANUAL BEFORE INSTALLATION
AND USE OF THIS PELLET-BURNING ROOM HEATER. FAILURE
TO FOLLOW THESE INSTRUCTIONS COULD RESULT IN
PROPERTY DAMAGE, BODILY INJURY OR EVEN DEATH.
Contact your building or fire officials about restrictions and installation
inspection requirements in your area.
50-2248
Version Française: www.enviro.com/fr.html
Advertisement
Table of Contents

Related Manuals for Enviro Maxx-M


Summary of Contents for Enviro Maxx-M
- Page 1 AND USE OF THIS PELLET-BURNING ROOM HEATER. FAILURE TO FOLLOW THESE INSTRUCTIONS COULD RESULT IN PROPERTY DAMAGE, BODILY INJURY OR EVEN DEATH. Contact your building or fire officials about restrictions and installation inspection requirements in your area. 50-2248 Version Française: www.enviro.com/fr.html...
-
Page 2: Table Of Contents
Table of Contents Introduction..................3 Rating Label Location..............3 Fuel Quality................3 Safety Warnings & Recommendations............4 Operating Instructions................6 Dimensions & Specifications............6 Control Board Functions.............7 Automatic Safety Features of Your Pellet Stove......7 Operating Your Pellet Stove............7 Turning Your Pellet Stove Off............9 Slider/Damper Set-Up..............9 Routine Cleaning and Maintenance............10 Warranty...................13 Installation Data Sheet...............14... -
Page 3: Introduction
Fuel quality is important, please read the following: Your Enviro pellet stove has been designed to burn ¼” (6mm) dia wood pellets and other organic fuels. DO NOT use this appliance as an incinerator. DO NOT use unsuitable and non recommended fuels, including liquid fuels as this will void any warranties stated in this manual. -
Page 4: Safety Warnings & Recommendations
To prevent the possibility of a fire, ensure that the appliance is properly installed by adhering to the installation instructions. An Enviro dealer will be happy to assist you in obtaining information with regards to your local building codes and installation restrictions. - Page 5 If this power cord should become damaged, a replacement power cord must be purchased from the manufacturer or a qualified Enviro dealer. Be careful that the electrical cord is not trapped under the appliance and that it is clear of any hot surfaces or sharp edges. This unit’s maximum power requirement is 432 watts.
-
Page 6: Operating Instructions
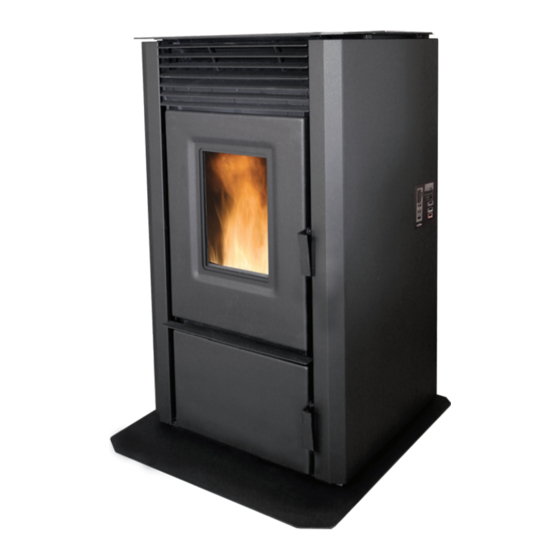
(637mm) " (650mm) " (1063mm) " (1047mm) " (605mm) Figure 1: Dimensions of Maxx-M. Table 1: Maxx-M Specifications. Description Fuel type Residential Pellet Heater 6mm (¼”) dia. Pellets - wood, corn, wheat, barley, & grass only* Voltage Current Max Power 110 - 120 V 4.2 Amps... -
Page 7: Control Board Functions
Operating Instructions ontRoL oaRd unctionS 1. ON/OFF BUTTON: Used to turn the unit ON and OFF manually. 2. FUEL TYPE BUTTON: Used to switch between fuel type modes; Pellet (for all qualities of wood pellets) and Multi-fuel (for all fuels including wood pellets). - Page 8 Operating Instructions PRE-BURN CHECK: The burn pot liner holes must be clear and the liner installed properly against the ignitor tube and locked in place. Check the hopper for enough pellets to start the unit. Note: Fuel Type can only be changed when the unit is cold. The thermostat mode can be changed during normal operation.
-
Page 9: Turning Your Pellet Stove Off
Operating Instructions uRning eLLet tove • MANUAL and HI / LOW mode: To turn the unit OFF, simply press the ON / OFF button. This will stop the feed of pellets. The blowers will continue to operate and cool the stove down. When cool enough, the stove will turn off. -
Page 10: Routine Cleaning And Maintenance
10. Set the fire grate in place, it should sit level on the front and Burn Pot back of the burn pot liner. Lock it in with the lever on the burn pot. 11. Close the door Figure 8: Maxx-M Burn Pot Assembly. - Page 11 If the glass has build up that can not be removed with only the cloth, clean the glass using paper towel and Figure 9: Maxx-M Burn Heat Exchanger Cleaning. a gas appliance glass cleaner, this may be purchased through most dealers. If a gas appliance glass cleaner is not available, use a damp paper towel dipped in fly ash to clean the glass. After the glass has been cleaned use the dry soft cloth to wipe down the...
-
Page 12: Warranty
Unplug the stove then open the right and left side panels to access the two Figure 10: Maxx-M Exhaust Passages. blowers. Remove the two (2) T-20 Torx screws on the back of the each panel and loosen the two (2) T-20 Torx screws on the front edge of the panel Vacuum all dust from motors. -
Page 14: Installation Data Sheet
SERIAL NUMBER:___________________________ _________________________________________ DATE OF PURCHASE: _____________ (dd/mm/yyyy) ADDRESS: DATE OF INSTALLATION:___________ (dd/mm/yyyy) _________________________________________ MAGNEHELIC AT INSTALL:___________________ _________________________________________ INSTALLER’S SIGNATURE: _________________________________________ _________________________________________ PHONE:___________________________________ MANUFACTURED BY: SHERWOOD INDUSTRIES LTD. 6782 OLDFIELD RD. SAANICHTON, BC, CANADA V8M 2A3 www.enviro.com March 6, 2013 C-13847...
Need help?
Do you have a question about the Maxx-M and is the answer not in the manual?
Questions and answers