Crestron DM-NVX-E30 Web Interface Manual
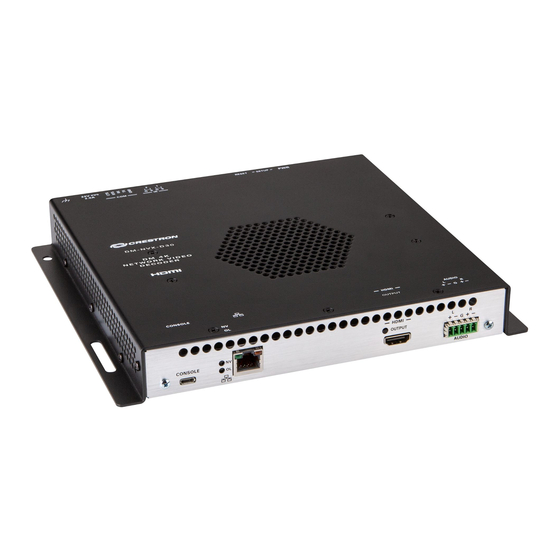
Digitalmedia 4k60 4:4:4 hdr network av encoder
Hide thumbs
Also See for DM-NVX-E30:
- Product manual (34 pages) ,
- Quick start manual (8 pages) ,
- Configuration manual (44 pages)

Related Manuals for Crestron DM-NVX-E30


Summary of Contents for Crestron DM-NVX-E30
- Page 1 DM-NVX-E30(C) DigitalMedia™ 4K60 4:4:4 HDR Network AV Encoder Web interface Guide Crestron Electronics, Inc.
- Page 2 Crestron disclaims any proprietary interest in the marks and names of others. Crestron is not responsible for errors in typography or photography.
-
Page 3: Table Of Contents
Table of Contents Introduction .............................. 4 Easy Configuration Guide ........................7 Status ................................ 11 Stream ..............................14 HDMI Input ............................. 18 Output ............................... 22 Network ..............................24 Device ............................... 29 3 • DM-NVX-E30(C) -
Page 4: Introduction
• Open a web browser from within the Crestron Toolbox™ application. Opening directly in Web Browser 1. Press the Setup button on the DM-NVX-E30(C) to display the IP address on the HDMI output or use the front panel of the DMF-CI-8 chassis for DM-NVX-E30C 2. - Page 5 Allow the connection, so that the Device Discovery Tool can be used. The DM-NVX-E30(C) is discovered and is listed in the device list on the left-hand side of the screen. The associated host name, IP address, and firmware version are also displayed.
- Page 6 5. Click the Web Configuration button in the Configuration page displayed on the left hand side of the Device Discovery Tool. 6 • DM-NVX-E30(C)
-
Page 7: Easy Configuration Guide
Easy Configuration Guide How to Log in to DM-NVX-E30(C) using Active Directory credentials There are two ways to login using Active Directory credentials: by using Active Directory user, or by using Active Directory Group user. To log in as Active Directory User: Pre-requisites: Users are already created on Active Directory server 1. - Page 8 “Domain name\username”, for example “crestronlab.com\admin_1” 6. Select Administrators in the Groups drop-down list, so that the Active Directory user will have administrator privileges 7. Log in to DM-NVX-E30(C) using Active Directory user credentials i.e “crestronlab.com\admin_1” To log in as Active Directory Group User Pre-requisites: Active Directory Users &...
- Page 9 1. Log in to DM-NVX-E30(C) 2. Navigate to the Device page, click on Authentication Management and select the Groups tab 3. Click on Create Group button 4. In Create Group dialog, set the for Active Directory Group slider to “ON”...
- Page 10 7. Log in to DM-NVX-E30(C) using Active Directory Group User credentials, i.e. crestronlab.com\user1 ‘ ’ . 10 • DM-NVX-E30(C)
-
Page 11: Status
Status The Status Information page is the first page that is visible when starting the web interface of DM-NVX-E30(C). It displays general information about the DM-NVX-E30(C) (such as model name, serial number, and firmware version), current network settings (such as host name and IP address, etc.), as well as information about the connection to the control system and/or DM-XiO-Director. - Page 12 Network: displays network-related information, which consists of the following: Domain Name Host Name of DM-NVX-E30(C) NOTE: By default the host name of DM-NVX-E30(C) consists of the model name followed by the MAC address of the device. For example, DM-NVX-E30(C)- 00107F7C6544.
- Page 13 IP ID - of DM-NVX-E30(C) Room ID IP Address/Hostname - Address of the control system Type (always set to Peer) Server Port (the default port is set to 41794) Connection Type (always set to Gway) Status (OFFLINE or ONLINE) Encrypt Connection – displays information whether the connection is...
-
Page 14: Stream
Stream The Stream page provides means to switch between the two modes (Receiver or Transmitter) of the DM-NVX-E30(C) and to set relevant stream parameters. The Stream page can be accessed at any time by simply clicking the STREAM tab in the navigation bar of the web-based user interface of the DM-NVX-E30(C). - Page 15 RTSP Port – Enter custom TCP port number for the RTSP server of the primary audio/video stream. Valid values range from 1 to 65535. By default the RTSP Port of the DM-NVX-E30(C) is set to port 554. TS Port – Enter custom UDP port (value must be an even number; odd value will be rejected by the device) at which both audio and video are transmitted.
- Page 16 Select the Custom DSCP check box and enter custom value in the DSCP text field. DSCP values can range from 1 to 63. Note that if Automatic Initiation is enabled the DM-NVX-E30(C) will restart the stream whenever any of the following parameters are changed. Otherwise the stream must be...
- Page 17 The Audio/Video section displays read-only audio/video information about the stream as follows: Audio Channels – number of channels in the stream • Audio Format – indicates the audio format of the input/output stream • Aspect Ratio – the aspect ratio of the stream • 17 • DM-NVX-E30(C)
-
Page 18: Hdmi Input
The HDMI Input page can be accessed at any time by simply clicking on HDMI INPUT in the navigation bar of the web-based user interface of the DM-NVX-E30(C). General Settings Modify the name of this HDMI input by editing the existing name or entering a brand new name for the HDMI input in the Name field. - Page 19 1. In the Select drop down list select Custom and click Load CEDID file: 2. In the Load CEDID file dialog click the +Browse button 3. Locate and select the desired custom EDID file (*.cedid), and then click the Open button. 19 • DM-NVX-E30(C)
- Page 20 + More Details link to view additional information about the HDMI input settings. + More Details section displays additional details about the HDCP state, horizontal and vertical resolution, aspect ratio, audio format and audio channels and more: 20 • DM-NVX-E30(C)
- Page 21 Aspect Ratio - Reports the aspect ratio of the HDMI output. Audio Format - Reports the audio format. Audio Channels - Reports the number of detected audio channels accompanying the video. Click –Less Details to hide this section from view. 21 • DM-NVX-E30(C)
-
Page 22: Output
The Output page can be accessed at any time by simply clicking the OUTPUT tab in the navigation bar of the web-based user interface of the DM-NVX-E30(C). Analog Settings Adjust the volume of the analog audio by moving the Analog Audio Volume slider to the left or right or by entering a value in the text field below the Analog Audio Volume 22 •... - Page 23 The volume level is applied equally to the left and right channels. Values range from -80 dB to 24 dB, adjustable in 0.1dB increments. 23 • DM-NVX-E30(C)
-
Page 24: Network
DM-NVX-E30(C). Network Settings To configure the network settings of DM-NVX-E30(C), modify one or more of the following: Host Name: Overwrite the existing host name in the Host Name text field with the desired new host name. - Page 25 Set the DHCP slider to Enabled or Disabled to specify whether the IP address of the DM-NVX-E30(C) is to be assigned by a DHCP (Dynamic Host Configuration Protocol) server. When DHCP is enabled: (default setting) The IP address of the DM-NVX-E30(C) •...
- Page 26 802.1x Configuration DM-NVX-E30(C) has built-in support for the 802.1X standard (an IEEE network standard designed to enhance the security of wireless and Ethernet LANs. The standard relies on the exchange of messages between the device and the network's host, or authentication server), allowing communication with the authentication server and access to protected corporate networks.
- Page 27 If the Enable Authentication Server Validation option was enabled, this will enable the list box of signed by trusted CAs certificates pre-loaded into the DM-NVX-E30(C). Select the check box next to each CA whose certificate can be used for server validation, as specified by the network administrator.
- Page 28 Note that a change in the IGMP support settings will require reboot of the DM-NVX- E30(C). 28 • DM-NVX-E30(C)
-
Page 29: Device
Downloading device logs o Connecting the DM-NVX-E30(C) to a control system DEVICE The Device page can be accessed at any time by simply clicking the tab in the navigation bar of the web-based user interface of the DM-NVX-E30(C). 29 • DM-NVX-E30(C) - Page 30 Device Management The Firmware section displays the following information about the DM-NVX-E30(C): o Main Firmware Version o Model, which is DM-NVX-E30(C) o Serial Number To upgrade the firmware of the DM-NVX-E30(C): 1. Click the Upload Firmware File radio button if you wish to upload a firmware file located on your PC.
- Page 31 The Maintenance section of the Device page allows rebooting or restoring the DM-NVX- E30(C) to factory default settings. Restoring Factory Default Settings 1. Click the Restore button to restore the settings of the DM-NVX-E30(C) to factory defaults. NOTE: When settings are restored, all settings, including the network settings, will revert to the factory default settings.
- Page 32 1. Click the Download Logs button. A logs file (*.tgz) is downloaded to the PC (Downloads folder) or mobile device. Name of the Log file consists of the following: 'logs_' + IP Address of DM-NVX-E30(C) + Date + Time + the extension .tgz ; for example: logs_172.30.73.11_2017.3.13_12.11.51.tgz...
- Page 33 Auto Update To auto update the controls provided on the web interface of DM-NVX-E30(C), do the following: 1. Move the Auto Update slider to the Enabled position. By default, the auto update functionality is set to Disabled. 2. Provide a path to the update cloud in the Custom URL Path text field.
- Page 34 2. Enter Room ID in the Room ID text field 3. In the IP ID drop-down list, select the IP ID of the DM-NVX-E30(C). Valid values range from 03 to FE in hexadecimal notation. 4. In the IP Address/Hostname text field, enter the IP address or hostname of the control system.
- Page 35 To revert to the previous settings without saving, click the Revert button. Configure Date/Time To configure the date and time settings of the DM-NVX-E30(C), in the Configure Date/Time section of the page, do the following: Time Synchronization 1.
- Page 36 Discovery Config Move the Discovery Agent slider to Enabled or Disabled to specify if the DM-NVX- E30(C) will be discoverable or not. When Discovery Agent is enabled the DM-NVX-E30(C) will be displayed in the 'Available Streams' lists of other receivers.
- Page 37 When authentication is enabled, click on the corresponding Current User, Users or Groups tabs to view, add, remove, and edit information local or Active Directory users and groups on DM-NVX-E30(C) or to change password for current user. 37 • DM-NVX-E30(C)
- Page 38 Click the Groups tab to view and edit group settings. The Groups tab can be used to add local and Active Directory groups, remove local and Active Directory groups, and preview information about a group. Use the Search Groups text field to enter search term(s) and display groups that match the search criteria. 38 • DM-NVX-E30(C)
- Page 39 3. Click OK to save; click Cancel to cancel the changes. Add Active Directory group A group cannot be created or removed from Active Directory server but an access can be granted to an existing group in Active Directory. 39 • DM-NVX-E30(C)
- Page 40 Directory server; however, because user’s access level is inherited from a group(s), users within the group will lose the access rights associated with this group. When AD group is removed from DM-NVX-E30(C), all members of that group will lose access to the DM-NVX device.
- Page 41 Management Groups settings. Users Click the Users tab to view and edit user settings. The Users tab can be used to add local and Active Directory users, remove local and Active Directory users, and preview information about users. 41 • DM-NVX-E30(C)
- Page 42 Users pane to move forward or backward through the pages. Each page can be set to display 5, 10, or 20 users by using the drop-down menu to the right of the navigation arrows. 42 • DM-NVX-E30(C)
- Page 43 Assign access level by selecting one or more groups from the Groups drop- • down list Make sure that the Active Directory User slider is set to Off • 3. Click OK to save; click Cancel to cancel the changes. 43 • DM-NVX-E30(C)
- Page 44 To grant access to an Active Directory user, you can either add the user to a local group on the DM-NVX-E30(C), or add the Active Directory group(s) that they are a member of to the DM-NVX-E30(C) (see Add Active Directory group).
- Page 45 Click OK to close the User Details dialog and to return to the Authentication Management Users tab. Update User Details Click the information button ( ) in the Actions column to update information for the selected user. 45 • DM-NVX-E30(C)
- Page 46 Name: Displays the name of the user • Active Directory User: Displays whether the user is an Active Directory user • Current User Click the Current User tab to preview read-only information or to change password for current user. 46 • DM-NVX-E30(C)
- Page 47 In Change Password dialog enter the new password in the Password text field, then re-enter the same password in the Confirm Password text field Click OK to save or click Cancel to cancel the changes. 47 • DM-NVX-E30(C)
Need help?
Do you have a question about the DM-NVX-E30 and is the answer not in the manual?
Questions and answers