
Related Manuals for GSi Cumberland Hi-Lo


Summary of Contents for GSi Cumberland Hi-Lo
- Page 1 Hi-Lo and PRO-1 Pan Feeders (For parts, refer to PNEG-250-PM) Installation and Operation Manual PNEG-250 Date: 05-19-14 PNEG-250...
- Page 2 PNEG-250 Hi-Lo and PRO-1 Pan Feeders...
-
Page 3: Table Of Contents
Table of Contents Contents Chapter 1 Introduction ............................4 Chapter 2 Safety ..............................5 Safety Guidelines ...........................5 Safety Instructions ..........................6 Safety Sign-Off Sheet ..........................10 Chapter 3 Decals ..............................11 Safety Decals and Placement ......................11 Chapter 4 Calculating Weight ..........................14 Calculating Weight of Feedline at Each Suspension Point ..............14 Determine Weight of Entire System .....................14 Chapter 5 Capacities and Specifications ......................15... -
Page 4: Chapter 1 Introduction
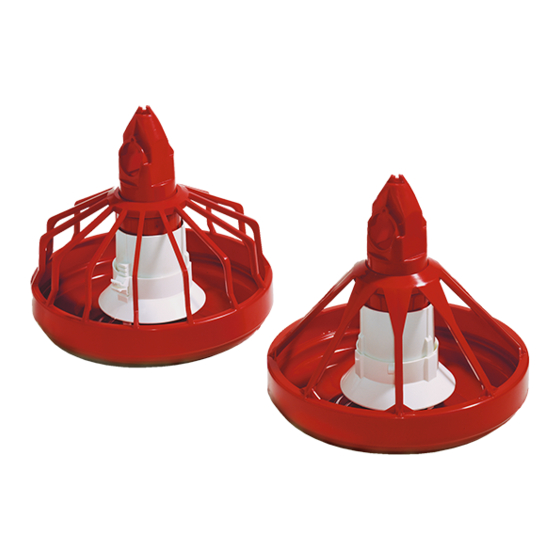
1. Introduction Cumberland’s Hi-Lo Pan Feeder is a revolutionary two-stage feeder bringing together features and advantages of other systems, and introducing original and effective solutions to some persistent problems and concerns. The Pan Feeder System is designed to convey granular or powdered poultry feed from external feed bins into the poultry house. -
Page 5: Chapter 2 Safety
2. Safety Safety Guidelines This manual contains information that is important for you, the owner/operator, to know and understand. This information relates to protecting personal safety and preventing equipment problems. It is the responsibility of the owner/operator to inform anyone operating or working in the area of this equipment of these safety guidelines. -
Page 6: Safety Instructions
2. Safety Safety Instructions Our foremost concern is your safety and the safety of others associated with this equipment. We want to keep you as a customer. This manual is to help you understand safe operating procedures and some problems that may be encountered by the operator and other personnel. As owner and/or operator, it is your responsibility to know what requirements, hazards, and precautions exist, and to inform all personnel associated with the equipment or in the area. - Page 7 2. Safety Operate Motor Properly In an emergency, shut down the power source. Turn OFF and lock out all power sources before performing any maintenance. Do not operate electric motor equipped units until motors are properly grounded. Disconnect power on electrical driven units before resetting motor overloads.
- Page 8 2. Safety Safety Guards The Pan Feeder System contains many moving and electrical parts, which will cause serious injury or death if touched. Guards are placed on the machine for your protection. Operating the machine at any time with guards removed or incorrectly fitted is a serious misuse of the machine and endangers safety. Safety in Handling the Pan Feeding System To prevent injury, use suitable hand protection when manually handling the components of this system.
- Page 9 2. Safety READ THESE INSTRUCTIONS BEFORE OPERATION AND SERVICE SAVE FOR FUTURE REFERENCE 1. Read and understand the operating manual before trying to install or operate the Pan Feeding System. 2. Power supply should be OFF for service of electrical components. Use CAUTION in checking voltage or other procedures requiring power to be ON.
-
Page 10: Safety Sign-Off Sheet
2. Safety Safety Sign-Off Sheet As a requirement of O.S.H.A., it is necessary for the employer to train the employee in the safe operating and safety procedures for this auger. This sign-off sheet is provided for your convenience and personal record keeping. -
Page 11: Chapter 3 Decals
It also instructs HIGH VOLTAGE the operator to lock out the power before servicing. Will cause injury or death. Lockout power before servicing. GSI Group Inc. 217-226-4421 PNEG-250 Hi-Lo and PRO-1 Pan Feeders... - Page 12 Will cause serious injury. Disconnect and lockout power before servicing. GSI Group, Inc. 217-226-4421 DC-993 WARNING DC-884: The decal shown is located on the lid of the grilled control pan. It measures 2.8" wide x 1.4" tall. It alerts the operator of death or dismemberment from coming into contact with a moving auger.
- Page 13 DC-992 GSI Group 217-226-4421 DC-992: The decal shown is located under the lid, inside the drive mount. It measures 2.8" wide x 1.4" tall. It alerts the operator to keep clear of moving parts. It also instructs the operator to disconnect and lock out the power before servicing.
-
Page 14: Chapter 4 Calculating Weight
4. Calculating Weight The winching system used to raise and lower the feed system in the poultry house imposes additional load on the building. It is essential to confirm that the building is able to carry this extra load. Consult a structural engineer to check the building strength. -
Page 15: Chapter 5 Capacities And Specifications
5. Capacities and Specifications Drive Unit Figure 5A Drive Units Phase Voltage Gearbox Weight Single 1/3 or 1/2 110/220 50 or 60 Direct Drive 28.4 lbs. (12.9 kgs) Three 1/3 or 1/2 190/380//208-230/460 50 or 60 Direct Drive 28.4 lbs. (12.9 kgs) Figure 5B Pans Model... - Page 16 5. Capacities and Specifications Control Pans Pan Style Switch Style Weight Hi-Lo Microswitch 8.8 lbs. (4.0 kgs) End Control Hi-Lo Spinner 8.8 lbs. (4.0 kgs) Hi-Lo Proximity 8.8 lbs. (4.0 kgs) Hi-Lo Microswitch 4.1 lbs. (1.8 kgs) Center House Hi-Lo Spinner 8.8 lbs.
-
Page 17: Chapter 6 Planning The System
6. Planning the System House Layout One-half (1/2) horsepower drive units are recommended for houses over 500' (152.4 m) long. It is not recommended that a drive unit ever be located more than 500' from the hopper/boot. Figure 6A shows a single boot feed system with the feed tank at the end of the house. Figure 6A Single Boot Feed System Ref # Description... - Page 18 6. Planning the System House Layout (Continued) Figure 6B shows a double boot feed system with the feed tank in the middle of the house. Figure 6B Double Boot Feed System Ref # Description Drive Unit/Control Pan Tubing Hopper Feeder Pan Flex-Flo Fill System Bulk Feed Tank PNEG-250 Hi-Lo and PRO-1 Pan Feeders...
-
Page 19: Chapter 7 Installation
7. Installation Installation Sequence This manual outlines the recommended sequence for the installation of the Hi-Lo Pan Feeder System. Observing this sequence provides the safest and easiest method of installation. Do not connect the system to the electrical mains until the final stage of installation. - Page 20 7. Installation Two-Piece Drop Tube 1. Place the top piece of the two-piece drop tube over the hole opening on the tube. (See Figure 7C.) Figure 7C Figure 7D 2. Push the grill up on to the top piece of the two-piece drop tube. (See Figure 7D.) 3.
- Page 21 7. Installation 4. For assembly when no shut off slide is used, the indicator bumps (B) on the top and bottom of the drop tube pieces must be aligned. (See Figure 7F.) Failure to do so will result in feed shifting where the drop tube meets the tube.
- Page 22 7. Installation 6. Place the feed level (C) on the feed level stand (D). (See Figure 7H.) Ref # Description Feed Level Feed Level Stand Figure 7H Visually check that the clip is securely situated in a notch. If the clip does not fit into the slot, the feed level can lower and the clip can become fixed out of the notches.
- Page 23 7. Installation 8. Place the feed level on the assembly. (See Figure 7J.) Figure 7J 9. Place the pan on the assembly. (See Figure 7K.) Figure 7K 10. The completed assembly should look like the image below. (See Figure 7L.) NOTE: Disassembly of the pan and grill may be performed by lifting on one side of the pan while pushing down on the other side and flexing the grill.
- Page 24 7. Installation PRO-1 Assembly Instructions 1. Align slots in drop tube (A) with tabs in drop tube extension (B) and snap together as shown in Figure 7M. 2. Align adjustment slots on lower drop tube (D) with notches on feed level adjustor (E) and snap into position as shown in Figure 7N.
- Page 25 7. Installation 5. Slide grill (7101254) over the top of the drop tube assembly and snap the pan (7098857) onto the grill as shown in Figure 7Q. Figure 7Q Flooding Applications For flooding applications, the feeder can be used in either a locked position, which prevents the pan from collapsing or in a collapsed position to take advantage of the Hi-Lo feature.
- Page 26 7. Installation Figure 7T Figure 7S Collapsed Pan Simply leave the locking collar in its assembled or lowered position to allow the pan to collapse into the grill for standard Hi-Lo operation as shown in Figure 7U. When the feed line is lowered to ground level, the pan is raised into position to open the flooding windows as shown in Figure 7V.
-
Page 27: E" Feeder Assembly Instructions
7. Installation PRO-1 Retrofit Converting a standard Hi-Lo feeder to the PRO-1 feeder is simple with the use of the PRO-1 retrofit kit (C2000235). The kit contains the drop tube extension (C2000209), lower drop tube (C2000210), feed level adjustor (C2000211) and the locking collar (C2000212). Simply remove the existing Hi-Lo feed level stand (7098855) and Hi-Lo feed level (7098854) and follow the instructions at the beginning of this section. - Page 28 7. Installation 2. Align the arrow on the drop tube assembly (D) with the letter “E” on the grill (C) and then lower the grill onto the drop tube. See Figure 7X of drop tube alignment with the arrow (A) aligned with the letter “E”...
- Page 29 7. Installation 3. Assemble the pan to the grill by placing the pan hook over the grill bar to act as a hinge. (See Figure 7Y.) Figure 7Y 4. Pivot the pan up until it is seated into the bottom of the grill and then rotate the pan into the locking position.
- Page 30 7. Installation 5. To install the drop tube: a. For one-piece drop tube: Slide the drop tube onto the auger tube. b. For two-piece drop tube: Snap the drop tube onto the auger tube and slide the drop tube cap onto the drop tube.
- Page 31 7. Installation 6. To adjust feeder (C), you MUST lift the grill out of the locking grooves (D) and rotate and align the arrow indicator on the feed level skirt with “D”, “E” or “F” on the grill (E). Then lower the grill back into the locked position (F).
-
Page 32: Tubing Assembly
7. Installation Tubing Assembly Be careful, there are many sharp edges that can cut while assembling the feedline. Wear protective clothing and gloves. CAUTION NOTE: Check to see that structural members are overhead to support winching the boot and hopper. (See Winching Section on Page 70.) Every fifth (5 ) auger tube should receive an insulator bracket assembly for... - Page 33 7. Installation 2. If the winching system is already in place, hang the line at approximately waist level. 3. Shorten the last full length of auger tube on the line (control pan side), if the building size requires it. 4. Secure the auger tubes together with the tube clamps (F) as shown in Figure 7AE.
- Page 34 7. Installation Figure 7AG Ref # Ref # Description 7101478 Double Swedged Tube Tube Clamp Tube End Cut Off Double Boot 2. Count and label (number) the tubes starting from the poultry boot and ending at the control unit. It is important to count and number each “group” of tubes (from the boot to the control unit) separately.
- Page 35 7. Installation Figure 7AK Tube Inserted into Slot on Figure 7AJ Anti-Rotation Clip Anti-Rotation Clip 5. Snap the two (2) anti-rotation clips together around each pan assembly on the tube to secure the pans. Rotate the tube to position the bottom of the pans horizontal to the floor. Continue to the next tube.
-
Page 36: Feeder Assembly Rooster Feeder
7. Installation Feeder Assembly Rooster Feeder Two-Piece Drop Tube 1. Place the top of the two-piece drop tube over the hole opening on the tube. (See Figure 7AN.) Figure 7AN 2. Push the grill up on to the assembly. (See Figure 7AO and Figure 7AP.) Figure 7AO Figure 7AP 3. - Page 37 7. Installation 4. Slide the bottom of the two-piece drop tube on the assembly, making certain the tabs are locked in place. (See Figure 7AR and Figure 7AS.) Figure 7AR Figure 7AS IMPORTANT: Top and bottom pieces of the drop tube must be oriented the correct way or feed leakage could occur.
- Page 38 7. Installation 7. To remove the bottom of the two-piece drop tube, squeeze the finger tabs (C) at the end of the assembly and pull the two (2) pieces apart. (See Figure 7AV.) Ref # Description Finger Tabs Figure 7AV 8.
- Page 39 7. Installation 10. Place the clip into the preferred notch. (See Figure 7AY.) Visually check that the clip is securely in a notch. If the clip does not fit into the slot, the feed level can lower and the clip can become fixed out of the notches (F). If the clip becomes fixed while out of a slot, the feed flow can stop.
- Page 40 7. Installation 13. Disassembly of the pan and grill may be performed by lifting on one side of the pan while pushing down on the other side and flexing the grill. With practice, this operation will become easy for cleaning. Place the pan on the assembly.
-
Page 41: Program Chart
7. Installation Program Chart Figure 7BF PNEG-250 Hi-Lo and PRO-1 Pan Feeders... - Page 42 7. Installation Figure 7BG PNEG-250 Hi-Lo and PRO-1 Pan Feeders...
- Page 43 7. Installation Figure 7BH PNEG-250 Hi-Lo and PRO-1 Pan Feeders...
- Page 44 7. Installation Figure 7BI PNEG-250 Hi-Lo and PRO-1 Pan Feeders...
- Page 45 7. Installation Figure 7BJ PNEG-250 Hi-Lo and PRO-1 Pan Feeders...
- Page 46 7. Installation Figure 7BK PNEG-250 Hi-Lo and PRO-1 Pan Feeders...
-
Page 47: Drive Unit/Control Pan Assembly
7. Installation Drive Unit/Control Pan Assembly 1. Unpack the drive unit and grilled control unit. 2. Connect the drive mount (See Figure 7BM) or anchor plate (See Figure 7BN), depending on the model of the control pan, to the gearbox of the drive unit, (See Figure 7BL) using the four (4) bolts provided with the control unit. - Page 48 7. Installation 4. If the pan assembly is not provided with the control pan, assemble the Hi-Lo grill onto the control pan. (See Figure 7BP.) a. Take off drop tube. b. Place through grill. c. Replace drop tube onto control pan base. d.
- Page 49 7. Installation 7. Wire the control pan to the drive unit motor. (See Figure 7BS.) a. Place cord into motor connection box. b. Tighten cord connector. c. Connect wires to motor leads, matching black to brown and blue to white. Figure 7BS 8.
-
Page 50: Control Pan Assembly
7. Installation Figure 7BV Ref # Description Vent Plug Control Pan Assembly Hi-Lo Center House Control Pan (All Clamp on Models) Figure 7BW is the Hi-Lo center house control pan with the pre-assembled double bell auger tube. The center house control pan can be mounted between two (2) sections of auger tube by trimming one auger bell as shown in Figure 7BX on Page 51 and installing it as shown in... - Page 51 7. Installation Figure 7BX Figure 7BY PNEG-250 Hi-Lo and PRO-1 Pan Feeders...
- Page 52 7. Installation If breaking the feed line is not an option, the double belled auger tube can be removed and the center house control pan can then be clamped to the feed line as shown in Figure 7BZ. 1. The outlet hole for the center house control pan and two (2) holes in front of the center house pan must be enlarged.
- Page 53 7. Installation Adjusting the Hi-Lo Microswitch Control Pans (End and Center House) 1. Check switch and adjust if necessary. Switch should click with 1/4" of movement. (See Figure 7CC.) Figure 7CC 2. Assemble remainder of Hi-Lo pan. (See Figure 7CD.) Figure 7CD PNEG-250 Hi-Lo and PRO-1 Pan Feeders...
- Page 54 7. Installation 3. Wire control pan to power source. (See Figure 7CE.) Lock out power before servicing. DANGER Figure 7CE Ref # Description Power In To End Control Control Pan Electrical Box Switch Proximity Switch Sensor Adjustment All capacitive switches have a potentiometer which allows switch sensitivity to be adjusted for the best results.
- Page 55 7. Installation Hi-Lo End Control Pan Assembly with Spinner Motor The Hi-Lo end control pan has three (3) main sensing components: The PC board (inside the electrical box of the end control pan), the solid state relay (mounted on the back side of the PC board) and the spinner motor (located in the “throat”...
- Page 56 Never remove the lid without first disconnecting and locking out the power. The Cumberland Hi-Lo control pan features a starting pulse on the spinning sensor motor (in the control pan feed level) that enhances operation. When feed is present, the spinning sensor motor applies a constant pressure against the feed with a spike of power every few seconds (the starting pulse).
- Page 57 7. Installation Hi-Lo Center House Control Pan Wiring 1. Attach switch box assembly (A) (supplied with center house pan) to lid of end control pan (C). 2. Run 20 gauge two (2) wire cord (not supplied) from the center house into the switch box. (See Figure 7CN for Wiring on Page 58.) 3.
- Page 58 7. Installation 7. Match the four (4) wires on the new lid to the wires that you just disconnected in the electronics box. Match the male to female connections with the following colors: 20 Gauge black to 20 gauge black, 16 gauge red to 20 gauge red, 16 gauge blue to 20 gauge blue and 20 gauge yellow to 20 gauge red.
- Page 59 7. Installation 9. To add a second control pan, run a wire from the second center house control pan to the switch box on the end control pan, as with the first center house control pan. (See Figure 7CO.) (NOTE: The switch box included in the second center house control pan is not used. Both center house control pans are wired into the same switch.) Figure 7CO 10.
-
Page 60: Auger Installation
7. Installation Auger Installation Watch carefully for wire, tags, metal clips and especially for kinks and bends. If the auger is bent or kinked, it must be straightened prior to operation. Otherwise, NOTICE excessive auger tube wear will result. 1. Remove the bearing cap, bearing and idler shaft from the boot. 2. - Page 61 7. Installation Use caution when releasing the tension on the auger. If the auger moves too quickly in any direction, it can injure the operator. CAUTION 7. Mark the auger (B) at the edge of the boot where the bearing mounts, as shown in Figure 7CR.
- Page 62 7. Installation 11. Pull the auger out from the back of the hopper (D) an additional 8" (20.3 cm) and clamp at that point with a pair of locking pliers. (See Figure 7CT.) 12. Allow the pliers to rest against the boot to hold the auger in place. Ref # Description Back of Hopper...
- Page 63 7. Installation 19. The auger may be lengthened by brazing two (2) sections of auger together. (See Figure 7CV.) 20. The ends to be brazed should be well filed and cleaned. Weld length should be 1/2" to 3/4" (13 mm to 19 mm). 21.
-
Page 64: Hopper Assembly
7. Installation Hopper Assembly Be careful, there are many sharp edges that can cut while assembling the feedline. Wear protective clothing and gloves. CAUTION The head of the bolts should be to the inside of the hopper to help prevent feed from bridging. 1. -
Page 65: 650 Lbs. Hopper Scale
7. Installation 650 Lbs. Hopper Scale Refer to Figure 7CY as the scales are being assembled and installed. 1. Hang the 650# hopper scale assembly (D) with four (4) drops from the main winch cable. 2. Using the cotter pins attached to the unloader (F), assemble the unloader extension (E) to the top of the unloader. - Page 66 7. Installation Figure 7CZ Hopper Scale Wiring Diagram PNEG-250 Hi-Lo and PRO-1 Pan Feeders...
-
Page 67: Anti-Roost Wire
7. Installation Anti-Roost Wire 1. Double loop the anti-roost wire around the first insulator at the boot as shown in Figure 7DA. 2. Secure the anti-roost wire around the insulator (A) with the cable clamp sleeves (C) provided as shown in Figure 7DA. - Page 68 7. Installation The shocker wire is to be installed in 50' (15.24 m) increments maximum. 4. Install an anti-roost wire tension spring, as shown in Figure 7DC at the next insulator, the fifth (5 auger tube down. 5. Hook one end of the spring over the insulator of the next section of wire as shown in Figure 7DC.
-
Page 69: Hopper Level Control Switch
7. Installation Hopper Level Control Switch Cumberland’s feed level control switches are designed to provide automatic control for the fill system on any hopper-fed feeding system. The switch should be mounted on the back (bearing) side of the feed hopper, using the provided mounting hardware. Mounting the switch as close as possible to the drop from the fill system will provide optimum operation. -
Page 70: Winching
7. Installation Winching Building Safety Before attempting to install a winching system, it is important to verify the structure of the poultry house can carry the added weight of the pan feeding system. WARNING Capacities and Specifications Section on Pages 15 and 16 to assess the weight to be carried. - Page 71 7. Installation 2. Required winch drop line locations. (See Figure 7DJ on Page 73.) a. One to hang each drive unit. b. One within 3' (0.9 m) of the drive. c. Two (2) to hang each feed hopper (19" (48.26 cm) apart for 120# and 200# hoppers, 25" (63.50 cm) for 300# and 400# hoppers).
- Page 72 7. Installation e. Bolt two (2) halves of the hopper suspension brackets using two (2) 5/16"-18 bolts and nuts. The drop cables will need to be spaced 19" apart for 120# and 200# hoppers or 25" for 300# and 400# hoppers. Suspend the boot using the two (2) drops on each side of the hopper as shown in Figure 7DI.
- Page 73 7. Installation Figure 7DJ 3. Screw the hooks along the marked line at the recommended spacing, for wood frame installation. Screw the hooks into the ceiling supports or rafters the full length of the threads to prevent bending. For metal frame installations, some support fabrication may be necessary in order to install pulleys at the recommended spacing.
- Page 74 7. Installation 7. For systems shorter than 360' (109.7 m), extend the 3/16" (0.476 cm) winch cable the full length of the feeder line, stringing the cable through the cable hole on the winch drum. Temporarily attach the cable to the ceiling with nails, staples or some type of fastener. The winch cable does not pass though any pulleys.
- Page 75 7. Installation 10. Thread the 1/8" (0.3175 cm) drop cable through each pulley and attach it to the 3/16" (0.47625 cm) winch cable about 6" (15 cm) from the pulley towards the winch with the 1/8" x 3/16" (0.3175 cm x 0.47625 cm) cable clamps.
- Page 76 7. Installation “Throwback” Installation Drops located close enough to the winch that they will wrap onto the drum when the feeder line is raised must be connected to the winch cable by a “throwback,” as shown in Figure 7DP. This is a suspension drop which routes the cable away from the winch far enough that the cable clamp sleeve and drop cable do not get wound onto the winch drum.
-
Page 77: Power Winch Instructions
7. Installation Power Winch Instructions Mounting Winch Assembly 1. Cut one length of 2 x 10 and one length of 2 x 4 long enough to span three (3) ceiling purlins. These will be used to support the winch assembly. 2. - Page 78 7. Installation 2. Attach one end of the cable loop to the “U-bolt” on the winch frame as shown in Figure 7DT. IT IS RECOMMENDED THAT LOOP BE DOUBLE CLAMPED TO “U-BOLT”. Figure 7DT 3. Thread the two (2) master pulleys on to the cable and then attach remaining end of loop to “U-bolt”. The master pulleys must be attached to the main line cable.
- Page 79 7. Installation Controls Installation 1. Mount master control box to the wall or other adequate surface. Unit should be mounted as close to winch assembly as possible (not more than 15') only 20' of control cable is supplied. If control box needs to be mounted further away then control cable must be spliced.
- Page 80 7. Installation 7. The drop cable nearest the winch assembly is to be installed and used as the control cable as shown Figure 7DY. Install the control mounting channel to the ceiling using the two (2) clamps provided. Mount the clamps approximately 1' from each end of channel. The channel must be mounted with the open end down.
- Page 81 7. Installation Primary Wiring ALL WIRING SHOULD BE DONE BY A QUALIFIED ELECTRICIAN. System operates on 230V 1 phase power only. 230V Power must be supplied to main control box. NOTE: Ground wire must be supplied to overhead control box to provide proper grounding for winch motor.
- Page 82 7. Installation Power Winch Operation Start with feeder in down position. 1. Flip DPDT toggle switch to up position. Push and hold in up push button until light is lit. Release up button. Feeder should now be in the up position ready to fill. 2.
-
Page 83: Chapter 8 Troubleshooting
8. Troubleshooting Safety in Maintenance and Repairs Before starting any repairs or maintenance on the Pan Feeder System observe the following safety steps: 1. Isolate the whole of the system from the electricity supply by switching OFF the power isolator and locking it. - Page 84 8. Troubleshooting Problem Checks Corrective Action e. Check to see if the spinner motor spins, but the feed line motor does not come e. Replace the PC board. ON and the green light does not 2. Spinner control pan will come ON.
-
Page 85: Chapter 9 Wiring Diagrams
9. Wiring Diagrams Rooster/Power Winch Wiring Diagram MAIN CONTROL UNIT 220V SINGLE PHASE Dashed lines indicate winch with time clock only. 20 AMP BREAKER (NOT SUPPLIED) UP LIGHT UP BUTTON TERMINAL STRIP DOWN DOWN LIGHT DOWN BUTTON CLOCK SWITCH FILL SWITCH FILL SYSTEM CLOCK MOTOR LIGHT... -
Page 86: Microswitch End Control 220V, 1 Phase (7101483)
9. Wiring Diagrams Microswitch End Control 220V, 1 Phase (7101483) PNEG-250 Hi-Lo and PRO-1 Pan Feeders... -
Page 87: Microswitch End Control 3 Phase (07101483-3)
9. Wiring Diagrams Microswitch End Control 3 Phase (07101483-3) 07101483-3 208V-230V 3 Phase control unit used on 07101482-3 20 Amp microswitch Attach line 1, 2 and 3 to the Coil voltage: 200V-240VAC 25 amp terminals marked L1, L2 and L3 Connect to L1 Black N.O. -
Page 88: Microswitch Center Control 220V, 1 Phase (7101540)
9. Wiring Diagrams Microswitch Center Control 220V, 1 Phase (7101540) Brown Blue Green/ Yellow Black White Ref # Part # Description 20-5060 Switch, Toggle SPST 15A with ON/OFF 07101123B C.H. Wires (Black) 7101123 C.H. Wires (White) 7100348 Cord 120" Long 14/3 C2200025 Switch 20 Amp Unimax Normally Closed... -
Page 89: Microswitch End And Center Control
9. Wiring Diagrams Microswitch End and Center Control PNEG-250 Hi-Lo and PRO-1 Pan Feeders... -
Page 90: End Control Box, I-Plus3 (C2000535)
9. Wiring Diagrams End Control Box, i-Plus3 (C2000535) PNEG-250 Hi-Lo and PRO-1 Pan Feeders... -
Page 91: Center Control Box, I-Plus3 (C2000563)
9. Wiring Diagrams Center Control Box, i-Plus3 (C2000563) PNEG-250 Hi-Lo and PRO-1 Pan Feeders... -
Page 92: End Control Box, I-Plus3 3 Phase (C2000590)
9. Wiring Diagrams End Control Box, i-Plus3 3 Phase (C2000590) PNEG-250 Hi-Lo and PRO-1 Pan Feeders... -
Page 93: I-Plus3 End And Center Control
9. Wiring Diagrams i-Plus3 End and Center Control PNEG-250 Hi-Lo and PRO-1 Pan Feeders... -
Page 94: Led Light And I-Plus3 End Control
9. Wiring Diagrams LED Light and i-Plus3 End Control PNEG-250 Hi-Lo and PRO-1 Pan Feeders... -
Page 95: Proximity Switch End Control 220V, 1 Phase (7100842)
9. Wiring Diagrams Proximity Switch End Control 220V, 1 Phase (7100842) PNEG-250 Hi-Lo and PRO-1 Pan Feeders... -
Page 96: Proximity Switch Center Control 220V, 1 Phase (C2000528)
9. Wiring Diagrams Proximity Switch Center Control 220V, 1 Phase (C2000528) White Black Coil Black Blue Green Brown Ref # Part # Description 7101128 Relay Assembly for Proximity Units 1 Phase S-7368 Switch, DPDT ON-ON Toggle 15 Amp PNEG-250 Hi-Lo and PRO-1 Pan Feeders... -
Page 97: Proximity End And Center Control
9. Wiring Diagrams Proximity End and Center Control PNEG-250 Hi-Lo and PRO-1 Pan Feeders... -
Page 98: Spinner End Control 110V, 1 Phase (7100614)
9. Wiring Diagrams Spinner End Control 110V, 1 Phase (7100614) OPEN PNEG-250 Hi-Lo and PRO-1 Pan Feeders... -
Page 99: Spinner End Control 220V, 1 Phase (7100211)
9. Wiring Diagrams Spinner End Control 220V, 1 Phase (7100211) OPEN PNEG-250 Hi-Lo and PRO-1 Pan Feeders... -
Page 100: Spinner Center Control 110V-220V, 1 Phase (C2000306)
9. Wiring Diagrams Spinner Center Control 110V-220V, 1 Phase (C2000306) Ref # Part # Description S-7398 Connector, 3/8" Cord 14/3 7100275 Nut, Conduit 3/8" S-7399 Jamb Nut 3/8" E171-A1017 DC Spinner Motor PNEG-250 Hi-Lo and PRO-1 Pan Feeders... -
Page 101: Spinner Center Control 220V (7100407)
9. Wiring Diagrams Spinner Center Control 220V (7100407) Blue Black Blue Yellow Black White Black Black Yellow Ref # Part # Description E305-0269 WR, 3" WR-18 Black E106-1003, 3/8 1775 Switch ON-OFF-OFF Spot 3 Position E305-0268 WR, 3" WR-18 White E106-1003,1003 E305-0270 WR, 3"... -
Page 102: Spinner End And Center Control
9. Wiring Diagrams Spinner End and Center Control OPEN PNEG-250 Hi-Lo and PRO-1 Pan Feeders... -
Page 103: Chapter 10 Warranty
14 months from arrival at port of discharge, whichever is earlier. The end-user’s sole remedy (and GSI’s only obligation) is to repair or replace, at GSI’s option and expense, products that in GSI’s judgment, contain a material defect in materials or workmanship. - Page 104 Authorities having jurisdiction should be consulted before installations are made. 1004 E. Illinois St. Assumption, IL 62510-0020 Phone: 1-217-226-4421 Fax: 1-217-226-4420 www.gsiag.com Cumberland is a part of GSI, a worldwide brand of AGCO Corporation. Copyright © 2014 by Group Printed in the USA CN-311217...
Need help?
Do you have a question about the Cumberland Hi-Lo and is the answer not in the manual?
Questions and answers