
Related Manuals for Tektronix RSA7100 Series


Summary of Contents for Tektronix RSA7100 Series
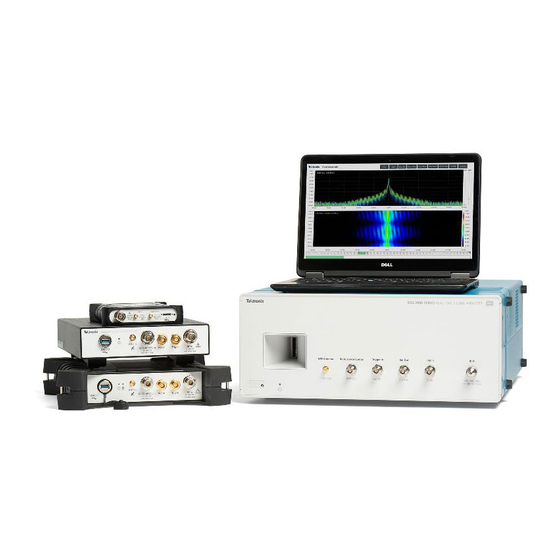
- Page 1 RSA7100 Series Real-Time Spectrum Analyzer Quick Start User Manual 071-3504-10...
- Page 3 RSA7100 Series Real-Time Spectrum Analyzer Quick Start User Manual Register now! Click the following link to protect your product. ► www.Tek.com/register www.tek.com 071-3504-10...
- Page 4 Copyright © Tektronix. All rights reserved. Licensed software products are owned by Tektronix or its subsidiaries or suppliers, and are protected by national copyright laws and international treaty provisions. Tektronix products are covered by U.S. and foreign patents, issued and pending. Information in this publication supersedes that in all previously published material.
- Page 5 Warranty Tektronix warrants that this product will be free from defects in materials and workmanship for a period of one (1) year from the date of shipment. If any such product proves defective during this warranty period, Tektronix, at its option, either will repair the defective product without charge for parts and labor, or will provide a replacement in exchange for the defective product.
-
Page 7: Table Of Contents
Timing reference ........................ RSA7100 Series Quick Start User Manual... - Page 8 Advanced techniques ......................Index RSA7100 Series Quick Start User Manual...
-
Page 9: Important Safety Information
The power cord disconnects the product from the power source. See instructions for the location. Do not position the equipment so that it is difficult to operate the power cord; it must remain accessible to the user at all times to allow for quick disconnection if needed. RSA7100 Series Quick Start User Manual... - Page 10 The product is heavy. To reduce the risk of personal injury or damage to the device get help when lifting or carrying the product. Use a two-person lift or a mechanical aid. Use only the Tektronix rackmount hardware specified for this product. RSA7100 Series Quick Start User Manual...
-
Page 11: Service Safety Summary
Dangerous voltages or currents may exist in this product. Disconnect power, remove battery (if applicable), and disconnect test leads before removing protective panels, soldering, or replacing components. Verify safety after repair. Always recheck ground continuity and mains dielectric strength after performing a repair. RSA7100 Series Quick Start User Manual... -
Page 12: Terms In This Manual
(This symbol may also be used to refer the user to ratings in the manual.) The following symbol(s) may appear on the product: RSA7100 Series Quick Start User Manual... -
Page 13: Compliance Information
Voltage changes, fluctuations, and flicker European contact. Mfr. Compliance Contact Tektronix, Inc. PO Box 500, MS 19‐045 Beaverton, OR 97077, USA www.tek.com This product is intended for use in nonresidential areas only. Use in residential areas may cause electromagnetic interference. -
Page 14: Safety Compliance
Additional compliances IEC 61010-1. Safety Requirements for Electrical Equipment for Measurement, Control, and Laboratory Use – Part 1: General Requirements. Equipment type Test and measuring equipment. Safety class Class 1 – grounded product. viii RSA7100 Series Quick Start User Manual... - Page 15 Only mains power supply circuits have an overvoltage category rating. Only measurement circuits have a measurement category rating. Other circuits within the product do not have either rating. Mains overvoltage category rating Overvoltage category II (as defined in IEC 61010-1). RSA7100 Series Quick Start User Manual...
-
Page 16: Environmental Considerations
This symbol indicates that this product complies with the applicable European Union requirements according to Directives 2012/19/EU and 2006/66/EC on waste electrical and electronic equipment (WEEE) and batteries. For information about recycling options, check the Tektronix Web site (www.tek.com/productrecycling). Perchlorate materials. -
Page 17: Preface
Preface The Tektronix RSA7100 Series Real-Time Spectrum Analyzer offers real time spectrum analysis up to 800 MHz bandwidth, a 14 GHz frequency range (26.5 GHz optional), and streaming storage of up to 2 hours of seamless data at full bandwidth. The RSA7100 is paired with the high-performance CTRL7100 instrument controller running SignalVu-PC. -
Page 18: Documentation
EMC Precompliance and EMC testing With this demonstration guide, you will explore what you can do with the Tektronix USB spectrum analyzer with EMCVu. Applications range from simple frequency / amplitude measurements of RF signals to real-time and modulation analysis that provide you with a complete system view of your device under test. -
Page 19: Upgrades
Internet of Things (IoT) In this demonstration guide, you will learn how to use Tektronix USB RSA to make the standard certification tests on IoT devices. Wireless technology standards are needed to ensure that products can interoperate within the ecosystem where they will be deployed. - Page 20 Preface RSA7100 Series Quick Start User Manual...
-
Page 21: Before Installation
Before installation Before installation, unpack the instrument and check that you received all items listed as Standard Accessories. Optional accessories and instrument options are also listed in this section. Check the Tektronix Web site (www.tek.com) for the most current information. -
Page 22: Recommended Accessories
Controller, no RAID memory RSA7100 C7100-B Controller, RAID memory, >40 minutes recording time at 800 MHz bandwidth (requires STREAMNL/FL-SVPC) RSA7100 C7100-C Controller, RAID memory, > 120 minutes recording time at 800 MHz bandwidth (requires STREAMNL/FL-SVPC) RSA7100 Series Quick Start User Manual... -
Page 23: Service Options
The instrument includes a 1 year warranty. Read the warranty statement at the front of this manual for details. Option number Description Purchased with instrument Three Year Gold Care Plan Five Year Gold Care Plan RSA7100 Series Quick Start User Manual... -
Page 24: Operating Requirements
Observe these clearance requirements for the RSA7100 when placing it on a cart, bench, or rack. Top/bottom: 44.45 mm (1.75 in) Sides: 44.45 mm (1.75 in) Rear: 76.2 mm (3.0 in) Ensure that no outside fans are blowing into the RSA7100 rear fans. RSA7100 Series Quick Start User Manual... - Page 25 Neither of these rackmounts is meant for use in vehicles. They are intended only for racks in a stationary environment, such as a laboratory or factory. If a vehicle rackmount is desired, a tray plus perimeter clamp should be used instead of the rails. RSA7100 Series Quick Start User Manual...
-
Page 26: Introduction To The Instrument
RF In is a 40 GHz Planar Crown bulkhead with 3.5 mm female coax adapter for RF input. IRIG-B port is a BNC female connector for IRIG-B signal input. (Option GPS required.) 1 PPS port is a SMA connector for pulse-per-second signal input. (Option GPS required.) RSA7100 Series Quick Start User Manual... -
Page 27: Rear Panel (Rsa7100)
This will help prevent damage to the instrument. You can reset the circuit breaker by first disconnecting the power cable, pressing the circuit breaker switch to reset it, and then reconnecting the power cable. Inhibit voltage MON connector. LAN connector. Inhibit mode switch (Manual/Default). Fan switch (High / Auto). RSA7100 Series Quick Start User Manual... -
Page 28: Front Panel (Ctrl7100)
Non-Maskable Interrupt (NMI) button. Acts as a reset button that cannot be ignored by any hardware or software that is masking out interrupts. System reset button. Power button with integrated LED. Peripheral bay. Status LEDs. RAID drives. RSA7100 Series Quick Start User Manual... -
Page 29: Rear Panel (Ctrl7100)
LVDS card in the controller may need to be replaced. PCIe port used to connect the convertor (RSA7100) to the controller (CTRL7100) with a PCIe cable to establish a connection through the SignalVu-PC application. RSA7100 Series Quick Start User Manual... -
Page 30: How To Clean The Instrument
Back up any user software on the hard disk. You may need to reinstall the software after your instrument is returned. When repacking the instrument for shipment, use the original packaging. If the packaging is unavailable or unfit for use, contact your local Tektronix representative to obtain new packaging. Seal the shipping carton with an industrial stapler or strapping tape. -
Page 31: Installation
SignalVu-PC application. The convertor will turn on after power is applied to the controller. The controller will take several minutes to boot and launch SignalVu-PC. NOTE. The convertor fans default to 100% when the system is turned on. The fans will automatically reduce speed after a minute or so. RSA7100 Series Quick Start User Manual... -
Page 32: Power Off
The fans will slow down and be quieter once the application is started. This is normal. Fan speed may vary while the application is running, depending on the internal temperature detected by the instrument. RSA7100 Series Quick Start User Manual... -
Page 33: How To Activate Microsoft Windows 10
If controller 2 is not connected to the Internet, the activation will fail and an Activate Windows watermark will display on the screen. To activate Windows and remove the watermark, you must connect to the Internet or call Microsoft. RSA7100 Series Quick Start User Manual... -
Page 34: How To Connect And Disconnect An Instrument
) when it is not. You can also view the name of the instrument that is connected by hovering the pointer over the connection icon. 5. When you want to connect to a different instrument, select Disconnect From Instrument to end the current connection. RSA7100 Series Quick Start User Manual... -
Page 35: Operation
DPX display has a unique method for processing, storing, and displaying the data. Tektronix real-time analyzers may have a frequency mask trigger. The frequency mask trigger allows you to set up a spectral mask to capture a signal when a spectral anomaly occurs. This allows the analyzer to check 100% of the input signal before acquiring, and then capture precisely the intermittent RF event of interest. - Page 36 (spectrum) display and a spectrogram diagram at the same time. Because the data source is shared among the different displays, the displays are correlated. That is, a point or set of points within one display is associated with a point or set of points in every other display in the application window. RSA7100 Series Quick Start User Manual...
-
Page 37: Elements Of The Display
The main areas of the application window are shown in the following figure. NOTE. If values or buttons on the application UI become truncated or displaced, you may need to adjust the Microsoft Windows display settings or custom DPI percentage setting. RSA7100 Series Quick Start User Manual... - Page 38 Displays Opens the Select Displays dialog box so that you can select measurement displays. Settings Opens the Settings control panel for the selected display. Each display has its own control panel. RSA7100 Series Quick Start User Manual...
- Page 39 Click to select from a list of custom favorite User presets and load the selected preset. Main menu bar Contains access to menus. Preset Recalls the Main preset. Replay Runs a new measurement cycle on the existing acquisition data record using any new settings. RSA7100 Series Quick Start User Manual...
- Page 40 Abort immediately halts the current acquisition/measurement cycle. In-process measurements and acquisitions are not allowed to complete. The Edit Favorites icon allows you access the below menu, which allows you to edit the contents of the Favorites bar. RSA7100 Series Quick Start User Manual...
-
Page 41: Display Categories
SEM, Cell ID, and TDD LTE Transmit Power Off) in compliance with Test Specifications 36.104 (Base Station radio transmission and reception) and 36.141 (Base Station conformance testing). Examples of these displays include: Channel Spectrum, Constellation, and ACLR. RSA7100 Series Quick Start User Manual... -
Page 42: Select Displays
3. Click Add (or double-click the icon) to add the selected display to the Selected displays list. Repeat the procedure to add other displays. 4. Click OK to close the dialog box. The selected displays will open. RSA7100 Series Quick Start User Manual... - Page 43 Enter a file name. The name you give the file will appear in the User Presets dialog box list. d. Select Setup file to save from the Save as type drop-down list. e. Click Save. RSA7100 Series Quick Start User Manual...
- Page 44 1. Click Application Presets in the Select Displays dialog box. 2. Use the pull down list to display the presets. NOTE. Some presets appear only if the associated instrument option is installed. 3. Select a preset from the list. RSA7100 Series Quick Start User Manual...
- Page 45 Spectrum Analysis Spectrum Modulation Analysis (Option SVMNL/FL-SVPC only) Constellation, DPX Spectrum, Signal Quality, Symbol Table Pulse Analysis (Option SVPNL/FL-SVPC only) DPX Spectrum, Pulse Table, Pulse Trace, Time Overview Spur Search Multi Zone 9k-1GHz Spurious RSA7100 Series Quick Start User Manual...
- Page 46 Bluetooth displays vary depending on the selected Test Setup. LTE™ (Option SV28NL/FL-SVPC) LTE Summary, LTE Constellation, Time Overview, Spectrum, LTE ACLR, LTE Channel Spectrum, SEM NOTE. LTE displays vary depending on the selected Test Setup. RSA7100 Series Quick Start User Manual...
- Page 47 The current Spectrum Length or Analysis Length is not long enough to allow a narrower RBW filter. If the Length control is set to Manual, try increasing it or setting it to Auto so that the Analysis Length will increase to the required value. RSA7100 Series Quick Start User Manual...
- Page 48 It includes the entire sweep plus any retrace time. When trace averaging is activated, the sweep reports the time for individual traces while collecting the averages, and reports the time for the entire averaged trace when averaging is complete. RSA7100 Series Quick Start User Manual...
-
Page 49: Start And Stop An Acquisition
If the analyzer is in Continuous Run mode, the Replay button is dimmed while acquisitions are active. 2. Click Stop to stop an acquisition. If an analysis is in process, it will finish its sequence and then stop. RSA7100 Series Quick Start User Manual... -
Page 50: Markers
Define Peaks menu tab. You can also drag the marker to the desired position using the touch screen or the mouse. 4. Read the frequency and power level from the marker readout on the display. RSA7100 Series Quick Start User Manual... - Page 51 If markers are turned off, click Peak in the Marker toolbar or on the front panel to add the marker reference (MR) and to position it on the maximum peak level on the trace in the selected display. Click Table in the Marker toolbar to open a tabular display showing the marker information. RSA7100 Series Quick Start User Manual...
- Page 52 To add another marker, select Add Marker from the drop-down list in the toolbar or from the front panel button. Markers can also be added by right-clicking in the desired display and selecting Add marker. RSA7100 Series Quick Start User Manual...
- Page 53 Define the threshold and excursion values. Quick tip You can add or delete markers using the drop-down list next to Define in the Marker toolbar, or by right-clicking in the desired display and selecting Add marker. RSA7100 Series Quick Start User Manual...
-
Page 54: Iqflow
CUSTOM-API (API). The Configure In/Out menu allows you to access the IQ Streaming control panel with its related features. Select Setup > Configure In/Out from the Main menu to access the IQ Streaming control panel. RSA7100 Series Quick Start User Manual... - Page 55 Stream IQ data to the 40 GbE card on a client controller. page 37.) (Requires Option STREAM.) LVDS (See Stream IQ data through the LVDS interface to a client controller. page 38.) (Requires Option 05.) RSA7100 Series Quick Start User Manual...
- Page 56 2. Click the Start button in the Streaming API tab in SignalVu-PC. The button will change to a Stop button when the data is streaming. 3. Check that the acquisition of data in your custom application is occurring. 4. Click the Stop button when you want to stop the streaming. RSA7100 Series Quick Start User Manual...
- Page 57 6. Click the Start button in the Streaming Ethernet tab in SignalVu-PC. The button will change to a Stop button when the data is streaming. 7. Check that the acquisition of data in your custom application is occurring. 8. Click the Stop button when you want to stop the streaming. RSA7100 Series Quick Start User Manual...
- Page 58 6. When you ready to stream the IQ data, click On to start streaming of IQ data through the LVDS. 7. You can now view data in your client side application. RSA7100 Series Quick Start User Manual...
-
Page 59: Timing Reference
This dish icon indicates the lock status of the selected time source. Green indicates that the system is locked to the selected time reference. Yellow indicates that the system is not locked to the selected time reference. RSA7100 Series Quick Start User Manual... - Page 60 IRIG-B detection is only available on RSA7100 units with Option GPS and an IRIG-B connector. When switching from any time reference to IRIG-B, it takes several seconds for the time to update with a valid signal. RSA7100 Series Quick Start User Manual...
-
Page 61: Print
2. Fill out the details in the Print dialog box, and then click OK. The Print dialog box is the standard Microsoft Windows Print dialog box. The printer controls are dependent on your printer. RSA7100 Series Quick Start User Manual... - Page 62 1. Select Options from the Tools menu. 2. Select the Prefs tab in the control panel. 3. Set the Color Scheme to Blizzard. The background color changes from black to white in the graphs. RSA7100 Series Quick Start User Manual...
-
Page 63: Save Data
Setup files enable you to save instrument settings for later recall. Using these files saves setup time and ensures consistent measurements. Picture .png/.jpg/.bmp Screen capture of SignalVu-PC application window. This can be useful for documenting results in test reports. RSA7100 Series Quick Start User Manual... - Page 64 This combined file contains header and IF samples (IQ samples for the RSA7100) in Midas 2.0 (Platinum BLUE) format. These files contain acquisition data that was recorded directly to a file from an RSA306B, RSA500A series, RSA600A series, or RSA7100 spectrum analyzer. RSA7100 Series Quick Start User Manual...
- Page 65 Select File > Save As to open the standard Windows Save dialog box where you can edit the file name, choose what data type to save, and select a folder for storing the file. RSA7100 Series Quick Start User Manual...
-
Page 66: Recall Data
Operation Recall data You can recall and reanalyze acquisition data and setup files previously saved by a Tektronix Real-Time Spectrum Analyzer. 1. Select Recall from the File menu. 2. In the Open dialog box, browse to the location of the file. -
Page 67: Record Data To Raid
At 320 to 800 MHz acquisition bandwidth, data can be packed in 12-bit samples. This is done to reduce the data transfer rate requirement and to guarantee gap-free recordings. At 320 MHz acquisition bandwidth and below, packing is not necessary and data is always stored as 16-bit samples. RSA7100 Series Quick Start User Manual... -
Page 68: Plot Measurements On A Map
(using world map file format to specify geographic location) or non geo-referenced (which does not have a geographic location information). Launching RSA Map To launch RSA Map: 1. Select Tools > RSA Map from the SignalVu-PC main menu bar. RSA7100 Series Quick Start User Manual... - Page 69 1. Select File > Load Map. 2. Navigate to the location of them map file to be loaded, and select the map file to load (you may need to specify the file type of the map. RSA7100 Series Quick Start User Manual...
- Page 70 Select the port that displays the name of the attached GPS receiver. 5. Set the Baud Rate as appropriate for the connected GPS receiver. 6. Click Apply to enable GPS. RSA7100 Series Quick Start User Manual...
- Page 71 7. Click OK to accept the GPS settings you have entered and close the Setup GPS window. When the analyzer is locked onto the GPS signal, the GPS icon displays a green lock icon. RSA7100 Series Quick Start User Manual...
- Page 72 GPS coordinates. If a GPS receiver is not active, or if you are using an image map, a single measurement is placed where you tapped the map RSA7100 Series Quick Start User Manual...
- Page 73 If you want to add a measurement at a point other than the current GPS location, disable GPS before placing the measurement. NOTE. To move measurement icons on a map, select the Move Result button. Click on the measurement and drag it to the new location. RSA7100 Series Quick Start User Manual...
- Page 74 3. Enable GPS as previously described. 4. Tap the Repeat Measurements button. 5. Tap the Settings button display the Settings window. 6. Set the type of measurement interval (time or distance between measurement positions) as needed. 7. Tap Done. RSA7100 Series Quick Start User Manual...
- Page 75 GPS position. The instrument will repeat measurements based on time or distance as specified on the (Settings) > Repeat Measurement tab. 9. Tap the map to stop measurements: RSA7100 Series Quick Start User Manual...
- Page 76 To view or delete the measurement results associated with an RSA Map measurement icon: 1. Tap the RSA Map Select button. 2. Tap a measurement icon to open the Map Measurements dialog box. 3. Tap the measurement of interest in the list. RSA7100 Series Quick Start User Manual...
- Page 77 The RSA Map azimuth direction arrow function lets you draw an arrow on a mapped measurement to indicate the direction your antenna was pointing when you took a measurement. 1. Tap the Change Azimuth button. RSA7100 Series Quick Start User Manual...
- Page 78 Measurements window and entering a Magnetic Azimuth value for the result. 4. To change the style of the azimuth line, select View > Azimuth line style – Line or Azimuth line style – Arrow. RSA7100 Series Quick Start User Manual...
- Page 79 Map Measurements dialog box. 3. Tap the measurement name that has the direction arrow to delete. 4. Tap the Delete Azimuth button. 5. Tap OK. RSA Map closes the dialog box and deletes the direction arrow. RSA7100 Series Quick Start User Manual...
- Page 80 To save measurement results: 1. Select File > Save As. 2. Navigate to the location where you want to save the results and type a name for the file. 3. Select Save to save the results. RSA7100 Series Quick Start User Manual...
- Page 81 2. Navigate to the location where you want to save the results and type a name for the file. 3. Select Save to save the results. RSA Map loads the contents of the recalled measurement archive. RSA7100 Series Quick Start User Manual...
-
Page 82: Advanced Techniques
Using the Trigger On This™ feature, you can draw a box around the area of interest in the graph, set a Density threshold, and the instrument will trigger when the measured Density exceeds your threshold. RSA7100 Series Quick Start User Manual... - Page 83 5. Use the Actions tab to set parameters for the Save on trigger function. The Save on trigger function allows you to save an acquisition data file and/or a screen capture when a trigger event occurs. RSA7100 Series Quick Start User Manual...
- Page 84 7. If desired, you can view the sample rate in the Acquisition Data tab of the Acquire control panel. The sample rate allows you to find the corresponding minimum off time and pulse width in the following table. RSA7100 Series Quick Start User Manual...
- Page 85 You can also trigger acquisitions based on the density of the DPX Bitmap trace as follows: 1. Select Triggered mode in the Trigger control panel. 2. Select RF Input from the Source drop-down list. RSA7100 Series Quick Start User Manual...
- Page 86 RBW or narrow the box until there are no colored pixels either above or below the box. The signal should enter the left side of the box and exit the right side. It should not cross the bottom edge of the box. RSA7100 Series Quick Start User Manual...
- Page 87 3. Set the Source to RF Input. 4. Set the Type to Frequency Mask. 5. Click Mask Editor to open the Mask Editor. The Mask Editor opens with the traces of the Spectrum display in the graph. RSA7100 Series Quick Start User Manual...
- Page 88 Click the X (delete button) to delete the selected mask point. Click Save to save the mask file and continue working with the mask editor. Click Open to load and edit a previously saved mask file. RSA7100 Series Quick Start User Manual...
- Page 89 F > T > F Two transitions define the trigger event. The signal must start outside of the mask (no violation), cross into the mask, and then cross back outside of the mask. RSA7100 Series Quick Start User Manual...
- Page 90 Some displays do not control the acquisition. These displays just show the captured data. Some displays share the same parameters. If any of one of these displays in such a family controls the acquisition, then the acquisition parameters are optimized for all of the displays in that family. RSA7100 Series Quick Start User Manual...
- Page 91 6. Click Add to add the icon to the Selected Displays list. NOTE. Add the Spectrum display if it is not already in the Selected Displays list. 7. Click OK to accept the changes and close the dialog box. RSA7100 Series Quick Start User Manual...
- Page 92 The data is now suitable for the Amplitude vs Time display but doesn't contain the full range of frequencies needed by the Spectrum display. In this case, the Spectrum is unable to run. RSA7100 Series Quick Start User Manual...
- Page 93 filter is always present, even when the preselector Off mode is manually selected. 1. Click Setup > Acquire on the main menu to open the Acquire control panel. 2. Select the Advanced tab and choose a preselector state. RSA7100 Series Quick Start User Manual...
- Page 94 CF ≤ 3.6 GHz: On CF > 3.6 GHz: Off Real time span > 50 MHz CF ≤ 3.41 GHz: On Not applicable CF ≤ 3.41 GHz: On CF > 3.41 GHz: Off CF > 3.41 GHz: Off RSA7100 Series Quick Start User Manual...
- Page 95 3. Select the Enable Test check box to set the application to perform the test once the conditions are defined. 4. Select the trace you wish to test from the Search in drop-down list box. RSA7100 Series Quick Start User Manual...
- Page 96 You can select any combination of actions to perform on a match. If you select all actions, they will all occur when a match is found (in Run mode). RSA7100 Series Quick Start User Manual...
- Page 97 3. Notice the vertical red bar. It highlights results that match the test definition. 4. Click the close box to remove the Mask Test control panel. RSA7100 Series Quick Start User Manual...
- Page 98 4. To edit values, add points, or delete points in a table: a. To edit an existing value, double-click on the cell you want to edit and enter the desired value. The active point shows as a red point on the plot. RSA7100 Series Quick Start User Manual...
- Page 99 7. From the Save As dialog, name the file and save it in the desired location. NOTE. Masks are saved in XML format with a .msk extension. 8. To dismiss the Mask Test Editor window, click Done. RSA7100 Series Quick Start User Manual...
- Page 100 The vertical red bar highlights results that have exceeded the test limits. The shaded region shows the mask area. The following figure shows the results of a passing is outside mask test with Upper Mask enabled. RSA7100 Series Quick Start User Manual...
- Page 101 The following figure shows the results of a failing is outside mask test with Lower Mask and Upper Mask enabled. The red area highlights the area of failure, which occurs at the lower mask. Markers are also in use. RSA7100 Series Quick Start User Manual...
- Page 102 Operation RSA7100 Series Quick Start User Manual...
-
Page 103: Index
Ink saver mode, 42 Installation, 1, 11 Power, 4 IQ streaming, 34, 36, 38 Power level triggering, 62 is inside mask (Mask Test), 78 Power off, 12 is outside mask (Mask Test), 78 Power on, 11 RSA7100 Series Quick Start User Manual... - Page 104 65 Select displays, 22 minimum pulse width, 65 Selected window, 70 violations, 69 Service, 3 Trigger Event parameters Settings accessing, 62 default, 23 Triggered trigger mode, 62 how to change, 28 RSA7100 Series Quick Start User Manual...
Need help?
Do you have a question about the RSA7100 Series and is the answer not in the manual?
Questions and answers