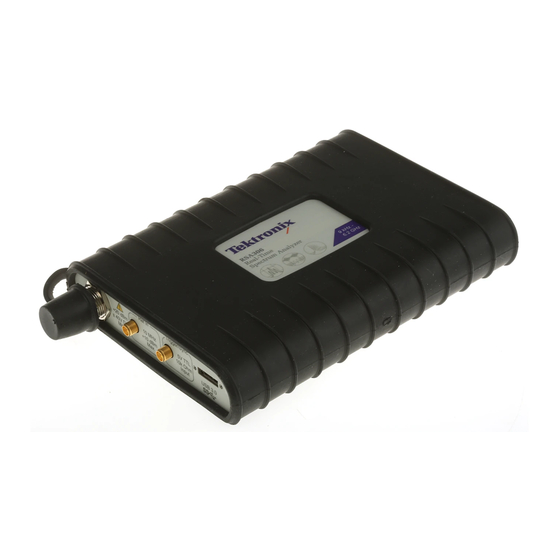
Tektronix RSA306 Technical Reference
Usb spectrum analyzer
Hide thumbs
Also See for RSA306:
- Self help manual (110 pages) ,
- Installation and safety instructions (24 pages) ,
- Quick start manual (8 pages)

Subscribe to Our Youtube Channel
Related Manuals for Tektronix RSA306


Summary of Contents for Tektronix RSA306
- Page 1 RSA306 USB Spectrum Analyzer Specifications and Performance Verification (Version 1 (or above) RF Signal Path Gain Cal) Technical Reference Revision A *P077113300* 077-1133-00...
- Page 3 RSA306 USB Spectrum Analyzer Specifications and Performance Verification (Version 1 (or above) RF Signal Path Gain Cal) Technical Reference Revision A www.tektronix.com 077-1133-00...
- Page 4 Copyright © Tektronix. All rights reserved. Licensed software products are owned by Tektronix or its subsidiaries or suppliers, and are protected by national copyright laws and international treaty provisions. Tektronix products are covered by U.S. and foreign patents, issued and pending. Information in this publication supersedes that in all previously published material.
-
Page 5: Table Of Contents
Test record........................RSA306 Specifications and Performance Verification... - Page 6 Table of Contents RSA306 Specifications and Performance Verification...
-
Page 7: Important Safety Information
Do not connect or disconnect probes or test leads while they are connected to a voltage source. Use only insulated voltage probes, test leads, and adapters supplied with the product, or indicated by Tektronix to be suitable for the product. -
Page 8: Service Safety Summary
Be sure your work area meets applicable ergonomic standards. Consult with an ergonomics professional to avoid stress injuries. Use only the Tektronix rackmount hardware specified for this product. Service safety summary The Service safety summary section contains additional information required to safely perform service on the product. Only qualified personnel should perform service procedures. -
Page 9: Terms In This Manual
(This symbol may also be used to refer the user to ratings in the manual.) The following symbol(s) may appear on the product: RSA306 Specifications and Performance Verification... -
Page 10: Preface
This manual applies only to instruments calibrated with Version 1 RF Signal Path Gain Cal. or later. For instruments calibrated with Version 0 RF Signal Path Gain Cal, use the Specifications and Performance Verification manual Tektronix part number 077-1030-XX available on the Tektronix web site. -
Page 11: Determining Rf Signal Path Gain Calibration Version
The preferred method requires SignalVu-PC software version 3.5.0119 or greater. Run SignalVu-PC and connect to the RSA306. In the SignalVu-PC application, select Help/About Tektronix Real Time Signal Analyzer. In the displayed windo, scroll through the Hardware Information section to find the line that reads “RF signal path gain calibration constants Ver:. -
Page 12: Specifications
This manual applies only to instruments calibrated with Version 1 RF Signal Path Gain Cal. or later. For instruments calibrated with Version 0 RF Signal Path Gain Cal, use the Specifications and Performance Verification manual Tektronix part number 077-1030-XX available on the Tektronix web site. -
Page 13: Frequency
External frequency reference input Input Frequency Range 10 MHz ±10 Hz Input Level Range –10 dBm to +10 dBm sinusoid Impedance 50 Ω Center frequency resolution Block IQ samples 1 Hz Streamed ADC samples 500 kHz RSA306 Specifications and Performance Verification... -
Page 14: Amplitude
Applies to corrected IQ data, with signal to noise ratios > 40 dB ±1.0 dB (18 °C to 28 °C) ±2.0 dB, (–10 ⁰C to 55 ⁰C), typical ±3.0 dB, 22 MHz - 24 MHz, (-10 ⁰C to 55 ⁰C), typical RSA306 Specifications and Performance Verification... -
Page 15: Trigger
Block baseband acquisition data (corrected) Maximum acquisition time Bandwidths 40 /( 2 ) MHz, 0 Hz Digital IF, N ≥ 0 Sample rates 56 / (2 ) Ms/s, 32-bit float complex samples, N ≥ 0 RSA306 Specifications and Performance Verification... -
Page 16: Noise And Distortion
Image: ≤ –35 dBc for 3700 MHz – 3882 MHz Center Frequency, typical ≤ –35 dBc for 5400 MHz – 5700 MHz Center Frequency, typical RFx3LO: ≤ –45 dBc for 4175 MHz – 4225 MHz Center Frequency, typical RSA306 Specifications and Performance Verification... - Page 17 +14 dBm, 40 MHz to 6.2 GHz, reference level = –10 dBm, typical –30 dBm, 40 MHz to 6.2 GHz, reference level = –50 dBm, typical These are indirectly tested by the 3rd Order IM Distortion test RSA306 Specifications and Performance Verification...
- Page 18 –1 –1 1050 5100 5695 3910 4505 1190 –1 –1 1050 5695 5700 4505 4510 1190 –1 –1 1050 5700 5900 4510 4710 1190 –1 –1 1050 5900 6220 4710 5030 1190 –1 –1 1050 RSA306 Specifications and Performance Verification...
-
Page 19: Real Time
Power consumption Per USB 3.0 SuperSpeed requirements: 5.0 V, ≤ 900 mA, nominal Physical Weight 0.59 kg (1.3 lbs) Dimensions Height 30.5 mm (1.2 in) Width 127 mm (5.0 in) Depth 190.5 mm (7.5 in) RSA306 Specifications and Performance Verification... -
Page 20: Regulatory
Transit drop, nonoperating Per MIL-PRF-28800F Class 2 nonoperating: Transit drops onto six faces and four corners of the equipment, from a height of 30 cm (11.8 in.) for a total of 10 impacts RSA306 Specifications and Performance Verification... -
Page 21: Performance Verification
This manual applies only to instruments calibrated with Version 1 RF Signal Path Gain Cal. or later. For instruments calibrated with Version 0 RF Signal Path Gain Cal, use the Specifications and Performance Verification manual Tektronix part number 077-1030-XX available on the Tektronix web site. -
Page 22: Required Equipment
Performance verification Required equipment These procedures use external, traceable signal sources to directly check warranted characteristics. The following table lists the equipment required for this procedure. Table 2: RSA306 required test equipment Item Description Model Number Purpose Desktop or Laptop PC... -
Page 23: Preliminary Checks
Do these steps before starting the performance verification procedures. Warm up the instrument 1. Connect the RSA306 USB cable to the host PC. The LED on the RSA306 should initially glow red then turn green after a few moments. 2. Make sure the SignalVu-PC application is connected to the RSA306 over USB. -
Page 24: Performance Verification Procedures
2. Set the signal generator to output a 0 dBm, 1 GHz CW frequency. 3. Reset the RSA306 to factory defaults: (Presets > Main) (The center frequency will be set to 1 GHz via Preset.) 4. Set the frequency span to 10 kHz. - Page 25 0 to 3 months ±1 ppm ±0.5 ppm 3 to 6 months ±2 ppm ±0.8 ppm 6 to 12 months ±3 ppm ±1 ppm 1 year to 2 years ±4 ppm ±2 ppm RSA306 Specifications and Performance Verification...
-
Page 26: External Reference Input, Functional Test
This check is a functional check. It is an important check for customer use, but does not check warranted specification limits. 1. Connect a signal generator RF output to the N-connector Ref input of the RSA306, as shown. The signal generator accuracy must be better than ±0.05 ppm. -
Page 27: Amplitude Accuracy At All Center Frequencies
For 1 MHz ≤ CF ≤ 30 MHz, RBW = 10 kHz For CF > 30 MHz, RBW = 100 kHz 5. Set the signal generator output amplitude to +12 dBm. The RF amplitude at the power sensor and RSA306 input = +6 dBm nominal. - Page 28 Performance verification 8. On the RSA306, peak the marker on the signal at the center frequency; measure and record the amplitude. 9. Measure and record the power meter amplitude. 10. Repeat steps 6 through 8 for all of the +20 dBm reference level frequencies in the table, measuring power meter amplitude and RSA306 amplitude.
- Page 29 5.701 GHz 5.804 GHz 5.806 GHz 6.200 GHz Table 6: Amplitude accuracy, 0 dBm reference level measurements Center/signal RSA306 reading, Power meter value, Error (RSA306 – frequency Pwr meter), dB 9 kHz 20 kHz 50 kHz RSA306 Specifications and Performance Verification...
- Page 30 2.341 GHz 2.419 GHz 2.421 GHz 2.699 GHz 2.701 GHz 3.000 GHz 3.699 GHz 3.701 GHz 4.569 GHz 4.571 GHz 4.629 GHz 4.631 GHz 4.749 GHz 4.751 GHz 4.959 GHz 4.961 GHz 5.699 GHz 5.701 GHz RSA306 Specifications and Performance Verification...
- Page 31 20 MHz 22 MHz 100 MHz 699 MHz 701 MHz 1 GHz 1.849 GHz 1.851 GHz 2.339 GHz 2.341 GHz 2.419 GHz 2.421 GHz 2.699 GHz 2.701 GHz 3.000 GHz 3.699 GHz 3.701 GHz 4.569 GHz RSA306 Specifications and Performance Verification...
- Page 32 Pwr meter), dB 9 kHz 20 kHz 50 kHz 100 kHz 300 kHz 1 MHz 3 MHz 10 MHz 20 MHz 22 MHz 100 MHz 699 MHz 701 MHz 1 GHz 1.849 GHz 1.851 GHz 2.339 GHz RSA306 Specifications and Performance Verification...
- Page 33 3 GHz to 6.2 GHz ±2.75 dB 0 dBm 9 kHz to ±2.0 dB 2.701 GHz ±2.75 dB 3 GHz to 6.2 GHz -13 dBm 9 kHz to ±2.0 dB 2.701 GHz 3 GHz to 6.2 GHz ±2.75 dB RSA306 Specifications and Performance Verification...
- Page 34 Performance verification Table 9: Amplitude accuracy results (cont.) Frequency Maximum Maximum Reference level range +error –error Specification -30 dBm 9 kHz to ±2.0 dB 2.701 GHz 3 GHz to 6.2 GHz ±2.75 dB RSA306 Specifications and Performance Verification...
-
Page 35: Channel Amplitude Flatness
7. Record the power meter reading in the 2 MHz – 42 MHz channel flatness table. (See Table 10.) 8. On the RSA306, position the marker on the peak amplitude of the signal; record the amplitude in the channel flatness table. - Page 36 17. Repeat steps 5 through 8 to measure and record for all the frequencies in the channel flatness table, 2140 MHz through 2180 MHz. (See Table 12.) Do not change the RSA306 center frequency setting. An alternate IF setting is used in this range.
- Page 37 20 MHz 22 MHz 24 MHz 26 MHz 28 MHz 30 MHz 32 MHz 34 MHz 36 MHz 38 MHz 40 MHz 42 MHz < +1 dB Maximum difference amplitude Minimum difference amplitude > –1 dB RSA306 Specifications and Performance Verification...
- Page 38 1278 MHz 1280 MHz 1282 MHz 1284 MHz 1286 MHz 1288 MHz 1290 MHz 1292 MHz 1294 MHz 1296 MHz 1298 MHz 1300 MHz < +1 dB Maximum difference amplitude Minimum difference amplitude > –1 dB RSA306 Specifications and Performance Verification...
- Page 39 2158 MHz 2160 MHz 2162 MHz 2164 MHz 2166 MHz 2168 MHz 2170 MHz 2172 MHz 2174 MHz 2176 MHz 2178 MHz 2180 MHz < +1 dB Maximum difference amplitude Minimum difference amplitude > –1 dB RSA306 Specifications and Performance Verification...
-
Page 40: Danl (Displayed Average Noise Level)
Turn on marker (Markers > Define Markers > Add) 6. Set the RSA306 to each of the center frequencies listed in the DANL frequencies of interest table. (See Table 13 on page 30.) After averaging is completed, move the marker near the center screen to the baseline noise on either side of the center screen spurious. - Page 41 3.5 GHz < –155 dBm/Hz 4.0 GHz < –155 dBm/Hz 4.5 GHz < –150 dBm/Hz 5.0 GHz < –150 dBm/Hz 5.5 GHz < –150 dBm/Hz 6.0 GHz < –150 dBm/Hz 6.2 GHz < –150 dBm/Hz RSA306 Specifications and Performance Verification...
-
Page 42: Phase Noise
1. Reset the RSA306 to factory defaults (Presets > Main). 2. Run the RSA306 alignment procedure (Tools > Alignments > Align Now). Note: the Center frequency should be 1 GHz. 3. Set the signal generator CW frequency = 1 GHz. - Page 43 After averaging is completed, enter the raw noise amplitude in dBm/Hz in the measurement table. (See Table 14.) g. Calculate and record Phase noise, the difference of CW amplitude in 100 Hz filter and noise measured with the POWER marker.(See Table 14.) RSA306 Specifications and Performance Verification...
- Page 44 (raw noise – CW amplitude), dBc/Hz frequency dBm/Hz Specification 1 kHz 10 Hz < –85 dBc/Hz 10 kHz 100 Hz < –84 dBc/Hz 100 kHz 1 kHz < –90 dBc/Hz 1 MHz 1 kHz < –118 dBc/Hz RSA306 Specifications and Performance Verification...
-
Page 45: Third-Order Intermodulation Distortion
4. Set one RF signal generator frequency to 2.1295 GHz. Set the second RF signal generator frequency to 2.1305 GHz. 5. Set each of the RF signal generators to provide a power level of –20 dBm each at the RSA306. The initial generator amplitude setting is should be -13 dBm, and the amplitude is fine-tuned as follows:... - Page 46 Item Measurement Specification Carrier #1 amplitude –20 dBm Carrier #2 amplitude –20 dBm IMD #1 amplitude < –80 dBm typ. IMD #2 amplitude < –80 dBm typ. < –60 dBc (Max IMD – (–20 dBm)) RSA306 Specifications and Performance Verification...
-
Page 47: Input-Related Spurious Response: Adc
5. Set the signal generator frequency to 21 MHz. 6. Set the signal generator output level for –30 dBm on the power meter. This amplitude is also at the RSA306 input (the signal generator setting will be near –24 dBm). - Page 48 19. Set the signal generator amplitude for –30 dBm on the power meter. This amplitude is also at the RSA306 input. 20. Set the RSA306 marker on the image spur seen at 120.2 MHz, at left edge of the span. Record the amplitude in the ADC measurements table.
- Page 49 LF ADC Image, dBc < –50 dBc RF CW amplitude 140 MHz RF Image amplitude 159.8 MHz RF Image amplitude 120.2 MHz RF ADC Image, dBc < –50 dBc (largest RF image -140 MHz CW) RSA306 Specifications and Performance Verification...
-
Page 50: Input-Related Spurious Response: Second Converter Images
5. Set the signal generator frequency to 1.0 GHz. 6. Set the signal generator for –30 dBm at the power meter and RSA306 input. Monitor and set the signal generator amplitude to -30 dBm at the power meter when changing frequency settings during this test. - Page 51 11. Calculate the difference between the image amplitude and the CW amplitude. This is the image spur magnitude in dBc. 12. Set the signal generator frequency to 2 GHz. 13. Set the RSA306 center frequency to 2 GHz. 14. Measure the CW amplitude at 2 GHz and note it in the second converter image measurements table. (See Table 17.) 15.
-
Page 52: Input-Related Spurious Response: First Converter Images
5. Set the signal generator output for –30 dBm at the power meter and RSA306 input. 6. Set the RSA306 to the Center frequency shown in the First converter images table. (See Table 18 on page 42.) 7. Set the signal generator frequency to the Image frequency value in the table. - Page 53 If the spur seen on screen is a residual, it will still be present with the input to the signal analyzer terminated in 50 Ω. Residual spurs are subject to separate specification limits. Table 18: First converter images: RSA306 and signal generator settings Specification, dBc...
-
Page 54: Input-Related Spurious Response: If Feedthrough
5. Set the signal generator to 1190 MHz. 6. Set the signal generator for –30 dBm at the power meter. This is also the amplitude at the input of the RSA306. The generator amplitude will be close to –24 dBm. - Page 55 12. Set the signal generator to 2440 MHz. 13. Set the signal generator for -30 dBm at the power meter. This is also the amplitude at the input of the RSA306. The generator amplitude will be close to -24 dBm.
-
Page 56: Input-Related Spurious Response: Rf X 2Lo
–24 dBm. 6. Set the RSA306 to the center frequency shown in the first column of the RF X 2LO table. (See Table 21 on page 46.) 7. Set the signal generator to the frequency shown in the second column of the RF X 2LO table. - Page 57 –30 dBm at the power meter for each frequency change. 12. Record results in the Test record. NOTE. This table includes the worst RF X 2LO spurs observed on the RSA306. Table 21: RF X 2LO: RSA306 and signal generator frequencies Specification, dBc...
-
Page 58: Input-Related Spurious Response: Rf X 3Lo
-24 dBm. 6. Set the RSA306 to the center frequency shown in the first column of the RF X 3LO table. (See Table 22 on page 48.) 7. Set the signal generator to the frequency shown in the second column of the RF X 3LO table. - Page 59 –30 dBm at the power meter for each frequency change. 12. Record results in the Test record. NOTE. This table includes the worst RF X 3LO spurs observed on the RSA306. Table 22: RF X 3LO: RSA306 and signal generator frequencies Specification, dBc...
-
Page 60: Input-Related Spurious Response: Half-If Response
NOTE. The half-IF specification applies when the second harmonic distortion of the signal at the input of the RSA306 is less than -60 dBc. A tunable band pass filter is used to attenuate the second harmonic distortion of the generator. - Page 61 8. Adjust the tunable filter for maximum power on the power meter. 9. Adjust the signal generator output for -30 dBm at the power meter. This is also the amplitude at the input of the RSA306. The generator amplitude will be close to -23 dBm.
- Page 62 Performance verification 23. Set the RSA306 to the center frequency shown in the first column of the 2440 MHz half-IF table. (See Table 24 on page 51.) 24. Measure and record the Half-IF spur amplitude. 25. Calculate and record the Half-IF spur amplitude in dBc (Half-IF amplitude (dBm) +30).
-
Page 63: Input-Related Spurious Response: Signal 2Rf X 2Lo
NOTE. The 2RF X 2LO specification applies when the second harmonic distortion of the signal at the input of the RSA306 is less than -60 dBc. A band pass filter or low pass filter is used to attenuate the second harmonic distortion of the generator. - Page 64 9. Adjust the tunable filter for maximum power on the power meter. 10. Set the signal generator output to –30 dBm at the power meter. This is also the amplitude at the input of the RSA306. The generator amplitude will be close to –23 dBm.
-
Page 65: Test Record
Performance verification Test record Print out the following test record pages and use them to record the performance test results for the RSA306 spectrum analyzer. Table 26: Test record: RSA306 Instrument Serial Number: Certificate Number: Temperature: RH %: Date of Calibration:... - Page 66 < –85 dBc/Hz 10 kHz < –84 dBc/Hz 100 kHz < –90 dBc/Hz 1 MHz < –118 dBc/Hz Third Order intermodulation distortion at 2130 MHz center frequency Test Measurement Specification, dBc Pass/Fail < –60 dBc RSA306 Specifications and Performance Verification...
- Page 67 4750 MHz 2370 MHz < –50 dBc 4950 MHz 2570 MHz < –50 dBc 4960 MHz 2580 MHz < –50 dBc 5700 MHz 3320 MHz < –50 dBc 6200 MHz 3820 MHz < –50 dBc RSA306 Specifications and Performance Verification...
- Page 68 Spurious response: RF X 3LO Specification, dBc Generator RF X 2LO spur (relative to –30 dBm Center frequency, MHz frequency, MHz amplitude, dBc input) Pass/Fail 130 MHz 5270 MHz < –50 dBc 4210 MHz 2870 MHz < –50 dBc RSA306 Specifications and Performance Verification...
- Page 69 Spurious response: 2RF X 2LO Specification, dBc Generator 2RF X 2LO spur (relative to –30 dBm Center frequency, MHz frequency, MHz amplitude, dBc input) Pass/Fail 2190 MHz 2785 MHz < –50 dBc 2870 MHz 4655 MHz < –50 dBc RSA306 Specifications and Performance Verification...
Need help?
Do you have a question about the RSA306 and is the answer not in the manual?
Questions and answers