
Related Manuals for Sunstream FL10014


Summary of Contents for Sunstream FL10014
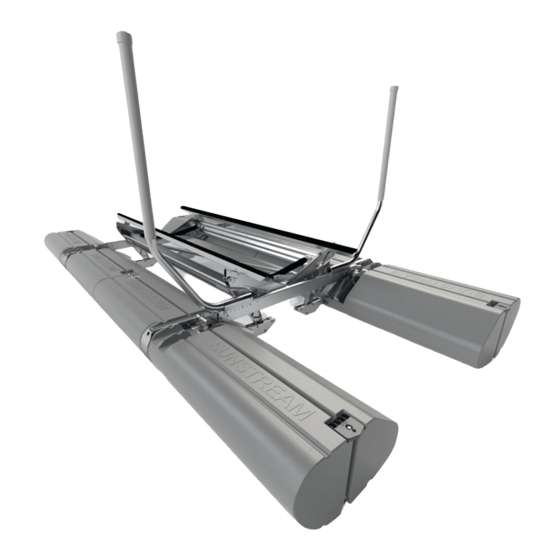
- Page 1 FL10014 ™ ASSEMBLY, USE AND INSTALLATION MANUAL READ CAREFULLY. KEEP THESE INSTRUCTIONS. COPYRIGHT SUNSTREAM CORPORATION 2014 - ALL RIGHTS RESERVED FORM NO. 690188 REV. PAGE 1 OF 36...
- Page 2 These assembly and installation instructions have been provided by Sunstream Corporation at the request of the potential installer and/or assembler. If you are not an authorized Sunstream Dealer and are not a reasonably skilled mechanic, please contact Sunstream so that we can refer you to a local dealer who can skillfully and safely perform the assembly and installation of your Sunstream boatlift.
- Page 3 ASSEMBLY, FRAME, PREASSEMBLED, FL10014 941117 ASSEMBLY, FLOAT, RIGHT, FL10 94-000002-33 AS., FLOAT, LEFT, ROLLER, FL10 941115 AS., FLOAT, LEFT, 10 94-000002-32 AS., FLOAT, RIGHT, ROLLER, FL10 941116 ASSEMBLY, HARDWARE KIT, PREASSEMBLED, FL10014 DOC 911121 PAGE 3 OF 36...
- Page 4 ASSEMBLY If you have any questions during the assembly process, please call your local dealer or Sunstream as (253)-395-0500. Before beginning assembly, find a flat area with room to work to set up your lift. Read ahead to the Installation Procedure to determine the best location to start.
- Page 5 NUT, .375-16, NYLOCK, SS BOLT, .375-16 X 3.00, HEX, SS PAGE 5 OF 36...
- Page 6 NUT, .500-13, NYLOCK, SS BOLT, .500-13 X 2.75, HEX, SS PAGE 6 OF 36...
- Page 7 50 Ft-lbs 68 N-m NUT, .500-13, NYLOCK, SS PAGE 7 OF 36...
- Page 8 PAGE 8 OF 36...
- Page 9 PAGE 9 OF 36...
- Page 10 285.77 285.77 282.00 282.00 PAGE 10 OF 36...
- Page 11 PAGE 11 OF 36...
- Page 12 PIN, COTTER, .125 X 1.50, SS WASHER, .750, SS PIN, .750 X 4.48, SS, HIGH STRENGTH PAGE 12 OF 36...
- Page 13 50 Ft-lbs 68 N-m NUT, .500-13, NYLOCK, SS PAGE 13 OF 36...
- Page 14 REPEAT STEPS 4A - 4F OPPOSITE SIDE PAGE 14 OF 36...
- Page 15 PIN, COTTER, .125 X 1.50, SS WASHER, .750, SS PIN, .750 X 4.48, SS, HIGH STRENGTH PAGE 15 OF 36...
- Page 16 PIN, COTTER, .125 X 1.50, SS WASHER, .750, SS PIN, .750 X 4.48, SS, HIGH STRENGTH FORM NO. 690188 REV. PAGE 16 OF 36...
- Page 17 PAGE 17 OF 36...
-
Page 18: Intentionally Blank
PAGE LEFT INTENTIONALLY BLANK PAGE 18 OF 36... - Page 19 PIN, COTTER, .125 X 1.50, SS WASHER, .750, SS PIN, .750 X 4.48, SS, HIGH STRENGTH BEAM ≥ 8' 10"/≥ 269cm ≤ 8' 10"/≤ 269cm PAGE 19 OF 36...
- Page 20 NUT, .375-16, NYLOCK, SS BOLT, .375-16 X 3.00, HEX, SS PAGE 20 OF 36...
- Page 21 BOAT BEAM BOAT BEAM ≥ 8' 10" /≥ 269cm ≤ 8' 10" /≤ 269cm ≤ 9' 6" /≤ 290cm BOAT BEAM BOAT BEAM ≥10' 2" /≥ 310cm ≥ 9' 6" /≥ 290cm ≤10' 6" /≤ 320cm ≤ 10' 2" /≤ 310cm PAGE 21 OF 36...
- Page 22 INSTRUCTIONS: 1. Connect hydraulic hoses marked red to the quick disconnects marked red. 2. Connect hydraulic hoses marked green to quick disconnects marked green. PAGE 22 OF 36...
- Page 23 PRIOR TO LAUNCH CHECK: ALL COTTER PINS ARE BENT AND SECURE. ALL NUTS ARE TIGHT. HYDRAULIC HOSES ARE NEATLY WIRE-TIED TO FRAME AND ARE CLEAR FROM PINCH POINTS. BATTERY TERMINALS AND ALL FITTINGS ARE TIGHT. RED RESERVOIR SEAL IS REMOVED (UNDER BREATHER CAP). PAGE 23 OF 36...
- Page 24 It is imperative that you replace the zinc on your lift regularly. Because many external factors affect the rate at which a zinc deteriorates, Sunstream recommends that you check its condition frequently, and change the zinc every six months or more often if needed. Zincs on lifts in coastal areas near the ocean deteriorate more rapidly and need to be changed more frequently.
-
Page 25: Installation Instructions
Installation Instructions If you have any questions, please call your dealer, or Sunstream at (253) 395-0500 Installation instructions and diagrams follow. These instructions and diagrams provide basic information about how to securely and safely install the FloatLift. Adhering to these instructions and diagrams, however, provides no guarantee that the installation will be safe and secure. - Page 26 Mooring the FloatLift The diagrams below shows the FloatLift tied up to different types of docks. To tie the FloatLift to a mooring buoy refer to the mooring buoy kit instructions. Floating Dock with a height less than 3’ above water and with a Dock Length Greater than Floatlift PAGE 26 OF 36...
- Page 27 Floating dock with height less than 3’ above water, Single Overhang Floating Dock with a height less than 3’above water, Double Overhang PAGE 27 OF 36...
- Page 28 Floating dock with a height less than 3’above water, Standard Slip Tide Fluctuations or Docks over 3' PAGE 28 OF 36...
- Page 29 Operating Instructions Switch the on/off switch on the RC unit to the “on” position. Remove red reservoir shipping cap underneath black reservoir cap. Ensure hoses are properly connected to pump. *GREEN* to *GREEN* *RED* to *RED* With the lift in more than 25”...
- Page 30 1st Time Boat is Fitted to Lift Pull the boat on the lift by hand Raise lift slightly to check boat balance. Reposition boat until floats remain level. Check bunk fit to Boat Note position of boat on lift Attach optional motorstop (with boat off) When Using Lift...
-
Page 31: Important Safety Instructions
Safety Labels, Safety Messages, and Instructions. Safety Labels should be located on the FloatLift and/or its accessories giving capacity and overload warnings - if the labels are missing, call Sunstream immediately so the labels can be provided. PAGE 31 OF 36... - Page 32 PAGE 32 OF 36...
- Page 33 Use only Sunfluid™ hydraulic fluid to replace any loss fluid in the hydraulic pump. Inspect and replace zincs if necessary. If any Sunstream Product is used in salt or brackish water, the Purchaser agrees that proper maintenance requires that the Purchaser shall attach, maintain, and regularly check sacrificial anodes, also known as “zincs”, to the Product to prevent electrolysis and...
- Page 34 (or with a reserve capacity of 160 Amp Hours. Reserve capacity is the most important feature. Battery Capacity: The FL10014 was tested to have an energy capacity of approximately 8 full cycles at using a new battery with a reserve capacity of 160 Ah. However, try to not dip below 50% battery capacity, since the solar panel would have difficulty in recovering from such a deep draw.
- Page 35 Lift stops after a split second. This is a sign of a low battery. If your battery is becoming low, the remote control will stop functioning (at about 11 volts). The lift can still be operated using the up/down switch in the powerpack. The pump motor will stop functioning if the voltage drops below 9 volts. Charge the battery using a 10A charger.
- Page 36 WARRANTY: Sunstream Corporation (“Company”) warrants its Products* for non-commercial and/or non-governmental use for a period of three (3)* years, in both fresh and salt water, to the original purchaser (“Purchaser”) against manufacturing defects in all Product materials and workmanship beginning from date of purchase of the Product from Company** under the...
Need help?
Do you have a question about the FL10014 and is the answer not in the manual?
Questions and answers