Table of Contents
Advertisement
Advertisement
Table of Contents

Related Manuals for CEM ORACLE


Summary of Contents for CEM ORACLE
- Page 1 ORACLE Operation Manual Corporation...
- Page 2 CEM Corpora on iPower, iDri, IFM, and One Touch Technology are registered trademarks of CEM Corpora on. CEM is a registered trademark of CEM Corporation SMART 6 is a trademark of CEM Corpora on.
-
Page 3: Table Of Contents
CEM QuikPrep Integrated Heater ......................... 42 Batch Testing on the ORACLE with Air Oven ......................43 QuikPrep Analysis on the ORACLE with an Air or Vacuum Oven................47 QuikPrep Analysis on the ORACLE with SMART 6 ....................50 SMART 6 Method Development ........................... 58 Data Management ................................ - Page 4 • The ORACLE should not be placed close to any electrical device susceptible to EMI. It is suggested that the user post a sign warning pacemaker wearers that a device utilizing microwave and magnetic fields is in operation.
-
Page 5: Introduction
45 seconds for the entire process. The ORACLE consists of an NMR magnet to perform the fat analysis, an electronics box (listed as processor box) for controlling and storing system settings and data, and may also include a SMART 6 Moisture/Solids Analyzer for rapid moisture analysis and sample drying prior to testing in the magnet. -
Page 6: Safety Overview
Safety Overview To the best of our knowledge, the information contained herein is accurate. However, CEM cannot accept liability of any kind for the accuracy or completeness of the information contained in this manual. The final determination of the suitability and proper use of the instrument described herein, the accuracy of the information and data obtained from such use, and whether such use infringes any patents or the legal safeguards of others are the sole responsibility of the user. -
Page 7: Instrument Components
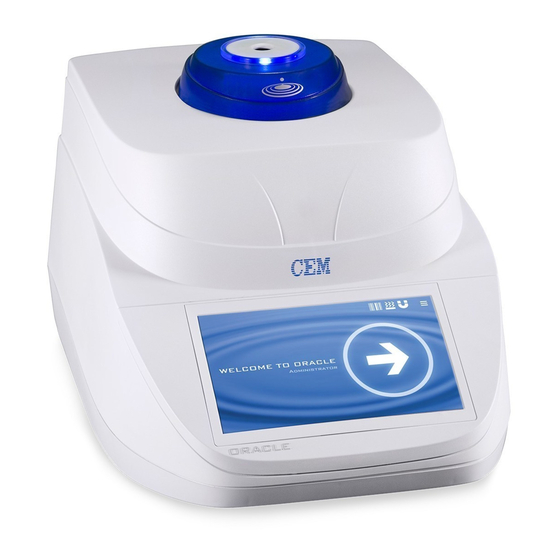
Instrument Components Processor Box ORACLE QuikPrep Magnet ORACLE Touch Screen USB Ports Only for users with a SMART 6 Exhaust Port Printer (optional) Ethernet Connection Balance USB Ports Type B (2) USB Ports Type A (3) SMART 6 Cavity Power Inlet... -
Page 8: System Installation
ORACLE magnet (120 lbs/55 kg) and, if applicable, the ORACLE processor (37 lbs/17 kg) and SMART 6 (55 lbs/25 kg). - Page 9 Processor Box on Shelf above Workbench Processor Box on Processor Box Workbench beside Magnet Under Workbench...
- Page 10 Remove the six screws from the sides of the magnet shipping container. Lift the top from the shipping container. With two people positioned on the sides of the magnet container - one on each side - use the straps and carefully lift the magnet from the skid and place it on the workbench.
- Page 11 If damage is noted, do not attempt instrument operation. If any instrument component has been damaged in shipping, contact the freight carrier to report the damage and to file a damage report. Contact CEM Service or the nearest subsidiary or distributor to request service information.
- Page 12 Cable Kit (160660) BNC Cable Ground Cable Shim Cable Short SMB – SMB Cable Long SMB – SMB Cable Ground Cable (Rx out to Rx in) Cross-over Ethernet Cable SMB-SMB Long Cable (Tx in to Tx out) SMB – SMB Short Cable BNC Cable CAT 5...
- Page 13 Power Conditioner Unpack the power conditioner and place it on the work bench or the floor as far away from the ORACLE magnet as possible. CAUTION Ensure that the power conditioner is not placed in close proximity with the ORACLE magnet to prevent demagnetization of the magnet.
- Page 14 ORACLE’s functionality. Unbox the heater block and place it near the ORACLE, either on a shelf or the benchtop. Plug the heater block into a standard wall outlet.
- Page 15 Unbox the scanner and stand, following the included directions to connect the cable to the scanner and assemble the stand in a convenient area near the ORACLE system. Plug the barcode scanner into any of the remaining USB outlets on the back of the Processor Box.
-
Page 16: Cable Connections
Once installed, plug the SMART 6 power cord into the power conditioner. Wait until connecting all ORACLE cables to connect the SMART 6 to the ORACLE processor box via the supplied green Ethernet cable, then proceed with powering the SMART 6 on. - Page 17 Connect the ground cable to the processor box and the magnet as illustrated. Ensure all washers are placed back on the screw prior to adding the nut. Connect the SMB long cable to the processor box and the magnet as illustrated below.
- Page 18 Connect the shim cable to the processor box as illustrated below. Connect the crossover CAT 5 Ethernet cable to the processor box as illustrated below.
- Page 19 Connect the monitor video cable to as illustrated below. Connect the Tx crossover cable to the processor box as illustrated below.
- Page 20 Connect the USB cable to the ORACLE and to the processor box as illustrated below. Connect the second USB cable to the ORACLE and processor box as illustrated below.
- Page 21 Connect the audio cable to the ORACLE and processor box as illustrated below. Use the 1” loom provided to wrap each cable going from the ORACLE to the processor box.
- Page 22 Power Conditioner, then turn the green switch on the processor box to the ON position. FOR SMART 6 USERS ONLY After following instructions to install the SMART 6 system in the SMART 6 manual, connect the SMART 6 to the ORACLE analyzer with the CAT5 Ethernet cable provided as illustrated below.
-
Page 23: Software Icons
Software Icons Accept Balance Connection Trac Film Counter Back QuikPrep Temperature Cancel Magnet Temperature Delete SMART 6 Connection Edit Tag Failing Value Passing Value Main Menu Play/Start Sample Next Repeat Sample... -
Page 24: Software Overview
The ORACLE is primarily operated using a glass capacitance touchscreen interface, although certain operations will be carried out by the SMART 6 if it is being used for moisture analysis. This manual will only review the ORACLE software interface and the SMART 6 screens that relate to the ORACLE analysis. Please refer to the SMART 6 manual for an overview of the SMART 6 software screens. - Page 25 Samples The ORACLE stores pertinent data for every sample test it has performed. Accessing the Sample Log will allow users to review a number of run parameters, such as fat result, moisture result (if connected to SMART 6), sample ID, date and time, user, tag, and initial weight.
- Page 26 The Instruments tab consists of connection and functionality features for the QuikPrep heater and the balance connected to the ORACLE, if one is present, as well as parameters for the ORACLE magnet itself. The Quik Prep tab controls functionality of the QuikPrep integrated heater located on the top of the ORACLE magnet.
- Page 27 Export Export gives the user the option to transfer data to a USB (6 ports on the ORACLE), for viewing data externally, such as on a laptop or PC. Users also have the option to transfer Diagnostic and Maintenance logs, which can lead to faster service and minimize system downtime in the event of any issues.
- Page 28 If an issue occurs where a bar code is lost after having already used the One-Time Pass, please contact the Process Control Group at CEM Corporation The balance icon indicates if the CEM supplied balance is connected and communicating with the ORACLE software.
-
Page 29: Smart 6 Connection
SMART 6 Connection This section is for users with a SMART 6 system. If not using a SMART 6 to dry the sample prior to ORACLE System Setup analysis, please continue to the section. 1. After following instructions in the SMART 6 manual to... - Page 30 4. Once logged in, confirm the ORACLE software has connectivity to the coreboard. This can be done by clicking on the magnet icon along the top of the ORACLE screen to check for magnet temperature. If XX is displayed, see page 70 for instructions on initiating the connection.
- Page 31 7. Choose the Exit ORACLE button, after which a window will appear asking “Are you sure you want to Exit”, press Yes to close out the ORACLE software. 8. Another window will then appear with 3 buttons, press the Start ORACLE button to activate the software.
- Page 32 9. The ORACLE software will then reload and bring the user back to the login screen. Log in again as an Administrator using the details in step 3. 10. After logging back in, go to the Main Menu icon and access Settings, then System.
- Page 33 14. Hit the gear button to access the pop-up menu, then choose the SET SMART 6 option to connect the SMART 6. This will set the IP Address connecting the ORACLE to the SMART 6 unit. 15. This will be confirmed by the SMART 6 icon at the top of the screen going white.
-
Page 34: System Setup
System Setup 16. Once the ORACLE has been turned on and the software has appeared, log in under the Administrator user. The password (case-sensitive) is: oracleadmin 17. Once logged in, access the menu through the Main Menu icon in the top right corner of the screen. - Page 35 USB flash drive. If the two numbers do not match, please contact CEM Corporation. 20. Once the USB is plugged into the ORACLE Processor Box, highlight the USB drive listed in the window. Select Import to complete the process.
- Page 36 Update. 23. Once the Magnet Offset Temperature is set, the ORACLE will prompt to place the Oil Tube in the magnet. Place...
- Page 37 X. If a red X appears, please contact your local CEM Service representative. 25. Remove the Oil Standard from the magnet. Then insert the Normalization Standard in the magnet and press OK to start the Cal-Lock sequence.
- Page 38 27. The final step of System Setup is System Normalization. The Oil standard will need to be first removed from the ORACLE, then after approximately 20 minutes the system will request the Normalization Standard. Place the Normalization Standard in the magnet and press Ok.
- Page 39 Note: Normalization will go through 4 separate stages, with each stage noted. The first two stages require the magnet to be empty of any tubes, and the temperature conditioning and last two stages require the Normalization tube to be placed in the magnet.
-
Page 40: Balance Setup
“Connect” button. In case of failure to connect, please review the balance settings below. Note: Settings are hardcoded in the ORACLE software and can only be changed in the balance. Currently, only Mettler balances are supported by the ORACLE software. -
Page 41: Sample Analysis
Glass Fiber Pads o The ORACLE uses CEM certified glass fiber sample pads to assist in rapid and accurate testing. The pads are specially designed to support the sample being tested without absorbing heat, but remaining porous enough to let moisture freely evaporate. - Page 42 This can be performed with a CEM template, which allows the user to easily add the exact same amount of product in the exact same form every time. The user can also mound the product on the pad and use the spatula to spread it evenly.
-
Page 43: Oracle Station Sample Preparation
4. Position the wrapped tube and sample into the ORACLE tube. Carefully press the sample into the bottom of the tube with the ORACLE Station press. The sample should be pressed firmly to ensure that the sample is... - Page 44 5. Gently place the ORACLE tube with the pressed sample pad into the ORACLE magnet or QuikPrep™. 6. After the analysis is complete, press the sample pads out of the ORACLE tube using the sample removal rod and throw the used ORACLE pads in the trash.
-
Page 45: Cem High Precision Heater Block
Consistent sample temperature is a critical component of an accurate and repeatable results in the ORACLE. In order to ensure that every sample analyzed in the ORACLE is at the proper sample temperature, CEM has developed and provides their own High Precision Heater Block. Standard market heater blocks can have temperature differences of up to 3°C between each individual hole, which would lead to poor results. -
Page 46: Cem Quikprep Integrated Heater
QuikPrep integrated heater system in order to reduce temperature conditioning times for a single sample from 30 minutes to less than 1 minute. This patented technique is only offered by CEM, and gives the user the flexibility to quickly get a single result for faster process control and formulation changes. -
Page 47: Batch Testing On The Oracle With Air Oven
ORACLE. When testing with an Air Oven, the user can choose to use a balance connected to the ORACLE to record the initial weights of the samples that will be analyzed, or use a separate balance to record the initial weights and manually input them into the ORACLE after the sample moisture is recorded. - Page 48 Note: The Sample ID can also be populated using the bar code scanner that is supplied with every ORACLE. BATCHING should be turned Batch, and toggled to the number of samples that will be analyzed in this upcoming batch.
- Page 49 7. Once the samples have been fully dried, follow the procedures outlined in the ORACLE Station Sample Preparation, then place each sample in the ORACLE tube into the heater block. Once all the samples have been completely prepared, begin a timer to ensure every sample is heated for the full optimized conditioning time.
- Page 50 10. Then following the instructions on the screen, remove the sample from the heater block and place the sample in the ORACLE magnet. The ORACLE will automatically detect that the sample is present, then run a set number of scans on the sample. After 35 seconds of analysis, the ORACLE will display the final % Fat result.
-
Page 51: Quikprep Analysis On The Oracle With An Air Or Vacuum Oven
When testing with an Air Oven, the user can choose to use the ORACLE to record the initial weights of the samples that will be analyzed, or use a separate balance to record the initial weights and manually input them into the ORACLE after the sample moisture is recorded. - Page 52 At this stage, if the samples have not been placed in the Air Oven to begin drying, do so now. 5. Once the samples have been fully dried, follow the procedures outlined in the ORACLE Station Sample Preparation, preparing and analyzing one sample at a time.
- Page 53 6. If there is an ORACLE tube from a previous analysis in the ORACLE, it must first be removed. 7. Place the ORACLE tube in the QuikPrep heater at the top of the ORACLE magnet. QuikPrep contains a sensor that will automatically detect the sample is present, and begin heating the sample for a predetermined length of time.
-
Page 54: Quikprep Analysis On The Oracle With Smart 6
Before beginning any sample testing, ensure the product has been fully and properly prepared in order to obtain the best results. Improper sample preparation or tempering can reduce accuracy and repeatability. For further information on sample preparation, please refer to the SMART 6 video on sample preparation, or contact CEM Corporation Process Application Support (800) 726-3331. - Page 55 1. Following the instructions on the screen, use the gray cover handle to lift the SMART 6 cover and center 1 or 2 CEM glass fiber Sample pads on the balance pan, depending on the sample preparation designated for the product.
- Page 56 “How to Run a Sample” for assistance. If you still have questions, please contact CEM Corporation Process Application Support (800) 726-3331 6. After the sample has been added and properly...
- Page 57 STOP key and contact CEM Service (800) 726- 5551. 7. During the test, the user can choose two different screens for viewing – Simple – This screen will only present the Moisture or Solids result during the testing process –...
- Page 58 10. Prepare (wrap) the sample in accordance with the instructions in the “ORACLE Station Sample Preparation” section of this manual. 11. If there is an ORACLE tube from a previous analysis in the ORACLE, it must first be removed. 12. Place the ORACLE tube in the QuikPrep heater at the top of the ORACLE magnet.
- Page 59 13. The ORACLE will then heat the sample accordingly, before automatically dropping it into the magnet for fat analysis. Please do not use either interface during this brief period of sample analysis, unless to cancel the test by pressing the X in the top left corner of...
- Page 60 14. After conditioning the sample to the correct temperature, the ORACLE will begin the process of analyzing the sample. The ORACLE will analyze each sample for 35 seconds before giving the final result.
- Page 61 15. Once the scans are complete, the results will appear on the SMART 6 screen. Note: This results screen shows both (fat and moisture) results. Simply use the arrows to the right and left of the result to scroll through Moisture, Solids, and Fat results.
-
Page 62: Smart 6 Method Development
SMART 6 Method Development To ensure accurate and repeatable results on the ORACLE, an accurate drying step is required prior to the analysis. When using the SMART 6 for a rapid moisture analysis, it is important to optimize the drying parameters before using the ORACLE for fat analysis. -
Page 63: Data Management
Internal Data Management The ORACLE has the ability to store data for further review. In order to find specific data points more easily, the users has the ability to sort and filter results based on the user, the sample ID or tag, or the time and date of analysis. - Page 64 4. The ORACLE also has the ability to generate and display statistical analysis on results. By pressing the Statistics icon, the ORACLE will provide users with the option of selecting certain data points to not only produce statistical analyses such as Average, Range, Minimum and Maximum, and Standard Deviation.
-
Page 65: External Data Management
SMART 6. Data Export The ORACLE allows any Administrator to export various information to a USB in a format that can then be dropped into various programs for further analysis. The system also has the capability to export Diagnostic or Maintenance logs to be sent to CEM for expedited servicing and repair of the ORACLE, reducing down time and providing the user with confidence their system is working as expected. -
Page 66: Oracle Maintenance
ORACLE Maintenance CEM recommends running full “Diagnostics” once per month to ensure your ORACLE is operating at peak performance. Diagnostics tests all electrical components of the system to verify that the magnet and processor (computer) are properly operating. -
Page 67: Qc Standards
QC Standards test calibration. The QC Standards test is designed to help ensure your ORACLE results stay within specification across a range of fat levels. This test must be calibrated using four standards containing different amounts of oil (nominally 10, 20, 50, and 80 %) which are designed to mimic the fat content of actual food samples. -
Page 68: Crm
CEM High Precision Heater Block. CRM’s can be sourced from a variety of laboratories worldwide. CEM recommends sourcing these samples from Muva Kempton in Germany or LGC, a worldwide company. For more information on sourcing CRM’s or contact... -
Page 69: Short Term Stability
Note- This test should only be run if instructed by CEM Service personnel as the ORACLE magnets are highly stable and should not drift over time. -
Page 70: Diagnostics
Diagnostics The ORACLE software contains a diagnostic testing procedure that runs a number of tests to ensure the hardware and software components are all functioning within each parameters specified range. Each test can be run individually, or all of the diagnostic tests can be run at once by using the Auto Run option. The total test time for the Auto Run is only 30 minutes, and requires the use of the Oil Standard tube for a number of tests. -
Page 71: Exporting System Diagnostics
Routine Maintenance Each ORACLE comes with a Routine Maintenance check sheet, which will review the maintenance needs of the SMART and ORACLE. While the ORACLE will maintain logs of certain maintenance procedures, it is recommended to use the check sheet for personal reminders of previous and upcoming maintenance needs, as well as aid a service technician in understanding the level of maintenance the system has received. -
Page 72: Oracle Settings
ORACLE Settings The ORACLE system comes equipped with a number of adjustable settings to optimize the user experience as well as settings that pertain to sample analyses and system functionality. Within the Settings folder, there are two sections that are... - Page 73 LIMS database. Data will be sent through the ORACLE in the High Throughput configuration. For users with a SMART 6 connected to the ORACLE, LIMS output should be handled by the SMART. QuikPrep conditioning time – For high throughput...
-
Page 74: System
ORACLE. SMART 6 – This setting must be turned “ON” in order for the ORACLE to connect with a SMART 6 moisture/solids analyzer. Note- this setting should be “OFF” for high throughput users without a SMART 6. -
Page 75: Backup
Backup The ORACLE has the ability to save specific data to the ORACLE hard drive as a backup and can be used to restore that information in the case of a future power outage or hardware failure. The “backup” settings list the various information users can save and restore as necessary. -
Page 76: Event Viewer
ORACLE processor, then press the button and follow the directions to upgrade the system. Event Viewer The “event viewer” is a tool used by CEM service and applications personnel to track and determine the possible cause of certain system issues. Event Viewer should only be... -
Page 77: Service And Repair
(illustrated below) to discharge all residual voltage from the instrument. Configure ORACLE for Coreboard connectivity. (Version 1.3.4 and higher) 1. Unplug the SMART 6 Ethernet cable if connected to the processor box. Only the Coreboard Ethernet cable should be plugged into the motherboard. -
Page 78: System Specifications
Temperature must be maintained between 15 °C and 30 °C. For optimum stability and performance, the ambient temperature should not vary more than 5 °C/day. The ORACLE should not be near areas with excessive air flow, such as under a fan or air vent. -
Page 79: Warranty
Warranty What Is Covered: CEM Corporation warrants that the instrument will be free of any defect in parts or workmanship and will, at its option, replace or repair any defective part (excluding consumables) or instrument. For How Long: This warranty remains in effect for 365 days from date of delivery to the original purchaser. - Page 80 Germany +81.3.5793.8543 (fax) (49) 2842.9644.0 (phone) info@cemjapan.co.jp (49) 2842.9644.11 (fax) info@cem.de (email) United Kingdom Subsidiary CEM Microwave Technology Ltd. Ireland Subsidiary 2 Middle Slade CEM Technology (Ireland) Ltd. Buckingham Industrial Park Sky Business Centre Buckingham MK18 1WA 9a Plato Business Park...
- Page 81 Corporation...
Need help?
Do you have a question about the ORACLE and is the answer not in the manual?
Questions and answers