Table of Contents
Advertisement
Advertisement
Table of Contents

Related Manuals for CEM SMART 6


Summary of Contents for CEM SMART 6
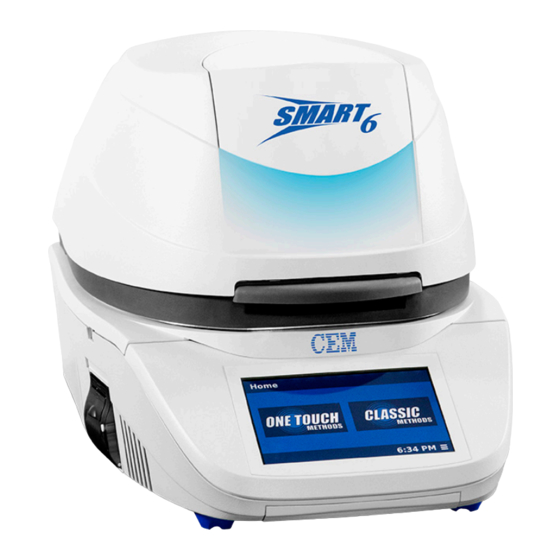
- Page 1 SMART 6 Microwave + Infrared Moisture & Solids Analyzer Manual...
- Page 2 THIS PAGE INTENTIONALLY LEFT BLANK...
-
Page 3: Table Of Contents
Right Side View Import Left Side View Export Rear View Instrument Filters Data Management Software Overview SMART 6 Database SMART 6 Statistics Software Icons Home Screen SMART 6 Printer Method Screen (One Touch and Classic) Internal Printer Paper Installation System Menu... - Page 4 Warranty Limited Warranty Information Contact Information CEM Corporation Headquarters CEM International Subsidiaries CEM Distributors...
-
Page 5: Introduction
Analyzer is designed to provide a rapid direct determination of the moisture, or other volatile components, of any and all products. Using a combination of microwave and infrared energy, the SMART 6 is able to accurately analyze samples with moisture content from 0.01-99.99%, as well as samples containing polar or non-polar solvents. -
Page 6: Safety
Flame detection with infrared feedback has been integrated to detect excessive temperature and immediately render the instrument inoperable. If the system is used in a manner not specified by CEM Corporation, these protection devices may be impaired. -
Page 7: Notice
Samples which have just been tested should be given adequate time to cool, based on the heat-retention properties of the sample. The cover of the SMART 6 will close on its own once it falls below a certain angle. Keep hands and tools clear of the SMART 6 cavity when closing the cover. -
Page 8: Instrument Overview
Instrument Overview Front View Balance Stem Port Cavity Cavity Handle Touch Screen Right Side View On/Off Switch Left Side View Exhaust Assembly USB Port Type A (1) Printer (optional) Instrument Overview... -
Page 9: Rear View
Rear View Magnetron Cooling Fan Fuses 15A (100-120V) 10A (200-240V) Ethernet Connection USB Ports Type B (2) Power Cord USB Ports Receptacle Type A (3) Instrument Filters Infrared Air Intake Filter Cavity Air Intake Cover (No Filter) Electronics Air Intake Filter Instrument Overview... -
Page 10: Software Overview
WARNING If the SMART 6 touchscreen is cracked or broken, contact CEM Service immediately because the damaged screen can injure the user, or lead to further system damage. Software Icons... -
Page 11: Home Screen
Additional information is available in the installation portion of this manual. • Classic Methods parameters can be revised in the SMART 6, and are typically for users with unique or specialized products that do not provide optimal results using a One Touch Method. Classic methods can be developed on each SMART 6 Analyzer, or imported from another instrument at a separate location. -
Page 12: Method Screen (One Touch And Classic)
Method Screen (One Touch and Classic) After choosing either the One-Touch Methods or Classic Methods, the method library will appear. Quickly touching the desired method will access the run screen to begin the sample analysis. Long holding (press and hold for 2-3 seconds) a method icon will open several additional options, which are detailed in this manual. -
Page 13: System Menu
System Menu The following is a basic review of each section of the System Menu to be used as a quick guide for locating software items and instrument functions. • Settings –Adjustable system settings unrelated to sample analysis • Tools – Calibration and Diagnostic tools used to ensure proper system functionality •... - Page 14 • Calibration – Calibration and validation of the balance, IR temperature sensor, and fan lift offset • System Update – Used for updating software when a new version is released • Networking – IP connection and setup for using the SMART 6 in conjunction with a LIMS Network or Trac instrument •...
- Page 15 • Contact Us – Contact for CEM Headquarters and Subsidiaries • Legal Notice – Legal information concerning the use and distribution of the SMART 6 and other CEM products • Software Notice – System notification pertaining to the software currently loaded on the system...
-
Page 16: System Installation
Specifications” section of this manual. 2. While unpacking, inspect the box, accessory kit and instrument for damage that may have occurred during shipping. If you notice damage, DO NOT attempt instrument set up. Contact your CEM representative for help. WARNING If any damage to the instrument is noted, do not attempt instrument operation. - Page 17 WARNING The SMART 6 weighs 60 pounds (27kg). While it can be safely lifted by a single person, if not lifted and supported properly, a chance of sustaining an injury or damage to the instrument is possible. Using two people to lift the instrument will greatly reduce both risks.
-
Page 18: System Setup
4. Close the instrument cover. WARNING The cover of the SMART 6 will close once it falls below a certain angle. Keep hands and tools clear of the cavity when closing the cover. 5. Position the SMART 6 to provide access to the back of the instrument. - Page 19 CEM Corporation recommends that the power cord be connected to a dedicated AC power outlet and that the power switch remains in the ON position at all times. After 15 minutes of idle time, the SMART 6 assumes a “sleep” mode.
- Page 20 14.4. If English is not the preferred language, select Language to scroll through and select the applicable system language. NOTE If the language is changed, the SMART 6 will reboot once the SAVE icon is selected. 14.5. Select Date Format to enter the desired format for displaying the date (MM/DD/YYYY, DD/MM/YYYY or YYYY/MM/DD).
- Page 21 See the ORACLE or Trac Fat Analyzer manual if connecting at this time. 19. Register the system by accessing www.cem.com and selecting “account” from the top right corner. • For new logins, select “Signup” from the menu and follow the instructions. Name, contact information, and unit serial numbers are required for a new login.
- Page 22 20. Additional SMART 6 methods can be imported at this time. Refer to the “Importing and Exporting” section of this manual. • For applications support or information on available methods, contact our support team at process.support@ cem.com or visit our website at www.cem.com.
-
Page 23: Sample Analysis
Glass Fiber Pads All SMART 6 systems use the CEM glass fiber sample pads to assist in rapid and accurate testing. The pads are specially designed to support the sample being tested without absorbing heat, but remaining porous enough to let moisture freely evaporate. - Page 24 WARNING Improper sample preparation and spread techniques can create an unsafe testing environment due to fire or volatiles in the cavity. • Pipette – For highly absorbent, high moisture samples (>85% moisture), pipette the sample onto the center of the top sample pad. The sample will fully absorb into the pad within a few seconds, after which the analysis can begin.
-
Page 25: Perform A Method
Improper sample preparation or tempering can reduce accuracy and repeatability. For further information on sample preparation contact us at (800) 726-3331 or email us at process.support@cem.com. 1. From the home screen, select either Classic Method or One Touch Method, based on the method to be per- formed. - Page 26 5. Close the SMART 6 cover. Press the green TARE button on the screen. WARNING The cover of the SMART 6 will close on its own once the cover falls below a certain angle. Keep hands and tools clear of the SMART 6 cavity when closing the cover.
- Page 27 If the system does not begin to heat within 10 seconds of pressing start, press STOP and contact CEM Service (800) 726-5551. 8. During the analysis, two screens are available for viewing •...
-
Page 28: Perform A Wastewater Method
3. Expel a sufficient amount of sample to be within the designated weight specification that was determined during method development. 4. Reweigh the syringe, and the SMART 6 will calculate the weight loss of the syringe as the initial weight. Perform a Method... -
Page 29: Perform An Ash Method
(2) minutes. The SMART 6 is able to analyze the drying curve of a specific sample type and apply an algorithm to the testing in order to achieve an accurate final result in up to half the test time. -
Page 30: Method - Create, Edit And Delete
Method - Create, Edit and Delete The SMART 6 is supported by the expert application team at CEM Corporation, and this team has collected a library of methods to make method development and validation easier and faster. If there is a method in the library that matches the description of the sample being analyzed, the method can be downloaded to a USB flash drive and imported into the SMART 6. - Page 31 • Moisture/Fat/Protein (Dry) NOTE Moisture/Fat, Moisture/Fat/Protein(Dry) methods require the use of a CEM Fat analyzer. For details on creating this type of method, refer to the Operation Manual for the corresponding Fat analyzer. 3.4. Choose the Option that best analyzes the sample.
- Page 32 This analysis requires an external balance to be connected to the SMART 6. 3.5. Designate the desired unit of measurement (Moisture or Solids) by toggling Calculation Mode. This will be the unit displayed first in databases and printouts, but both Moisture and Solids values can be accessed for any sample.
- Page 33 5. Select the “Parameters” tab. 5.1. Once in the system parameters, determine if the stage will be a Set Time or Constant Weight analysis. NOTE If creating multiple stages, only the final stage can be a Constant Weight stage. All previous stages must use Set Time.
- Page 34 trolled ramp and do not reach the temperature immediately upon analyzing the sample. 5.3. Constant Weight - The method will complete the analysis only when the weight reaches a stable end- point, which is determined in the category that was chosen in the method settings. 5.3.1.
- Page 35 WARNING Improper sample preparation and spread techniques can create an unsafe testing environment due to fire or volatiles in the cavity. 6.3. iDri can be set to OFF (default), ON, or COMBO. If iDri is turned ON, an iDri bias must also be added for accurate iDri analysis.
-
Page 36: Create A Classic Method
Create a Classic Method 1. Select Classic Methods from the Home Screen. 2. Select the plus icon in the top right corner of the screen. 3. Once in the method development screen, enter the “Settings” tab. 3.1. Enter a unique method name to easily link the method to the sample type being analyzed. 3.2. - Page 37 NOTE Moisture/Fat and Moisture/Fat/Protein methods require the use of a CEM Fat analyzer. For details on creating this type of method, please refer to the Operation Manual for the corresponding Fat analyzer. 3.3. Choose the option that best analyzes the sample.
- Page 38 • Delta Weight – The maximum amount of variance the weight changes over the length of the Delta Time. • Delta Time – The length of time in which the weight must not change more than the Delta Weight. • Ambient Fan Speed – The amount of airflow being pulled through the sample cavity to remove moisture.
- Page 39 NOTE If creating multiple stages, only the final stage can be a Constant Weight stage. All previous stages must use Set Time. 6.1. Set Time - The method will run for a preset length of time, regardless of sample size or final weight. 6.1.1.
- Page 40 7.4. Weight compensation determines compensation of the buoyancy effect of the heated sample. NOTE Do not turn off the Weight Compensation unless instructed to do so by a CEM representative. CAUTION Not following proper sample preparation and spread techniques can lead to a reduction in precision, inaccurate results, or even damage the system.
-
Page 41: Create A Profat Method
Create a ProFat Method This option is only applicable to users who purchased the ProFat system. These methods are not available to users of a standard SMART 6 system. 1. Choose One Touch Methods from the Home Screen. 2. Choose the plus icon in the top right corner of the screen. - Page 42 • Standard – Loss on Drying (LOD) analysis only for testing Moisture, Solids, or Volatile content. It calculates the difference between initial weight and final weight. • Ash – After the SMART 6 step, place the sample in an ashing furnace, then return it to the SMART 6 for a final weight measurement.
- Page 43 4.1. Select the Plus button to create a new stage. If the method will be a single stage method, the user does not need to return to the Stages tab. For multi-stage methods, return to the Stages Tab after setting the method parameters to create additional stages. 5.
- Page 44 5.2.2. Set the run time for each analysis. 5.2.3. Set the Maximum temperature for the sample type. Some category parameters contain a con- trolled ramp and do not reach the temperature immediately upon analyzing the sample. 5.3. Constant Weight - The method will complete the analysis only when the weight reaches a stable end- point, which is determined in the category that was chosen in the method settings.
- Page 45 proportion of each product if there are 2 or more products being blended. The sum of all the propor- tions must equal 100.00% (50%/50%, 75%/20%/5%, etc). 6.5. If the product has any additional additives (such as added water, salt, spices, etc), these should be added in the Bias section.
-
Page 46: Edit Method
Edit Method Only Administrators can edit methods. 1. From the methods screen, long hold the method to be edited until the additional menu icons appear. 2. Select the edit icon. 3. The method settings, number of stages, stage parameters, and details can now be edited. 4. -
Page 47: Delete Method
Delete Method Only Administrators can delete methods. 1. From the methods screen, long hold the method to be deleted until the additional menu icons appear. At this time, multiple methods can be selected. 2. Select the delete Icon. 3. Select “OK” to delete the methods. Method - Create, Edit and Delete... -
Page 48: Users
Users Create User Only Administrators can create new users. 1. From the Home screen, select the System Menu icon in the bottom right corner of the screen. 2. Select Users. 3. Select Add User. 4. Select Name. 5. Using the keypad, enter the desired user name, using a maximum of 16 characters. Press the Hide Keypad icon on the bottom right of the keypad to return to the Add User screen. - Page 49 access, and is able to create and edit methods and make system setting changes. If toggled off, the user only has Basic access, which is capable of choosing different methods and running samples only. While there may be multiple Administrator and Basic users, every system must maintain at least one Administrator. 7.
-
Page 50: Edit/Delete User
Edit/Delete User Only Administrators have the privilege to edit/delete. A Basic (non-Administrator) user can only edit their password. 1. From the Home screen, select the System Menu icon in the bottom right corner of the screen. 2. Select Users. 3. Select the user to edit/delete. 4. -
Page 51: Auto Login
Auto Login Auto Login determines if the SMART 6 automatically logs in as an assigned user or prompts the operator to select a user and enter a password, upon initial powering. 1. From the Home screen, select the System Menu icon in the bottom right corner of the screen. -
Page 52: Logs
• If Auto Login is set to “ON”, the Home Screen will be displayed once the SMART 6 completes the initial powering. Logs The User Logs is an account of user activity including: Method Import/Export, methods run, user login/logout, and edit/delete users. -
Page 53: Method Import And Export
Method Import and Export Years of customer interaction have helped to compile a library of methods with parameters spanning a large range of sample types. These methods can be easily transferred to any SMART 6 system following the steps below. Import Only Administrators can import methods. -
Page 54: Export
6. The methods to be imported should be listed on the left side of the screen. Once the correct method is cho- sen, press the Import icon located in the top right corner of the screen. If the USB is fully plugged in and no methods are shown, the method is not in the correct file configuration. - Page 55 been installed. 6. The method will export to the USB stick and display a final window that the export has been successful. NOTE If the USB stick already contains the method to be exported or a different method that has the same name as the method, a prompt window will request whether or not to overwrite the current method.
-
Page 56: Data Management
Data Management The SMART 6 is equipped with a variety of options to store and review data. It comes equipped with an internal database which can store a large number of methods. Each method stores up to 50 results that can be recalled and analyzed as needed by the user. -
Page 57: Smart 6 Statistics
SMART 6 Statistics The SMART 6 can analyze a number of statistical values on the data within each method. Similar to the Information Icon, the Statistics Icon can be accessed from two different locations; however, the data and analysis will be the same. - Page 58 5. After the data range has been set, select the Search icon to access the statistical analyses. The SMART 6 will include the Average, Minimum result, Maximum Result, Results Range, and Standard Deviation. It will also list all samples being used to compile the statistical analysis.
-
Page 59: Smart 6 Printer
SMART 6 Printer The SMART 6 can print data to assist users in creating and maintaining a paper copy of the results. An internal printer can be purchased as an option, or an external printer at the customer site can be connected to the SMART 6 for printing. -
Page 60: Internal Printer
Data will provide more information on the method and sample analyzed, such as method parameters and sample biases. 3. When connecting the printer to the SMART 6 or reconnecting it due to a loss of communication between the two systems, select the Add Printer tab. - Page 61 5. If the printer name is not automatically inserted on the screen, type in the name of the printer for future identi- fication. 6. Do not attempt automatic installation. Choose NO when prompted to perform the manual printer installation. 7. Once the list of printer manufacturers loads, select SII as the internal printer. SMART 6 Printer...
- Page 62 CEM Corporation. 9. Once the correct driver has been specified, select Install to complete the process. The SMART 6 will prompt the user to print a test page to insure the installation process was successful. Once the test page has been printed, select Close to return to the Print menu.
-
Page 63: External Database And Networks
1. Using the available ports in the rear of the instrument, connect one end of a USB-TypeB to USB-TypeA cable to the second USB Type B port in the back of the SMART 6 (See below). Connect the other end of the cable to a computer that is connected to the network or database that will store the SMART 6 results. - Page 64 External Database and Networks...
-
Page 65: Software Update
1. Using a computer, create a folder titled “CEM” on the USB. 2. Download the SMART 6 software and copy into the “CEM” folder on the USB. 3. Insert the USB containing the software update bundle (*.cib) into the USB port located on the side of the unit. -
Page 66: Smart 6 Maintenance
SMART 6 Maintenance The SMART 6 is designed for durability and is intuitive enough to be used on a production floor as well as in a laboratory setting. Therefore, there are relatively few maintenance procedures for the SMART 6 as compared to other moisture/solids analyzers. - Page 67 • To verify that the cover is sealing and the interlock system is working properly, the SMART 6 should be routinely tested for microwave leakage. To test for leakage, operate the instrument at 100% power for five (5) minutes.
-
Page 68: One Touch Category Parameters
One Touch Category Parameters Category Parameters Each category contains a unique combination of method parameters that optimize the analysis of each sample. Name Ramp Time Ramp Temp Delta Wt Delta Time Fan Off Fan Speed Ambient Speed Milk Dairy Cheese Meat Condiments Plastic... -
Page 69: System Specifications
Location • Designated area with a sturdy, non-flammable workbench capable of handling at least the weight of the system • SMART 6 & ProFat Weight = 55 lbs (25 kg) • SMART Q Weight = 38 lbs (18 kg) • Provides adequate space for sample preparation •... - Page 70 Data Storage • Unlimited methods. Each method stores up to 50 results Display • Touchscreen interface with menu-driven software Accessory Ports • 4 x USB-a, 2 x USB-b, 1 x Ethernet Printer Options • Optional internal thermal printer • Request list of compliant external printers Fan Power % Fan Power CFM 10.5...
- Page 71 Limited Warranty Information What Is Covered: CEM Corporation warrants that the instrument will be free of any defect in parts or workmanship and will, at its option, replace or repair any defective part (excluding consumables) or instrument. For How Long: This warranty remains in effect for 365 days from date of delivery to the original purchaser.
- Page 72 No warranty, express or implied, extends beyond the face hereof. CEM Corporation shall not be liable for loss of use of instrument or other incidental or consequential costs, expenses or damages incurred by the purchaser or any other user. This warranty is not transferable.
- Page 73 Address: Via Dell Artigianato, 6/8 24055 Cologno Al Serio (BG) Italy Web Address: http://www.cemmicroonde Email: info.srl@cem.com Japan: CEM Japan K.K. Phone: +81-3-5793-8542 Fax: +81-3-5793-8543 Address: 2-18-10 Takanawa Minato-Ku Tokyo 108-0074 Japan Web Address: http://www.cemjapan.co.jp Email: info@cemjapan.co.jp UK: CEM Microwave Technology Ltd. Phone: +44-1-280-822873 Fax: +44-1-280-822342 Contact Information...
- Page 74 Email: info.ireland@cem.com CEM Distributors For a complete list of distributors of CEM products, including contact information, go to the CEM website (http:// www.cem.com), select Contact, and then select your region to see a list of distributors by country. Contact Information...
- Page 75 THIS PAGE INTENTIONALLY LEFT BLANK...
- Page 76 All Rights Reserved. This guide contains registered trademarks of CEM Corporation. December 2, 2020 proprietary information which shall not be SMART 6 and iDri are a trademark of CEM Rev. 6 reproduced or transferred to other documents Corporation. Copyright CEM Corporation 2020 or disclosed to others without prior written permission of CEM Corporation.
Need help?
Do you have a question about the SMART 6 and is the answer not in the manual?
Questions and answers
My screen is blank, how do I make it come on?
To turn on a blank screen on a CEM SMART 6, locate the power switch on the right side of the instrument and set it to the ON position. Make sure the power cord is plugged into a dedicated electrical outlet. Once powered, the Home Screen will be displayed.
This answer is automatically generated
we have an error : default temperature magnet. what can we do, we can't do any analysis.
I don't see in the manual anything about what temperature our samples should be tested at or if that should matter. We are using this to get solid readings for condensed and cream milk products. We have found that if the product is hotter (150F) vs. (40F) we are getting higher solids readings.