
Related Manuals for iBeam TE-CDVR-9QM


Summary of Contents for iBeam TE-CDVR-9QM
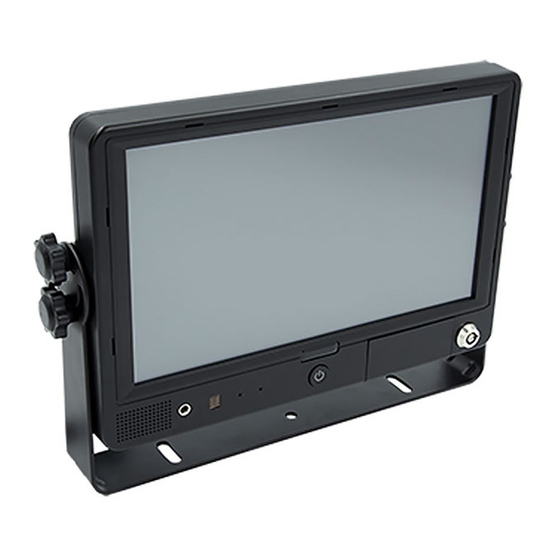
- Page 1 TE-CDVR-9QM User Manual iBeamUSA.com MetraDealer.com techsupport@metra-autosound.com � TECH SUPPORT 800-253-8324...
-
Page 2: Table Of Contents
Contents 1..Precautions................1 2. Accessories ................3 Connections ................. 4 4. Remote Control ..............5 5. Controls ................. 6 6. Operation ................7 6.1 Time and Indicators ............7 6.2 Menu Operation ............7 7. Main Menu ................10 7.1 Record ................ 10 7.2 Display ................ -
Page 3: Precautions
1. Precautions ● Storage and Keeping 1. Do not expose the monitor to excessive heat or cold. The storage temperature of this device is -30~+80℃, and the operating temperature is -20~+70 ℃. Battery operating temperature is 0-70℃.The humidity is Rh90%. 2. - Page 4 Maintenance 1. Remove all the cable connections from the monitor before cleaning the device. 2. Use a mild household detergent and clean the unit with a slightly damp, soft cloth. Never use strong solvents such as thinner or benzine, as they might damage the finish of the device.
-
Page 5: Accessories
2. Accessories U-Support Bracket Center Mount Bracket Power cable Sun Shield Angle Adjustment Screws IR Remote control Keys... -
Page 6: Connections
3.Connections ① White: Camera 1 trigger A: GPS GPS Input ② Blue: Camera 2 trigger B: Camera1 White 4 PIN Female C: Camera2 Blue 4 PIN Female ③ Green: Camera 3 trigger D: Camera3 Green 4 PIN Female ④ Brown: Camera 4 trigger E: Camera4 Brown 4 PIN Female ⑤... -
Page 7: Remote Control
4.Remote Control ② ① ③ ④ ⑤ ⑦ ⑥ ⑧ ⑨ ⑩ ① Mute ⑦ Menu ② Standby ⑧ Display Mode Selection ③ Recording ⑨ Language Selection ④ Volume Decrease ⑩ HDMI Switch ⑤ Volume Increase Event Recording ⑥ Snapshot... -
Page 8: Controls
5. Controls ⑨ ⑤ ① ② ③ ④ ⑥ ⑪ ⑧ ⑦ ⑩ ⑫ ① ⑦ AUX Input Emergency Hole ② ⑧ Remote Receiver Micro SD Slot ③ ⑨ HDMI Input ⑩ ④ Recording Indicator Insert Direction ⑪ Slot Number ⑤... -
Page 9: Operation
6. Operation Touch the bottom area to display menu 6.1 Time and Indicators Top left displays date and time. Top right displays 5 indicators: AUX/Rec/Play/Lock/GPS AUX indicator turns red when AUX audio is inserted on the front panel. Rec indicator turns red when recording. Play indicator turns red when playing back. - Page 10 Year Selection Event Recording List Capture List Month Selection Exit Normal Recording list Video files and snapshots are available in green highlighted dates Delete Select All Play Protect Files Exit filesfffiles Play next file Play last file Pause Video Play Hide Player Menu Exit Volume Adjustment...
- Page 11 Click this icon for snapshot under live recording and playback mode. “Snapshot Success” will display when snapshot is done. Pictures are saved in capture list of player menu. Click this icon to adjust volume under live recording and playback mode. Mute Volume-leveling Value Click this icon to set menu.
-
Page 12: Main Menu
7.Main Menu 7.1 Record Power On Rec: Recording will start when power is on if setting the Power On Rec ON. Cyclic Rec: New video files will overwrite the previous ones when SD cards are full if setting the Cyclic Rec ON. Recording will stop when SD cards are full if setting the Cyclic Rec OFF. -
Page 13: Display
G-sensor Sensitivity: G-sensor Sensitivity is optional for low, middle, high level,which stands for +/-1g, +/-2g, +/-4g. Video Quality: Resolution of video quality is classified into low /middle /high. Default quality is high. 7.2 Display Camera Display Setting Camera Name Setting... - Page 14 Click the camera name in the gray box and input new one with maximum 8 digits. Click this icon to set menu Display time Click Menu Lock Setting to set menu password. Default Password is 123456 Click this icon to turn on / off camera parking lines.
- Page 15 Connect the vehicle speed wire with the monitor speed wire before operation.A full screen of selected camera will be displayed when the vehicle is over speed or underspeed.Click the Option icon to set the speed threshold. Speed recording will start if setting the Speed Rec. ON. There are 2 speed sources: GPS and vehicle speed sensor.
-
Page 16: Storage
Click this icon to set screen on duration and battery power supply duration after external power is off. Click this icon to select video system Under camera mode or HDMI input under non-camera mode. Under Mirror sub-menu, each video input can be set to display in either mirror or non-mirror image. -
Page 17: System
7.4 System Click this icon to display the monitor Software version Click this icon to select language Click this icon to display GPS information... - Page 18 Click this icon to set audio out channel. Click this icon to set device ID and license plate number. The information will be displayed on all the video files to distinguish different vehicles and drivers. Click this icon to set date and time. Year should range between 2000-2037 Click this icon to set scheduled...
-
Page 19: Recording Time
* Overlapped scheduled recording is not allowed. * Recording setting must be resumed if interrupted. * Scheduled recording can be stopped by the control button for regular recording. * If event recording is activated (trigger signal, motion detection, collision etc.), scheduled recording will be paused and then retrieved when event recording is finished. - Page 20 IMPORTANT If you are having difficulties with the installation of this product, please call our Tech Support line at 1-800-253-TECH. Before doing so, look over the instructions a second time, and make sure the installation was performed exactly as the instructions are stated.
Need help?
Do you have a question about the TE-CDVR-9QM and is the answer not in the manual?
Questions and answers