Table of Contents
Advertisement
Quick Links
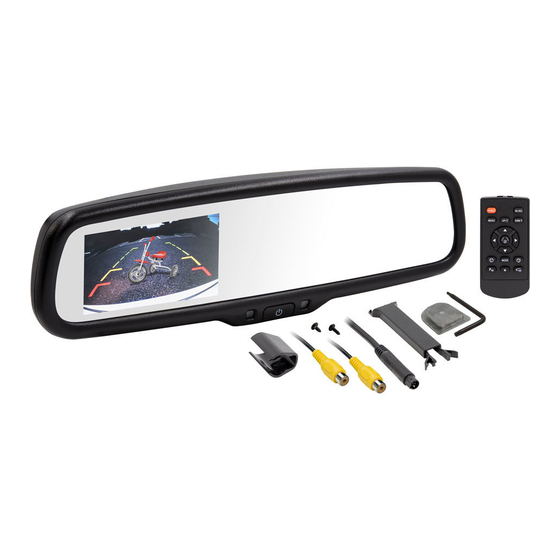
KIT COMPONENTS
• A) Mirror with mount • B) Power harness • C)
A
iBEAM Vehicle Safety Systems
®
Universal
w/ 4.3" Monitor
Visit
iBeamUSA.com
specific applications
Product Features
• Automatic brightness adjustment for monitor
• OE style auto dimming mirror
• 4.3" screen
• 2 video inputs
• Adjustable parking lines via included remote
• Reverse trigger input
Accessories
B
iBEAMUSA.com
OE Style Auto Dimming Mirror
for more detailed information about the product and up-to-date vehicle
C
© COPYRIGHT 2019 METRA ELECTRONICS CORPORATION
TE- AD43
I N S TA L L AT I O N I N S T R U C T I O N S
TABLE OF CONTENTS
Mirror Wiring ...................................................... ...2
Mirror Operation... .................................................3
Brightness Adjustments........................................ 4
Parking Line Adjustments..................................5-6
Specifications..........................................................7
TOOLS REQUIRED
• Cutting/stripping tool • Tape
• Pry tool • Painters tape or chalk
Attention!
When testing the aftermarket
equipment, ensure that all factory equipment
is connected before cycling the key to
ignition.
REV. 4/11/19 INSTTE-AD43
Advertisement
Table of Contents

Related Manuals for iBeam TE-AD43


Summary of Contents for iBeam TE-AD43
- Page 1 • A) Mirror with mount • B) Power harness • C) Accessories Attention! When testing the aftermarket equipment, ensure that all factory equipment is connected before cycling the key to ignition. iBEAM Vehicle Safety Systems iBEAMUSA.com ® REV. 4/11/19 INSTTE-AD43 © COPYRIGHT 2019 METRA ELECTRONICS CORPORATION...
- Page 2 MIRROR WIRING Mirror Wiring: (Figure A) 1. Connect the BLACK wire to chassis ground. 2. Connect the RED wire to 12V accessory. 3. Connect the GREEN wire to a positive reverse trigger. 4. Connect the YELLOW female RCA Camera RCA labeled CAMERA to the reverse camera male RCA.
- Page 3 MENU OPERATION Menu Operation: Button Operation On the remote: (Figure B) • Short press of MENU button allows you to switch between the menus. ( Figure B, 1 ) • Press SEL/REC to switch among the options. ( Figure B, 2) •...
- Page 4 BRIGHTNESS ADJUSTMENTS Automatic Brightness Adjustment The brightness of the monitor screen will vary with the ambient light. This provides the driver with a clear view of the screen in different lighting situations when reversing. Weak Light When the ambient light is weak, the screen will automatically reduce the brightness of the screen to provide a better visual.
- Page 5 PARKING GUIDELINE ADJUSTMENT Parking Guideline Adjustments NOTE: The guideline adjustments can ONLY be done while the vehicle is in reverse and the backup image is on the screen. • Pressing the center button will enter the adjustment mode. The system starts by adjusting the left line first.
- Page 6 When setting the guidelines it is suggested to use the grid and measurements in Figured K as a guideline. iBEAM suggests laying tape or using chalk to mark off the measurements to properly assist in adjusting the guidelines. When calibrating the guidelines, there will be numbers on the top of the screen.
- Page 7 MIRROR SPECIFICATIONS REV. 4/11/2019 INSTTE-AD43...
- Page 8 Log onto www.installerinstitute.com or call 800-354-6782 for more information and take steps toward a better tomorrow. Metra recommends MECP certified technicians iBEAM Vehicle Safety Systems iBEAMUSA.com ® © COPYRIGHT 2019 METRA ELECTRONICS CORPORATION REV. 4/11/19 INSTTE-AD43...
Need help?
Do you have a question about the TE-AD43 and is the answer not in the manual?
Questions and answers