
Related Manuals for Magnetrol Orion Jupiter Enchanced 2 Series


Summary of Contents for Magnetrol Orion Jupiter Enchanced 2 Series
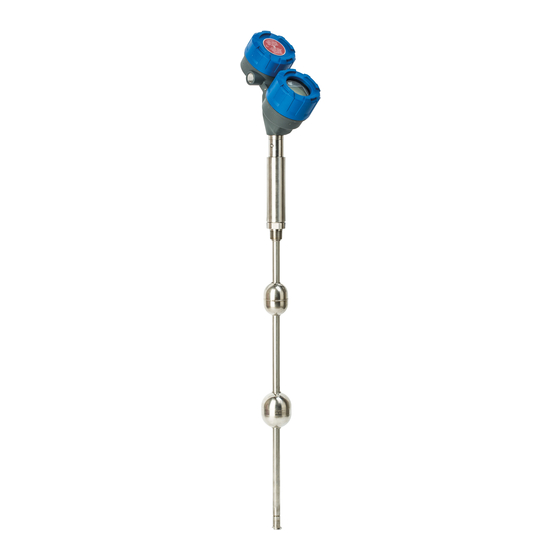
- Page 1 All manuals and user guides at all-guides.com Enhanced Model 2xx Fieldbus ™ Digital Output OUNDATION Software v3.x Fieldbus ™ Operating Manual OUNDATION Magnetostrictive Level Transmitter A Magnetrol Company...
- Page 2 Notes do not normally contain described in this manual at any time without notice. actions. They follow the procedural steps to which Magnetrol makes no warranty with respect to the accuracy they refer. of the information in this manual.
-
Page 3: Table Of Contents
All manuals and user guides at all-guides.com Fieldbus Enhanced Jupiter Model 2xx ® ™ OUNDATION Magnetostrictive Level Transmitter Table of Contents 1.0 F fieldbus Overview ........1 4.0 Diagnostic Parameters ..........17 ™ OUNDATION 1.1 Description ...............1 4.1 Simulation Feature ..........18 1.2 Benefits ..............2 5.0 Reference Information..........19 1.3 Device Configuration..........2 5.1 Troubleshooting ............19... -
Page 4: Foundation
All manuals and user guides at all-guides.com Fieldbus Overview ™ OUNDATION Description fieldbus is a digital communications system ™ OUNDATION that serially interconnects devices in the field. A Fieldbus system is similar to a Distributed Control System (DCS) with two exceptions: •... -
Page 5: Benefits
OUNDATION interoperability by the Fieldbus Foundation. Orion Instruments Jupiter device registration can be found at www.fieldbus.org. Choose Magnetrol as the device manu- facturer when searching for the registration. 2. Operation: With control now taking place within the devices in the field, better loop performance and control are the result. -
Page 6: Intrinsic Safety
All manuals and user guides at all-guides.com An important requirement of Fieldbus devices is the inter- operability concept mentioned earlier. Device Description (DD) technology is used to achieve this interoperability. The DD provides extended descriptions for each object and provides pertinent information needed by the host system. DDs are similar to the drivers that your personal computer (PC) uses to operate peripheral devices connected to it. -
Page 7: Complete Installation
Caution: Do not discard the shipping container until all parts are accounted for and inspected. Electrostatic Discharge (ESD) Handling Procedure Magnetrol/Orion’s electronic instruments are manufac- tured to the highest quality standards. These instruments use electronic components that may be damaged by static electricity present in most work environments. -
Page 8: Before You Begin
All manuals and user guides at all-guides.com Before You Begin Caution: This instrument is intended for use in Installation Category II, Pollution Degree 2 locations. 2.3.1 Site Preparation Each Jupiter magnetostrictive transmitter is built to match the specifications required within the defined model option number. -
Page 9: Operational Considerations
All manuals and user guides at all-guides.com 2.3.3 Operational Considerations Exterior ambient temperature of the service should not exceed the design specifications of the electronics (-40° to +175° F (-40° to +80° C)). The operating temperature limits of the LCD are -5° to +160° F (-20° to +70° C). Temperatures below -5°... -
Page 10: Internal, Direct Insertion
All manuals and user guides at all-guides.com 2. Position the Jupiter transmitter on the side of the MLI where it will be attached. Mark the location and the exact area where the clamps will be attached to hold the Jupiter in place. -
Page 11: Wiring
All manuals and user guides at all-guides.com Wiring Caution: The Jupiter magnetostrictive transmitter operates at volt- ages of 9-32 VDC (nominal voltage is 24 VDC). Higher voltages will damage the transmitter. Wiring between the power supply and the Jupiter transmitter should be made using 18–22 AWG shielded Red (+) Black (-) twisted pair instrument cable. -
Page 12: Function Blocks
All manuals and user guides at all-guides.com 8. Power may be applied to the instrument when the installa- tion is complete and has been checked by the instrument engineer or safety officer. Function Blocks Overview The Enhanced Jupiter Model 2xx is a level transmitter with four F fieldbus Function Blocks (one Resource... -
Page 13: Resource Block
RESOURCE block state machine. Under normal operating conditions, it should be “On-Line.” DD_RESOURCE: a string identifying the tag of the resource that contains the Device Description for this device. MANUFAC_ID: contains Magnetrol International’s fieldbus ™ manufacturer’s ID number, which is OUNDATION 0x000156. - Page 14 All manuals and user guides at all-guides.com DD_REV: contains the revision of the DD associated with the version of firmware in the Enhanced Jupiter transmitter. It is used by interface devices to correctly select the associated RESTART: Default and Processor selections are available. Default will reset the Jupiter to the established block configuration.
- Page 15 All manuals and user guides at all-guides.com FAULT_STATE, SET_FSTATE, CLR_FSTATE: these only apply to output function blocks. (The Model 2xx has no output function blocks). MAX_NOTIFY: the maximum number of alert reports that the transmitter can send without getting a confirmation. The user can set the number low, to control alert flooding, by adjusting the LIM_NOTIFY parameter value.
-
Page 16: Transducer Block
All manuals and user guides at all-guides.com Transducer Block The TRANSDUCER block is a custom block containing parameters that support the enhanced level transmitter. It contains the Jupiter probe configuration, diagnostics, and calibration data, and outputs level with status information. The TRANSDUCER block parameters are grouped in a useful configuration. -
Page 17: Jupiter Configuration Parameters
All manuals and user guides at all-guides.com 3.3.3 Jupiter Configuration Parameters This set of parameters within the Transducer Block is important and required to configure every Jupiter transmitter. Sensor Mount MEASUREMENT_TYPE Select from LEVEL_ONLY or LEVEL&INTERFACE. 100% Set Point PROBE_LENGTH Enter the exact length of probe. The probe length is shown as the last 3 digits of the probe model number printed on the nameplate attached to the transmitter. -
Page 18: Firmware Version
All manuals and user guides at all-guides.com 3.4.2 Firmware Version The last two parameters in the TRANSDUCER block show the firmware version of the transmitter. FIRMWARE_VERSION: displays the version of the firmware. COPROCESSOR_VERSION: displays the version of the coprocessor. Analog Input Block The ANALOG INPUT (AI) block takes the transducer blocks input data, selected by channel number, and makes it available to other function blocks at its output:... - Page 19 All manuals and user guides at all-guides.com CHANNEL: The number of the logical hardware channel that is connected to this I/O block. This information defines the transducer to be used going to or from the physical world. L_TYPE: Determines if the values passed by the transducer block to the AI block may be used directly (Direct) or if the value is in different units and must be converted linearly (Indirect), or with square root (Ind Sqr Root), using the...
-
Page 20: Diagnostic Parameters
All manuals and user guides at all-guides.com HI_ALM: The status for high alarm and its associated time stamp. LO_ALM: The status for low alarm and its associated time stamp. LO_LO_ALM: The status for low low alarm and its associated time stamp. The TRANSDUCER and AI block’s MODE_BLK parame- ter must be set to AUTO to pass the PV Value through the AI to the network. -
Page 21: Simulation Feature
All manuals and user guides at all-guides.com When the Model 2xx transmitter is initially powered on, the measurement engine does not have enough valid meas- urement cycles to make a decision about the output level. For the first sixteen measurement cycles after power is applied, the QUALITY is “Uncertain,”... -
Page 22: Reference Information
All manuals and user guides at all-guides.com Reference Information Troubleshooting The Jupiter transmitter is designed and manufactured for years of trouble free operation over a wide range of condi- tions. Common transmitter problems are discussed in terms of their symptoms and recommended corrective actions. -
Page 23: Status Messages
All manuals and user guides at all-guides.com 5.1.2 Status Messages Display Message Action Comment None Normal operating mode Initial None Shown at power-up during self check Default Cal Factory set default calibration parameters Consult Factory are in use, level reading may be inaccurate Lo Temp Present temperature in electronics Transmitter may need to be moved... -
Page 24: Ff Segment Checklist
All manuals and user guides at all-guides.com 5.1.3 FF Segment Checklist There can be several reasons for a F fieldbus ™ OUNDATION installation to be in a faulty condition. In order to assure that communication can be established, the following requirements must be met. -
Page 25: Agency Approvals
All manuals and user guides at all-guides.com Agency Approvals AGENCY MODEL PROTECTION METHOD AREA CLASSIFICATION FM & CSA 2X1-XXXXXXX-XXX Intrinsically Safe Class I, Div. 1: 2X2-XXXXXXX-XXX Groups A, B, C, & D Class II, Div. 1: 2X3-XXXXXXX-XXX 2X4-XXXXXXX-XXX Groups E, F, & G Class III, IP66 TYPE 4X, T4 FISCO Explosion Proof Œ... -
Page 26: Agency Drawing
All manuals and user guides at all-guides.com 5.2.3 Agency Drawing 46-649 Jupiter Magnetostrictive Transmitter - F fieldbus™ OUNDATION... - Page 27 All manuals and user guides at all-guides.com 5.2.3 Agency Drawing 46-649 Jupiter Magnetostrictive Transmitter - F fieldbus™ OUNDATION...
-
Page 28: Specifications
All manuals and user guides at all-guides.com Specifications 5.3.1 Functional System Design Measurement Principle Magnetostrictive time-of-flight Input Measured Variable A return signal is generated from the precise location where the magnetic field of the MLI float intersects the magnetostrictive wire Zero and Span 6 inches to 400 inches (15 to 999 cm) User Interface... -
Page 29: Physical
All manuals and user guides at all-guides.com Specifications 5.3.3 Physical Enclosure finish: Baked on polymer powder coat Enclosure rating: NEMA 4X7/9, IP 66 11.5 (292) (279) Sensor length: 6 to 400 inches (15 to 999 cm) 12.5 (203) (318) Inches (mm) 8.00 (203) 11.5... -
Page 30: Parts
All manuals and user guides at all-guides.com Parts 5.4.1 Replacement Parts Item Description Part Number Œ Electronic module Display & F fieldbus 031-2840-001 ™ OUNDATION Terminal board fieldbus ™ 030-9151-004 OUNDATION Ž O-ring (Viton ® 012-2201-237 Aluminum housing cover without glass 004-9193-002 ... -
Page 31: Model Numbers
All manuals and user guides at all-guides.com Model Numbers 5.5.1 Enhanced Jupiter Magnetostrictive Transmitter TRANSMITTER TYPE Enhanced Jupiter Magnetostrictive OUTPUT LCD display, 4–20 mA & HART, SIL 1 LCD display & F Fieldbus ™ OUNDATION LCD display, 4–20 mA & HART, SIL 2 Œ Interface transmitter, 4–20 mA &... - Page 32 All manuals and user guides at all-guides.com Model Numbers 5.5.1 Enhanced Jupiter Magnetostrictive Transmitter MOUNTING CONNECTION None, defines external mount 4'' 2500# RF ANSI Flange ⁄ " NPT thread 4" 600# RTJ ANSI Flange 1" BSP thread 4" 900# RTJ ANSI Flange 1"...
- Page 33 All manuals and user guides at all-guides.com Model Numbers 5.5.1 Enhanced Jupiter Magnetostrictive Transmitter FLOAT The floats listed below are suitable for most applications. Consult factory for custom floats. For models with 2 floats, choose top float below, then consult factory for second float selection. For externally mounted models use float code “00”. DIRECT INSERTION TOTAL LEVEL FLOAT SELECTION Minimum Liquid 316/316L SS...
-
Page 34: References
All manuals and user guides at all-guides.com 5.6 References 1. F fieldbus , A Pocket Guide ™ OUNDATION Ian Verhappen, Augusto Pereira 2. F fieldbus ™ —System Engineering Guidelines, AG–181 OUNDATION Appendix – Transducer Block Parameters ITEM PARAMETER NAME PARAMETER LABEL ITEM PARAMETER NAME PARAMETER LABEL... -
Page 35: Configuration Data Sheet
All manuals and user guides at all-guides.com Jupiter Magnetostrictive Transmitter ® Configuration Data Sheet Copy blank page and store calibration data for future reference and troubleshooting. Item Value Value Value Vessel Name Vessel # Media & Dielectric Tag # Serial # TROUBLESHOOTING Level Correct Value... - Page 36 No claims for misapplication, labor, direct or consequen- tial damage will be allowed. 5300 Belmont Road • Downers Grove, Illinois 60515-4499 • 630-969-4000 • Fax 630-969-9489 • www.magnetrol.com 145 Jardin Drive, Units 1 & 2 • Concord, Ontario Canada L4K 1X7 • 905-738-9600 • Fax 905-738-1306 Heikensstraat 6 •...
Need help?
Do you have a question about the Orion Jupiter Enchanced 2 Series and is the answer not in the manual?
Questions and answers