Sign In
Upload
Download
Table of Contents
Contents
Add to my manuals
Delete from my manuals
Share
URL of this page:
HTML Link:
Bookmark this page
Add
Manual will be automatically added to "My Manuals"
Print this page
×
Bookmark added
×
Added to my manuals
Manuals
Brands
METREL Manuals
Test Equipment
AlphaPAT
Instruction manual
METREL AlphaPAT Instruction Manual
Hide thumbs
1
2
Table Of Contents
3
4
5
6
7
8
9
10
11
12
13
14
15
16
17
18
19
20
21
22
23
24
25
26
27
28
29
30
31
32
33
34
35
36
37
38
39
40
41
42
43
44
45
46
47
48
49
50
51
52
53
54
55
56
page
of
56
Go
/
56
Contents
Table of Contents
Bookmarks
Table of Contents
Table of Contents
1 General Description
Warnings
Warning Markings on Connector Panel
Standards Applied
2 Instrument Description
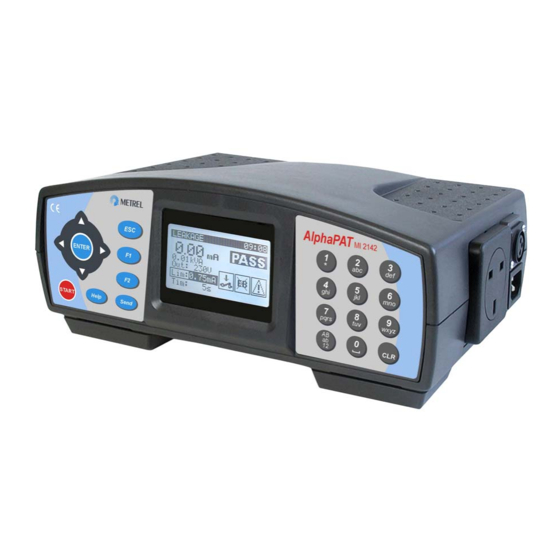
Front Panel
Connector Panels
Bottom Side
Safety Pre-Tests
Meaning of Symbols and Messages on the Instrument Display
3 Technical Specifications
Earth Bond Resistance
Insulation Resistance
Substitute Leakage Current
Leakage Current and Apparent Power
Touch Leakage Current
Polarity Test
TRMS Current
General Data
4 Main Menu and Test Modes
Help Menus
How to Enter Help Menu
Main Menu
Autotest Shortcut Menu
Autotest Custom Menu
Single Test Menu
Recall Results Menu
Autotest TAG Menu
Setup Menu
5 Single Test Mode
How to Perform Measurements in Single Test Mode
6 Measurements
Earth Bond Resistance
How to Perform Single Earth Bond Resistance Measurement
Insulation Resistance
Insulation Resistance on Class I Appliances
Insulation Resistance on Class II Appliances
How to Perform Single Insulation Resistance Measurement
Substitute Leakage Current
Substitute Leakage Current on Class I Appliances
Substitute Leakage Current on Class II Appliances
How to Perform Single Substitute Leakage Current Measurement
Leakage Current and Power
How to Perform Single Leakage Current Measurement
Touch Leakage Current
How to Perform Single Touch Leakage Current Measurement
Polarity Test
How to Perform the Measurement
True RMS Current Measurement
How to Perform TRMS Clamp Current Measurement
7 Autotest Modes
Autotest Shortcut Menu
How to Set the Autotest Shortcut Sequence
How to Set Autotest Parameters
How to Set or Enter Autotest Shortcut Code
How to Set Autotest Sequence by Using Barcode Reader
How to View Autotest Shortcut Sequence Measurement Parameters
How to Start Autotest Shortcut Sequence
Autotest Custom Menu
How to View And/Or Change an Existing Autotest Custom Sequence
How to Save the Autotest Custom Sequence
How to Delete an Existing Custom Test Sequence from the List
How to Start Custom Autotest Sequence
Autotest TAG Menu
How to View Autotest Sequence from RFID TAG
How to View And/Or Save Autotest Results from TAG
How to Send an Autotest Sequence/Results to TAG
Performing Autotest Sequences
Visual Inspection
Earth Bond Resistance Measurement
Insulation Resistance Measurement
Substitute Leakage Current Measurement
Leakage Current and Apparent Power Measurement
Touch Leakage Current Measurement
Polarity Test
TRMS Clamp Current Measurement
8 Saving and Recalling Autotest Results
Autotest Save Results Menu
How to View Autotest Sequence Results
How to Save Autotest Sequence Results
How to Download or Send Autotest Sequence Results
Recall Results Menu
How to Search for and Recall Saved Autotest Results
How to Delete Saved Autotest Results
How to Download or Send Stored Autotest Results
9 Measuring 110 V Appliances
110 V Adapter
How to Perform Measurements by Using 110 V Adapter
10 Other Instrument Operations
Setup Menu
Setting Date and Time
Display Contrast Adjustment
Language Selection
Viewing of Instrument Data
Serial Communication Port Settings
Reset Instrument Settings
11 Maintenance
Periodic Calibration
Fuses
Service
Cleaning
12 Instrument Set and Accessories
Advertisement
Quick Links
1
Autotest Shortcut Menu
2
Autotest Shortcut Menu
3
How to Download or Send Autotest Sequence Results
4
Instrument Set and Accessories
Download this manual
AlphaPAT
MI 2142
Instruction manual
Ver. 1.2. Code no. 20 750 748
Table of
Contents
Previous
Page
Next
Page
1
2
3
4
5
Advertisement
Table of Contents
Need help?
Do you have a question about the AlphaPAT and is the answer not in the manual?
Ask a question
Questions and answers
Related Manuals for METREL AlphaPAT
Test Equipment METREL A 1322 Instruction Manual
3p-active gt / machine (38 pages)
Test Equipment METREL A 1422 Instruction Manual
3p-active gt / machine (38 pages)
Test Equipment METREL Eurocheck CS 2099 User Manual
Professional, multifunctional field calibrator intended for use with metrel installation test instruments (24 pages)
Test Equipment METREL MI 2142 Instruction Manual
(56 pages)
Test Equipment METREL MI 3200 User Manual
Teraohm 10 kv (46 pages)
Test Equipment METREL MI 3125 Short Instructions
Eurotestcombo multifunction tester (24 pages)
Test Equipment METREL MI 3108 EurotestPV Instruction Manual
Combined photovoltaic tester and electrical installations safety tester (117 pages)
Test Equipment METREL EurotestXA MI 3105 Instruction Manual
Multifunctional hand-held installation tester (136 pages)
Test Equipment METREL TeraOhm User Manual
5 kv (36 pages)
Test Equipment METREL MI 2094 User Manual
Multitester (80 pages)
Test Equipment METREL Eurotest 61557 User Manual
(96 pages)
Test Equipment METREL DeltaPAT MI 3309 BT Instruction Manual
(84 pages)
Test Equipment METREL Earth 2/3 Instruction Manual
(20 pages)
Test Equipment METREL EasiPLUS MI 3000 Instruction Manual
(68 pages)
Test Equipment METREL MI 3340 AlphaEE XA Instruction Manual
(131 pages)
Test Equipment METREL BetaPAT MI 2141 User Manual
Portable appliance testers (60 pages)
This manual is also suitable for:
Mi 2142
Table of Contents
Print
Rename the bookmark
Delete bookmark?
Delete from my manuals?
Login
Sign In
OR
Sign in with Facebook
Sign in with Google
Upload manual
Upload from disk
Upload from URL


Need help?
Do you have a question about the AlphaPAT and is the answer not in the manual?
Questions and answers