Advertisement
Quick Links
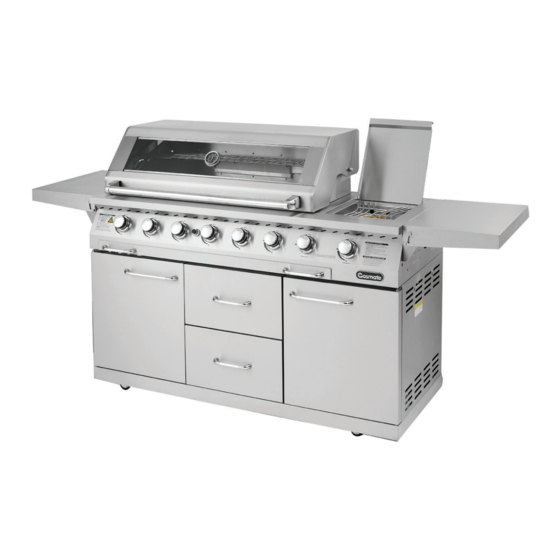
PROFESSIONAL BBQ SERIES
Model No. 4 Burner BQ1010P and 6 Burner BQ1011P
FEATURES
• Deluxe gas BBQ
• Double skinned stainless steel hood with glass
viewing window and temperature gauge
• Stainless steel BBQ body, fascia, cabinet
and side shelves
• Electronic Piezo ignition
• Stainless steel grill
• Enamel coated hotplate
• Stainless steel main burners
• Rear rotisserie burner
• Operates on Propane Gas
• Complete with hose
and regulator
• AGA Certified
• Certified for conversion
to Natural Gas
FOR YOUR SAFETY
If you smell gas:
1. Shut off the gas to the appliance.
2. Extinguish any open flame.
3. If odour continues, immediately call your gas supplier.
Do not store or use gasoline or other flammable vapour
and liquids in the vicinity of this or any other appliance.
WARNING:
Improper installation, adjustment, alteration, service or
maintenance can cause injury or property damage.
Read the instructions thoroughly before installing or
servicing this equipment.
Gasmate
is a registered trademark of: Sitro Group Australia Pty Ltd www.gasmate.com.au
®
Important: Retain these instructions for future use.
6 Burner model shown
FOR OUTDOOR USE ONLY
Aber Holdings Ltd - N.Z www.gasmate.co.nz
03503 11/16
Advertisement

Related Manuals for Gasmate PROFESSIONAL BBQ Series


Summary of Contents for Gasmate PROFESSIONAL BBQ Series
- Page 1 Read the instructions thoroughly before installing or FOR OUTDOOR USE ONLY servicing this equipment. Gasmate is a registered trademark of: Sitro Group Australia Pty Ltd www.gasmate.com.au ® Aber Holdings Ltd - N.Z www.gasmate.co.nz Important: Retain these instructions for future use.
-
Page 2: Table Of Contents
CONTENTS GENERAL INFORMATION Gas Installation Codes Section Page • Barbecues must be used in accordance with the General information installation requirements of your gas supply authority, or the Australian Standard AS 5601. Lighting procedure • Barbecues for use with bottled gas are labelled ‘propane gas’. - Page 3 Never Store your Gas Cylinder Indoors. Location of your Barbecue If you store your barbecue indoors, ALWAYS disconnect DO NOT use your barbecue in garages, porches, sheds, the cylinder first and store it safely outside. Cylinders breezeways, or other enclosed areas. Your barbecue is to must be stored outdoors in a well ventilated area out of be used OUTDOORS.
-
Page 4: Lighting Procedure
Nominal Hourly Gas Consumption Number Injector Injector Injector Total Gas Model of BBQ Size Main Size Side Size Rear Consumption Pressure Type Number Burners Burners Burner Burner MJ/h 0.98mm 1.13mm 1.00mm Propane 96 MJ/h 2.75 kPa MJ/h each 11.6 MJ/h 15 MJ/h 11.5 MJ/h BQ1011P... - Page 5 5. Adjust the heat by turning the knob to the High/ Ignition system check Low position. Problem: Burner will not ignite 6. To turn the barbecue ‘OFF’, turn the cylinder valve to the ‘OFF’ position and then turn all of Possible Reason Solution the control knobs on the appliance clockwise to...
-
Page 6: Operating Procedure
OPERATING PROCEDURE Burn-off Roasting The cooking surface does not need any burn-off time. For best results when roasting remove the hotplate and Due to the nature of the coating, DO NOT use sharp or centre the grill. metallic objects on the surface. The outer two burners should be used on the low to medium setting. -
Page 7: Care And Maintenance
CARE & MAINTENANCE Care & Maintenance cooking surface. Use only plastic cooking utensils. Do not use pans on the cooking surface. Do not overheat the As with all appliances, proper care and maintenance cooking surface with the will keep them in top operating condition and prolong hood down or when there is no food on the cooking their life. - Page 8 CLEANING THE BURNER (B) Use a narrow bottle brush with a flexible handle (DO NOT use a brass wire brush), run the brush through each Follow these instructions to clean burner tube several times. and/or replace burners. (C) Wear eye protection: use an air hose to force air into 1.
-
Page 9: Assembly Instructions
ASSEMBLY INSTRUCTIONS IMPORTANT: Remove any transit protection Tools Required: material before use. ( not included) 1. Side shelves * There are 2 screws already Pre-assembled on each side * Loosen then hang the side shelf on these 2 screws on each side * Assemble 2 M6X15 screws as shown on each side * Tighten all screws... - Page 10 Unscrew ignition cap and place a Battery (Size: AA) into place with the (+) end facing outwards. Screw cap back on. Upon pressing the ignition button, you should hear a clicking sound. For Manual Ignition, use a match placed onto end of match holder.
-
Page 11: Natural Gas Conversion
NATURAL GAS CONVERSION Conversion ONLY to be done by an authorised person. TO BE INSTALLED ONLY ON OR IN A NON- SERVICING INSTRUCTIONS COMBUSTIBLE ENCLOSURE Appliances should be serviced at least annually and Note: Recommended clearances must be maintained. servicing must only be carried out by a Licensed Plumber or Authorised Person. -
Page 12: Safe Locations
SAFE APPLIANCE LOCATIONS Within a partial enclosure that includes an overhead cover and more than two walls, the following will This appliance shall only be used in an above ground apply: open-air situation with natural ventilation, without at least 25% of the total wall area is completely open, stagnant areas, where gas leakage and products of and at least 30% of the remaining wall area is open and combustion are rapidly dispersed by wind and natural...
Need help?
Do you have a question about the PROFESSIONAL BBQ Series and is the answer not in the manual?
Questions and answers