Advertisement
Quick Links
myLogic - Profilo
Posto esterno
PROFILO
PL72
Scatola da incasso
e telai portamoduli
Module frame com-
plete with back-box
Posto interno
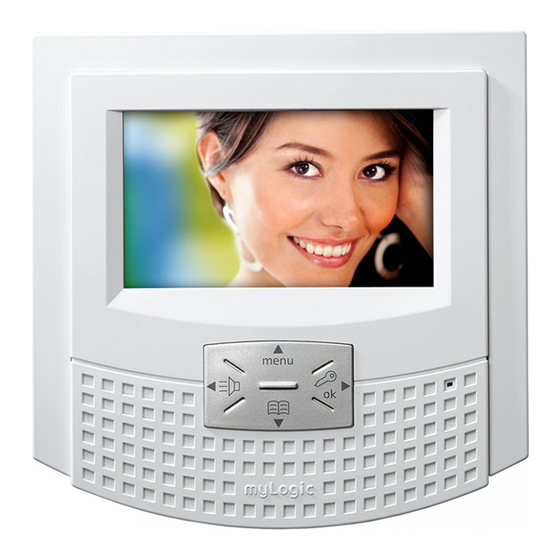
myLogic
ML2262C
Terminale domotico con schermo touch-
screen
Touch-screen home automation terminal
Il manuale d'uso inizia da pagina 35
AVVERTENZE DI SICUREZZA
IT
Leggere attentamente le avvertenze contenute nel presente manuale
perché forniscono importanti informazioni riguardanti la sicurezza
di installazione, uso e manutenzione. Conservarlo in modo appro-
priato per future consultazioni.
Posizionare il terminale myLogic in ambiente asciutto e lontano da
fonti di calore o apparecchiature che producono calore e campi
magnetici.
Per la pulizia del
terminale
un panno pulito. Per la pulizia dello schermo usare il panno allegato
al prodotto.
Questo apparecchio deve essere destinato solo all'uso per il quale
è stato concepito. Il costruttore non può essere considerato respon-
sabile per eventuali danni derivati da usi impropri, erronei ed
irragionevoli.
Non lasciare alla portata dei bambini le parti dell'imballaggio (sac-
chetti di plastica, polistirolo espanso, ecc.).
Non aprire l'apparecchio quando è acceso.
L'esecuzione dell'impianto deve essere effettuato da personale
specializzato ed in conformità con le leggi vigenti.
In caso di guasto, funzionamento irregolare o modifica all'impianto
avvalersi di personale specializzato.
L'apparecchio è conforme alle direttive CEE (marchio europeo CE).
external door station
VD2120CPL
Modulo telecamera a colori
con gruppo fonico incorporato
Colour camera module with
integrated door speaker
internal station
ML2083
Scatola da incasso
Back-box
non usare acqua o solventi chimici, ma
CD2131PL
Modulo codificatore digita-
le con 1 pulsante
Digitizer module with 1 call
button
Alimentatori
2221S
Alimentatore di linea
Line power supply
The user's manual begins on page 35
Read the instructions contained in this manual carefully because
they provide important information about safe installation, use and
maintenance. Keep this manual appropriately for future reference.
Install your myLogic home automation terminal in a dry place away
from heat sources or devices that produce heat and magnetic fields.
Do not clean the home automation terminal with water or chemical
solvents, use a dry cloth for cleaning. To clean off the screen use
only the microfiber cloth which comes with the product.
This device must be exclusively operated for its intended use. The
manufacturer cannot be held responsible for possible damage
caused by improper, erroneous and unreasonable use.
Keep packing parts away from children (i.e. plastic bags, expanded
polystyrene, etc.).
Do not open the device when it is on.
The installation must be made by professionals in compliance with
the regulations in force.
Always refer to specialized personnel in case of breakdown,
irregular operation or change in the installation.
The device complies with the EEC directives (CE European mark).
ML2262PLC
Power supplies
2220S
Trasformatore
Transformer
SAFETY NOTICES
EN
Italiano
English
Mi 2447IGb
Mi 2447IGb
- 1 -
Advertisement

Subscribe to Our Youtube Channel
Related Manuals for FARFISA INTERCOMS myLogic ML2262PLC


Summary of Contents for FARFISA INTERCOMS myLogic ML2262PLC
- Page 1 Italiano English ML2262PLC myLogic - Profilo Posto esterno PROFILO external door station VD2120CPL CD2131PL PL72 Scatola da incasso Modulo telecamera a colori Modulo codificatore digita- e telai portamoduli con gruppo fonico incorporato le con 1 pulsante Colour camera module with Digitizer module with 1 call Module frame com- plete with back-box...
- Page 2 POSTO INTERNO INTERNAL STATION Home automation hands free device with colour touch-screen display for DUO digital system Technical characteristics Power supply directly from the line Operating current: 0.2A Screen: 4.3" LCD touch-screen Television standard: Horizontal frequency: 15625Hz Vertical frequency: 50Hz Band width: >5MHz Thermostat:...
- Page 3 2 - Togliere le morsettiere dal terminale domotico. - Unplug the terminal blocks from the home automation terminal. 3 - Effettuare i collegamenti sulle morsettiere come da schema da realizzare. - Make the connections as required by the electric diagram to wire. 6 - Fissare il terminale domotico alla scatola da incasso utilizzando le 4 viti fornite a corredo del prodotto.
- Page 4 POSTO ESTERNO EXTERNAL DOOR STATION VD2120CPL CD2131PL Modulo telecamera con gruppo Modulo codificatore digitale fonico integrato con un pulsante Dati tecnici Dati tecnici Alimentazione: 13Vca±1 Alimentazione dal modulo telecamera Assorbimento con collegamento al CD2131PL: 0,8A VD2120CPL Standard segnale video: Tempo azionamento serratura: 3/6 secondi PL72 Illuminazione minima:...
- Page 5 Installazione Installation VD2120CPL CD2131PL Muratura e passaggio dei cavi. Flush mounting and cables Posizione delle aperture passacavo. placing. Openings for cables. Posizionare la telecamera in modo che i raggi solari o altre fonti luminose dirette o riflesse di forte intensità non colpiscano l’obiettivo della telecamera.
- Page 6 ALIMENTATORI POWER SUPPLIES " " Art. 2220S Art. 2221S " " " " TRASFORMATORE ALIMENTATORE DI LINEA Dati tecnici Dati tecnici Tensione di rete: 127V o 220-230Vca Alimentazione di rete: 110V÷240Vca Frequenza: 50 ÷ 60 Hz Frequenza: 50 ÷ 60 Hz Potenza: 22VA Potenza:...
- Page 7 Tabella delle distanze massime garantite Table of the maximum allowed distances Art.2302 Farfisa cable Cavo Farfisa art.2302 Tratta * Cavo Farfisa 2302 Cavo telefonico Cavo CAT5 Cavo a 2 conduttori twistato con- Twisted pair cable specified for Section Farfisa 2302 cable Twisted cable CAT5 cable sigliato per la realizzazione di im- the digital installation with DUO...
- Page 8 SCHEMI INSTALLATIVI INSTALLATION DIAGRAMS IMPIANTO VIDEOCITOFONICO MONOFAMILIARE ONE-WAY VIDEOINTERCOM SYSTEM CD2131PL PL72 Relè 1 LP LP Relay 1 art.2220S 110V÷ Relè 2 240VAC Relay 2 ML2262 art.2221S ML2083 230V 127V J1 = togliere ponticello J12 = 1-2 remove jumper VD2120CPL Se occorre collegare all'impianto base uno SE = Serratura elettrica (12Vca-1A max.) o più...
- Page 9 Esempi applicativi per collegare più attuatori 2281 Examples of connecting more actuators 2281 (max (massimo 9) per l'attivazione di ulteriori servizi 9) for the activation of additional functions (lo schema del riquadro scelto sostituisce quello presente nel riquadro (the diagram inside the dashed box take the place of that present in degli schemi installativi di pagina 8) the installing diagram reported on page 8) Alimentazione attuatori 2281 tramite un trasformatore PRS210...
- Page 10 FUNZIONAMENTO VIDEOCITOFONICO VIDEOINTERCOM OPERATION - Controllare che i collegamenti dell'impianto siano effettuati corretta- - Check that the connections of the installation are correct. mente. - Operate the installation by connecting the power supplies to the - Mettere in funzione l'impianto collegando a rete gli alimentatori. mains.
- Page 11 Regolazioni Adjustments I livelli fonici sono regolati in fabbrica; modificare le regolazioni poste The audio levels are set in the factory; settings on the back of the sul retro dell'apparecchio solamente in caso di effettiva necessità. device must be changed only if really necessary. VIDEOCITOFONO ML2062C ML2062C VIDEOINTERCOM Taratura dei livelli fonici.
- Page 12 CD2131PL Programmazione Programming Il modulo codificatore CD2131PL, presente nel videokit, è programmato The CD2131PL digitizer module included in the videokit is programmed con lo stesso codice di chiamata del posto interno (100), pertanto non with the same calling code as the internal station (100) and therefore necessita di nessuna programmazione.
- Page 13 Tabella 1 Table 1 Codici di selezione dei modi di programmazione Selection type of the programming Indirizzo o funzione da programmare Address or function to be programmed Modo Indirizzo associato al primo pulsante di chiamata. Codici User address associated to the first button. da 1 a 200 (vedere tabella 3 alle pagine 15, 16 e 17).
- Page 14 Esempio di programmazione del codificatore digitale CD2131PL Example of programming for digital encoder CD2131PL Mi 2447IGb - 14 -...
- Page 15 Tabella 3 - Table 3 Corrispondenza tra i codici assegnati ai pulsanti e la posizione dei microinterruttori di MS1 e MS2. Cross-reference table between codes and microswitches position of MS1 and MS2. Mi 2447IGb - 15 -...
- Page 16 Mi 2447IGb - 16 -...
- Page 17 Tabella dei toni Tone table Fine conversazione / programmazione errata. End of conversation / wrong programming. Indica un errore durante la programmazione o che, dopo 10 Indicates an error during the programming phase or that the secondi, termina la conversazione. conversation time is near to expire.
- Page 18 PROGRAMMAZIONI PROGRAMMING Il terminale domotico myLogic deve essere programmato The myLogic home automation terminal must be suitably programmed opportunamente per definirne il modo di funzionamento. La maggior to define the operation mode. Most programming operations are parte delle programmazioni sono semplici e necessitano di essere simple and need to be changed in case of new domestic requirements.
- Page 19 si possono creare nuovi ingressi definendo il loro nome ed il loro create new entrances, defining their name and addresses, or you indirizzo oppure cancellarli. can delete them. Nome ingresso videocitofonico, mnemonico con il quale è Videointercom entrance name, mnemonic name used to identify individuato un ingresso videocitofonico all’interno del sistema (es.
- Page 20 Procedura di blocco/sblocco delle programmazioni Procedure used to lock/unlock programming Per poter bloccare o sbloccare le programmazioni protette occorre operations eseguire la procedura seguente: The following procedure must be carried out to lock or unlock the protected programming operations: “menu” “settings”...
- Page 21 Modalità di scrittura Entering modes Esistono due diverse modalità di immissione caratteri o numeri: Two different modes can be used to enter characters or numbers: sovrapposizione (testo nero su fondo rosso): il nuovo carattere overwriting (black text against red background): the new character cancella il precedente.
- Page 22 tramite tastiera inserire il nu- use the keypad to insert mero della stanza (es. 0) the room number (i.e. 0) Impostazioni rapide 4. Indirizzo/Nome Impostazioni rapide 4. Indirizzo/Nome Default settings 4. Address/Name Default settings 4. Address/Name premere "salva" per memo- press “save”...
- Page 23 Creazione nuovo attuatore Create a new actuator Dopo aver premuto "nuovo attuatore" appare la pagina alfanumerica After having pressed “new actuator” on the display appears the di inserimento nominativi - Inserire il nome dell’attuatore (Es. Irrigazione) alphanumerical page to insert the name – Insert the name of actuator e premere "salva";...
- Page 24 2 dovrà sempre essere programmato con l’indirizzo “i2” (con “i” “i2” (with “i” either lowercase or uppercase), Attention: the internal indifferentemente minuscolo o maiuscolo); Attenzione: i relé interni relays are the only actuators that have an alphanumeric code as the sono gli unici attuatori che hanno come indirizzo un codice alfanumerico address (character and number) and not only a numeric code like any (carattere e numero) e non solo numerico come tutti gli altri attuatori.
- Page 25 Sensor DV2420 Max relays contact load: 12Vac-1A 24Vdc-1A ML2262 2281 Sensor Max relays contact load: DV2420 12Vac-1A 24Vdc-1A 2281 ML2262 Max relays contact load: 12Vac-1A 24Vdc-1A 2281 Per creare, cancellare o modificare gli eventi occorre premere in To create, delete or edit events push in sequence: sequenza: "menu"...
- Page 26 all’evento OFF (vedi nel capitolo “Programmazione Messaggio” la - Ringtone: when the event will happen myLogic will play a sound. voce “Evento ON”). This function is automatically enabled at event creation. - Soneria: all’accadere dell’evento il dispositivo myLogic emetterà un Warning: it is possible to choose up to two sound functions: one segnale acustico personalizzabile.
- Page 27 pagina nella quale è possibile variare, premendo il relativo tasto Event ON = select Yes or No and press “save”. Yes means the modifica, i seguenti parametri: sound will be played when the event is ON, NO means the sound Durata = inserire un valore compreso tra 0 e 90 che rappresenta will be played when the event is OFF.
- Page 28 Tabella eventi Event table Evento Event Actuator relay will close Actuator relay will close Il relè attuatore chiuderà il Il relè attuatore chiuderà il contatto quando l'evento è contatto quando l'evento è the contact when the event the contact when the event ON (evento VERO) OFF (evento FALSO) is ON (event TRUE)
- Page 29 Interfono/SMS Intercom/SMS Per poter comunicare od inviare messaggi tra utenti In order to communicate or send messages between the condominiali o tra terminali myLogic del proprio users in the building or between myLogic home automation appartamento occorre inserire nella rubrica i nomi degli terminal of your apartment, you must enter the user utenti e soprattutto gli indirizzi utente e stanza.
- Page 30 Termoregolazione Heating control La termoregolazione permette di gestire l’impianto di The heating control allows to manage the heating or air riscaldamento o condizionamento dell’abitazione. Questa conditioning plant of the house. This function is normally funzione è normalmente gestita dall’utente finale per cui la managed by the user, the planning procedure is illustrated procedura di programmazione è...
- Page 31 - Link to Button allows for displaying the icon of a specific button - Quadro pulsanti on the Home Page - Link a pulsante - New note/memo - Nuovo nota/allarme - SMS sending - Invia Messaggio - Silent - Silenzioso - Favourites - Preferiti - Calls...
- Page 32 Per l’immissione delle programmazioni deve essere usata la stessa To enter the programming settings you must follow the same procedura del capitolo “Programmazione indirizzo, nome utente, procedure illustrated in the section “How to program address, user numero stanza”. name, and room number”. Per inserire ulteriori "indirizzi alternativi"...
- Page 33 Per attivare la procedura di blocco delle programmazioni procedere To active the lock function follow the procedure below: come riportato di seguito: - press “modify” on the right of the text box with the function name, - premere "modifica" alla destra della casella testo che riporta il nome select “YES”...
- Page 34 Default - Ritorno alla programmazione di fabbrica. Touch screen setting Attenzione: premendo questo tasto tutti i dati e le The setting of the touch screen is made in the factory and should not programmazioni precedentemente memorizzate saranno be made by the user. In case of inaccuracies in the pressure of the cancellate.
- Page 35 Manuale d'uso User's manual Art. ML 2062C 02.07.10 30,3° 11:18 Attuazioni / Eventi Cambio temporan. Foto menu Stilo per touch screen Stilus for touch screen Schermo touch screen da 4,3" 16/9. Touch screen 4,3" 16/9. Tramite lo stilo o un dito è possibile abilitare e program- Use the pen or finger to activate and program all the videointercom functions.
- Page 36 Pagina principale Home Page L’Home Page raccoglie le principali funzioni, quelle d’uso più The Home Page contains the most popular functions that can be comune, a disposizione con un semplice tocco. used with a simple touch. 02.07.10 30,3° 11:18 Attuazioni / Eventi Cambio temporan.
- Page 37 Applicazioni collegate all’Home Page Applications connected to the Home Page 02.07.10 30,3° 11:18 Si accede alle applicazioni strisciando lo To access the applications move the pen or stilo o il dito sul touch screen nelle 4 direzio- finger on the touch screen in the four ni.
- Page 38 Pannello di Controllo Control panel Da questa schermata si accede alle funzioni e alle impostazioni di From this page you can access myLogic functions and settings. myLogic. Ogni settore è facilmente riconoscibile da un’icona e da Each sector is easily identified by the icon and identification un colore identificativo.
- Page 39 Videointercom Videocitofonia From this menu you can access the typical videointercom Da questo menu è possibile accedere alle funzioni tipiche della functions, such as displaying the image from the door station videocitofonia come visualizzare l’immagine proveniente dalla camera, make a voice connection and access the lists of lost, telecamera dell’ingresso, collegarsi all’audio degli stessi e made and received calls.
- Page 40 Monitor Telecamera By touching this icon you can activate the connection with the Toccando quest'icona si attiva il collegamento con la telecamera camera connected at the door station where the last call was collegata all’ingresso con il quale è stata effettuata l’ultima made (with myLogic in idle state, this function can also be chiamata (con myLogic a riposo, questa funzione si attiva anche dal pulsante videocitofonia...
- Page 41 Scatto manuale Manual Si scatta una foto dell'immagine inquadrata. Si possono memo- You can take a photo of the framed image. You can save in the rizzare fino a circa 60 immagini; i successivi scatti cancellano system approximately 60 images; the next shooting will delete le immagini meno recenti.
- Page 42 Elenco ingressi Monitor list All’interno di questo menu si trova la lista degli ingressi collegati This menu contains the list of door stations connected to the all’impianto che è possibile scorrere con i tasti freccia su e giù. installation. The list can be scrolled with the up and down Toccando l’icona alla destra del nome si visualizza l’immagine arrows.
- Page 43 Elenchi chiamate (effettuate, perse e ricevute) Call lists (made, lost and received) All’interno di questi menu si trova l’archivio delle chiamate perse, These menus contain the lists of lost, made and received calls. effettuate e ricevute. 02.07.10 30,3° 11:18 02.07.10 30,3°...
- Page 44 Interfono / SMS Intercom / SMS Menu dedicato alla comunicazione interna. Consente di effettuare Menu dedicated to internal communication. It is used to make calls chiamate tra i vari ambienti dell’abitazione (per esempio apparta- between the different rooms (for example, apartment and attic) or mento e mansarda) o tra ambienti fisicamente separati (per areas that are physically separated (for example, between house esempio tra casa e garage o tra il proprio appartamento e quello...
- Page 45 Chiama… Calling… Permette di effettuare una chiamata digitando direttamente It is used to make a call by directly entering the numeric l’indirizzo numerico della postazione. address of the station. 11:18 02.07.10 30,3° 11:18 02.07.10 30,3° 3 4 5 6 7 8 9 0 3 4 5 6 7 8 9 0 Canc Canc...
- Page 46 Bozze Drafts Qui si trovano memorizzati gli SMS il cui invio non è andato a This menu contains the text messages that were not sent (i.e. buon fine (Es. la linea era occupata). the line was busy). È possibile ritentare l’invio del messaggio o eliminarlo You can send the message again or delete it permanently.
- Page 47 Nuovo nota/memo New note/memo Consente di realizzare una nuova nota o un nuovo memo. It is used to make a new note or reminder. 02.07.10 30,3° 11:18 02.07.10 30,3° 11:18 Nuovo Esci Exit The application is shown as a post-it note where you can write L’applicazione si presenta come un foglietto per gli appunti dove notes or draw using the following tools: si può...
- Page 48 Elenco note Notes Da qui si può scorrere (con i tasti su e giù) tutte le note salvate. From this page it is possible to scroll all the stored notes (with Attraverso il tasto "Opzioni" è possibile eliminare la nota, the up and down buttons).
- Page 49 Questa coppia di icone permette This pair of icons allows to 11:18 11:18 02.07.10 30,3° 02.07.10 30,3° di scegliere quale esigenza select what climate demand is climatica attivare: to activate: Riscaldamento Aria condizion. Heating Air-conditioning Attiva la modalità condizionamento. It enables the air conditioning setting. Attiva la modalità...
- Page 50 Caldo/Freddo (modalità manuale) Warm/Cold (manual setting) Se la gestione della temperatura è manuale, si può impostare la If the temperature management is set as manual, the desired temperatura desiderata con effetto permanente. temperature can be planned with a permanent effect. 02.07.10 26.0°...
- Page 51 quale delle tre temperature programmate attribuirgli (T1 o T2 o which of the three programmed temperatures to associate (T1 T3); quando è selezionata l’ora, con i tasti su e giù, si può or T2 or T3); when it’s selected the time, with the keys up and modificare la durata della fascia oraria.
- Page 52 Attuazioni / Eventi Actuators / Events Per attuatore si intende un dispositivo che collegato all’impianto Actuator stays as a device that once properly connected to può chiudere (stato ON) o aprire (stato OFF) un contatto al suo the system can close (status ON) or to open (status OFF) an interno.
- Page 53 sfondo bianco e il colore dell’icona rappresenta lo stato in quel programmed or “on event”, appear on white background and the momento. Lo sfondo bianco indica che l’attuatore è gestito da colour of the icon represents at that time the status. The background in white colour points out that the actuator is myLogic (l’utente non può...
- Page 54 Manuale Manual Gestione manuale dell’attuatore (l’attuatore al quale è stata Actuator Manual management (the actuator to which a manual attribuita una modalità manuale, è disponibile nel quadro attuatori mode has been associated, is available in the picture actuators dove manualmente può essere commutato ON o OFF). where manually ON or OFF can be switched).
- Page 55 Quadro eventi Events panel Da qui l’utente può controllare lo stato degli eventi della casa, ad From here the user can check the status of the events of the esempio, porta aperta o porta chiusa, piove / non piove, stato house, for instance door open or closed, raining / not raining, sensore gas...
- Page 56 Stato State Indica lo stato dell’evento. It points out the event status Address / Name Indirizzo / Nome From this area the modification menu is entered, name and the Da questo ambiente si accede al menu di modifica del nome e address of the event can be modified.
- Page 57 Preferiti Favourites Una volta presa familiarità con le funzionalità di myLogic, Once taken familiarity with the functionalities of myLogic, it will diventerà naturale utilizzare e gestire il menu dei Preferiti. Infatti become natural to use and to manage the menu of the nel menu “Preferiti”...
- Page 58 11:18 11:18 02.07.10 30,3° 02.07.10 30,3° Invia messaggio SMS sending Ordina preferiti Favourites sort. Nuovo nota/memo New note/memo Foto Gallery Volumi Volume levels Immagini Background images Le immagini accessibili da questo menu possono essere The images contained in this menu can be used in two ways: utilizzate per due scopi: come sfondo nell’Home Page o come as Home Page screen or as sequence of the “Background sequenza dello screensaver “Immagini”.
- Page 59 Impostazioni Settings Da questo menu è possibile personalizzare myLogic. Tra le This menu is used to personalise myLogic. Settings include: audio impostazioni rientrano: la gestione dell’audio, con i vari volumi, with volumes, ringers and ringer time; screen with Home Page sonerie e la loro durata;...
- Page 60 Avanzate Advanced settings Questo menu, il cui accesso è protetto, permette una serie di This menu with protected access is used to make a series of configurazioni e funzioni avanzate. advanced configurations and functions. Attenzione, l’accesso a queste funzioni è protetto in quanto la Warning: the access to these functions is protected because modifica di alcuni parametri potrebbe pregiudicare gravemente the change of some parameters may cause severe...
- Page 61 Durata sonerie Rings duration Qui si possono scegliere le durate delle sonerie di: Here you can choose the ringing time for: - Chiamata da esterno - Call from external (door station) - Chiamata da utente (appartamento diverso) - Call from internal (from other apartments) - Chiamata intercomunicante (stesso appartamento) - Intercom call (from other stations in the same apartment) - Campanello...
- Page 62 Schermo Screen 11:18 11:18 02.07.10 30,3° 02.07.10 30,3° Schermo Nessuno sfondo Seleziona sfondo Seleziona Screen No background Select background screensaver salvaschermo select Nessuno sfondo No background image Toccando l’icona si ripristina l’immagine di sfondo di default Touch the icon to restore the default screen image in the Home nella Home Page.
- Page 63 Avanzate Advanced settings 30,3° 11:18 30,3° 11:18 02.07.10 02.07.10 Avanzate Home Page Indirizzi alternativi Varie Advanced Home Page settings Secondary address Others Riga di comando Info memoria Memory card Command line Memory info Memory card Info sul sistema Default About... Default Home Page Home Page settings...
- Page 64 Cod. 52704840 Mi 2447IGb Mi 2447IGb - 64 -...
Need help?
Do you have a question about the myLogic ML2262PLC and is the answer not in the manual?
Questions and answers