
Subscribe to Our Youtube Channel
Related Manuals for Timeguard LEDCST10PIRB


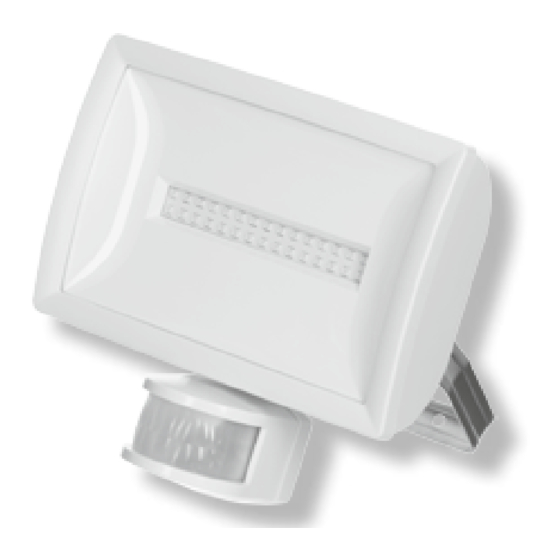
Summary of Contents for Timeguard LEDCST10PIRB
- Page 1 LED Coastal Grade PIR Floodlight Model: LEDCST10PIRB (Black) Model: LEDCST10PIRWH (White) Model: LEDCST20PIRB (Black) Model: LEDCST20PIRWH (White) Model: LEDCST30PIRB (Black) Model: LEDCST30PIRWH (White)
-
Page 2: General Information
Up to 12 metres • Time On Adjustment: 5 seconds to 10 minutes • Dusk Level Adjustment: Day and Night or Night only operation • CE Approved LEDCST10PIRB-WH • 10W LED Non replaceable lamp • Energy Usage: 10Kwh/1000h • Lumen Output: 750lm LEDCST20PIRB-WH •... -
Page 3: Parallel Switching
LEDCST30PIRB-WH • 30W LED Non replaceable lamp • Energy Usage: 30Kwh/1000h • Lumen Output: 2250lm Other Loads – External (Slave) • Up to 10 sets of LEDCST10-20-30 Uncontrolled floodlights • LED lamp: Max 10 sets with total of 200W • Halogen lamp: Max 1000W •... -
Page 4: Installation Procedure
• Recommended installation height is 2.5m above ground, the maximum detection range about 12m and at the angle of about 180° . 2.5m 2.5m 180° 180° 5. Installation Procedure 5.1 Mark the position of the mounting holes on the wall using the U bracket supplied as a template. - Page 5 5.4 Secure the supply cable into the junction box through the hole(s) provided ensuring that a cable gland, grommet or sealing compound is used to maintain the IP rating of the luminaire. 5.5 Attach the strain relief to the luminaire and screw in ensuring not to over-tighten.
-
Page 6: Connection Diagram
6. Connection Diagram ISOLATION SWITCH MAINS SUPPLY Connect the 3 core mains supply cable to the terminal block on the unit as follows:- LIVE (Brown or Red) NEUTRAL (Blue or Black) EARTH (Green/Yellow) For additional lighting connect the external load to the terminal box on the back plate as follows;... -
Page 7: Operation
7. Operation • Turn the power on to the isolating switch and test for correct operation. 8. Walk Test and Adjustment • The purpose of the Walk is used to test and adjust the detection coverage of the floodlight under auto mode. Test Procedure •... - Page 8 Knob Settings The floodlight has two adjustment knobs: Time and Lux at the bottom of the detector head. • Adjust the knobs carefully with flat blade screwdriver. TIME knob setting • You can set the time knob from 5 seconds to about 10 minutes, the floodlight will switch the lamp ON, for the time duration set after each detected movement.
- Page 9 Dusk setting (Time knob setting) • When setting the Time knob to fully clock wise, the motion detector of the floodlight won’t function. The lamp will operate depending on the ‘Lux’ level, i.e. dusk to dawn. Setting Advice WARNING 9. Lens Masking •...
-
Page 10: Manual Override Mode
10. Manual Override Mode The light can be switched on for longer time periods by use of the Manual Override Mode. This can be activated at night by using the internal wall switch or circuit breaker. • Switch the internal wall switch/circuit breaker once (OFF/ON) within 1.5 seconds •... -
Page 11: Troubleshooting Guide
12. Troubleshooting Guide Lamp stays ON all The unit may be suffering from false activation. the time at night. Cover the sensor lens completely with a thick cloth. This will prevent the sensor from ‘seeing’ anything. If the unit now switches off after the set time duration and does not re-activate, this indicates that the problem was caused by false activation. - Page 12 Unit activates during The level of ambient light in the area may be too dark the daytime. for the current DUSK setting. During daylight, adjust the DUSK control slightly anti-clockwise. When the lamp turns off, enter the detection area. If the PIR still activates, the setting is still too high.
-
Page 13: Year Guarantee
Note: A proof of purchase is required in all cases. For all eligible replacements (where agreed by Timeguard) the customer is responsible for all shipping/postage charges outside of the UK. All shipping costs are to be paid in advance before a replacement... - Page 14 If you experience problems, do not immediately return the unit to the store. Telephone the Timeguard Customer Helpline; HELPLINE 020 8450 0515 or email helpline @ timeguard.com Qualified Customer Support Co-ordinators will be on-line to assist in resolving your query.
Need help?
Do you have a question about the LEDCST10PIRB and is the answer not in the manual?
Questions and answers