Table of Contents
Advertisement
Quick Links
Advertisement
Table of Contents

Related Manuals for Timeguard Sure time STFL10PIRB


Summary of Contents for Timeguard Sure time STFL10PIRB
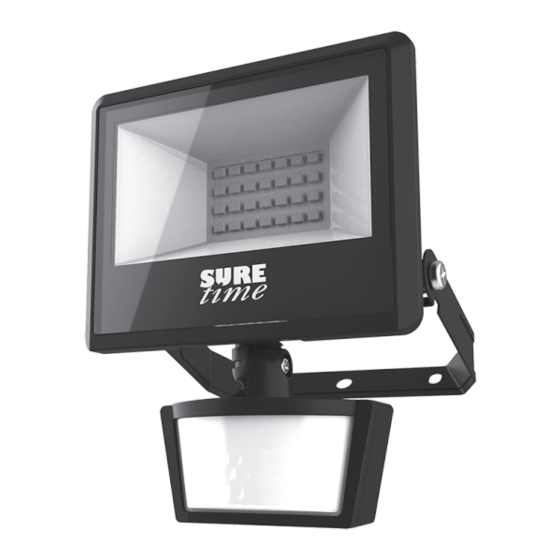
- Page 1 LED PIR Floodlight Models: STFL10PIRB STFL20PIRB STFL30PIRB STFL50PIRB...
-
Page 2: General Information
1. General Information These instructions should be read carefully and retained for further reference and maintenance. 2. Safety • Before installation or maintenance, ensure the mains supply to the luminaire is switched off and the circuit supply fuses are removed or the circuit breaker turned off. -
Page 3: Installation Advice
4. Installation Advice As the detector responds to changes in temperature, avoid the following situations: • Pointing the detector towards objects with highly reflective surfaces, such as pools of water or white-painted walls. • Mounting the detector near heat sources, such as heating vents, air conditioning units, lights etc. -
Page 4: Installation Procedure
5. Installation Procedure 5.1 Mark the position of the mounting holes on the wall using the U bracket supplied as a template. 5.2 Drill the holes for the wall plugs ensuring not to infringe with any gas/water pipes or electrical cables that may be hidden below the surface. -
Page 5: Connection Diagram
6. Connection Diagram from Connect the 3 core mains supply cable the unit as follows:-LIVE (Brown or Red) L NEUTRAL (Blue or Black) N EARTH (Green/Yellow) brown brown blue yellow & green blue yellow & green connect to main power 7. - Page 6 8. Walk Test and Adjustment • The purpose of the Walk is used to test and adjust the detection coverage of the floodlight under auto mode. Test Procedure • Adjust the Time knob to (fully anti-clockwise), and Lux knob is set to the ‘Sun’...
- Page 7 • The detector head can be turned 90° left or right by hand, and can be tilted ° downward. Tilt upward 70° Tilt downward 70° Tilt upward 40° Pan right 90° Tilt downward 70° Pan left 90°...
- Page 8 Knob Settings The floodlight has two adjustment knobs: Time and Lux at the bottom of the detector head. • Adjust the knobs carefully with flat blade screwdriver. TIME knob setting • You can set the time knob from seconds to about minutes, the floodlight will switch the lamp ON, for the time duration set after each detected movement.
-
Page 9: Manual Override Mode
9. Manual Override Mode The light can be switched on for longer time periods by use of the Manual Override Mode. This can be activated at night by using the internal wall switch or circuit breaker. • Switch the internal wall switch/circuit breaker once (OFF/ON) within 2 seconds. -
Page 10: Troubleshooting Guide
10. Troubleshooting Guide Lamp stays ON all The unit may be suffering from false activation. the time at night. Cover the sensor lens completely with a thick cloth. This will prevent the sensor from ‘seeing’ anything. If the unit now switches off after the set time duration and does not re-activate, this indicates that the problem was caused by false activation. - Page 11 Unit activates during The level of ambient light in the area may be too dark the daytime. for the current DUSK setting. During daylight, adjust the DUSK control slightly anti-clockwise. When the lamp turns off, enter the detection area. If the PIR still activates, the setting is still too high.
-
Page 12: Year Guarantee
Note: A proof of purchase is required in all cases. For all eligible replacements (where agreed by Timeguard) the customer is responsible for all shipping/postage charges outside of the UK. All shipping costs are to be paid in advance before a replacement...
Need help?
Do you have a question about the Sure time STFL10PIRB and is the answer not in the manual?
Questions and answers