Tektronix TLA 700 Series Service Manual
Hide thumbs
Also See for TLA 700 Series:
- Technical reference manual (139 pages) ,
- Installation manual (83 pages) ,
- Instructions manual (11 pages)
Table of Contents
Advertisement
Quick Links
Service Manual
TLA 700 Series Logic Analyzer Modules
TLA 7Lx & TLA 7Mx
070-9779-02
This document supports module firmware version
1.00 and above.
Warning
The servicing instructions are for use by qualified
personnel only. To avoid personal injury, do not
perform any servicing unless you are qualified to
do so. Refer to all safety summaries prior to
performing service.
Advertisement
Table of Contents
Troubleshooting

Related Manuals for Tektronix TLA 700 Series


Summary of Contents for Tektronix TLA 700 Series
- Page 1 Service Manual TLA 700 Series Logic Analyzer Modules TLA 7Lx & TLA 7Mx 070-9779-02 This document supports module firmware version 1.00 and above. Warning The servicing instructions are for use by qualified personnel only. To avoid personal injury, do not perform any servicing unless you are qualified to do so.
- Page 2 Copyright Tektronix, Inc. All rights reserved. Tektronix products are covered by U.S. and foreign patents, issued and pending. Information in this publication supercedes that in all previously published material. Specifications and price change privileges reserved. Printed in the U.S.A. Tektronix, Inc., P.O. Box 1000, Wilsonville, OR 97070–1000 TEKTRONIX and TEK are registered trademarks of Tektronix, Inc.
- Page 3 Tektronix, with shipping charges prepaid. Tektronix shall pay for the return of the product to Customer if the shipment is to a location within the country in which the Tektronix service center is located.
- Page 4 TEKTRONIX SERVICE OPTIONS Tektronix offers the following service options. These options are modular, flexible, and easy to order with your instru- ment. Designed to ease installation and start up, to support tracking of calibration to requirements of ISO9000, and to provide for extended repair coverage, these options help fix your long-term maintenance costs and eliminate un- planned expenditures.
-
Page 5: Table Of Contents
..........3–5 Performance Verification Procedures TLA 700 Series Logic Analyzer Modules Service Manual... - Page 6 ..........6–41 TLA 700 Series Logic Analyzer Modules Service Manual...
- Page 7 ........10–2 TLA 700 Series Logic Analyzer Modules Service Manual...
- Page 8 ......... . 10–17 Figure 10–5: P6417 Probe exploded view ..... . . 10–21 TLA 700 Series Logic Analyzer Modules Service Manual...
- Page 9 ......6–39 Table 7–1: TLA 7L1, TLA 7L2, TLA 7L3, and TLA 7L4 options . . . 7–1 Table 7–2: TLA 7M1, TLA 7M2, TLA 7M3, and TLA 7M4 options 7–1 TLA 700 Series Logic Analyzer Modules Service Manual...
- Page 10 Table of Contents TLA 700 Series Logic Analyzer Modules Service Manual...
-
Page 11: General Safety Summary
Do Not Operate in an Explosive Atmosphere. Keep Product Surfaces Clean and Dry. Provide Proper Ventilation. Refer to the manual’s installation instructions for details on installing the product so it has proper ventilation. TLA 700 Series Logic Analyzer Modules Service Manual... - Page 12 CAUTION indicates a hazard to property including the product. Symbols on the Product. The following symbols may appear on the product: WARNING Protective Ground CAUTION Double High Voltage (Earth) Terminal Refer to Manual Insulated viii TLA 700 Series Logic Analyzer Modules Service Manual...
-
Page 13: Service Safety Summary
Use Care When Servicing With Power On. Dangerous voltages or currents may exist in this product. Disconnect power, remove battery (if applicable), and disconnect test leads before removing protective panels, soldering, or replacing components. To avoid electric shock, do not touch exposed connections. TLA 700 Series Logic Analyzer Modules Service Manual... - Page 14 Service Safety Summary TLA 700 Series Logic Analyzer Modules Service Manual...
-
Page 15: Preface
Verification and Adjustment Technical Reference Manual that contains the performance verification procedures for the TLA 7Lx/TLA 7Mx Logic Analyzer Module and for other major components in the TLA 700 Series Logic Analyzer. Adjustment Procedures refer you to the TLA 700 Series Performance... -
Page 16: Manual Conventions
Specifications and replaceable parts information are documented in this service manual. The procedures for using the test fixture are documented in the TLA 700 Series Performance Verification and Adjustment Technical Reference Manual. Certification Procedures Certification procedures are used to certify a product and provide a traceability path to national standards. - Page 17 Modules Throughout this manual, the term module refers to a TLA 700 Series Logic Analyzer or DSO unit that mounts inside a TLA 700 Series Portable or Benchtop Mainframe. A module is composed of circuit cards, interconnecting cables, and a user-accessible front panel.
-
Page 18: Related Manuals
Preface Related Manuals The following manuals are available as part of the TLA 700 Series Logic Analyzer documentation set. (See Standard Accessories and Optional Accesso- ries on page 10–20 for part numbers.) The procedures and information in this manual assumes that service personnel have access to all manuals listed in the following table, except for the TLA 7QS (Quick Start) manuals. -
Page 19: Introduction
Adjustment and Certification Interval Generally, you should perform the adjustments and certification (calibration) described in the TLA 700 Series Performance Verification and Adjustment Technical Reference Manual once per year or following repairs that affect adjustment or calibration. Strategy for Servicing This manual contains the information needed for periodic maintenance and service of the TLA 7Lx/TLA 7Mx Logic Analyzer Module. -
Page 20: Service Offerings
Tektronix technicians provide warranty service at most Tektronix service locations worldwide. The Tektronix product catalog lists all service locations worldwide or you can visit us on our Customer Services World Center web site at http://www.tek.com/Mea- surement/Service. - Page 21 Introduction Self Service. Tektronix supports repair to the replaceable-part level by providing for circuit board exchange. Use this service to reduce down-time for repair by exchanging circuit boards for remanufactured ones. Tektronix ships updated and tested exchange boards. Each board comes with a 90-day service warranty.
-
Page 22: Contacting Tektronix
For product support outside of North America, contact your local Tektronix distributor or sales office. Service Contact your local Tektronix distributor or sales office. Or, visit Support our web site for a listing of worldwide service locations. http://www.tek.com For other... -
Page 24: Specifications
Product Description The logic analyzer module is designed to be used with either the benchtop mainframe or portable mainframe in a TLA 700 Series Logic Analyzer. The logic analyzer module is used as a test and measurement tool for high-speed digital timing and state acquisition across several channels. -
Page 25: Characteristic Tables
This section lists the specifications for the logic analyzer module. All specifica- tions are guaranteed unless noted Typical. Specifications that are marked with the symbol are checked directly (or indirectly) in the TLA 700 Series Perfor- mance Verification and Adjustment Technical Reference Manual. The specifica- tions apply to all versions of the logic analyzer module unless otherwise noted. -
Page 26: Table 1-3: Clocking
Maximum synchronous clock rate 200 MHz in full speed mode (5 ns minimum between active clock edges) 100 MHz in half speed mode (10 ns minimum between active clock edges) 1–3 TLA 700 Series Logic Analyzer Modules Service Manual... - Page 27 Any or all of the clock channels may be enabled. For an enabled clock channel, either the rising, falling, or both edges can be selected as the active clock edges. The clock channels are stored. Full and half speed modes are controlled by PowerFlex options and upgrade kits. 1–4 TLA 700 Series Logic Analyzer Modules Service Manual...
-
Page 28: Table 1-4: Trigger System
Trigger position is programmable to any data sample (4 ns boundaries) Increment counter Either of the two counter/timers used as counters can be incremented. Start/Stop timer Either of the two counter/timers used as timers can be started or stopped. 1–5 TLA 700 Series Logic Analyzer Modules Service Manual... - Page 29 Timers can be used as testable flags with TLA 7Lx and TLA 7Mx Modules with serial numbers B020000 and higher and TLA 700 Series Software Version 1.10 or higher. Word recognizers are traded off one-by-one as Signal In 1, Signal In 2, glitch detection, setup and hold detection, or transition detection resources are added.
-
Page 30: Table 1-5: Input Parameters (With P6417 Probe)
Description MagniVu memory depth 2016 samples per channel MagniVu sampling period Data is asynchronously sampled and stored every 500 ps in a separate high resolution memory; there are no clocking options. 1–7 TLA 700 Series Logic Analyzer Modules Service Manual... -
Page 31: Table 1-7: Merged Modules
–40 to +71 C (–40 F to +160 F) Humidity Operating and nonoperating To 95% relative humidity at or below 30 C (86 F) To 45% relative humidity up to 50 C (122 F) 1–8 TLA 700 Series Logic Analyzer Modules Service Manual... -
Page 32: Table 1-10: Mechanical
AC Power Line Harmonic Emissions EN 50082-1 Immunity: IEC 801-2 Electrostatic Discharge Immunity IEC 801-3 RF Electromagnetic Field Immunity IEC 801-4 Electrical Fast Transient/Burst Immunity IEC 801-5 Power Line Surge Immunity 1–9 TLA 700 Series Logic Analyzer Modules Service Manual... - Page 33 Specifications 1–10 TLA 700 Series Logic Analyzer Modules Service Manual...
-
Page 35: Operating Information
The operating information is limited to the functions you need to perform the procedures found in this document. You can find more detailed operating instructions in the TLA 700 Series User Manual and in the online help. This chapter is divided into the following sections:... -
Page 36: Merging Modules
You can combine two logic analyzer modules to create a single two-wide module. This process is called merging modules. The procedures for merging modules is described in the TLA 700 Series Installation Manual. 2–2 TLA 700 Series Logic Analyzer Modules Service Manual... -
Page 37: Operating Information
Probe Connectors. The probe connectors are color-coded to match the labels on the probes. Table 2–1 on page 2–5 summarizes the probe connectors and data channels available for each version of the logic analyzer module. 2–3 TLA 700 Series Logic Analyzer Modules Service Manual... -
Page 38: Figure 2-2: Front Panel Of The Logic Analyzer Module
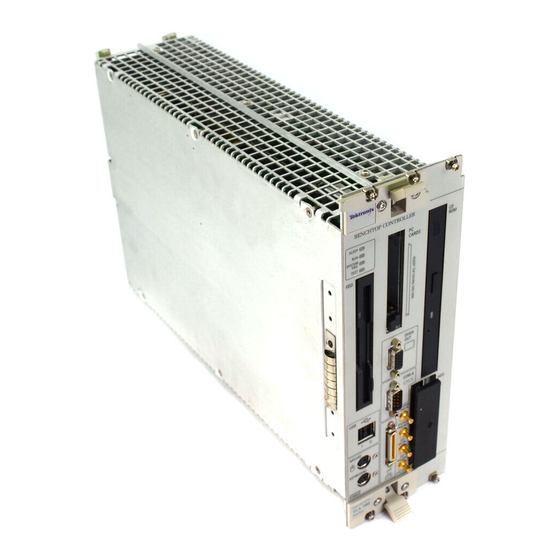
Operating Information Injector/ejector handle READY Indicator Probe retainer mounting holes ACCESSED Indicator ARM’D Indicator TRIG’D Indicator Probe connectors Configuration label Figure 2–2: Front panel of the logic analyzer module 2–4 TLA 700 Series Logic Analyzer Modules Service Manual... -
Page 39: Table 2-1: Logic Analyzer Module Variations
TRIG’D Indicator. The TRIG’D indicator lights when the logic analyzer module triggers and stays on until the module finishes acquiring data. Configuration Label. The configuration label indicates the speed and memory depth of the logic analyzer module. 2–5 TLA 700 Series Logic Analyzer Modules Service Manual... -
Page 40: Merge Cable Connectors
You must jumper the pins when updating the flash image. The logic analyzer module is shipped without a jumper installed on these pins. Refer to the TLA 700 Series Installation Manual for instructions on upgrading the firmware. Probes Depending on the channel width of the logic analyzer module, there may be up to eight (8) P6417 acquisition probes with each module. -
Page 41: Diagnostics
NOTE. Performing the self calibration does not guarantee that all logic analyzer module parameters operate within limits. Operation within limits is achieved by performing the Adjustment Procedures, described in the TLA 700 Series Performance Verification and Adjustment Technical Reference Manual. Proper operation may be confirmed by performing the performance verification procedures in this same manual. -
Page 42: Menu Overview
Running to Calibrated. Menu Overview The logic analyzer is controlled by interactive windows through the TLA 700 Series Windows 95 application. The TLA 700 Series application consists of the following windows: System window. This window provides an overview of the entire logic analyzer. - Page 43 Click on the appropriate button to enable or disable the modules. Refer to the online help for more information on the individual menus, icons, and fields within each window. You may also want to refer to the TLA 700 Series Logic Analyzer User Manual for additional information.
- Page 44 Operating Information 2–10 TLA 700 Series Logic Analyzer Modules Service Manual...
-
Page 46: Theory Of Operation
A single 102-channel or 136-channel logic analyzer module can be merged with a second module to create a two-module-wide logic analyzer. Lower channel count modules do not support merging. 3–1 TLA 700 Series Logic Analyzer Modules Service Manual... -
Page 47: Local Processor Unit Board
+5 V and +3.5 V supplies for use on the Acquisi- tion board. The power connections to the Acquisition board are made through one of the 100-pin ribbon cables and from the backplane. 3–2 TLA 700 Series Logic Analyzer Modules Service Manual... -
Page 48: Acquisition Board
Clock Circuitry. The system clock is 125 MHz and has both edges active. The system clock is derived from the 10 MHz clock (from the backplane) through a phase-locked loop. The acquisition run circuitry is integrated with the clock circuitry to support time correlation. 3–3 TLA 700 Series Logic Analyzer Modules Service Manual... - Page 49 Refer to the TLA 700 Series Performance Verification and Adjustment Technical Reference Manual for instructions on performing the threshold adjustment procedure.
-
Page 50: Daughter Boards
The local bus sends the system clock of the Master module to the Slave module. The two merged modules must be located in adjacent slots. 3–5 TLA 700 Series Logic Analyzer Modules Service Manual... - Page 51 Theory of Operation The Merge Cable Connector passes 26 signals between the two modules (16 trigger event signals, two storage control signals, four valid sample clock identification signals, and four data-login control signals). 3–6 TLA 700 Series Logic Analyzer Modules Service Manual...
-
Page 53: Performance Verification Procedures
Performance Verification Procedures The performance verification and calibration (certification) procedures for the TLA 7Lx/TLA 7Mx Logic Analyzer Module are located in the TLA 700 Series Performance Verification and Adjustment Technical Reference Manual. You must use the adjustment/verification fixture to complete the performance verification and adjustment procedures. - Page 54 Performance Verification Procedures 4–2 TLA 700 Series Logic Analyzer Modules Service Manual...
- Page 56 The TLA 7Lx/TLA 7Mx Logic Analyzer Module has no manual adjustments. All adjustments are controlled by software and by a Adjustment/Verification test fixture. Refer to the TLA 700 Series Performance Verification and Adjustment Technical Reference Manual for the adjustment procedures.
- Page 57 Adjustment Procedures 5–2 TLA 700 Series Logic Analyzer Modules Service Manual...
-
Page 59: Maintenance
Related Maintenance Procedures The TLA 700 Series Installation Manual contains maintenance procedures not included in this manual. Refer to the TLA 700 Series Installation Manual for the following information: Refer to the Upgrades chapter for instructions on upgrading the software or firmware in the logic analyzer module. -
Page 60: Preventing Esd
A proper time to perform preventive maintenance is just before performing adjustments on the module. General Care The side cover keeps dust out of the module and should be in place during normal operation. 6–2 TLA 700 Series Logic Analyzer Modules Service Manual... -
Page 61: Inspection And Cleaning Procedures
To clean internal surfaces, use a 75% isopropyl alcohol solution as a cleaner and rinse with deionized water. Before using any other type of cleaner, consult your Tektronix Service Center or representative. Inspection — Exterior. Inspect the outside of the module for damage, wear, and missing parts. -
Page 62: Table 6-2: Internal Inspection Check List
Replace circuit board if parts are pins. damaged. Wiring and cables Loose plugs or connectors. Firmly seat connectors. Repair or replace Burned, broken, or frayed circuit boards with defective wires or wiring. cables. 6–4 TLA 700 Series Logic Analyzer Modules Service Manual... - Page 63 7. Dry all components and assemblies in an oven or drying compartment using low-temperature (51.7 C to 65.6 C/125 F to 150 F) circulating air. Lubrication. There is no periodic lubrication required. 6–5 TLA 700 Series Logic Analyzer Modules Service Manual...
- Page 64 Maintenance 6–6 TLA 700 Series Logic Analyzer Modules Service Manual...
-
Page 65: Removal And Installation Procedures
Inspection and Cleaning procedure on page 6–2 for cleaning instructions. List of Circuit Boards The Mechanical Parts List section provides a list of all replaceable circuit boards. 6–7 TLA 700 Series Logic Analyzer Modules Service Manual... -
Page 66: Summary Of Procedures
Torque screwdriver handle Accepts Torx driver bits T-10 Torx tip Torx driver bit for T-10 size screw heads Soldering iron Standard tool Solder wick Standard tool 1/4-inch nut driver Standard tool 6–8 TLA 700 Series Logic Analyzer Modules Service Manual... -
Page 67: Injector/Ejector Handles
2. Remove the two screws that secure the injector/ejector handle to the chassis. 3. Remove the injector/ejector handle from the module. Remove screws (4) Ejector handles (2) Figure 6–1: Injector/ejector handle replacement 6–9 TLA 700 Series Logic Analyzer Modules Service Manual... -
Page 68: Installation
2. Install the screws to secure the injector/ejector handle to the chassis. 3. Apply the proper replacement label. Cover You will need a screwdriver with a size T-10 Torx tip (Table 6–3, items 1 and 2) to replace the cover. 6–10 TLA 700 Series Logic Analyzer Modules Service Manual... -
Page 69: Removal
6. Slide the cover back to disengage the tab and lift the cover from the chassis (guide the merge cable through the center hole while removing the cover). Cover Remove screws (4) Remove screws (8) Chassis Rear panel Figure 6–2: Cover removal 6–11 TLA 700 Series Logic Analyzer Modules Service Manual... -
Page 70: Installation
4 through 8. If the cover is not properly seated, the module can be damaged when you install it in a mainframe or it will not meet EMC requirements. 6–12 TLA 700 Series Logic Analyzer Modules Service Manual... -
Page 71: Figure 6-4: Seating The Cover On The Chassis
6. If you have a 102-channel module or a 136-channel module, install the flat-head screws near the front of the module. Tighten the screws to 4 in lbs. 7. Slide the rear panel on the chassis and install the two rear panel screws. 6–13 TLA 700 Series Logic Analyzer Modules Service Manual... -
Page 72: Daughter Boards
NOTE. After replacing the Daughter boards refer to Table 6–6 on page 6–40 and to Table 6–7 on page 6–41 to determine the proper procedures to perform post-repair adjustments and to verify proper operation of the logic analyzer module. 6–14 TLA 700 Series Logic Analyzer Modules Service Manual... -
Page 73: Removal
Acquisition board. 3. Lift the Daughter board straight up to disconnect it from the Acquisition board connector. Remove screws (2) EMI bracket Daughter board Figure 6–5: Daughter board replacement 6–15 TLA 700 Series Logic Analyzer Modules Service Manual... -
Page 74: Installation
2) to replace the Local Processor Unit (LPU) board. NOTE. When placing an order for a replacement LPU board or an LPU exchange board from the Tektronix Exchange Center, you must supply the following information: Model number, serial number, PowerFlex Option upgrade number, and firmware level. -
Page 75: Installation
If the PowerFlex level does not match the information on the side panel label, you must return the entire logic analyzer module to your local Tektronix service center. Refer to Table 6–6 on page 6–40 and to Table 6–7 on page 6–41 to determine the proper procedures to run to verify proper operation of the logic analyzer module. -
Page 76: Figure 6-7: Inserting Lpu Board Tabs Into Front Subpanel
EMI bracket in place. Tabs on LPU board Front subpanel slot Push forward on P1 connector during installation Chassis Figure 6–7: Inserting LPU board tabs into front subpanel 6–18 TLA 700 Series Logic Analyzer Modules Service Manual... -
Page 77: Acquisition Board
NOTE. The 34-channel and 68-channel modules do not have a Merge cable or Merge Cable connector. For these modules; ignore the steps dealing with the Merge cable and the Merge Cable connector. 6–19 TLA 700 Series Logic Analyzer Modules Service Manual... -
Page 78: Removal
Unplug the cables from the Acquisition board and set them aside. NOTE. It may be necessary to remove the spacer post between the two cables to unlock the cables from the connector. 6–20 TLA 700 Series Logic Analyzer Modules Service Manual... -
Page 79: Figure 6-9: Removing The Cables From The Acquisition Board
Removal and Installation Procedures Unplug ribbon cables (2) Squeeze to unlock cable Figure 6–9: Removing the cables from the Acquisition board 6–21 TLA 700 Series Logic Analyzer Modules Service Manual... -
Page 80: Figure 6-10: Removing The Merge Cable Connector From The Chassis
(see Figure 6–10). Remove screws (2) Merge cable connector Figure 6–10: Removing the Merge cable connector from the chassis 6–22 TLA 700 Series Logic Analyzer Modules Service Manual... -
Page 81: Figure 6-11: Removing The Acquisition Board From The Chassis
8. Carefully slide the Acquisition board away from the front panel until the probe connectors clear the front panel. Then lift the circuit board from the chassis. 9. Disconnect the Merge cables from the Acquisition board. 6–23 TLA 700 Series Logic Analyzer Modules Service Manual... -
Page 82: Installation
7. Perform the Daughter Board installation procedure (see page 6–16). 8. Perform the Local Processor Unit Board installation procedure (see page 6–17). 9. Perform the Cover installation procedure (see page 6–12). 6–24 TLA 700 Series Logic Analyzer Modules Service Manual... -
Page 83: Fuses
+5 V F2508 Acquisition board +5 V F1981 LPU board +24 V F2901 Acquisition board +24 V F1983 LPU board –24 V F2903 Acquisition board –24 V Figure 6–12: Fuse replacement 6–25 TLA 700 Series Logic Analyzer Modules Service Manual... -
Page 84: Installation
6–17). 4. Perform the Cover installation procedure (see page 6–12). P6417 Probe Podlet Replacement Refer to Replacing Probe Podlets in the TLA 700 Series Installation Manual for instructions on replacing the individual probe podlets. Rear EMI Gaskets NOTE. Use both hands to replace the four rear EMI Gaskets. -
Page 85: Figure 6-13: Rear Emi Gasket Removal
Rotate into place lifting any gasket finger that bind. Make sure gasket snaps into holes by pulling on gasket Figure 6–14: Rear EMI gasket replacement 4. Perform the Acquisition Board installation procedure (see page 6–24). 6–27 TLA 700 Series Logic Analyzer Modules Service Manual... - Page 86 5. Perform the Daughter Boards installation procedure (see page 6–16). 6. Perform the Local Processor Unit Board installation procedure (see page 6–17). 7. Perform the Cover installation procedure (see page 6–12). 6–28 TLA 700 Series Logic Analyzer Modules Service Manual...
-
Page 87: Troubleshooting
Fault isolation is supported to the following circuit boards and replaceable parts: LPU board (A10) Acquisition board (A11, A12, A16, A17, A18, A19, A20, A21) Daughter boards (A13) Power supply fuses Interconnect cables 6–29 TLA 700 Series Logic Analyzer Modules Service Manual... -
Page 88: Required Documents
The list is not exhaustive, but it may help you eliminate a problem that’s quick to fix, such as a blown fuse or loose cable. 6–30 TLA 700 Series Logic Analyzer Modules Service Manual... -
Page 89: Table 6-4: Failure Symptoms And Possible Causes
Mainframe does not boot Non-system disk or floppy in external drive; make sure logic analyzer boots from hard drive (Refer to the TLA 700 Series Installation Manual for software reinstallation procedures.) Hard drive failure or corrupted files on hard drive; contact local... -
Page 90: Eliminate Other Problem Sources
Troubleshooting Eliminate Other Problem Sources The TLA Logic Analyzer Module is part of the TLA 700 Series Logic Analyzer, which comprises modules installed in one of two mainframes (benchtop or portable). The following procedures will help you eliminate the mainframe and other modules as possible sources of the failure(s) that you troubleshoot. -
Page 91: Probe-Level Troubleshooting
NOTE. The procedure below requires that the logic analyzer is functional and operates normally when the modules are installed. Procedures to functionally verify the probes are located in the TLA 700 Series Performance Verification and Adjustment Technical Reference Manual. 1. Verify that the probe is correctly connected to the module and to the system-under-test;... -
Page 92: Preparation
If there are no diagnostic failures when you power on the logic analyzer, you can display and run the calibration and diagnostics property sheet by selecting Calibration and Diagnostics from the System menu. 6–34 TLA 700 Series Logic Analyzer Modules Service Manual... -
Page 93: Fault Isolation Procedure
To run the extended diagnostics, do the following steps: 1. Start the TLA 700 Series application if it is not already running. 2. Select the System menu, and point to Calibration and Diagnostics. 3. Select the extended diagnostics property page. - Page 94 7. Refer to Table 6–6 on page 6–40 after module replacement and perform ALL verification and adjustment procedures identified in that table for the replaced board. 6–36 TLA 700 Series Logic Analyzer Modules Service Manual...
-
Page 95: Primary Troubleshooting Chart
Replace Other test fail? acquisition board Fuses Replace good? fuses Self Replace calibration acquisition board Faulty fail? Reinstall module firmware firmware? Good module Replace LPU board Figure 6–15: Primary troubleshooting chart 6–37 TLA 700 Series Logic Analyzer Modules Service Manual... -
Page 96: Diagnostic Tests Table
Acquisition RAM Data Bus Acquisition RAM Address Bus Store Signals Flag Bus Acquisition Data Path Address/Data Bus Hi-Resolution RAM Acquisition RAM Data Bus Acquisition RAM Address Bus Store Signals Bin & Log Busses 6–38 TLA 700 Series Logic Analyzer Modules Service Manual... - Page 97 At-speed Threshold Acquire only) Ensure probes are disconnected before running this test. Replace the Daughter board if this test fails and the DAC and the At-speed Async Acquire test both pass. 6–39 TLA 700 Series Logic Analyzer Modules Service Manual...
-
Page 98: Adjustment After Repair
Power-on and Extended Diagnostics The PowerFlex restoration or changes can only be made by Tektronix service personnel. Refer to the TLA 700 Series Installation Manual for instructions for updating module firmware. 6–40 TLA 700 Series Logic Analyzer Modules Service Manual... -
Page 99: Overview Of Procedures
Adjustment Technical Reference Manual Calibration (certification) Annual recertification Verifies primary refer- After acquisition, LPU, or TLA 700 Series Perfor- ences daughter board replace- mance Verification and ment Adjustment Technical Reference Manual 6–41 TLA 700 Series Logic Analyzer Modules Service Manual... - Page 100 Troubleshooting 6–42 TLA 700 Series Logic Analyzer Modules Service Manual...
- Page 101 CAUTION. When returning the LPU board separately, be sure to properly support the narrow LED arm of the circuit board so it will not be damaged during transit or storage. If the instrument is being shipped to a Tektronix Service Center, enclose the following information: The owner’s address...
- Page 102 Temperature range: –40 F to +160 F (–40 C to +71 C) Altitude: To 40,000 feet (12,190 meters) See Table 1–9 on page 1–8 for a complete listing of the environmental character- istics. 6–44 TLA 700 Series Logic Analyzer Modules Service Manual...
-
Page 104: Table 7-1: Tla 7L1, Tla 7L2, Tla 7L3, And Tla 7L4 Options
Table 7–1 lists the options for the TLA 7L1, TLA 7L2, TLA 7L3, and TLA 7L4 Logic Analyzer modules. NOTE. Service options are listed on the Tektronix Service Options page that precedes the Table of Contents in this manual. Table 7–1: TLA 7L1, TLA 7L2, TLA 7L3, and TLA 7L4 options... - Page 105 Options 7–2 TLA 700 Series Logic Analyzer Modules Service Manual...
- Page 107 Replaceable Electrical Parts Refer to the Mechanical Parts List section for a complete listing and description of replaceable parts. 8–1 TLA 700 Series Logic Analyzer Modules Service Manual...
- Page 108 Replaceable Electrical Parts 8–2 TLA 700 Series Logic Analyzer Modules Service Manual...
-
Page 110: Figure 9-1: Interconnections
J1390 J1270 J1630 TLA 7L3, TLA 7L4 Probe W200 TLA 7M3, TLA 7M4 Probe Daughter Board J1480 J1790 TLA 7L4 and Probe TLA 7M4 Only Merge W300 W350 Figure 9–1: Interconnections 9–1 TLA 700 Series Logic Analyzer Modules Service Manual... -
Page 111: Figure 9-2: Block Diagram
Clocks Probe TLA 7L4 and TLA 7M4 Only Merge Local Processor Unit Board 68330 Bus Communications Interface 68330 Power processor system supplies 68330 Bus Acquisition Board Interface Figure 9–2: Block diagram 9–2 TLA 700 Series Logic Analyzer Modules Service Manual... - Page 113 This section contains a list of the replaceable parts for the TLA 7Lx/TLA 7Mx Logic Analyzer Module. Use this list to identify and order replacement parts. Parts Ordering Information Replacement parts are available through your local Tektronix field office or representative. Changes to Tektronix products are sometimes made to accommodate improved components as they become available and to give you the benefit of the latest improvements.
- Page 114 Items in this section are referenced by figure and index numbers to the exploded view illustrations that follow. Tektronix part number Use this part number when ordering replacement parts from Tektronix. 3 and 4 Serial number Column three indicates the serial number at which the part was first effective. Column four indicates the serial number at which the part was discontinued.
- Page 115 SALEM, OR 97303 TK2469 UNITREK CORPORATION 3000 LEWIS & CLARK HWY VANCOUVER, WA 98661 SUITE 2 TK2647 INSTRUMENT SPECIALTIES CO INC. C/O TEMCO NW HILLSBORO, OR 97123 1336 SE 51ST STREET 10–3 TLA 700 Series Logic Analyzer Modules Service Manual...
- Page 116 131–6174–00 CONN,DIN:PRESSFIT,MALE,RTANG,3 X 32,0.1 CTR 81312 96P603307319 (A16P1, A16P2, A18P1, A18P2) –13 386–6868–00 BACK PANEL TK1943 386–6868–00 –14 441–2102–00 CHASSIS ASSY:TWO WIDE, 34CH, W/SUB FRONT PANEL & 80009 441–2102–00 LABEL ATTACHED 10–4 TLA 700 Series Logic Analyzer Modules Service Manual...
-
Page 117: Figure 10-1: Tla 7L1 And Tla 7M1 Logic Analyzer Module Exploded View
Replaceable Mechanical Parts A16 A18 Figure 10–1: TLA 7L1 and TLA 7M1 Logic Analyzer Module exploded view 10–5 TLA 700 Series Logic Analyzer Modules Service Manual... - Page 118 (A10DS1100, A10DS1102, A10DS1103) –28 150–1279–00 DIODE,OPTO:LED,YEL,585NM,2MCD AT 5V 50434 HLMP–1620–010 (A10DS1101, A10DS1101) –29 200–4272–00 COVER 80009 200–4272–00 –30 348–1365–01 SHLD GSKT,ELEC:SYMETRICAL SLOTTED FINGER,0.350 W TK2647 0493–0069–01 X 7.5 L,RIVIT MTG,SNAP–IN,RIVIT SPACING 1.5 IN 10–6 TLA 700 Series Logic Analyzer Modules Service Manual...
- Page 119 Replaceable Mechanical Parts 10–7 TLA 700 Series Logic Analyzer Modules Service Manual...
- Page 120 131–6174–00 CONN,DIN:PRESSFIT,MALE,RTANG,3 X 32,0.1 CTR 81312 96P603307319 (A17P1, A17P2, A20P1, A20P2) –13 386–6868–00 BACK PANEL TK1943 386–6868–00 –14 441–2103–00 CHASSIS ASSY:TWO WIDE, 68CH, W/SUB FRONT PANEL & 80009 441–2103–00 LABEL ATTACHED 10–8 TLA 700 Series Logic Analyzer Modules Service Manual...
-
Page 121: Figure 10-2: Tla 7L2 And Tla 7M2 Logic Analyzer Module Exploded View
Replaceable Mechanical Parts A17 A20 Figure 10–2: TLA 7L2 and TLA 7M2 Logic Analyzer Module exploded view 10–9 TLA 700 Series Logic Analyzer Modules Service Manual... - Page 122 (A10DS1100, A10DS1102, A10DS1103) –28 150–1279–00 DIODE,OPTO:LED,YEL,585NM,2MCD AT 5V 50434 HLMP–1620–010 (A10DS1101) –29 200–4272–00 COVER 80009 200–4272–00 –30 348–1365–01 SHLD GSKT,ELEC:SYMETRICAL SLOTTED FINGER,0.350 W TK2647 0493–0069–01 X 7.5 L,RIVIT MTG,SNAP–IN,RIVIT SPACING 1.5 IN 10–10 TLA 700 Series Logic Analyzer Modules Service Manual...
- Page 123 Replaceable Mechanical Parts 10–11 TLA 700 Series Logic Analyzer Modules Service Manual...
- Page 124 80009 671–3871–01 (A21, TLA 7M3 ONLY) –12 671–3871–02 B020000 CIRCUIT BD ASSY:102CH,512K,100MHZ ACQUISITION 80009 671–3871–02 (A21, TLA 7M3 ONLY) –13 131–6174–00 CONN,DIN:PRESSFIT,MALE,RTANG,3 X 32,0.1 CTR 81312 96P603307319 (A19P1, A19P2, A21P1, A21P2) 10–12 TLA 700 Series Logic Analyzer Modules Service Manual...
-
Page 125: Figure 10-3: Tla 7L3 And Tla 7M3 Logic Analyzer Module Exploded View
Replaceable Mechanical Parts A19 A21 Figure 10–3: TLA 7L3 and TLA 7M3 Logic Analyzer Module exploded view 10–13 TLA 700 Series Logic Analyzer Modules Service Manual... - Page 126 00779 1–104549–0 (A19J1390, A19J1420, A19J1790, A20J1390, A20J1420, A20J1790) –28 131–6016–00 CONN,HDR:SMD,FEMALE,STR,2 X 50,0.05 X 0.1 CTR 00779 104550–9 (PART OF A13) –29 671–3307–00 CKT BD ASSY:COMPARATOR DAUGHTER BOARD 80009 671–3307–00 (A13) 10–14 TLA 700 Series Logic Analyzer Modules Service Manual...
- Page 127 200–4272–00 COVER 80009 200–4272–00 –38 211–0718–00 SCREW,MACHINE:6–32 X 0.312,FLH100,STL,CDPL,T–10 0KB01 ORDER BY DESCR TORX DR –39 348–1365–01 SHLD GSKT,ELEC:SYMETRICAL SLOTTED FINGER,0.350 W TK2647 0493–0069–01 X 7.5 L,RIVIT MTG,SNAP–IN,RIVIT SPACING 1.5 IN 10–15 TLA 700 Series Logic Analyzer Modules Service Manual...
- Page 128 80009 671–3561–01 (A12, TLA 7M4 ONLY) –12 671–3561–02 B020000 CKT BD ASSY:136CH,512K ACQUISITION 80009 671–3561–02 (A12, TLA 7M4 ONLY) –13 131–6174–00 CONN,DIN:PRESSFIT,MALE,RTANG,3 X 32,0.1 CTR 81312 96P603307319 (A11P1, A11P2, A12P1, A12P2) 10–16 TLA 700 Series Logic Analyzer Modules Service Manual...
-
Page 129: Figure 10-4: Tla 7L4 And Tla 7M4 Logic Analyzer Module Exploded View
Replaceable Mechanical Parts A11 A12 Figure 10–4: TLA 7L4 and TLA 7M4 Logic Analyzer Module exploded view 10–17 TLA 700 Series Logic Analyzer Modules Service Manual... - Page 130 (PART OF A13) – 131–3363–00 CONN,HDR:PCB,MALE,RTANG,2 X 17,0.1CTR 53387 N2534–5002UB (PART OF A13) –28 131–5980–00 CONN,HDR:SMD,MALE,STR,2 X 50,0.05 X 0.1 CTR 00779 1–104549–0 (A11J1270, A11J1390, A11J1420, A11J1790, A12J1270, A12J1390, A12J1420, A12J1790) 10–18 TLA 700 Series Logic Analyzer Modules Service Manual...
- Page 131 –37 200–4272–00 COVER 80009 200–4272–00 –38 211–0718–00 SCREW,MACHINE:6-32 X 0.312,FLH100,STL,CDPL,T-10 0KB01 ORDER BY DESCR TORX –39 348–1365–01 SHLD GSKT,ELEC:SYMETRICAL SLOTTED FINGER,0.350 W TK2647 0493–0069–01 X 7.5 L,RIVIT MTG,SNAP–IN,RIVIT SPACING 1.5 IN 10–19 TLA 700 Series Logic Analyzer Modules Service Manual...
- Page 132 80009 020–3000–XX – 012–1412–00 LEAD SET ASSY:LAPIKPV 23633 68654 – 012–1426–00 LEAD SET,ELEC:PKG OF 12,2 TO 1 SIGNAL/GROUND 23633 69025 – 012–1427–00 LEAD SET,ELEC:PKG OF 4,4 TO 1 SIGNAL/GROUND 23633 69026 10–20 TLA 700 Series Logic Analyzer Modules Service Manual...
-
Page 133: Figure 10-5: P6417 Probe Exploded View
Replaceable Mechanical Parts Figure 10–5: P6417 Probe exploded view 10–21 TLA 700 Series Logic Analyzer Modules Service Manual... - Page 134 PROBE RETAINER BRACKET WITH SCREWS –12 INSTALLATION TOOL & PODLET COLOR-CODED BANDS PODLET REPLACEMENT KIT (020–2200–00) 10–5–4 PODLET (INCLUDING CABLE) –5 8-CHANNEL PODLET HOLDERS –11 PODLET LATCHES –12 INSTALLATION TOOL & PODLET COLOR-CODED BANDS 10–22 TLA 700 Series Logic Analyzer Modules Service Manual...
Need help?
Do you have a question about the TLA 700 Series and is the answer not in the manual?
Questions and answers