Table of Contents
Advertisement
Advertisement
Table of Contents

Summary of Contents for AQUAPHOR RO-102S
- Page 1 AQUAPHOR RO-101S, RO-102S (in further RO) REVERSE OSMOSIS SYSTEM OWNER’S MANUAL...
-
Page 2: Table Of Contents
Please read this manual carefully before you proceed with the installation. Your failure to follow any of the attached instructions or operating parameters may lead to the product’s failure and possible property damage. Save the manual for future reference. AQUAPHOR RO-101S, RO-102S... -
Page 3: Introduction
Thank you for your purchase of this Aquaphor RO. With proper installation and maintenance, this system will provide you with premium quality drinking water. The technology used in the Aquaphor RO enriches the filtered water with minerals in controlled quantities. -
Page 4: Safety Instructions
Additionally, it will form pinholes in the tubing. Be sure to follow any state or local regulations. Caution: The Reverse Osmosis system is designed to be connected to cold water only. Never run warm or hot water through your appliance. AQUAPHOR RO-101S, RO-102S... -
Page 5: Product Assembly
2.2. Reverse Osmosis membrane block: Replacement membrane cartridge Aquaphor RO-50S (for Aquaphor RO-101S only) (4) ..1 pc Replacement membrane cartridge Aquaphor RO-100S (for Aquaphor RO-102S only) (4) ..1 pc 2.3. -
Page 6: Design And Operation Principles
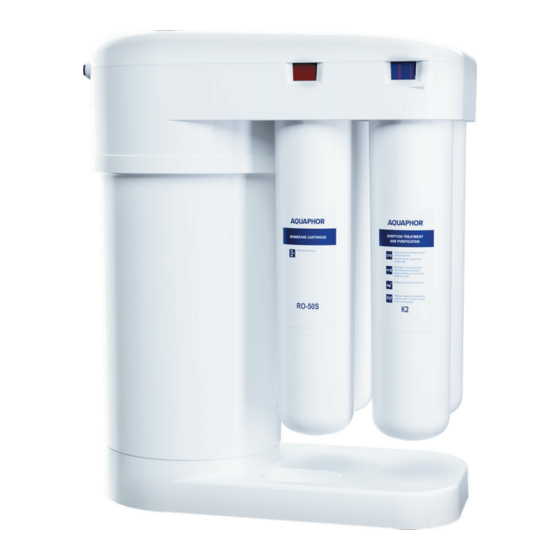
An integral part of the RO housing is the treated water storage tank (6). Treated water goes into the storage tank upon exiting the membrane cartridge. This storage tank ensures availability of the required amount of filtered water always. AQUAPHOR RO-101S, RO-102S... - Page 7 Reverse Osmosis membrane block (4) includes the replacement membrane cartridge ‰ Aquaphor RO-50S (for RO-101S) or RO-100S (for RO-102S) and purifies water by removing organic compounds, non-organic compounds, and salts while softening water. Water conditioning block (5) includes the mineralizing cartridge K7M. The water conditioning ‰...
-
Page 8: Installation
Black JG tube 1/4” Incoming tap water Red JG tube 3/8” Cold water supply Drain saddle Treated water Blue JG tube 1/4” Water flow direction Connection node, shutoff valve in open position Picture 4. RO installation scheme AQUAPHOR RO-101S, RO-102S... -
Page 9: Connection Node (8)
Connect JG tube (follow the instructions below to correctly connect the JG tubes). ‰ ATTENTION! Make sure that the sealing O-Ring is located correctly in its place and not dam- aged during installation. AQUAPHOR RO-101S, RO-102S... - Page 10 Pull the locking clip (2) off the plastic plug (1), then pull the tube (3) out by applying pressure on the face of the connecting piece. To apply pressure, use the tube disconnection key (4) included in the water filter set. Figure 7. Disconnection of JG tubes AQUAPHOR RO-101S, RO-102S...
-
Page 11: Clean Water Faucet Installation
Put on the captive-nut (9) on the plastic pipe (10) with pressed metal bushing (8) (fig. 8) and screw on the ‰ nut onto the tail end of the faucet. ∅ 12 mm Figure 8. Tube connecting to the clean water faucet procedure AQUAPHOR RO-101S, RO-102S... -
Page 12: Drain Saddle Installation
Put the plastic nut onto the JG drain tube (1/4”, black) so that the tube is protruding from the other side of the nut by a length of 20 mm (see figure 9b). To eliminate any noise from the water in the drain saddle, push the JG tube deeper into the pipe. Figure 9b. Drain saddle installation AQUAPHOR RO-101S, RO-102S... -
Page 13: Slotted Plug Installation
To start RO, you must connect the supply tube and carry out the flushing procedure of filter and membrane cartridges. Step 1. Connect the incoming tubes according to the diagram below (figure 11). The tube connection scheme is illustrated on figure 6 Figure 11. Incoming tubes connection AQUAPHOR RO-101S, RO-102S... - Page 14 Note: In total, the general flushing of filter and membrane cartridges and startup time will take you about 3 hours. * Depending on the storage, transportation and operation conditions, the complete flushing of membrane cartridge may take up to 24 hours. AQUAPHOR RO-101S, RO-102S...
-
Page 15: Replacing Cartridges
Interchange the positions of K5 and K2 car- tridges. Set the shutoff valve on the connection node into the open position and close the clean water faucet. Make sure that RO connections are sealed. Figure 13. Installation of the membrane cartridge service plug AQUAPHOR RO-101S, RO-102S... - Page 16 * The K7 cartridge is not included in the water filter set and is sold separately. ** Depending upon storage, transportation and operation conditions, complete flushing of the membrane cartridge may take up to 24 hours. AQUAPHOR RO-101S, RO-102S...
-
Page 17: Recommended Filter Replacement
Recommended Replace ment (months) Replacement filter cartridge K5 (1) Replacement filter cartridge K2 (2) Replacement membrane cartridge Aquaphor RO-50S (3) Replacement filter cartridge K7M (4) Once purchased, the cartridges can be stored for three years from the manufacturing date. 12. Recommended filter maintenance The frequency at which the filter and membrane cartridges should be replaced depends on your tap water quality. -
Page 18: Warranty
Installation, operational, storage and transportation rules described in this manual should be maintained. The manufacturer is not responsible for operation of the Aquaphor RO and possible consequences, in case if: - RO or components have visible mechanical, thermal or chemical damages;... -
Page 19: Troubleshooting
If water runs slower than 50 ml/min, then the membrane needs to be replaced. Turn off the shutoff valve and open it every time you replace each cartridge If any other faults are identified, please contact our customer service department at +1 (855) 855 2299 or email sales@aquaphor.com, support@aquaphor.com... - Page 20 Client’s signature: For installation, operational and technical maintenance, please, contact: Manufacturer: Westaqua-Invest OÜ division of AQUAPHOR Corp., L. Tolstoi 2A, Sillamäe, Esto- nia, 40231. www.aquaphor.com AQUAPHOR Corp. division of ELECTROPHOR, Inc., Pyonerskaya Str., 27 lit.A, St.-Petersburg, Russia, 197110. www.aquaphor.ru Production facility location, date of...


Need help?
Do you have a question about the RO-102S and is the answer not in the manual?
Questions and answers