Advertisement
Quick Links
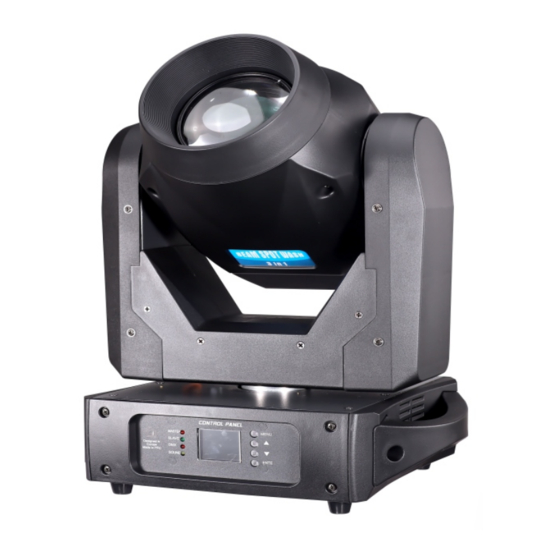
LED BEAM SPOT WASH 150
LED MOVING HEAD
MJ-1057
User Manual
PROFESSIONAL LED LIGHTING
=======
========
Thank you for choosing our LED BSW moving head light. For the sake of
your safety, Please read and follow these instructions carefully and keep
this manual in a safe place for future reference.
Advertisement

Related Manuals for MJ LED LIGHTNING MJ-1057


Summary of Contents for MJ LED LIGHTNING MJ-1057
- Page 1 LED BEAM SPOT WASH 150 LED MOVING HEAD MJ-1057 User Manual PROFESSIONAL LED LIGHTING ======= ======== Thank you for choosing our LED BSW moving head light. For the sake of your safety, Please read and follow these instructions carefully and keep...
- Page 2 CONTENTS 1. Safety Instruc ons ................1 2. Technical Specifica ons ..............3 3. Descrip on ..................4 3.1 Control Panel ................4 4. Gobo and Lamp .................. 5 4.1 Gobos ..................5 5. How To Set The Unit ................5 5 .1 Main Func on ................
- Page 3 8 . Cleaning 1. Safety Instruc ons The cleaning of internal and external op cal lenses and/or mirrors must be carried out periodically Please read the instruc on carefully which includes important informa on about to op mize light output. Cleaning frequency depends on the environment in which the fixture the installa on, usage and maintenance.
- Page 4 200-209 All reset DO NOT operate in dirty or dusty environment, do clean fixtures regularly. 210-219 Enable blackout while Pan/Tilt Color Gobo Moving DO NOT touch any wire during opera on as there might be a hazard of electric shock. 220-229 Disable blackout while Pan/Tilt Color Gobo Moving Avoid power wires together twist other cables.
- Page 5 2 . Technical Specifica ons ANGLE/FROST 000-007 Off Power supply 008-128 Angle - AC 100~240V 50/60Hz 129-255 Frost Power Consump on PRISM 000-007 No effect - 189W 008-255 Prism Effect Light Source R-PRISM - 1 X W LED 000-127 Index Angle 128-189 Counter-clockwise rota on fast to slow...
- Page 6 Focus 043-045 Color10 - Motorized focus 046-048 Color11 Zoom 049-051 Color12 052-054 Color13 - Motorized linear zoom system 055-057 Color14 Protocols 058-060 Color15 - DMX 512 061-063 Color16 - Date input/output: 3/5 Pin XLR socket 064-127 Color wheel indexing 128-189 Counter-Clockwise rota on, fast to slow Weight 190-193...
- Page 7 4. DMX input/output: For DMX 512 opera on, use 3/5-pin XLR plug cable to link the units together 032-039 Macro 4 5. Power In: Used to connect to supply power. 040-047 Macro 5 048-055 Macro 6 6. Power out: Used to connect to next unit. 056-063 Macro 7 7.
- Page 8 000-255 0% ~ 100% SPECIAL FUNCTION mode 1(17) 000-069 No func on DMX Se ngs mode 2(20) 070-079 Enable blackout while Pan/Tilt Moving MasterSlave 080-089 Disable blackout while Pan/Tilt Moving Blackout 090-099 Enable blackout while Color changing Hold 100-109 Disable blackout while Color changing 110-119 Enable blackout while Gobo changing 120-129...
- Page 9 DMX Se ngs 008-016 Gobo2-1 017-025 Gobo2-2 To select DMX Se ngs press the ENTER bu on to confirm, use the UP/DOWN bu on to select DMX 026-034 Gobo2-3 Address, DMX Channel Mode or DMX State. 035-043 Gobo2-4 DMX Address —DMX512 address se ng 044-052 Gobo2-5 053-061...
- Page 10 Dimmer Curve 240-247 Macro 30 To select Dimmer Curve, press the ENTER bu on to show the DIMMER CURVE on the display. Use 248-255 Macro 31 MACRO SPEED the DOWN/UP bu on to select the Mode 1 or Mode 2 or Mode 3 or Mode 4. Once the mode has 000-255 fast to slow been selected, press the ENTER bu on to setup, to go back to the func ons without any change...
- Page 11 Slave Mode TILT 000-255 0 °~ 270° To select Slave Mode, press the ENTER bu on to confirm. U se the UP/DOWN bu on to select PAN/TILT SPEED master, slave 1 or slave 2, press the ENTER bu on to store. Press the MENU bu on back to the 000-255 Fast to Slow last menu or let the unit idle one minute to exit menu mode.
- Page 12 Auto Test 5. The end of the DMX 512 system should be terminated to reduce signal errors. Select Auto Test, press the ENTER bu on to confirm, the unit will run built-in programs to 6. 3 pin XLR connectors are more popular than 5 pins XLR. automa cally test pan, lt, shu er, color, CMY, gobo, gobo rota on, prism, prism rota on, iris, 3 pin XLR: Pin 1: GND, Pin 2: Nega ve signal (-), Pin 3: Posi ve signal (+) frost, zoom, focus, dimmer and lamp on/off.
- Page 13 Effect —Reset Effect 6 . Control By Universal DMX Controller Select Effect, press the ENTER bu on to confirm, use the UP/DOWN bu on to select Yes (the unit 6 .1 Connec on will run built-in program to reset effect to their home posi ons) or No, press the ENTER bu on to store.
- Page 14 Pan—pan home posi on adjustment Beam/Frost—Beam/Frost home posi on adjustment Enter offset mode, Select Pan, press the ENTER bu on to confirm, the present posi on will blink on Enter offset mode, Select Beam/ Frost, press the ENTER bu on to confirm, the present posi on will the display, use the UP/DOWN bu on to offset the value from - 128 to 127, press the ENTER bu on to blink on the display, use the UP/DOWN bu on to offset the value from - 128 to 127, press the ENTER store.
Need help?
Do you have a question about the MJ-1057 and is the answer not in the manual?
Questions and answers