Table of Contents
Advertisement
Quick Links
Advertisement
Table of Contents

Related Manuals for MJ LED LIGHTNING MJ-1029A


Summary of Contents for MJ LED LIGHTNING MJ-1029A
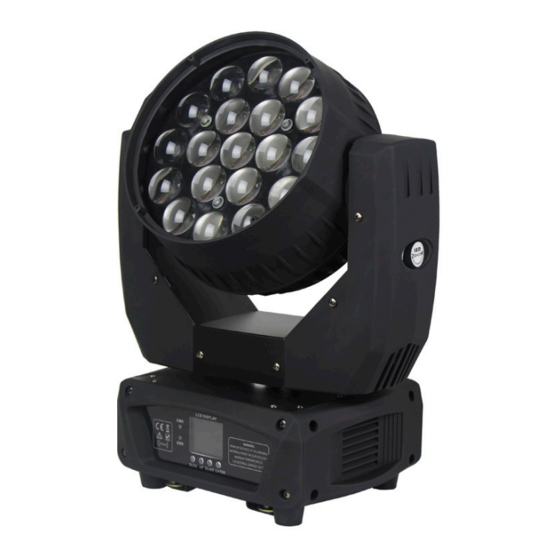
- Page 1 Zoom LED Moving Head Light MJ-1029A User Manual PROFESSIONAL LED LIGHTING ====== ======== Thank you for choosing our LED zoom moving head light. For the sake of your safety, Please read and follow these instructions carefully and keep this manual in a safe place for future...
-
Page 2: Table Of Contents
Catalogue Chapter Page Safe Usage Of The Product -----------------------------------------------------------------------------------------3 Install The Equipment ------------------------------------------------------------------------------------------------4 Power Code Connection ---------------------------------------------------------------------------------------------4 DMX Connection ------------------------------------------------------------------------------------------------------4 DMX Terminator -------------------------------------------------------------------------------------------------------5 Function Set --------------------------------------------------------------------------------------------------------------5 Operation Menu ---------------------------------------------------------------------------------------------------------6 Control panel of LED display information ----------------------------------------------------------------------9 Maintenance --------------------------------------------------------------------------------------------------------------9 Keeping The Product Clean ------------------------------------------------------------------------------------------9 Trouble Shooting --------------------------------------------------------------------------------------------------------10... -
Page 3: Safe Usage Of The Product
SAFE USAGE OF THE PRODUCT When unpacking and before disposing of the carton, check there is no transportation damage before using the product. Should there be any damage caused by transportation, consult your dealer and do not use the apparatus. The product is for indoor use only, IP20. -
Page 4: Install The Equipment
Install The Equipment: Use 2pcs clamp and safety cord(need to purchase).Use clamp fix with light hook which in the packing box with light, then use screw install to the bottom of lamp. Hang the fixture on the structure and fasten the screws attached to each clamp. Make sure the light is installed reliable, and confirm the light which you fixed is strong enough for hanging the light. -
Page 5: Dmx Terminator
Connection between the controller and a projector and between one projector and another must be made with a 2 core-screened cable, with each core having at least a 0.5mm diameter. Connection to and from the projector is via cannon 3 pin (which are included with the projector) XLR plugs and sockets. -
Page 6: Operation Menu
Press MENU into the main menu, when the LCD is off. When the LCD display the main menu,Press the menu into sub menu.(as picture 1) Use button switch and LCD display, can set the address code and function code easily. Check or modify lighting function settings, Press the MENU display panel. - Page 7 Pan Reverse ON/OFF Set Up Tilt Reverse ON/OFF Pan Calibration 0-255 0-255 Tilt Calibration Focus Calibration 0-255 Code Wheel ON/OFF Signal Link ON/OFF Handspike Delay ON/OFF ID Code 0-25 Temperature Set 50°C - 85°C Temp Switch Set ON/OFF Screen Protect ON/OFF Screen Rot ON/OFF...
- Page 8 Main Menu Touch the menu to into setting. Sub Menu Sub menu include address, run mode, test mode, language , Setup and sys info. Press the main menu to do each setting. Run mode, “√” is mean to the currently run mode. At the same time, only running one mode. When you select DMX mode and auto mode, Press “...
-
Page 9: Control Panel Of Led Display Information
White Current: White current adjust Factory set: you can set all parameters to factory set. Test mode, test mode is a special mode, only can be used when it is in test mode interface, exit interface, then return to previous running mode. In the test mode, you can adjust Pan, tilt and focus motor’s position, also can adjust intensity of RGBW color. -
Page 10: Trouble Shooting
Trouble Shooting: Problem Answer The LED moving head light doesn’t switch Check the fuse the power socket Although shines, but the LED moving head Check the digital start address and lamp doesn’t accept the instruction of the also check the connection situation of controller. - Page 11 0-255 Red dimmer from dark to bright 0-255 Green dimmer from dark to bright 0-255 Blue dimmer from dark to bright 0-255 White dimmer from dark to bright 0-255 R1 dimmer from dark to bright 0-255 G1 dimmer from dark to bright 0-255 B1 dimmer from dark to bright 0-255...
-
Page 12: Technical Parameters
Technical Parameters: Construction: Composite plastic, die-casting aluminum, Voltage: AC100V-240V; 50/60Hz Power Consumption: 300W (220V) LED Bulbs: 4IN1*19LEDs LED Current: 700mA LED Lifetime: 50000Hours Colors: RGBW color mixing Adjusts the light: 0-100 electron adjusts the light, various colors may alone move also may mix the color tone Strobe: 1-25/second high speed strobe, but single color Mixes the color strobe Head Movement: Pan 540°, Tilt 270°, with auto position correction and electronic replacement...
Need help?
Do you have a question about the MJ-1029A and is the answer not in the manual?
Questions and answers