Table of Contents

Related Manuals for York JDOH Series


Summary of Contents for York JDOH Series
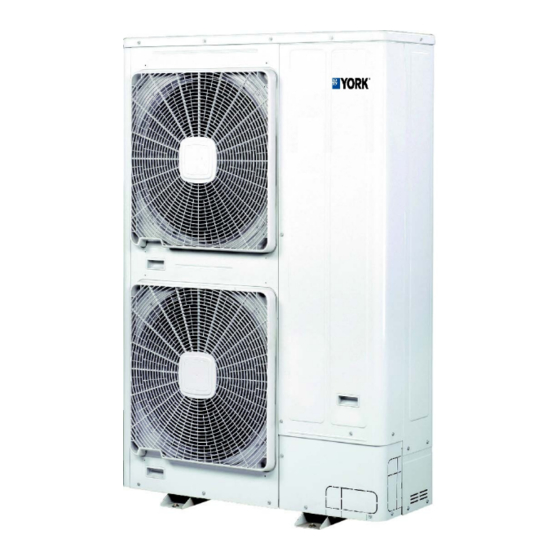
- Page 1 VRF OUTDOOR UNITS INSTALLATION MANUAL New Release FAN-1712 201602 INVERTER-DRIVEN MULTI-SPLIT SYSTEM HEAT PUMP AIR CONDITIONERS JDOH SERIES JDOH080HSEF0AQ JDOH100HSEF0AQ JDOH120HSEF0AQ Issue Date: 26. Feb.2016 P00899Q ORIGINAL INSTRUCTIONS...
- Page 3 IMPORTANT NOTICE G YORK pursues a policy of continuing improvement in design and performance of products. The right is therefore reserved to vary specifications without notice. G YORK cannot anticipate every possible circumstance that might involve a potential hazard. G This heat pump air conditioner is designed for standard air conditioning only. Do not use this heat pump air conditioner for other purposes such as drying clothes, refrigerating foods or for any other cooling or heating process.
- Page 4 SAFETY SUMMARY G Use refrigerant R410A in the refrigerant cycle. Do not charge oxygen, acetylene or other flammable and poisonous gases into the refrigerant cycle when performing a leakage test or an air-tight test. These types of gases are extremely dangerous and can cause an explosion.
- Page 5 SAFETY SUMMARY G Do not install the indoor unit, outdoor unit, remote control switch and cable within approximately 3 meters from strong electromagnetic wave radiators such as medical equipment. G Supply electrical power to the system to energize the oil heater for 12 hours before start-up after a long shutdown.
- Page 6 Therefore, the utilization of the unit other than those indicated in these instructions is not recommended. Please contact your local agent, as the occasion arises. YORK's liability shall not cover defects arising from the alteration performed by a customer without YORK's consent in a written form.
-
Page 7: Table Of Contents
TABLE OF CONTENTS 1. Safety Summary ........................1 2. Structure ........................... 1 Outdoor Unit & Refrigerant Cycle ..................1 Necessary Tools and Instrument List for Installation ............3 3. Transportation and Handling ....................4 Transportation ......................... 4 Handling of Outdoor Unit ....................4 4. -
Page 8: Safety Summary
1. Safety Summary G Do not perform installation work, refrigerant Do not install the indoor unit, outdoor unit, piping work, drain piping and electrical remote control switch and cable within wiring connection without referring to the approximately 3 meters from strong installation manual. - Page 9 <Refrigerant Cycle> <Outdoor Unit> Ambient Thermistor Discharge Gas Thermistor Discharge Gas Thermistor Thermistor Compressor Heat Exchanger Sensor for Regrigerant Pressure Oil Separator Accumulator Strainer(3/8) Strainer(1/2) Strainer(3/4) Distributor Reversing Valve Capillary Tube Electronic Expansion Valve Check Valve Solenoid Valve Solenoid Valve Check Joint Stop Valve for Liquid Line Stop Valve for Gas Line...
-
Page 10: Necessary Tools And Instrument List For Installation
Necessary Tools and Instrument List for Installation Tool Tool Tool Tool Handsaw Copper Pipe Bender Spanner Leveller Phillips Clamper for Solder- Manual Water Pump Charging Cylinder Screwdriver less Terminals Hoist Vacuum Pump Pipe Cutter Gauge Manifold (for Indoor Unit) Refrigerant Gas Brazing Kit Cutter for Wires Ammeter... -
Page 11: Transportation And Handling
3. Transportation and Handling Handling of Outdoor Unit Transportation Transport the product as close to the installation location as practical before unpacking. Do not put any foreign material into the outdoor unit and check to ensure that none exists in the outdoor unit before the Do not put any material on the product. -
Page 12: Outdoor Unit Installation
4. Outdoor Unit Installation • Do not install the outdoor unit in a space where Factory-Supplied Accessories a seasonal wind directly blows to the outdoor Check to ensure that the following accessories heat exchanger or a wind from a building space are packed with the outdoor unit. -
Page 13: Service Space
Service Space Install the outdoor unit with a sufficient space around the outdoor unit for operation and maintenance as shown below. (1) Obstacles on Inlet Side (a) Upper Side is Open. (mm) Single Installation Multiple Installation * Around sides * Around sides are open. - Page 14 (2) Obstacles on Discharge Side (a) Upper Side is Open. (mm) Single Installation Multiple Installation Min. Front Side Min. 700 Min.100 Min.50 Fit positions " " with unit front side. NOTE: NOTE: Mount the airflow guide and Mount the airflow guide and open both open right end or left end.
-
Page 15: Installation Work
Installation Work (1) Secure the outdoor unit with the anchor (4) Multi-Row and Multiple Installations bolts. Air Flow Direction Base of Outdoor Unit Special Washer Anchor Bolt Concrete Filled Mortar Fig. 4.5 Installation Space (5) Fig. 4.6 Installation of Anchor Bolts Keep a distance of more than 15mm between other units and do not put obstacles on the right Fix the outdoor unit to the anchor bolts by... - Page 16 (4) Fix the outdoor unit firmly so that declining, Incorrect making noise, and falling down by strong wind or earthquake is avoided. Base Width of Outdoor Unit 100mm Fixing Plate (Field-Supplied) Both sides on the unit fixing Outdoor Unit can be possible. is Unstable.
-
Page 17: Refrigerant Piping Work
Refrigerant Piping Work G Flaring Dimension Perform the flaring work as shown below. Use refrigerant R410A in the refrigerant cycle. (mm) Do not charge oxygen, acetylene or other Diameter -0.4 flammable and poisonous gases into the R410A refrigerant cycle when performing a leakage 6.35 test or an air-tight test. -
Page 18: Refrigerant Piping Work
Combination between Indoor Unit and Outdoor Unit Table 5.1 Indoor Unit Type List Nominal Horsepower (HP) Indoor Unit Type 10.0 In-the-Ceiling In-the-Ceiling Low Height 4-Way Cassette Wall Floor Conncealed Available A maximum total capacity of 130% and a minimum total capacity of 50% can be obtained by combination of the indoor units when compared with the nominal outdoor unit capacity. - Page 19 JE-102SN JE-162SN...
-
Page 20: Piping Connection
Outdoor Unit Model < ≥ Indoor Unit Model (HP) 0.8 1.5 < 2.5 5.0 Outdoor Unit Model JE-102SN JE-162SN 10.0 ≥ Outdoor Unit Model JE-162SN JE-162SN Outdoor Unit Model JE-102SN < ≥ JE-162SN Piping Connection Pipes can be connected from 4 directions. Hold down the cover slowly. - Page 21 (1) Confirm that the valve is closed. Right Side Piping Hole (2) Prepare a field-supplied bend pipe for liquid line. Connect it to the liquid valve by flare nut through the square hole of bottom base. For Piping Connection When tightening the flare nut, use two spanners.
-
Page 22: Air Tight Test
(c) Rear Piping Work (4) Stop Valve After removing rear piping cover, punch Operation of the stop valve should be out the “C” holes along the guide line. performed according to the below. <Gas Valve> Rear Cover NOTE: To avoid damage protect cables and pipes with adequate insulation (Field- Supplied). -
Page 23: Vacuum Pumping
(5) Connect the gauge mani-fold using (4) This system is not necessary to charge charging hoses with a nitrogen cylinder to refrigeration less than 30m of the actual the check joints of the liquid line and the piping length. If the total piping length is gas line stop valves. - Page 24 (6) Additional Refrigerant Charge If total piping length is move than 30m, it is necessary additional refrigerant charge as follows. Additional Refrigerant Charge Calculation Although refrigerant has been charged into this unit, it is required that additional refrigerant be charged according to piping length.
-
Page 25: Caution Of The Pressure By Check Joint
Caution of the Pressure by Check Joint When the pressure is measured, use the check joint of gas stop valve ((A) in the figure below) and use the check joint of liquid piping ((B) in the figure below). At that time, connect the pressure gauge according to the following table because of high pressure side and low pressure side changes by operation mode. -
Page 26: Collecting Refrigerant
Collecting Refrigerant Electrical Wiring When the refrigerant should be collected into the outdoor unit due to indoor/outdoor unit relocation, collect the refrigerant as follows. G Turn OFF the main power switch to the (1) Attach the manifold gauge to the gas stop indoor unit and the outdoor unit and wait for valve and the liquid stop valve. -
Page 27: Electrical Wiring Connection
Electrical Wiring Connection 6.2.1 For Outdoor Unit and the outdoor unit coincide correctly. If not, some component will be damaged. The electrical wiring connection for the outdoor unit is shown in Fig. 6.1 (1) Use shielded wires (>0.75mm ) for (1) Connect the power supply wires to L1, L2, intermediate wiring to protect electrically L3, and N (for 380-415V), for the three... - Page 28 Outdoor Unit / Power Supply Line No. 0 System No. 1 System No. 3 System Outdoor Unit Outdoor Unit Outdoor Unit L1 L2 L3 N L1 L2 L3 N L1 L2 L3 N Operating Line (Shielded Twist Pair Cable) DC5V (Non-Pole Transmission H-LINK II System) Distribution Box or Pull Box Distribution Box or Pull Box FUSE...
- Page 29 Table 6.1 Electrical Data and Recommended Wiring, Breaker Size/1 Outdoor Unit Maximum Power Nominal Running Fuse Nominal Supply Line Model Power Supply Sensitive Current Current Current (mA) MLFC2.0SQ 20.5 380V 3N~ 60Hz MLFC3.5SQ MLFC3.5SQ ELB: Earthleakage Breaker, MLFC: Flame Retardant Polyflex Wire n Field Minimum Wire Sizes for Power Source Transmitting Power Source Cable Size...
- Page 30 Power Source of Power Source Line Power Source Line Indoor Unit Remote Distribution Box Remote Distribution Box Remote Distribution Box Control Line or Pull Box Control Line or Pull Box Control Line or Pull Box (Field-Supplied) It is need for China and (Field-Supplied) It is need for China and (Field-Supplied)
-
Page 31: Test Run
Test Run Test run should be performed according to the Table 7.2 on page 26. And use the Table 7.1 on page 25 for recording test run. G Do not operate the system until all the check points have been cleared. (A) Check to ensure that the electrical resistance is more than 1 megohm, by measuring the resistance between... - Page 32 Table 7.1 Test Run and Maintenance Record MODEL: SERIAL. No. COMPRESSOR MFG. No. CUSTOMER'S NAME AND ADDRESS: DATE: 1. Is the rotation direction of the indoor coil fan correct? 2. Is the rotation direction of the outdoor coil fan correct? 3.
- Page 33 Table 7.2 Checking of Wire Connection by Test Run NOTE: "TEST RUN" shall be performed with each refrigerant cycle (each outdoor unit). (1) Turn ON the power source of the units. Setting Temperature (2) Procedure for "TEST RUN" mode of remote control switch. HIGH SET TEMP.
- Page 34 Table 7.3 Alarm Code Code Category Content of Abnormality Leading Cause Indoor Unit Activation of Protection Device Activation of Float Switch, High Level in Drain Pan Activation of PSH, Pipe Clogging, Excessive Outdoor Unit Activation of Protection Device Refrigerant, Inert Gas Mixing Abnormality between Indoor and Incorrect Wiring, Loose Terminals, Disconnect Wire, Transmission...
-
Page 35: Safety And Control Device Setting
Safety and Control Device Setting • Compressor Protection • Fan Motor Protection High Pressure Switch: This switch cuts out the When the thermistor temperature is reached to operation of the compressor when the the setting, motor output is decreased. discharge pressure exceeds the setting. The other way, when the temperature becomes lower, limitation is cancelled. - Page 36 © 2015 Johnson Controls, Inc. WWW.johonsoncontrols.com FAN-1712 201602 Johnson Controls reserve the right change product features without notice. P00899Q 2016.02 V00...
Need help?
Do you have a question about the JDOH Series and is the answer not in the manual?
Questions and answers