Table of Contents
Advertisement
INSTALLATION&MAINTENANCE
MANUAL
MULTI-SPLIT SYSTEM HEAT PUMP
New Release
INVERTER-DRIVEN
AIR CONDITIONERS
Models
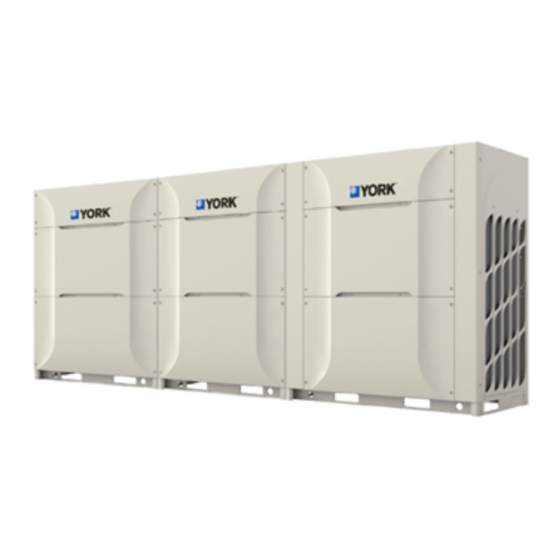
< Outdoor Units >
JVOH080VPEMBQ
JVOH380VAEMBQ
JVOH100VPEMBQ
JVOH400VAEMBQ
JVOH120VPEMBQ
JVOH420VAEMBQ
JVOH140VPEMBQ
JVOH440VAEMBQ
JVOH160VPEMBQ
JVOH460VAEMBQ
JVOH180VPEMBQ
JVOH480VAEMBQ
JVOH200VPEMBQ
JVOH500VAEMBQ
JVOH220VPEMBQ
JVOH520VAEMBQ
JVOH240VPEMBQ
JVOH540VAEMBQ
JVOH260VAEMBQ
JVOH560VAEMBQ
JVOH280VAEMBQ
JVOH580VAEMBQ
JVOH300VAEMBQ
JVOH600VAEMBQ
JVOH320VAEMBQ
JVOH620VAEMBQ
JVOH340VAEMBQ
JVOH640VAEMBQ
JVOH360VAEMBQ
JVOH660VAEMBQ
JO2017062E
JVOH680VAEMBQ
JVOH700VAEMBQ
JVOH720VAEMBQ
JVOH740VAEMBQ
JVOH760VAEMBQ
JVOH780VAEMBQ
JVOH800VAEMBQ
JVOH820VAEMBQ
JVOH840VAEMBQ
JVOH860VAEMBQ
JVOH880VAEMBQ
JVOH900VAEMBQ
JVOH920VAEMBQ
JVOH940VAEMBQ
JVOH960VAEMBQ
P01373Q
Original Instruction
Advertisement
Table of Contents

Subscribe to Our Youtube Channel
Related Manuals for York JVOHQ Series


Summary of Contents for York JVOHQ Series
- Page 1 INSTALLATION&MAINTENANCE New Release JO2017062E MANUAL INVERTER-DRIVEN MULTI-SPLIT SYSTEM HEAT PUMP AIR CONDITIONERS Models < Outdoor Units > JVOH080VPEMBQ JVOH380VAEMBQ JVOH680VAEMBQ JVOH100VPEMBQ JVOH400VAEMBQ JVOH700VAEMBQ JVOH120VPEMBQ JVOH420VAEMBQ JVOH720VAEMBQ JVOH140VPEMBQ JVOH440VAEMBQ JVOH740VAEMBQ JVOH160VPEMBQ JVOH460VAEMBQ JVOH760VAEMBQ JVOH180VPEMBQ JVOH480VAEMBQ JVOH780VAEMBQ JVOH200VPEMBQ JVOH500VAEMBQ JVOH800VAEMBQ JVOH220VPEMBQ JVOH520VAEMBQ JVOH820VAEMBQ JVOH240VPEMBQ JVOH540VAEMBQ...
- Page 2 IMPORTANT NOTICE ● The company pursues a policy of continuous improvement in design and performance of products. The right is therefore reserved to vary specifications without notice. ● The company cannot anticipate every possible circumstance that might involve a potential hazard. ●...
- Page 3 CHECKING PRODUCT RECEIVED ● Upon receiving this product, inspect it for any shipping damage. Claims for damage, either apparent or concealed, should be filed immediately with the shipping company. ● Check the model number, electrical characteristics (power supply, voltage and frequency) and accessories to determine if they are correct.
-
Page 4: Table Of Contents
Contents 1.Safety Instruction ..............................1 2. Structure ................................4 2.1 Outdoor Unit and Refrigerating System ......................4 2.2 Tools and Instruments Required for Installation .................... 4 3. Prepare Before Installation ..........................6 3.1 Outdoor Model Number ..........................6 3.2 Combination of Indoor Unit and Outdoor Unit ....................7 4. -
Page 5: Safety Instruction
1.Safety Instruction <Signal Words> ● Signal words are used to identify levels of hazard seriousness. Definitions for identifying hazard levels are provided below with their respective signal words. DANGER : DANGER indicates a hazardous situation which, if not avoided, will result in death or serious injury. - Page 6 WARNING ● Please do not use sprays such as pesticide, oil paint, hair spray or other flammable gases within 1 meter of the unit. ● If the circuit breaker acts or fuse acts frequently, please stop the system operation immediately and contact your local dealer or customer service.
- Page 7 NOTICE ● Do not tread on the product or place sundries on the product. ● Do not place or put any material on the product or inside the product. ● Provide a strong and correct foundation so that: A. The outdoor unit is not on an incline. B.
-
Page 8: Structure
2. Structure 2.1 Outdoor Unit and Refrigerating System Refer to the technical manual for the structur diagram and system cycle diagram. 2.2 Tools and Instruments Required for Installation Check that the designed pressure of the machine is 4.15MPa. To avoid mixing of refrigerant with cooling oil or other refrigerants in the system, the size of the connecting device is changed. - Page 9 ■ ○ : Interchangeability is available with current R22 : Only for Refrigerant R410A (No Interchangeability with R22) ● × : Prohibited : Only for Refrigerant R407C (No Interchangeability with R22) Interchangeability Reason of Non- Measuring Instrument with R22 Interchangeability and Attention and Tool Strictly Required) (★:...
-
Page 10: Prepare Before Installation
3. Prepare Before Installation 3.1 Outdoor Model Number <Base Module> Model JVOH080VPEMBQ JVOH100VPEMBQ JVOH120VPEMBQ JVOH140VPEMBQ JVOH160VPEMBQ Model JVOH180VPEMBQ JVOH200VPEMBQ JVOH220VPEMBQ JVOH240VPEMBQ <Combination Module> ※ Model JVOH260VAEMBQ JVOH280VAEMBQ JVOH300VAEMBQ JVOH320VAEMBQ JVOH340VAEMBQ JVOH100VPEMBQ JVOH120VPEMBQ JVOH140VPEMBQ JVOH160VPEMBQ JVOH160VPEMBQ Combination JVOH160VPEMBQ JVOH160VPEMBQ JVOH160VPEMBQ JVOH160VPEMBQ JVOH180VPEMBQ Model JVOH360VAEMBQ... -
Page 11: Combination Of Indoor Unit And Outdoor Unit
3.2 Combination of Indoor Unit and Outdoor Unit JVOHQ Series of outdoor units can be connected to the indoor units shown in below table: Table 3.1 Indoor Unit Standard Capacity (100 W) Indoor Unit Model Compact Ducted ○ ○ ○... - Page 12 Table 3. 2 System Combination Minimum Unit Maximum Quantity Recommended Outdoor Unit Operating of Indoor Units That Number of Indoor Combined Capacity Capacity (100W) Can be Connected Units JVOH080VPEMBQ JVOH100VPEMBQ JVOH120VPEMBQ JVOH140VPEMBQ JVOH160VPEMBQ JVOH180VPEMBQ JVOH200VPEMBQ JVOH220VPEMBQ JVOH240VPEMBQ JVOH260VAEMBQ JVOH280VAEMBQ JVOH300VAEMBQ JVOH320VAEMBQ JVOH340VAEMBQ JVOH360VAEMBQ...
-
Page 13: Transport And Handling
NOTE: In a system, where all the indoor units are running, the capacity of the total indoor units should be less than or equal to the combined capacity of the outdoor unit. Otherwise, the overloading operation may occur in the case of harsh working conditions or in narrow operation range. -
Page 14: Lifting Method
Corrugated paper frame Put plank or corrugated angle bead, that the thickness is more than 15mm Do not remove corrugated paper frame and packing belt Wire rope Wooden base 4.2 Lifting Method When lifting the machine, ensure the balance of the machine, confirm the safety and then lift it smoothly. 1. - Page 15 3. Lifting/hoisting without wooden base, as shown in Figure 4.2. Figure 4.2 Lifting Diagram Without Wooden Base When handling the machine with a forklift, prohibit Prohibit to use the forklift or other tools to operate to operate a fork on the opening at side of the with excessive force to the square opening at the machine as this may damage the machine.
-
Page 16: Installation Of Outdoor Unit
5. Installation of Outdoor Unit 5.1 Factory Accessories Check for the following components which are outdoor unit accessories before installation: Table 5.1 Factory Accessories Accessory 10HP 12HP 14HP 16HP Gas side Connecting ─ Ø22.2 - Ø25.4 Ø25.4 - Ø28.58 Ø25.4 - Ø28.58 Piping Ø22.2 - Ø19.05 Liquid Side... -
Page 17: Installation
5.2 Installation (1) Outdoor unit should be installed in a dry and well-ventilated environment. (2) Outdoor units should be installed in a shaded place, or in a place not exposed to direct sunlight and high temperature heat radiation place. (3) The outdoor unit should be installed in a place where the noise and the air flow discharge during operation will not affect the neighbours or the surrounding ventilation. -
Page 18: Maintenance Space
5.3 Maintenance Space When you install the outdoor unit, the maintenance space should be reserved as per the following requirements: ● If there is no wall in the rear and front, installation space requirements are as follows: * Front: 500mm or more * Rear: more than 300mm (Unit: mm) * Left and right: 10mm or more (If snow protection... - Page 19 2) When the walls are on 3 sides: • Single Installation (mm) Min. 300 + h1/2 Min.10*¹ Front Side Min. 500 + h2/2 No limit for this side wall height Top View • Multiple / Serial Installation <Installation in The Same Direction> <Rear to Rear Installation>...
-
Page 20: Foundation
NOTE: *1. If the field-supplied snow protection hood or the air flow deflector duct is adopted, the space of minimum 50mm is required. *2. Partly open a wall if the unit is surrounded by walls at four sides. 3. Keep the top of the outdoor unit without any obstacle to prevent short circuit due to inlet air and outlet air of each outdoor unit. 4. - Page 21 (3) Install the outdoor unit horizontally in whole plane direction using level gauge to check that the slope in the four directions (front, rear, left, and right) tilt does not exceed 10mm. Left and right side Front side and rear side (4) Please provide a firm and correct foundation to ensure: The outdoor unit is on a horizontal plane.
-
Page 22: Condensation Water Treatment
Nuts Washer Vibration proof mat Anchor bolt M12 Concrete Filled with concrete (6) When you install outdoor unit on the roof or the balcony, ice may easily accumulate around the drain ditch in the winter morning, hence do not drain the area where the staff often pass. (7) When the outdoor unit needs a drain pipe, use a drain pipe joint device (optional, model DC-01Q). -
Page 23: The Refrigerant Piping Construction
● Drain Pipe Joint Drain pipe joint is a drain connection device when using Name Model outdoor unit chassis as a water tray. Drain pipe joint DC-01Q Drain pipe connection components: Model Part Name Material / Color Quantity Usage Drain pipe joint PP / black Connect the drain connection DC-01Q... - Page 24 ● Notice for piping end When installing pipe through the wall, Incorrect Correct Do not place the pipe directly on the ground secure a cap at the end of the pipe. Correct Incorrect Correct Incorrect Rain water can enter Wall hole Wall hole Attach a cap or vinyl bag...
- Page 25 Table 6.1 Outdoor Unit Piping Specifications (mm) Liquid Liquid Outdoor Unit Model Outdoor Unit Model Pipe Pipe Pipe Pipe JVOH080VPEMBQ 19.05 9.52 JVOH540VAEMBQ 38.1 19.05 JVOH100VPEMBQ 22.2 9.52 JVOH560VAEMBQ 44.45 19.05 JVOH120VPEMBQ 25.4 12.7 JVOH580VAEMBQ 44.45 19.05 JVOH140VPEMBQ 25.4 12.7 JVOH600VAEMBQ 44.45 19.05...
-
Page 26: Flare And Joints
● Piping wall thickness and material Piping specification is as shown in below table: (mm) R410A Outer Diameter of Wall Hardness Grade Piping Thickness 6.35mm O material 9.52mm O material 12.7mm O material 15.88mm O material 19.05mm 1 / 2H material 22.2mm 1 / 2H material 25.4mm... -
Page 27: Precautions For Installation Of Outdoor Unit
6.3 Precautions for Installation of Outdoor Unit Outdoor unit arrangement Take the 4-module combination as an example. The outdoor unit is arranged as per the order of A, B, C and D and the outdoor unit A should be installed near the indoor unit side. Outdoor unit capacity: A≥B≥C≥D Outdoor unit capacity: A≥B≥C≥D Outdoor unit... - Page 28 (3)Take 3-module combination of outdoor units as an example:If the piping length between the outdoor unit is no less than 2m, set the oil pool so that oil pool can prevent the accumulation of cooling oil accumulation inside individual outdoor unit. *Less than 2m *2m or more The outdoor unit...
-
Page 29: System Piping Connection
6.4 System Piping Connection Piping connection must be carried out for each outdoor unit. NOTE: Verify that the refrigerant piping is connected in the same refrigerant circulation system. ● Site preparation for the use of refrigerant piping. Refer to the position as shown in Figure 6.1 when you connect the pipes (mm) Model JVOH080VPEMBQ... - Page 30 6.4.1 JVOH080VPEMBQ~JVOH240VPEMBQ Piping Specifications (Base Module) Outdoor unit To indoor unit Refrigerant piping (Ømm) Model JVOH080VPEMBQ JVOH100VPEMBQ JVOH120VPEMBQ JVOH140VPEMBQ 19.05 22.2 25.4 25.4 pipe 19.05~22.2 22.2~25.4 25.4~28.58 25.4~28.58 Pipe size Liquid 9.52 9.52 12.7 12.7 pipe 9.52~12.7 9.52~12.7 12.7~15.88 12.7~15.88 Model JVOH160VPEMBQ JVOH180VPEMBQ JVOH200VPEMBQ JVOH220VPEMBQ JVOH240VPEMBQ 28.58...
- Page 31 2-Module Combination Table (Ømm) JVOH260 JVOH280 JVOH300 JVOH320 JVOH340 JVOH360 Model VAEMBQ VAEMBQ VAEMBQ VAEMBQ VAEMBQ VAEMBQ The outdoor JVOH160 JVOH160 JVOH160 JVOH160 JVOH180 JVOH200 unit A VPEMBQ VPEMBQ VPEMBQ VPEMBQ VPEMBQ VPEMBQ Combination Mode The outdoor JVOH100 JVOH120 JVOH140 JVOH160 JVOH160 JVOH160...
- Page 32 3-Module Combination Table (Ømm) JVOH500 JVOH520 JVOH540 JVOH560 JVOH580 JVOH600 Model VAEMBQ VAEMBQ VAEMBQ VAEMBQ VAEMBQ VAEMBQ The outdoor JVOH180 JVOH200 JVOH220 JVOH240 JVOH240 JVOH240 unit A VPEMBQ VPEMBQ VPEMBQ VPEMBQ VPEMBQ VPEMBQ Combination The outdoor JVOH160 JVOH160 JVOH160 JVOH160 JVOH180 JVOH200 Mode...
- Page 33 6.4.4 JVOH740VAEMBQ~JVOH960VAEMBQ Piping Specifications (4-Module Combinations) (Indoor unit on the left) Outdoor unit B Outdoor unit D Outdoor unit A Outdoor unit C To indoor unit Branch pipe 1 Branch pipe 2 Branch pipe 3 (Indoor unit on the right) Outdoor unit D Outdoor unit B Outdoor unit C...
- Page 34 (Ømm) JVOH860 JVOH880 JVOH900 JVOH920 JVOH940 JVOH960 Model VAEMBQ VAEMBQ VAEMBQ VAEMBQ VAEMBQ VAEMBQ The outdoor JVOH240 JVOH240 JVOH240 JVOH240 JVOH240 JVOH240 unit A VPEMBQ VPEMBQ VPEMBQ VPEMBQ VPEMBQ VPEMBQ The outdoor JVOH220 JVOH240 JVOH240 JVOH240 JVOH240 JVOH240 unit B VPEMBQ VPEMBQ VPEMBQ...
- Page 35 CAUTION ● Ensure that there is no gas inside the pipe when removing the closing pipe. Otherwise, the pipe may be blown out and it may lead to injury. ● Do not expose surrounding parts and the oil return pipe of the compressor to flames when torch is used.
- Page 36 6.4.6 Piping Connection (1) Confirm that the stop valve is fully closed. (2) As shown in Figure 6.2, when you weld the gas side pipe, use a metal plate to protect the compressor and the sound insulation cover of the compressor. The welding sparks should not burn the valve body.
- Page 37 ● Module combination branch pipe type: Outdoor Combination Item Model Branch Pipe Type Remarks Outdoor Unit Number of Capacity Outdoor Units 26HP~34HP JM-30SNQ 36HP~48HP JM-46SNQ Piping JVOH260VAEMBQ 50HP~54HP JM-46SNQ+JM-30SNQ Connection ~JVOH960VAEMBQ 56HP~72HP JM-68SNQ+JM-30SNQ JM-68SNQ+JM-30SNQ 74HP~96HP +JM-30SNQ ● The assembly of JVOH740VAEMBQ is illustrated below: (For Piping from Front or Rear Side) Outdoor unit D...
- Page 38 ● Branch pipe (Optional) 2 Piping size for the main pipeline "Branch pipe" Main Pipe (branch pipe 1 to first branch pipe) The first branch pipe: The first branch ( 2 ) Max piping length<100m Max piping length≥100m Main piping size Outdoor Outdoor Multi-kit...
- Page 39 3 Diameter of the piping from the 1st branch pipe and indoor unit.( 3 ) Downstream Indoor Gas Pipe Liquid Pipe Unit Capacity (kW) Q≤15.9 15.88 9.52 16≤Q<25 19.05 9.52 25≤Q<33.5 22.2 9.52 33.5≤Q<45 25.4 12.7 45≤Q<50 28.58 12.7 50≤Q<72.9 28.58 15.88 72.9≤Q<100.8...
- Page 40 5 Diameter of the pipe between the branch pipes of outdoor units. For example, diameter of piping between branch pipe 1, branch pipe 2 and branch pipe 3. The Pipe Diameter (Downstream Between Branch ①,② outdoor unit and ③ capacity) 28.58 12.7 28.58...
- Page 41 ● Piping construction conditions: Allowed Piping Length (* 7) ≤ Number of > Number Of Project Mark Recommended Recommended Indoor Units Indoor Units Total Length of Total Piping Length ≤ 1,000m ≤ 300m (*8) Liquid Pipe Actual length ≤ 165m ≤...
- Page 42 ● Limitation of piping branch If the length of the pipe from the first branch pipe to the farthest indoor unit is more than 40m, follow the following conditions during installation: Example 1: In case of that the piping length L2 from 1st branch pipe to the farthest indoor unit exceeds 40m, perform the construction following the conditions as below: (1) When the piping distance L2 exceeds 40m, the b, c or g, h and the piping diameters of the gas and liquid side are all required to be enlarged by one gauge through the adapter.
-
Page 43: Electrical Wiring
7. Electrical Wiring WARNING ● Before performing wiring connection or regular check, turn off the main power supply of the indoor and outdoor units. Wait for at least ten minutes after shutting off the power supply. ● Before performing wiring connection or regular inspection, ensure that the indoor and outdoor fan is stopped. - Page 44 8-12HP Communication Power supply terminal terminal Shield grounding Grounding screw Indoor unit - outdoor unit communication wire Crimp cable (fixing power Outdoor unit - outdoor unit wire) communication wire Cable ties (for fixing communication wires) 14-16HP Communication terminal Shield grounding Power supply terminal Indoor unit - outdoor unit...
- Page 45 18HP Communication terminal Shield grounding Indoor unit- outdoor unit Power supply communication wire terminal Outdoor unit - outdoor unit Grounding communication wire screw Crimp cable Cable ties (fixing power wire) (for fixed communication wires) Cable ties (for fixed communication wires) 20-24HP Communication terminal...
-
Page 46: Wiring
7.2 Wiring WARNING It is a must to connect ELB (Earth Leakage Breaker), CB (Circuit Breaker) and S (Main Switch) to each outdoor unit's power supply. Otherwise, it may cause electric shock or fire. Remark: Connect power wires to indoor unit and outdoor unit separately. (1) Power wire Separate power wires for each outdoor unit as per the following method(Don't connect power wire from other module):... - Page 47 Note: (1) Ensure that field wiring is as per provisions of local laws and regulations, and that a qualified or certified personnel performs all the wiring operations is must. (2) Refer power cable dimensions specified in the above table must be according to relevant standards. (3) If power wire is connected using a distribution box, sum up the current value and select the wires as per the below table specifications.
-
Page 48: Outdoor Unit Wiring
7.3 Outdoor Unit Wiring Perform the wiring connection as per the following: (1) Connect three-phase electric power wire to the terminal L1, L2, L3, and N (380V) of the block and connect the ground wire to the ground terminal in the electrical box. (2) Connect the communication cable between the indoor and the outdoor unit to terminals 1 and 2 of the terminal block TB2 on the PCB3. - Page 49 Indoor unit Outdoor unit - outdoor unit - outdoor unit PCB3 Install insulating Ground sleeve terminal Grounding wire Grounded Grounded Shield Cable Shield clamp Outdoor unit communication shielded wire Ground Indoor unit to outdoor unit terminal Communication shielded cable Grounding screw Communication Cable clamp...
-
Page 50: Electrical Wiring For Indoor And Outdoor Unit
NOTE: Power wire Communication 1. Do not put the power and communication cables in the same cable conduit. In addition, keep a distance wire of at least 5 cm between the power wires and Communication communication wires. wire 2. Put the cable through the rubber rings and fix it to the entrance hole to protect the cable. - Page 51 ● Communication wire Refrigerant group 1 Refrigerant group 2 Outdoor unit Outdoor unit Outdoor unit Outdoor unit (main) (sub) (main) (sub) 1 2 3 4 1 2 3 4 1 2 3 4 1 2 3 4 H-LINK II Communication cable Communication wire (main-sub) B A 2 1 L N...
-
Page 52: Outdoor Dip Switch Setting
7.5 Outdoor DIP Switch Setting Turn off the electrical power supply to all units before setting the DIP switches. Otherwise DIP switch fails to work and the setting becomes invalid. But the dip switch DSW4-No. 1, 2, 4 is valid when the power is turned ON under the status of power ON setting. - Page 53 ● Communications settings: Set the outdoor unit number, the refrigerant system number, and the terminal resistance for the H-LINK or H-LINK II system. ● Outdoor number setting: When you combine base model module, set the DSW6 as shown below: DSW6 (Outdoor unit No.
- Page 54 Cancel terminal resistance setting Cancel terminal resistance setting by turning pin 1 of DSW10 to OFF by turning pin 1 of DSW10 to OFF DSW10 DSW10 Terminal resistance setting Outdoor unit Outdoor unit Outdoor unit Outdoor unit DSW10 DSW10 DSW10 DSW10 DSW10 DSW10...
- Page 55 Setting External Input/Output Function: Function Input Output Fixed Heating Mode Operation Signal Fixed Cooling Mode Alarm Signal Demand Stoppage Compressor ON Signal Outdoor Fan Motor Start/Stop Defrost Signal Forced Stoppage Demand Current Control 40% Demand Current Control 60% Demand Current Control 70% Demand Current Control 80% Demand Current Control 100% Low noise setting 1...
- Page 56 Fill out the selected function No. in the space provided in the following table: Item SEG2 SEG1 Item SEG2 SEG1 Circulator Function at Heating 25 N/A Thermo-Off Crankcase Heating Band Switch to Night Mode (Low Noise) Control During Stoppage Indoor Fan Warm Start Period Cancellation of Outdoor Ambient Temperature Limit Setting...
-
Page 57: Additional Refrigerant Charge
8. Additional Refrigerant Charge 8.1 Air Tightness Test (1) Ensure that the stop valve is completely closed before airtight inspection. <Air tightness detection> (a) After you connect the liquid pipe, open the liquid side stop valve bonnet. Do not connect low pressure piping and gas side stop valve. -
Page 58: Vacuum
CAUTION ● Isolate and protect the gas side stop valve, and do not directly charge to the gas side stop valve (see Figure 8.1). ● Before charging, ensure that the electronic expansion valve of the indoor unit is in the open state. Make sure that the piping is connected with the indoor unit. - Page 59 8.3 Calculating Refrigerant's Additional Charge Although the unit is charged with refrigerant, the supplementary refrigerant quality is determined and charged into the system based on the length of refrigerant piping. The actual additional charge volume is determined according to the following requirements. After completing the charging, report the additional charge to the local service center.
-
Page 60: Charging Operation
Prompt: The refrigerant charging method must be in compliance with specifications provided in the above table. Ensure that the total additional refrigerant charge of the system not exceed the maximum refrigerant charge as shown in the table below. If the calculated value of the additional charge of the refrigerant exceeds the range shown in the table below, the total length of the piping construction plant should be shortened and the additional charge of the refrigerant should be recalculated to meet the following requirements:... - Page 61 Charge the correct refrigerant quantity according to Table 8.1. If not, a compressor may be damaged due to an excess or insufficient refrigerant charge. The outdoor unit Refrigerant charge from check joint of gas stop valve may lead to compressor failure.
-
Page 62: Test Run
9. Test Run Perform trial run according to Chapter 9.2. Record the values as per Table 9.1. CAUTION ● Start the machine only when all the check points are checked and cleared. For indoor unit test run, refer to the installation manual and which is attached to the indoor unit. 9.1 Prerequisites for Test Run 1. -
Page 63: Trial Run
NOTICE 1. Ensure that the electrical components provided on the site (the main power switch, circuit breaker, wire, cable conduit connection, and terminal) are chosen as per the technical manual. Verify that the device complies with the national electrical code. 2. - Page 64 ● When the machine is running, note the following: *Do not touch the edges of any components of exhaust because the compressor and pipe in the exhaust end temperature up to 90 or more. °C *Do not press the AC contractor button, it leads to serious accidents. ●...
- Page 65 Table 9.1 Trial Run and Mainten Recordance Model: Serial No.: Compressor No.: User name and address: Date: 1. Is the indoor fan rotation direction correct? 2. Is the outdoor fan rotation direction correct? 3. Is there any abnormal sound from operation of compressor? 4.
- Page 66 Table 9.2 Alarm Code Code Classification Alarm Content Main Reason Indoor protection device action (float Water level is too high, drain, or float switch is Indoor Unit switch) abnormal. Outdoor protection device action (high Piping clogging, excessive refrigerant, non- The Outdoor Unit pressure switch) condensable gas mixed Communication between indoor and...
- Page 67 Indoor and outdoor unit capacity set, The outdoor unit capacity is set incorrectly, or the capacity combination error total capacity of the indoor unit is too large. The same indoor unit number setting appears in The indoor unit address is incorrect the same system.
-
Page 68: Compressor Protection
10. Compressor Protection ● Protection of compressor The compressor is protected by the following protection devices. (1) High-pressure pressure switch: When the pressure of exhaust air from the compressor exceeds the set value, the switch acts and the operation is stopped. (2) Crank case heating band: This heating band is used to prevent lubricant oil from being blistering during cold starting, it is working on even when the compressor is not running. - Page 69 Demo...
- Page 70 Demo...
- Page 71 Demo...
- Page 72 Packing List Item Remarks The outdoor unit: 1 pc Piping accessories bag(Except 100Type): 1 pc Tie No. Installation and maintenance manual: 1 pc 080-100: 2pc Refrigerant label: 1 pc 120-180: 3pc Filter 1 pc 200-240: 6pc Insulated cotton 1 pc some 1098429 Qingdao Hisense Hitachi Air-conditioning Systems Co.,Ltd.
Need help?
Do you have a question about the JVOHQ Series and is the answer not in the manual?
Questions and answers