Table of Contents
Advertisement
Quick Links
Advertisement
Table of Contents

Related Manuals for Venstar EXPLORER


Summary of Contents for Venstar EXPLORER
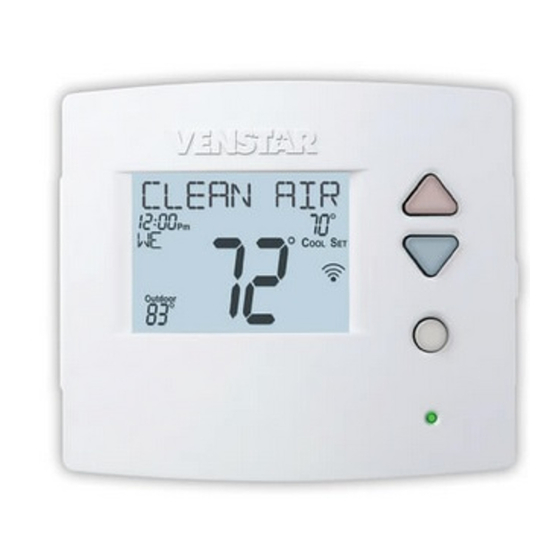
- Page 3 Congratulations and thank you for purchasing your new Venstar EXPLORER thermostat. This ® guide is intended to help you install and setup the basic features of the EXPLORER Thermostat. ® For a full owner’s manual and installation guide, visit Venstar.com.
-
Page 4: Necessary Tools
Compatibility Venstar EXPLORER Thermostat is designed to work with 24V systems ® requiring both the R & C wires. This includes gas, electric, oil, forced air, variable speed, heat pump and radiant heat. It can control: • Heating: one, two and three stages (W1, W2, W3) •... - Page 5 Step 1 - Power Off Current System 1) Go to your home’s circuit breaker panel and switch the furnace and air conditioner breakers off. 2) To confirm power is off, adjust the temperature on your current thermostat. If the system does not respond accordingly, power has probably been successfully shut off.
-
Page 6: Step 3 - Before You Go Any Further
R (24Vac), C (24Vac) and W (Heat). Most Heating only systems use very simple thermostats that only require 2 wires the R (24Vac) and W (Heat). The EXPLORER thermostat requires 3 wires to the thermostat. In this case an Add-A-Wire accessory will not work and it will be necessary to install another wire for the C (24Vac) connection. - Page 7 5 wires available. 3. Purchase and install a Venstar Add-A-Wire accessory (ACC-0410). E. If you have a heat pump with aux heat the Venstar EXPLORER will require 6 wires: R (24Vac), C (24Vac), W1/O/B (reversing valve), Y (1st stage compressor), W2 (Aux Heat) and G (fan).
- Page 8 Add-A-Wire accessory (ACC-0410). • If you have a single stage fossil fuel heater with air conditioning, and you would like install the Venstar EXPLORER using only 4 wires, follow the directions below. You will need a screwdriver along with a 3”...
- Page 9 Add-A-Wire accessory (ACC-0410). • If you have a multi stage system that requires 6 wires, and you would like install the Venstar EXPLORER using only 5 wires, follow the directions below. You will need a screwdriver along with a 3” or 4”...
- Page 10 Step 4 - Label & Disconnect Wires TIP: Before disconnecting any wires, 1) One by one, apply a label take a photo of your current wire designated to each wire configuration with your mobile device. you disconnect from your current thermostat. Wire from the Install on the old thermostat...
- Page 11 Step 5 - Remove Current Backplate Unscrew the current backplate and TIP: If needed, wrap the wires remove it from the wall. Be careful around a pencil or pen to keep not to let the wires fall into the wall. them from falling inside the wall.
-
Page 12: Step 7 - Connect Wires
Step 7 - Connect Wires 1) Match your previous wire configuration to the new base. One by one, connect each wire by inserting the metal end into the corresponding slot and tightening the screw. TIP: Use pliers to straighten wire before inserting into new base. - Page 13 Step 8 - Check Dip Switch 1) Ensure which switch is correct for your system. Dip switches are located on the back of the thermostat ELEC GAS/EL ELEC GAS/EL 1. When GAS/EL or HP is set for GAS/EL: ELEC ELEC This switch (GAS or ELEC) controls how the thermostat will control the Fan (G) terminal in heating mode.
- Page 14 Step 9 - Attach Thermostat 1) Align the pins on the thermostat circuit board with the corresponding holes below the wiring connectors and push the top and the bottom of the plastic housing enclosing the display until it clicks into place, top and bottom.
-
Page 15: Step 11 - Set Up Wi-Fi Connection
Skyport account setup). 3. A 6-digit code obtained from the thermostat is successfully entered into a Skyport account. 4. Successfully download and install the Venstar Skyport app on your mobile device(s). Your thermostat operates on the 2.4 Ghz, Wi-Fi b/g/n band. - Page 16 Quick Start - Connect to Wi-Fi The EXPLORER thermostats are joined to a Wi-Fi network with the help of the Venstar Configurator App. This app may be downloaded from your mobile device’s app store. Once the EXPLORER thermostat is installed with the optional Wi-Fi Module, the Configurator App will facilitate connection to the access point in 5 steps as outlined below.
- Page 17 Select the access The Wi-Fi icon of the mobile point to join. appears on the device. Select Wi-Fi, display when then select the successfully Explorer thermostat connected. (THERMOSTAT- XXXX). Enter the password: 123456789 when prompted. Return to the Configurator App.
- Page 18 If the thermostat is connected to the local Wi-Fi Access Point, but not yet joined to a Skyport account, you may join the thermostat to an account by doing the following: 1. Open your browser to: http://venstar.skyportcloud.com 2. Select “Create account now” Create Account Now 3.
- Page 19 The complete manual is available to help you on the Venstar website at: Venstar.com. It is much easier to setup the time period program/schedule on the Skyport Web App.
-
Page 20: Troubleshooting
Troubleshooting Use the following troubleshooting guide to diagnose common problems. If you are still having problems or are unsure please visit www.venstar.com/thermostats or e-mail customer service at thermostatsupport@venstar.com Problem Possible Cause Solution The air conditioning does The compressor timer Adjust the not attempt to turn on. -
Page 21: Warranty
Warranty One-Year Warranty - This Product is warranted to be free from defects in material and workmanship. If it appears within one year from the date of original installation, whether or not actual use begins on that date, that the product does not meet this warranty, a new or remanufactured part, at the manufacturer’s sole option to replace any defective part, will be provided without charge for the part itself provided the defective part is returned to the distributor through a qualified servicing dealer. - Page 24 Patents Issued & Pending Printed on recycled paper. P/N 88-1114 Rev. 5 12/17...
Need help?
Do you have a question about the EXPLORER and is the answer not in the manual?
Questions and answers