Advertisement
Table of Contents
- 1 Table of Contents
- 2 Overview
- 3 Front Panel
- 4 Display
- 5 Quick Start
- 6 Set the Clock and Go
- 7 Selecting the Heat or Cool Mode
- 8 Basic Operation
- 9 Programming
- 10 Advanced Setup
- 11 Advanced Setup Table
- 12 About Advanced Features & Operation
- 13 Warranty
- Download this manual
See also:
Instruction and Installation Manual
E
asy
Stat
Stat
Single Day
Single Day
PROGRAMMABLE
PROGRAMMABLE
Non-Volatile Memory - Retains settings
in the event of a power failure
Outdoor Sensor Ready -
Compatible with the
optional wired, or wireless
Outdoor Sensor
Use with most Air Conditioning & Heating Systems including: 1 or 2 Stage
Electric Cooling & 2 Stage Gas Heating, Heat Pump, Electric or Hydronic Heat.
OWNER'S
OWNER'S
MANUAL
MANUAL
residential
THERMOSTAT
TSTATEZ
world's easiest
world's easiest
PROGRAMMABLE THERMOSTAT
PROGRAMMABLE THERMOSTAT
up to
2-heat
up to
2-heat
& 2-cool
& 2-cool
One for All - Can Control:
- Gas / Electric
- Heat Pump
- Electric Heat
- Hydronic Systems
HEAT
COOL
Venstar Inc. 08/07
HEAT
PUMP
Advertisement
Table of Contents

Related Manuals for Venstar TSTATEZ


Summary of Contents for Venstar TSTATEZ
- Page 1 PUMP Outdoor Sensor Use with most Air Conditioning & Heating Systems including: 1 or 2 Stage Electric Cooling & 2 Stage Gas Heating, Heat Pump, Electric or Hydronic Heat. OWNER’S OWNER’S MANUAL MANUAL Venstar Inc. 08/07...
-
Page 2: Table Of Contents
PROGRAMMING ADVANCED SETUP ABOUT ADVANCED FEATURES & OPERATION WARRANTY Follow Installation Instructions carefully. CAUTION DISCONNECT POWER TO THE HEATER - AIR CONDITIONER BEFORE REMOVING THE OLD THERMOSTAT AND INSTALLING WARNING THE NEW THERMOSTAT. Venstar Inc. 08/07 P/N TSTAT1100EZ Page 1... -
Page 3: Overview
Overview The most common way to program the EasyStat thermostat is to program it just as you would an alarm clock. You can program this thermostat in the HEATING MODE (normal winter operation) and/or in the COOLING MODE (normal summer operation). -
Page 4: Front Panel
Use the Mode/Next button to step to the next screen. When done, press Set Program to exit or Run Program to exit and run the program. Service Call: Venstar.com Rev. 1 OUTDOOR PROGRAM MODE/ PROGRAM ON/OFF... -
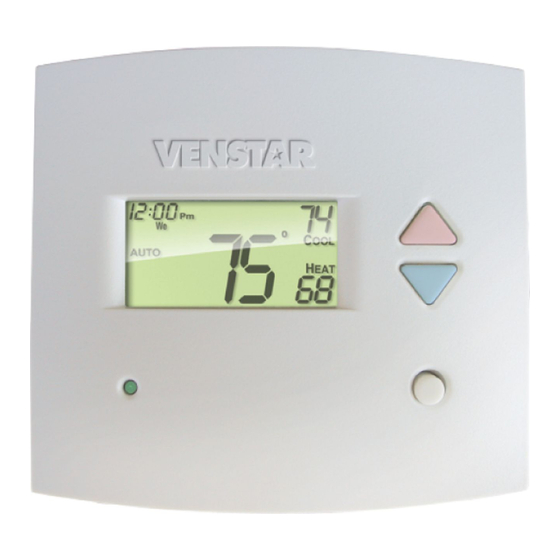
Page 5: Display
Display 12:00 COOL HEAT SLEEP WAKE SIDE Mode Indicators - Page 6 Selects the operation mode of the equipment. WAKE/SLEEP - Indicates the time period program is enabled to run. HEAT - Indicates the heating mode. COOL - Indicates the air conditioning mode. OFF - Indicates heating and cooling are turned off. -
Page 6: Quick Start
Quick Start Set the Clock and Go During Setup & Programming: Pressing the UP or DOWN CLOCK Press the SET buttons will modify the flashing CLOCK button selection. To adjust the Setting the Clock Clock or Day use I2:00 Setup Buttons. -
Page 7: Selecting The Heat Or Cool Mode
Selecting the Heat or Cool Mode Select Mode by Pressing the MODE Button I2 00 Heating Only HEAT The HEAT setting indicates the temperature the room has to reach before the furnace will turn on to heat the room. Press MODE/ I2 00 NEXT... -
Page 8: Basic Operation
Basic Operation Selecting Your Desired Temperature (adjusting the setpoints) HEAT OR COOL MODE Pressing the UP or DOWN buttons in Heat or Cool mode will adjust only the heat or cool set temperature. Adjust the desired 12:00 HEAT set temperature with the buttons. -
Page 9: Programming
Programming Heat Schedule i2:00 HEAT The thermostat must be in the Heat mode to access these setup steps. WAKE Press the PROGRAM button to enter time period programming. PROGRAM 7:00 Adjust the start time WAKE Press for Wake. MODE/NEXT 7:00 HEAT Adjust the heating WAKE... - Page 10 Programming Cool Schedule i2:00 HEAT The thermostat must be in the Cool mode to access these setup steps. WAKE Press the Set Program button. PROGRAM 7:00 Adjust the start time WAKE Press for Wake. MODE/NEXT 7:00 COOL Adjust the cooling WAKE setpoint for Wake.
-
Page 11: Advanced Setup
Advanced Setup Press the MODE/NEXT button. While holding the MODE/NEXT, MODE/NEXT NOTE: Each step # is located press the PROGRAM ON/OFF at the bottom right PROGRAM button to enter Setup corner of the display ON / OFF screens. for easy reference. Select backlight operation: YES - Light continuously NO - Light for 8 seconds... - Page 12 Advanced Setup Select Electric Heat operation: On = 1st stage electric heat Off = 1st stage gas heat Press (Step 5 only appears if heat pump is off in step 4) MODE/NEXT Adjust the minimum difference between cooling & heating setpoints.
-
Page 13: Advanced Setup Table
Advanced Setup Advanced Setup Table Step # Description Range Factory Default Time of Day 24 hour 12:00 am Thermoglow Backlight Yes / No Heat, Cool or both Heat / Cool Heat / Cool Heat Pump Yes / No Reversing Valve Polarity O / b Electric Heat Yes / No... -
Page 14: About Advanced Features & Operation
About Advanced Features & Operation DEADBAND OPERATION - Controls up to two Heat and two Cool stages (please see the diagram below). The 1st Stage of heat or cool is turned on when: (A) The temperature spread from the setpoint is equal to or greater than: the setpoint plus the 1st stage deadband (step #7, page 11). - Page 15 About Advanced Features & Operation EMERGENCY HEAT - Only available if you have a heat pump installed. To initiate the Emergency Heat feature, press the FAN button. While holding the FAN button press the UP button. 12:00 HEAT Press for Emergency Heat Operation - During Emergency Heat operation the thermostat will turn on the fan and the 2nd stage of heat when there is a demand for heat.
- Page 16 About Advanced Features & Operation CALIBRATION - Under normal circumstances it will not be necessary to adjust the calibration of the temperature sensor. If calibration is required, please contact a trained HVAC technician to correctly perform the following procedure. I2 00 Place the thermostat Press the UP and...
-
Page 17: Warranty
Warranty One-Year Warranty - This Product is warranted to be free from defects in material and workmanship. If it appears within one year from the date of original installation, whether or not actual use begins on that date, that the product does not meet this warranty, a new or remanufactured part, at the manufacturer’s sole option to replace any defective part, will be provided without charge for the part itself provided the defective part is returned to the distributor through a qualified servicing dealer.
Need help?
Do you have a question about the TSTATEZ and is the answer not in the manual?
Questions and answers