Table of Contents
Advertisement
Quick Links
Advertisement
Table of Contents

Summary of Contents for Vision TC3-AMP
- Page 1 Questo manuale d’istruzione è fornito da trovaprezzi.it. Scopri tutte le offerte per Vision TC3-AMP o cerca il tuo prodotto tra le migliori offerte di Componenti Hi Fi TECHCONNECT AMPLIFIER OWNERS MANUAL www.visionaudiovisual.com/techconnect/tc3-amp TC3-AMP_manual_en...
-
Page 2: Declaration Of Conformity
WARNING: TO REDUCE THE RISK OF FIRE OR ELECTRIC SHOCK, DO NOT EXPOSE THIS APPLIANCE TO RAIN OR MOISTURE. All products are designed and imported into the EU by ‘Vision’ who is wholly owned by ‘Azlan Logistics Ltd.’, Registered in England Nr. 04625566 at Lion House, 4 Pioneer Business Park, Clifton Moor, York, YO30 4GH. -
Page 3: Place Of Installation
WARNING SIGNS If you detect an abnormal smell or smoke, turn this product off immediately and unplug the power cord. Contact your reseller or Vision. PACKAGING Save all packing material. It is essential for shipping in the event the unit ever needs repair. -
Page 4: Front Panel
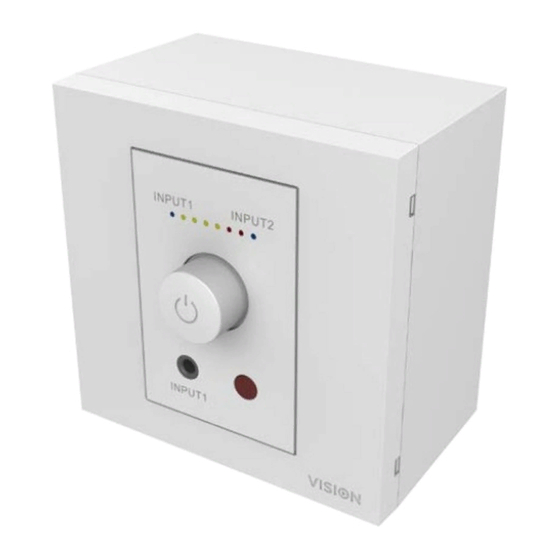
FRONT PANEL 1. Active input indicators (Blue LED) 2. Input 1 3.5mm Minijack socket 3. Volume (rotate) / Input selection (short push) / Standby (long push) TC3-AMP_manual_en... -
Page 5: Rear Panel
IR REMOTE CONTROL 1. Power On / Off 2. Input 1 and 2 3. Volume up and down 4. Mute Note: the remote is common to other Vision products so some buttons such as tone do not function with this product. TC3-AMP_manual_en... -
Page 6: Installation Instructions
INSTALLATION INSTRUCTIONS This amplifier module can be fixed as a stand-alone product or integrated into a Techconnect connectivity faceplate. Using as a stand-alone product: CONNECT INPUTS If you have a 2-phono cable twist the two ground wires together CONNECT OUTPUTS Connect up to two speakers to each output (four total) The speaker cable must be unshielded with a gauge of no less than 0.75mm. - Page 7 Integrating into connectivity faceplate: The example below shows how to connect an adjacent module. A short cable is included with the amplifier to make this connection. TC3-AMP_manual_en...
-
Page 8: Programme Memory
PROGRAMME MEMORY By default power is turned on the amplifier resumes last input and volume level. To change this so that it always comes on at a fixed input and volume level: With amplifier in standby, press and hold the rotary dial for 10 seconds. Keep holding it down. -
Page 9: Troubleshooting
TROUBLESHOOTING If your system is not operating properly, please refer to the following information. If the problem persists, disconnect from power and contact your AV reseller immediately. Problem Correction No Sound • Turn off and check connections. • Check output level from sources. For example, laptop volume. -
Page 10: Specifications
SPECIFICATIONS AMPLIFIER MODULE DIMENSIONS: 42 x 64 x 36mm / 1.65″ x 2.8″ x 1.57″ BACKBOX DIMENSIONS: 86 x 86 x 45mm / 3.39" x 3.39" x 1.77" SURROUND DIMENSIONS: 86 x 86 x 8mm / 3.39" x 3.39" x 0.31" CARTON DIMENSIONS: 240 x 205 x 63mm / 9.45″... -
Page 11: Warranty
WARRANTY This product comes with a 2-year return to base warranty, effective from the date of purchase. This warranty applies only to the original purchaser and is not transferable. For the avoidance of doubt, this will be taken from the information held by the appointed national distributor at the point of sale.


Need help?
Do you have a question about the TC3-AMP and is the answer not in the manual?
Questions and answers