Enterasys Matrix-V V2H124-24 Hardware Installation Manual
Matrix-v series fast ethernet switch
Hide thumbs
Also See for Matrix-V V2H124-24:
- Quick reference manual (2 pages) ,
- Configuration manual (498 pages)

Related Manuals for Enterasys Matrix-V V2H124-24


Summary of Contents for Enterasys Matrix-V V2H124-24
- Page 1 Matrix-V Series V2H124-24 FAST ETHERNET SWITCH Hardware Installation Guide P/N 9033924-05...
- Page 3 ENTERASYS NETWORKS reserves the right to make changes in specifications and other information contained in this document and its web site without prior notice. The reader should in all cases consult ENTERASYS NETWORKS to determine whether any such changes have been made.
-
Page 4: Regulatory Compliance Information
Notice Regulatory Compliance Information Federal Communications Commission (FCC) Notice This device complies with Part 15 of the FCC rules. Operation is subject to the following two conditions: (1) this device may not cause harmful interference, and (2) this device must accept any interference received, including interference that may cause undesired operation. -
Page 5: Environmental Requirements
This is a class A product based on the standard of the Voluntary Control Council for Interference by Information Technology Equipment (VCCI). If this equipment is used in a domestic environment, radio disturbance may arise. When such trouble occurs, the user may be required to take corrective actions. -
Page 6: Safety Information
Notice Warning: Fiber Optic Port Safety When using a fiber optic media expansion module, never look at the transmit laser while it is powered on. Also, never look directly at the fiber TX port and fiber cable ends when they are powered on. Avertissment: Ports pour fibres optiques - sécurité... -
Page 7: Please Read The Following Safety Information Carefully Before Installing The Switch
Please read the following safety information carefully before installing the switch: WARNING: Installation and removal of the unit must be carried out by qualified personnel only. • This guide is intended for use by network administrators who are responsible for setting up and installing network equipment;... -
Page 8: Veuillez Lire À Fond L'information De La Sécurité Suivante Avant D'installer Le Switch
HO3VVF3GO.75 (minimum). IEC-320 receptacle. Veuillez lire à fond l'information de la sécurité suivante avant d'installer le Switch: AVERTISSEMENT: L’installation et la dépose de ce groupe doivent être confiés à un personnel qualifié. • Ne branchez pas votre appareil sur une prise secteur (alimentation électrique) lorsqu'il n'y a pas de connexion de mise à... - Page 9 Cordon électrique - Il doit être agréé dans le pays d’utilisation Danemark: La prise mâle d’alimentation doit respecter la section 107-2 D1 de la norme DK2 1a ou DK2 5a. Suisse: La prise mâle d’alimentation doit respecter la norme SEV/ASE 1011. Europe La prise secteur doit être conforme aux normes CEE 7/7 (“SCHUKO”) LE cordon secteur doit porter la mention <HAR>...
-
Page 10: Declaration Of Conformity
EN 61000-3-2 EN 55024 EC Directive 73/23/EEC EN 60950 EN 60825 Equipment Type/Environment: Networking Equipment, for use in a Commercial or Light Industrial Environment. Enterasys Networks, Inc. declares that the equipment packaged with this notice conforms to the above directives. viii... - Page 11 This document is an agreement (“Agreement”) between the end user (“You”) and Enterasys Networks, Inc. on behalf of itself and its Affiliates (as hereinafter defined) (“Enterasys”) that sets forth Your rights and obligations with respect to the Enterasys software program/firmware installed on the Enterasys product (including any accompanying documentation, hardware or media) (“Program”) in the package and prevails over any additional, conflicting or inconsistent...
- Page 12 52.227-19 (a) through (d) of the Commercial Computer Software-Restricted Rights Clause and its successors, and (iii) in all respects is proprietary data belonging to Enterasys and/or its suppliers. For Department of Defense units, the Program is considered commercial computer software in accordance with DFARS section 227.7202-3 and its successors, and use, duplication, or disclosure by the...
- Page 13 (i) license fees due and paid, and (ii) the use, copying and deployment of the Program. You also grant to Enterasys and its authorized representatives, upon reasonable notice, the right to audit and examine during Your normal...
- Page 14 Agreement shall be void and a breach of this Agreement. 12. WAIVER. A waiver by Enterasys of a breach of any of the terms and conditions of this Agreement must be in writing and will not be construed as a waiver of any subsequent breach of such term or condition.
-
Page 15: Table Of Contents
Selecting a Site Ethernet Cabling Equipment Checklist Package Contents Optional Rack-Mounting Equipment Mounting Rack Mounting Desktop or Shelf Mounting Installing an Optional Module into the Switch Installing an SFP Transceiver Connecting Switches in a Stack Connecting to a Power Source... - Page 16 1000 Mbps Gigabit Ethernet Collision Domain 100 Mbps Fast Ethernet Collision Domain 10 Mbps Ethernet Collision Domain Cable Labeling and Connection Records Appendix A: Troubleshooting A-1 Diagnosing Switch Indicators Power and Cooling Problems Installation In-Band Access Appendix B: Cables B-1...
- Page 17 Contents Glossary Index...
- Page 18 Contents...
- Page 19 Tables Table 1-1. Port Status LEDs Table 1-2. System Status LEDs Table 3-1. Serial Cable Wiring Table 4-1. Maximum 1000BASE-T Gigabit Ethernet Cable Length Table 4-2. Maximum 1000BASE-SX Gigabit Ethernet Cable Lengths Table 4-4. Maximum 1000BASE-LH Gigabit Ethernet Cable Length Table 4-5.
- Page 20 Tables...
- Page 21 Figure 2-4. Making VLAN Connections Figure 3-1. RJ-45 Connections Figure 3-2. Attaching the Brackets Figure 3-3. Installing the Switch in a Rack Figure 3-4. Attaching the Adhesive Feet Figure 3-5. Installing an Optional Module Figure 3-6. Installing an SFP Transceiver Figure 3-7.
- Page 22 Figures...
-
Page 23: Chapter 1: Introduction
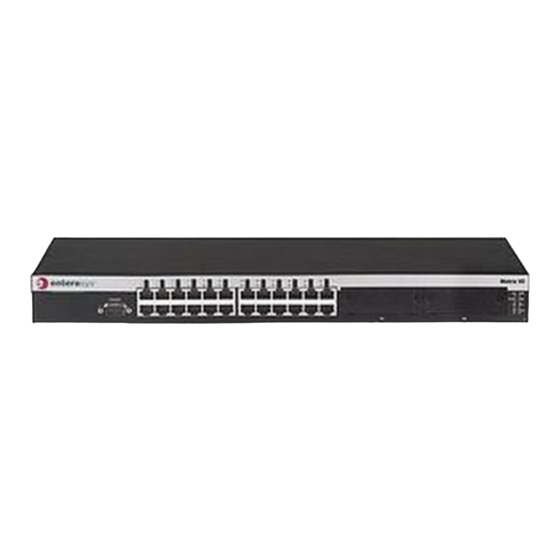
Chapter 1: Introduction Overview The Matrix V-Series V2H124-24 switch is a stackable Fast Ethernet switch with 24 10BASE-T / 100BASE-TX ports and two ports for 100BASE-FX, 1000BASE-T, or combination 1000BASE-T/SFP uplink modules, or a stacking module. The V2H124-24 also includes an SNMP-based management agent, which provides both in-band and out-of-band access for managing the switch. -
Page 24: V2H124
With a comprehensive arrange of LEDs, the V2H124-24 switch provides “at a glance” monitoring of network and port status. The switch can be managed over the network with a web browser or Telnet application, or via a direct connection to the console port. -
Page 25: Port And System Status Leds
Port and System Status LEDs The V2H124-24 base unit also includes a display panel for key system and port indications that simplify installation and network troubleshooting. The LEDs, which are located on the front panel for easy viewing, are shown below and described in the following tables. -
Page 26: Power Supply Receptacles
(Link/Activity) On/Flashing Green Power Supply Receptacles There are two power receptacles on the rear panel of the switch. The standard power receptacle is for the AC power cord. The receptacle labeled “RPU” is for the optional Redundant Power Unit (RPU). -
Page 27: Optional Media Extender Modules
Optional Media Extender Modules 100BASE-FX Multimode Module 100BASE-FX Multimode Module Figure 1-5. Single-Port 100BASE-FX Multimode Module Using multimode fiber optic cable, the 100BASE-FX port can be connected to a remote site up to 2 km (1.24 miles) away. The 100BASE-FX module is fixed to operate at 100 Mbps full duplex, and supports auto-negotiation for flow control. -
Page 28: Figure 1-8. 1000Base-T/Sfp Combination Module
Introduction Using Category 5, 5e, or 6 twisted-pair cable you can connect to another device up to 100 m (328 ft) away. The 1000BASE-T module operates at 10, 100, and 1000 Mbps. At 1000 Mbps it operates at full duplex and supports auto-negotiation of speed and flow control. -
Page 29: Features And Benefits
The module allows up to eight switches to be linked together using stacking cables. The push button on the module enables one switch in the stack to be selected as the master. Features and Benefits Connectivity •... -
Page 30: Management
Introduction Management • “At-a-glance” LEDs for easy troubleshooting • Network management agent: • Manages switch in-band or out-of-band • Supports Telnet, SNMP/RMON and web-based interface... -
Page 31: Chapter 2: Network Planning
Fast Ethernet, the maximum is two; and for Gigabit Ethernet the maximum is one. This is known as the hop count. However, a switch turns the hop count back to zero. So subdividing the network into smaller and more manageable segments, and linking them to the larger network by means of a switch, removes this limitation. -
Page 32: Application Examples
When the time comes for further expansion, just connect to another hub or switch using one of the Fast Ethernet ports built into the front panel or a Gigabit Ethernet port on a slide-in expansion module. -
Page 33: Network Aggregation Plan
In the figure below, the 10BASE-T/100BASE-TX ports on the switch are providing 100 Mbps connectivity for up to 24 segments. In addition, the switch is also connecting several servers at 1000 Mbps. Server Farm 10/100 Mbps Segments Figure 2-2. -
Page 34: Remote Connections With Fiber Cable
100BASE-FX multimode fiber (MMF) slide-in module, you can run a link up to 2 km. A 100BASE-FX single-mode fiber (SMF) link can run up to 20 km. This allows the switch to serve as a collapsed backbone, providing direct connectivity for a widespread LAN. -
Page 35: Making Vlan Connections
Tagged Ports Finance VLAN 2 Testing VLAN 3 VLAN 4 Figure 2-4. Making VLAN Connections Note: When connecting to a switch that does not support IEEE 802.1Q VLAN tags, use untagged ports. Tagged Port Untagged Ports VLAN unaware switch Marketing... -
Page 36: Application Notes
Application Notes Full-duplex operation only applies to point-to-point access (such as when a switch is attached to a workstation, server or another switch). When the switch is connected to a hub, both devices must operate in half-duplex mode. Avoid using flow control on a port connected to a hub unless it is actually required to solve a problem. -
Page 37: Chapter 3: Installing The Switch
Chapter 3: Installing the Switch Selecting a Site Switch units can be mounted in a standard 19-inch equipment rack or on a flat surface. Be sure to follow the guidelines below when choosing a location. • The site should: • be at the center of all the devices you want to link and near a power outlet. -
Page 38: Equipment Checklist
Installing the Switch Figure 3-1. RJ-45 Connections Equipment Checklist After unpacking this switch, check the contents to be sure you have received all the components. Then, before beginning the installation, be sure you have all other necessary installation equipment. Package Contents Matrix V-Series V2H124-24 switch •... -
Page 39: Mounting
Mounting This switch can be mounted in a standard 19-inch equipment rack or on a desktop or shelf. Mounting instructions for each type of site follow. Installing Optional Modules: Before mounting the switch, you may want to install optional modules. If you have purchased optional slide-in 100BASE-FX, 1000BASE-T, 1000BASE-T/SFP, or stacking modules, install these modules now, following the instructions “Installing an Optional Module into the Switch”... -
Page 40: Desktop Or Shelf Mounting
Mount the device in the rack, using four rack-mounting screws (not provided). Figure 3-3. Installing the Switch in a Rack If installing a single switch only, turn to “Connecting to a Power Source” at the end of this chapter. If installing multiple switches, mount them in the rack, one below the other, in any order. -
Page 41: Installing An Optional Module Into The Switch
Remove the blank metal plate (or a previously installed module) from the appropriate port by removing the two screws with a flat-head screwdriver. With the module still in the anti-static bag, touch the metal frame of the switch to prevent damage caused by static electricity discharge. Also, it is recommended to use an ESD wrist strap during installation. -
Page 42: Installing An Sfp Transceiver
Slide the SFP transceiver into the port until it clicks into place. Note: SFP transceivers are hot-swappable. The switch does not need to be powered off before installing or removing a transceiver. However, always first disconnect the network cable before removing a transceiver. -
Page 43: Figure 3-7. Connecting Switches In A Stack
Only one switch in the stack can operate as the Master, all other units operate in slave mode. If more than one switch in the stack is selected as Master, or if no switches are selected, the stack will not function. -
Page 44: Connecting To A Power Source
AC power source now, following the instructions included with the package. Connecting to the Console Port The DB-9 serial port on the switch’s front panel is used to connect to the switch for out-of-band console configuration. The command-line-driven configuration program can be accessed from a terminal or a PC running a terminal emulation program. -
Page 45: Wiring Map For Serial Cable
Wiring Map for Serial Cable Switch’s 9-Pin Serial Port 2 RXD (receive data) 3 TXD (transmit data) 5 SGND (signal ground) ------------------------------ 5 SGND (signal ground) No other pins are used. The serial port’s configuration requirements are as follows: • Default Baud rate—9,600 bps •... - Page 46 Installing the Switch 3-10...
-
Page 47: Chapter 4: Making Network Connections
Chapter 4: Making Network Connections Connecting Network Devices The V2H124-24 switch is designed to be connected to 10 or 100 Mbps network cards in PCs and servers, as well as to other switches and hubs. It may also be connected to remote devices using the optional 100BASE-FX or 1000BASE-T/SFP modules. -
Page 48: Connecting To Pcs, Servers, Hubs And Switches
Figure 4-1. Making Twisted-Pair Connections If the device is a network card and the switch is in the wiring closet, attach the other end of the cable segment to a modular wall outlet that is connected to the wiring closet. (See the section “Network Wiring Connections.”) Otherwise, attach the other end to an available port on the switch. -
Page 49: Figure 4-2. Network Wiring Connections
Twisted-Pair Devices Equipment Rack Switch (side view) Punch-Down Block Patch Panel Wall Figure 4-2. Network Wiring Connections... -
Page 50: Fiber Optic Devices
Connect one end of the cable to the SC or LC port on the switch and the other end to the port on the other device. Since SC and LC connectors are keyed, the cable can be attached in only one orientation. -
Page 51: Connectivity Rules
However, note that because switches break up the path for connected devices into separate collision domains, you should not include the switch or connected cabling in your calculations for cascade length involving other devices. -
Page 52: 100 Mbps Fast Ethernet Collision Domain
For each piece of equipment, identify the devices to which it is connected. • Note the length of each cable and the maximum cable length supported by the switch ports. Fiber Bandwidth Maximum Cable Length 2 m - 5 km (7 ft - 3.2 miles) LC... - Page 53 • For ease of understanding, use a location-based key when assigning prefixes to your cable labeling. • Use sequential numbers for cables that originate from the same equipment. • Differentiate between racks by naming accordingly. • Label each separate piece of equipment. •...
- Page 54 Making Network Connections...
-
Page 55: Appendix A: Troubleshooting
• Be sure the cable is plugged into both the switch and corresponding device. • If the switch is installed in a rack, check the connections to the punch-down block and patch panel. • Verify that the proper cable type is used and its length does not exceed specified limits. -
Page 56: In-Band Access
IP address. Also, be sure the port through which you are connecting to the switch has not been disabled. If it has not been disabled, then check the network cabling that runs between your remote location and the switch. -
Page 57: Appendix B: Cables
In straight-through cable, pins 1, 2, 3, and 6, at one end of the cable, are connected straight through to pins 1, 2, 3, and 6 at the other end of the cable. When using any RJ-45 port on this switch, you can use either straight-through or crossover cable. -
Page 58: Straight-Through Wiring
If the twisted-pair cable is to join two ports and only one of the ports has an internal crossover (MDI-X), the two pairs of wires must be straight-through. (When auto-negotiation is enabled for any RJ-45 port on this switch, you can use either straight-through or crossover cable to connect to any device type.) -
Page 59: 1000Base-T Pin Assignments
EIA/TIA 568B RJ-45 Wiring Standard End A 1000BASE-T Pin Assignments All 1000BASE-T ports support automatic MDI/MDI-X operation, so you can use straight-through cables for all network connections to PCs or servers, or to other switches or hubs. The table below shows the 1000BASE-T MDI and MDI-X port pinouts. These ports require that all four pairs of wires be connected. -
Page 60: Fiber Standards
Cables tests are specified in the ANSI/TIA/EIA-TSB-95 Bulletin, “The Additional Transmission Performance Guidelines for 100 Ohm 4-Pair Category 5 Cabling.” Note that when testing your cable installation, be sure to include all patch cables between switches and end devices. Adjusting Existing Category 5 Cabling to Run 1000BASE-T If your existing Category 5 installation does not meet one of the test parameters for 1000BASE-T, there are basically three measures that can be applied to try and correct the problem:... -
Page 61: Appendix C: Specifications
Appendix C: Specifications Physical Characteristics Ports 24 10/100BASE-TX, with auto-negotiation Media Slots 2 ports for optional 100BASE-FX, 1000BASE-T, 1000BASE-T/SFP, or stacking modules Network Interface Ports 1-24: RJ-45 connector, auto MDI/X 10BASE-T: RJ-45 (100-ohm, UTP cable; Categories 3 or better) 100BASE-TX: RJ-45 (100-ohm, UTP cable; Category 5 or better) Buffer Architecture 8 Mbytes Aggregate Bandwidth... -
Page 62: Switch Features
Internal, auto-ranging transformer: 100 to 240 VAC, 50 to 60 Hz External, supports connection for redundant power supply Power Consumption 45 Watts maximum Maximum Current 0.8 A @ 110 VAC 0.5 A @ 240 VAC Switch Features Forwarding Mode Store-and-forward Throughput Wire speed Flow Control Full Duplex: IEEE 802.3x... -
Page 63: Standards
Standards IEEE 802.3 Ethernet IEEE 802.3u Fast Ethernet IEEE 802.3z and 802.3ab Gigabit Ethernet IEEE 802.1D (Bridging) IEEE 802.3x full-duplex flow control ISO/IEC 8802-3 Compliances Safety UL 60950 CSA C22.2 No. 60950 73/23/EEC EN 60950 IEC 60950 EN 60825 CFR 1040.10 Electromagnetic Compatibility (EMC) 47 CFR Parts 2 and 15 CSA C108.8... -
Page 64: 1000Base-T Extender Module
Specifications Communication Mode Full duplex Network Interface Single-mode transceiver: 9/125 micron single-mode fiber cable Multimode transceiver: 50/125 or 62.5/125 micron multimode fiber cable Standards IEEE 802.3u Fast Ethernet ISO/IEC 8802-3 1000BASE-T Extender Module Ports 1 1000BASE-T, RJ-45 connector Communication Speed 10, 100, and 1000 Mbps Communication Mode Full duplex only at 1000 Mbps... -
Page 65: Stacking Module
Communication Mode Full duplex only at 1000 Mbps Full and half duplex at 10/100 Mbps Standards IEEE 802.3z Gigabit Ethernet IEEE 802.3ab Gigabit Ethernet IEEE 802.3u Fast Ethernet IEEE 802.3 Ethernet Stacking Module Ports 2 USB Type-A ports... - Page 66 Specifications...
- Page 67 Glossary 10BASE-T IEEE 802.3 specification for 10 Mbps Ethernet over two pairs of Category 3, 4, or 5 UTP cable. 100BASE-FX IEEE 802.3 specification for 100 Mbps Ethernet over two strands of 50/125, 62.5/ 125 micron, or 9/125 micron core fiber cable. 100BASE-TX IEEE 802.3u specification for 100 Mbps Ethernet over two pairs of Category 5 UTP cable.
- Page 68 Glossary End Station A workstation, server, or other device that does not forward traffic. Ethernet A network communication system developed and standardized by DEC, Intel, and Xerox, using baseband transmission, CSMA/CD access, logical bus topology, and coaxial cable. The successor IEEE 802.3 standard provides for integration into the OSI model and extends the physical layer and media with repeaters and implementations that operate on fiber, thin coax and twisted-pair cable.
- Page 69 Glossary IEEE 802.3z Defines CSMA/CD access method and physical layer specifications for 1000BASE Gigabit Ethernet. LAN Segment Separate LAN or collision domain. Light emitting diode used for monitoring a device or network condition. Local Area Network (LAN) A group of interconnected computer and support devices. Modal Bandwidth Bandwidth for multimode fiber is referred to as modal bandwidth because it varies with the modal field (or core diameter) of the fiber.
- Page 70 Glossary Unshielded twisted-pair cable. Virtual LAN (VLAN) A Virtual LAN is a collection of network nodes that share the same collision domain regardless of their physical location or connection point in the network. A VLAN serves as a logical workgroup with no physical barriers, allowing users to share information and resources as though located on the same LAN.
- Page 71 IEEE 802.3 Ethernet 1-7 IEEE 802.3u Fast Ethernet 1-7 IEEE 802.3x flow control 1-2 IEEE 802.3z Gigabit Ethernet 1-7 indicators, LED 1-3 installation connecting devices to the switch 4-2 desktop or shelf mounting 3-4 installing optional modules 3-3 network wiring connections 4-2 Index-1...
- Page 72 DB-9 3-8 port saturation 1-2 ports, connecting to 4-1, 4-4 power, connecting to 3-8 problems, troubleshooting A-1 rack mounting 3-3 rear panel of switch 1-1 rear panel receptacles 1-4 RJ-45 port 1-2 connections 4-1 pinouts B-3 RMON 1-2 RS-232 port 1-2...
- Page 73 2-1 method 1-1 Telnet A-2 temperature within a rack 3-3 troubleshooting in-band access A-2 power and cooling problems A-1 switch indicators A-1 twisted-pair connections 4-1 web-based management 1-2 Index Index-3...
- Page 74 Index Index-4...
- Page 76 150200039300A R01...
Need help?
Do you have a question about the Matrix-V V2H124-24 and is the answer not in the manual?
Questions and answers