Table of Contents
Advertisement
Quick Links
Carbon dioxide + Humidity, Temperature
CO METER
Model : GCH-2018
Your purchase of this CO2 METER marks a step forward for you
into the field of precision measurement. Although this CO2 is a
complex and delicate instrument, its durable structure developed.
Please read the following instructions carefully and always keep
this manual within easy reach.
OPERATION MANUAL
Advertisement
Table of Contents

Related Manuals for Lutron Electronics GCH-2018


Summary of Contents for Lutron Electronics GCH-2018
- Page 1 Carbon dioxide + Humidity, Temperature CO METER Model : GCH-2018 Your purchase of this CO2 METER marks a step forward for you into the field of precision measurement. Although this CO2 is a complex and delicate instrument, its durable structure developed.
- Page 2 TABLE OF CONTENTS 1. FEATURES...............1 2. SPECIFICATIONS............. 1 3. FRONT PANEL DESCRIPTION........... 5 3-1 Display..............5 3-2 Power Button.............5 3-3 Hold Button ( Esc Button ).......... 5 3-4 REC Button ( Enter Button )........5 3-5 Set Button ( Button )..........▲...
-
Page 3: Specifications
1. FEATURES NDIR method principal for CO2 ( Carbon dioxide ) measurement, available for long term operation. High repeatability and high accuracy. Two probes, one is for CO2/Temp. measurement, the other probe is for Humidity/Temp./Dew point measurement. Separate probe, easy operation and convenient for remote measurement. - Page 4 Unit Humidity % RH Dew point ℃ ℉ Temp. ℃ ℉ CO2 : Response Time < 2 min. typically. * Reach the 63% reading value * Depend the environment air circulation. Humidity/Dew point : 10 to 30 seconds typically. * Reach the 85% reading value * Depend the environment air circulation.
- Page 5 Probes no. Two probes : * Probe 1 is for CO2, Temp. measurement. * Probe 2 is for Humidity, Dew point. Temp. measurement. Operating 0 to 50 ℃ Temperature Operating Main instrument : Less than 85% R.H. Humidity C02 probe : Less than 85% R.H. Humidity probe : 0 to 95 %RH.
- Page 6 2-2 Electrical Specifications (23± 5 ℃ CO2 ( Carbon dioxide ) Range 0 to 4,000 ppm Resolution 1 ppm ( Carbon Accuracy ± 40 ppm dioxide ) 1,000 ppm. ≦ ± 5% of reading * > 1,000 ppm 3,000 ppm. ≦...
-
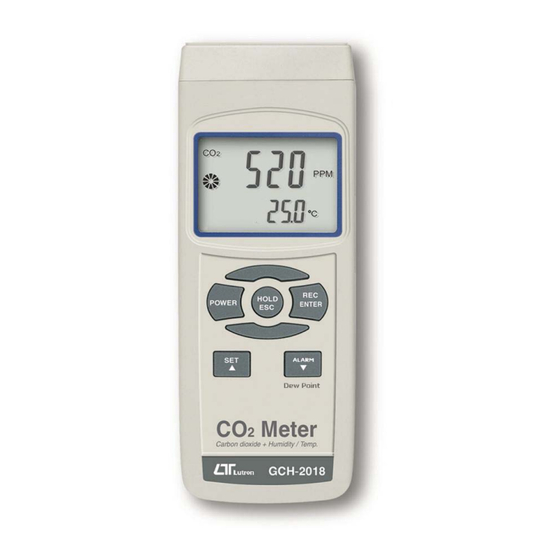
Page 7: Front Panel Description
Dew Point Range -25.3 to 48.9 ℃ ℃ ℃ Resolution 0.1 ℃ Range -13.5 to 120.1 ℉ ℉ ℉ Resolution ℉ Remark : * Dew Point display value is calculated from the Humidity/Temp. measurement automatically. * The Dew Point accuracy is sum accuracy value of Humidity &... - Page 8 3-1 Display 3-2 Power Button 3-3 Hold Button ( Esc Button ) 3-4 REC Button ( Enter Button ) 3-5 Set Button ( Button ) ▲ 3-6 Alarm/Dew point Button ( Button ) ▼ 3-7 Battery Compartment/Cover 3-8 Stand 3-9 Input socket 3-10 RS-232 Output Terminal 3-11 DC 9V Power Adapter Input Socket 3-12 Reset button...
-
Page 9: Measuring Procedure
4. MEASURING PROCEDURE 4-1 CO2 measurement 1)Plug the " CO2 Probe Plug " ( 3-15, Fig. 1 ) into the " Probe Input Socket " ( 3-9, Fig. 1 ). 2)Power on the meter by pressing the " Power Button " ( 3-2, Fig. - Page 10 b. Dew point measurement The procedures of " Dew point measurement " are same as the above " a. Humidity/Temp. measurement " except press the " Dew point Button " ( 3-6, Fig. 1 ) once, the lower LCD will show the indicator " DEW " & and the Dew point value along the unit.
-
Page 11: Advanced Setting
4-5 Data Record ( Max., Min. reading ) * The data record function records the maximum and minimum readings. Press the " REC Button " ( 3-4, Fig. 1 ) once to start the Data Record function and there will be a " REC. " symbol on the display. * With the "... - Page 12 Press the " Set Button " ( 3-5, Fig. 1 ) continuously at least two seconds will enter the " Advanced Setting ", then press the " Set Button " ( 3-5, Fig. 1 ) once a while in sequence to select the four main function, the lower display will show : PoFF..
- Page 13 5-2 Change the Temp unit ℃ ℉ When the lower display show " t-CF " : 1)Press the " Enter Button " ( 3-4, Fig. 1 ) once, the upper display will show " 0 ", use the " Button " ( 3-5, Fig. ▲...
-
Page 14: Rs232 Pc Serial Interface
5-4 Setting the CO2 Altitude ( Height ) value For precision measurement, it recommend to set the meter's environment altitude ( height ) value for the compensation. When the lower display show " ALt " : 1)Press the " Enter Button " ( 3-4, Fig. 1 ) once, the upper display will show the setting "... - Page 15 The 16 digits data stream will be displayed in the following format : D15 D14 D13 D12 D11 D10 D9 D8 D7 D6 D5 D4 D3 D2 D1 D0 Each digit indicates the following status : Start Word = 02 When send the upper display data = 1 When send the lower display data = 2 D12 &...
-
Page 16: Battery Replacement
7. BATTERY REPLACEMENT 1)When the left corner of LCD display show " ", it is necessary to replace the battery. However, in-spec. measurement may still be made for several hours after low battery indicator appears before the instrument become inaccurate. 2)Slide the "... - Page 17 9. ANNEX The follow CO2 value are for the requirement for different environment, however it is for reference only. Building, office, home 1,000 PPM ≦ School 1,500 PPM ≦ Hotel, public area 1,500 PPM ≦ Indoor swimming pool 1,500 PPM ≦...
Need help?
Do you have a question about the GCH-2018 and is the answer not in the manual?
Questions and answers