Table of Contents
Advertisement
Quick Links
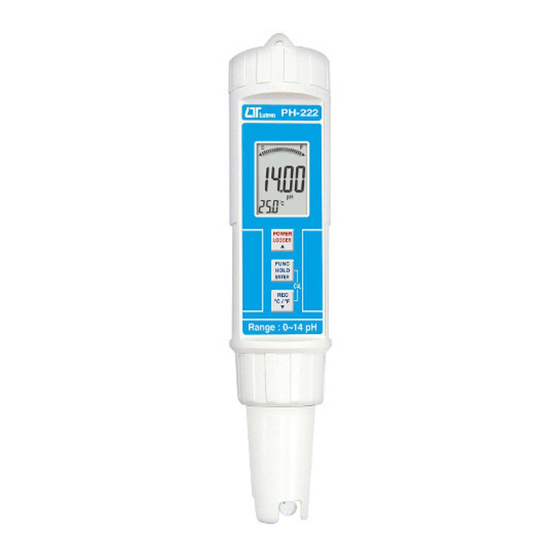
LUTRON PH-222
MANUAL
Your purchase of this PEN pH METER marks a step forward into the field of precision measurement.
Although this meter is a complex and delicate instrument, it offers durable structure that offer a
long-life span if correct calibration and storage techniques are implemented. Please read the
following instructions carefully and always keep this manual within easy reach.
Advertisement
Table of Contents

Summary of Contents for Lutron Electronics PH-222
- Page 1 LUTRON PH-222 MANUAL Your purchase of this PEN pH METER marks a step forward into the field of precision measurement. Although this meter is a complex and delicate instrument, it offers durable structure that offer a long-life span if correct calibration and storage techniques are implemented. Please read the...
-
Page 2: Table Of Contents
TABLE OF CONTENTS 1. FEATURES 2. SPECIFICATIONS 3. FRONT PANEL DESCRIPTION 3-1 Display 3-2 Power ( Logger, ▲ ) Button 3-3 Hold ( Enter, CAL ) button 3-4 REC ( ℃/℉ button, ▼ ) Button 3-5 pH electrode ( Temp. sensor ) 3-6 Battery compartment/Cover 3-7 Protection cover 4. -
Page 3: Features
1. FEATURES • Pen Style Digital pH meter with a built-in electrode for general purpose applications. • Built in Temperature sensor for Automatic Temperature Compensation (ATC). • User replaceable pH electrode. • IP67 Rated. • Records Maximum and Minimum Values. •... -
Page 5: Front Panel Description
3. FRONT PANEL DESCRIPTION... -
Page 6: Ph Calibration Procedure
This is why calibration is an important step to ensure a high degree of accuracy. Required Equipment for Calibration • pH-222 Meter with electrode fitted • Buffer solutions: o pH 7.00 Buffer Solution (PH-07A, 50ml included) o pH 4.00 Buffer Solution (PH-04A, 50ml included) - Page 7 pH 4 Calibration 1) Rinse the electrode in distilled water to remove remnants of pH 7.00 buffer solution. 2) If the instrument isn’t already on, turn it on by pressing the “POWER” Button (3-2, Front Panel Description). 3) Press the “HOLD” Button (3-3, Front Panel Description) once and then press the . button (3-4, Front Panel Description) once.
-
Page 8: Ph Measurement
3) Press the button 3 times. The display will show: 4) Press the “HOLD” Button (3-3, Front Panel Description) once. The “Clr will begin flashing and then show “END”. It will then return to normal measurement mode and this confirms that the “CALBIRATION CLEAR” procedure has been completed as per the below: 5. -
Page 9: Data Logger
4) To exit the Memory Record Function, press the “REC” Button for at least 2 seconds. The display will then revert to the standard measurement screen and will no longer show “REC” NOTE: To reset your Minimum or Maximum reading, whilst in the “REC MAX” or “REC MIN” screen press the hold button and this will delete the current Minimum or Maximum reading. -
Page 10: Replacement Of Battery
3) Press the button, the display will show the following: 4) Press the Button to confirm your desire to delete data. The screen will now show you Null and this confirms the memory is empty. 7. Replacement of Battery 1) When the display shows it is necessary to replace the batteries.


Need help?
Do you have a question about the PH-222 and is the answer not in the manual?
Questions and answers