Table of Contents
Advertisement
Available languages
Available languages
Quick Links
READ INSTRUCTIONS CAREFULLY FOR SAFE
For customer support, please contact:
Tel: +1 (949) 800 8488
US Patent 8317470, 8807938, 8790085, 9255584, 8851841
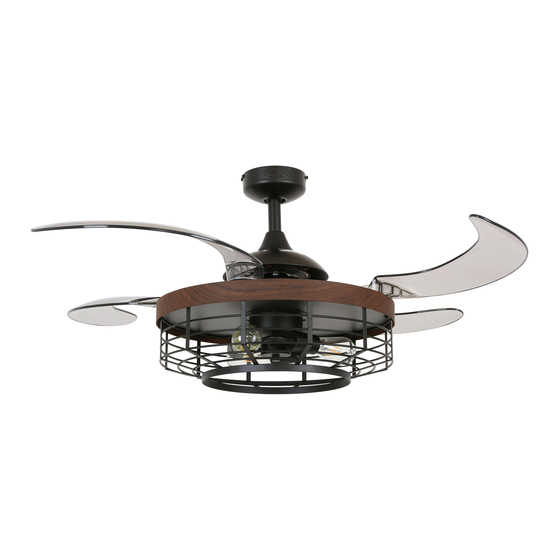
FANAWAY MONTCLAIR
CEILING FAN
• INSTALLATION
• OPERATION
• MAINTENANCE
• WARRANTY INFORMATION
CAUTION
INSTALLATION AND FAN OPERATION.
Email:
support@beaconlighting.us
www.beaconlighting.us.
V1.0 (01/2020)
Advertisement
Table of Contents

Subscribe to Our Youtube Channel
Related Manuals for Fanaway Montclair


Summary of Contents for Fanaway Montclair
- Page 1 FANAWAY MONTCLAIR CEILING FAN • INSTALLATION • OPERATION • MAINTENANCE • WARRANTY INFORMATION CAUTION READ INSTRUCTIONS CAREFULLY FOR SAFE INSTALLATION AND FAN OPERATION. For customer support, please contact: Tel: +1 (949) 800 8488 Email: support@beaconlighting.us www.beaconlighting.us. US Patent 8317470, 8807938, 8790085, 9255584, 8851841...
-
Page 2: Safety Precautions
Fanaway Montclair Installation Instructions THANK YOU FOR PURCHASING Thank you for purchasing this quality Fanaway product. To ensure correct function and safety, please read and follow all instructions before assembly, installation and use of this ceiling fan. Please keep instructions for future reference. -
Page 3: Parts List
Fanaway Montclair Installation Instructions PARTS LIST • Unpack your ceiling fan and carefully. Remove all parts and hardware. • Lay out all the components on a smooth surface and make sure there are no components missing before assembling. If parts are missing, return the complete product to the place of purchase for inspection or replacement. -
Page 4: Installing The Mounting Bracket
Fanaway Montclair Installation Instructions • Mounting bracket x 1 Wood screw x 2 • Canopy x 1 Machine screw x 2 • Down rod with ball joint x 1 Flat washer x 2 • Bolt and pin cover x 1... -
Page 5: Installing The Fan
Fanaway Montclair Installation Instructions To hang your fan where there is an existing fixture but no ceiling joist, you may need an installation hanger bar (C) as shown in Fig.5. Make sure the hanger bar you purchase has been designed for use with ceiling fans. -
Page 6: Fan Installation
Fanaway Montclair Installation Instructions FAN INSTALLATION LIGHT KIT INSTALLATION (Fig.7 & 8) 1. Loosen the screw (1) from the fan bracket. Align the two slot screws with the keyhole slots (2) of the light kit bracket. (Fig. 7) 2. Turn the light kit counterclockwise until the slot screws are firmly at the end of the slots (2). -
Page 7: Hanging The Fan
Fanaway Montclair Installation Instructions HANGING THE FAN Pass the power supply wires (C) from the ceiling outlet box (B) through the center of the ceiling mounting bracket (D). Install the ceiling mounting bracket (D) on the outlet box (B) with the mounting screws (F) provided with the outlet box and washers (E) provided with fan. -
Page 8: Electrical Wiring Diagram
Fanaway Montclair Installation Instructions ELECTRICAL WIRING DIAGRAM WARNING: To avoid possible electrical shock, be sure you have turned off the power at the main circuit panel. Follow the steps below to connect the fan to your household wiring. Use the wire connecting nuts supplied with your fan. -
Page 9: Finishing The Installation
Fanaway Montclair Installation Instructions FINISHING THE INSTALLATION Slide and align the canopy up to the mounting bracket. Ensure all electrical wiring is tucked inside the canopy and that the wires are not damaged during this step. Secure the canopy to the hanger bracket using the screws provided. -
Page 10: Installing The Remote Battery
Fanaway Montclair Installation Instructions INSTALLING THE REMOTE BATTERY 1 x 9V DC (size) battery is required to operate the remote control. Remove the battery cover from the back of the remote and 1 x 9V DC (size) battery. Ensure the polarities are correct as shown on the battery connector. -
Page 11: Warranty
Fanaway Montclair Installation Instructions AFTER INSTALLATION WOBBLE: NOTE: ceiling fans tend to move during operation due to the fact that they are mounted on a rubber grommet. If the fan was mounted rigidly to the ceiling it would cause excessive vibration. Movement of a few centimetres is quite acceptable and DOES NOT suggest any problem. -
Page 12: Medidas De Seguridad
Fanaway Montclair Installation Instructions GRACIAS POR SU COMPRA Gracias por adquirir este producto Fanaway de calidad. Para garantizar el correcto funcionamiento y la seguridad de este ventilador de techo, antes de armarlo, instalarlo y usarlo lea y siga todas las instrucciones. -
Page 13: Lista De Piezas
Fanaway Montclair Installation Instructions LISTA DE PIEZAS • Desempaque el ventilador con cuidado. Saque todas las piezas y la tornillerí a. • Deposite todos los componentes sobre una superficie lisa y verifique que no falta ninguno antes de iniciar el armado. Si falta alguna pieza, regrese el producto completo al lugar donde lo adquirió para que lo examinen o reemplacen. - Page 14 Fanaway Montclair Installation Instructions • 1 soporte de armado 2 tornillos para madera • 1 florón 2 tornillos de máquina • 1 tija con junta de bola 2 arandelas planas • 1 cubierta de perno y clavija 2 arandelas de resorte...
- Page 15 Fanaway Montclair Installation Instructions Para colgar el ventilador donde ya existe una luminaria pero no hay una viga de techo, es posible que necesite instalar una barra de colgado (C) como se ilustra en la Fig. 5. Asegúrese de que la barra de colgado que compra se ha diseñado para utilizarse con ventiladores de techo.
- Page 16 Fanaway Montclair Installation Instructions INSTALACIÓN DEL VENTILADOR INSTALACIÓN DEL KIT DE ILUMINACIÓN (Fig. 7 y 8) 1. Afloje el tornillo (1) del soporte del ventilador. Ponga en línea las dos ranuras de los tornillos con las ranuras del bocallave (2) del kit de iluminación. (Fig. 7) 2.
- Page 17 Fanaway Montclair Installation Instructions CÓMO COLGAR EL VENTILADOR Pase los cables de alimentación eléctrica (C) de la caja de salida del techo (B) a través del centro del soporte de armado en el techo (D). Instale el soporte de armado en el techo (D) en la caja de salida (B) con los tornillos de armado (F) suministrados con la caja de salida y las arandelas (E) incluidas con el ventilador.
-
Page 18: Diagrama De Cableado Eléctrico
Fanaway Montclair Installation Instructions DIAGRAMA DE CABLEADO ELÉCTRICO ADVERTENCIA: Para evitar cualquier posible descarga eléctrica, asegúrese de haber desconectado la alimentación eléctrica en el panel de circuito general. Siga los pasos que aparecen a continuación para conectar el ventilador al cableado de su casa. Use los protectores de conexión de cable que se suministran con su ventilador. -
Page 19: Cómo Finalizar La Instalación
Fanaway Montclair Installation Instructions CÓMO FINALIZAR LA INSTALACIÓN Deslice y ponga en línea el florón en el soporte de armado. Verifique que todo el cableado eléctrico está introducido en el florón y que los cables no se han dañado al hacerlo. Fije el florón al soporte de colgado con los tornillos suministrados. -
Page 20: Funcionamiento Del Control Remoto
Fanaway Montclair Installation Instructions INSTALACIÓN DE LA BATERÍ A DEL CONTROL REMOTO El control remoto funciona con 1 batería de 9V DC. Retire la tapa de la batería ubicada en la parte posterior del control remoto e inserte 1 batería de 9V DC. Compruebe que las polaridades están en dirección correcta como se indica en el conector de la batería. -
Page 21: Después De La Instalación
Fanaway Montclair Installation Instructions DESPUÉS DE LA INSTALACIÓN BAMBOLEO: NOTA: Los ventiladores de techo tienden a moverse cuando están en funcionamiento debido a que están armados sobre una arandela de caucho. Si el ventilador se montó en el techo de forma rí gida, esto podrí... -
Page 22: Información Técnica
Fanaway Montclair Installation Instructions INFORMACIÓN TÉCNICA Dimension Velocida Voltios Amper Vatios ft³ /min ft³ /min/ Peso Peso ft³ (V) es del neto bruto ventilador (lb) (lb) BI-48" Extra alta 0,47 56,36W 4172,69 74,03 26,68 31,31 5,05 VENTILADO Media alta 0,36...
Need help?
Do you have a question about the Montclair and is the answer not in the manual?
Questions and answers