
Subscribe to Our Youtube Channel
Related Manuals for Sawmaster R1048


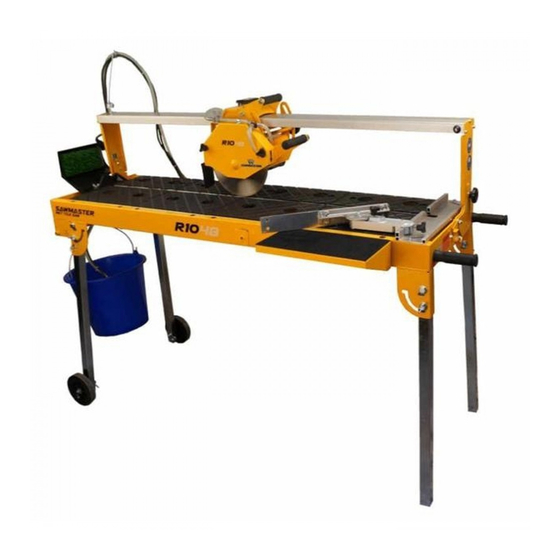
Summary of Contents for Sawmaster R1048
- Page 1 R1048 Wet tile saw Owner’s Manual Keep for your records ATTENTION! Read safety and operating instructions carefully before operating the saw for the fi rst time. Retain manual for future reference. 2018.04.26...
-
Page 2: Table Of Contents
Contents The Cutting Table Table of Contents Steps to Make Miter Cuts Safety Precautions Cutting Depth General Safety Rules Choose the Right Blade Health Warnings Electrical Specifications Do’s & Don’ts for Blades Unpack, Assembly Wet Cut Blades Set-up Dry Cut Blades Saw Maintenance Features Cleaning... -
Page 4: Safety Precautions
R1048 • Owner’s Manual Safety Precautions L. A visual check of the machine must be made at least once a shift to ensure that visible damages or faults are recognized. Any changes (including changes in the performance or behavior of the machine) must be reported to the supervisor. -
Page 5: General Safety Rules
General Safety Rules • Never use the machine improperly or work in an • A visual check of the machine must be made at least unsafe manner. once a shift to ensure that visible damages or faults are recognized. Any changes (including perfor- Always wear safety goggles, dust mask, and ear •... -
Page 6: Unpack, Assembly
R1048 • Owner’s Manual Unpacking Open the carton box cover by lifting the top portion. Locate the accessory box and check its content for the following items before discarding any packaging: • Saw • Pin (2) • Universal Wrench • Water Pump •... -
Page 7: Features
Splash Guard reduce swater waste Blade Capacity of 10” enhances Cutting Capacity Side Extension Table Rubber Matted Cutting Table Specifications R1048 Max Blade Motor Cutting Length Cutting Depth Weight Dimensions Capacity 1-1/2 HP 10-in blade for... -
Page 8: Saw Stand Assembly
R1048 • Owner’s Manual Saw Stand Assembly FOLDING STAND It is recommended that adjusting the folding leg be done by at least two people. Remove the detachable wheel assembly and stow it on the frame. Shift the cutting head away from the end of the frame where the leg is being adjusted. -
Page 9: Blade Installation
Blade Installation WARNING: Disconnect the power plug before installing the blade onto the blade shaft. Loosen the knobs securing the blade guard and remove the guard. Loosen the cutting shaft nut (left-hand thread); while knurled nuts loosening the nut, block the cutting shaft from turning. -
Page 10: Motor Capacitor Installation
R1048 • Owner’s Manual Motor Capacitor Installation WARNING: Disconnect the power plug before servicing the motor Locate the aluminum housing on the side of the motor body. Using a phillip/cross screw driver to remove the two screws to open the capacitor housing cover. -
Page 11: Water Pump Installation
Water Pump Installation Remove the water pump from the box and check that it is not damaged. Place the water pump into the bucket and place the bucket underneath the water drain hole on the water tray. Position the water outlet of the pump so that it lays horizontally. -
Page 12: Adjustable Angle Guide
R1048 • Owner’s Manual The Adjustable Angle Guide The Adjustable Angle Guide is a two- piece assembly consisting of a base and an attachment that rotates. This guide will support cutting angles between 0°, 22.5°, 30°, 45° and many more. The... -
Page 13: Operating The Saw (Cont.)
Operating The Saw :continued 5. Prevent accidental restarting of the saw by unplugging the power cable. CUTTING AT CONSTANT DEPTH When cutting at constant depth the cutting Turn on the saw and slowly and uniformly head must be pulled against the work piece. pull the head along the guide rail and across The motor should be turned off when the workpiece. -
Page 14: The Cutting Table
R1048 • Owner’s Manual The Cutting Table FEATURES • The easily removable cutting table is covered with an anti-skid rubber coating, which allows the material being cut to sit on the table while the cutting head is pulled through it. -
Page 15: Cutting Depth
Cutting Depth The recommended cutting depth is 1/4” below the cutting table surface. The cutting clearance has been fixed from original design. Blade Diameter Cutting Depth 8” 1.4” 10” 2.4” WARNING: Setting the blade too low may damage the cutting table and if set too high, the blade may grab the material being cut, causing damage and possibly injury. -
Page 16: Electrical Specifications
R1048 • Owner’s Manual Electrical Specifications R1048 Power 1-1/2 H.P olts 15 V Amps 15 Amps Motor RPM 3450 Cycle 60 Hz Phase EXTENSION CORD CHART WARNING: Wire Gauge Length of Cord No. 12 25’ To avoid permanent motor damage you must use No. -
Page 17: Do's & Don'ts For Blades
Do’s & Don’ts For Blades Wet Cut Blades DO'S DON'TS Inspect blades daily for cracks Do not operate the saw without • • or uneven wear. safety guards in position. Always use appropriate blade Do no operate the saw with •... -
Page 18: Dry Cut Blades
R1048 • Owner’s Manual Dry Cut Blades DO'S DON'TS In addition to the following, In addition to the following, • • always follow wet recommen- always follow wet recommen- dations. dations. Use appropriate blade for Do not make long cuts with dry •... -
Page 19: Saw Maintenance
Saw Maintenance WARNING: For your safety, before performing any maintenance on the saw turn off the power switch and unplug the power cord. GENERAL RULES Always clean the machine before maintenance/repair. Before cleaning/maintaining/repairing the machine, the machine must be turned off and unplugged. Steps to Follow When Cleaning the Saw Please do not use aggressive cleaners (i.e. - Page 20 R1048 • Owner’s Manual Maintenance Steps to Follow when Cleaning the Saw after Use Remove dirty water from water After use of the saw tray/container. Remove dirt and mud from the bottom of the container. Rinse the water pump with fresh water to prevent clogging from residual dirt.
-
Page 21: Before & After A Prolonged Time
WARNING: For your safety, before performing any maintenance on the saw turn off the power switch and unplug the power cord. Before & After A Prolonged Time Clean and lubricate all movable parts. DO NOT Before not using the GREASE the GUIDE RAILS. machine for a prolonged period of time Check that the legs are safely fixed. -
Page 22: Water Pump Maintenance
R1048 • Owner’s Manual WARNING: For your safety, before performing any maintenance on the saw turn off the power switch and unplug the power cord. Water Pump Maintenance When the machine has not been used for a long period of time, hard packed dirt may build up inside the pump and block the pump fan from rotating. -
Page 23: Alignment Instructions
For your safety, before performing any maintenance on the saw turn off the power switch and unplug the power cord. Instructions: Performing a Realignment of a R1048 Reminder: Always unplug unit before servicing. Adjust the cutting head such that the blade passes through the table, not over. - Page 24 R1048 • Owner’s Manual Method 3: Fig. 2 Front view 1. Underneath the carriage cover is four bolts (size 13 wrench) that hold the head's two sub-assembly together. The upper assembly is the carriage and the lower assembly is the actual cutting head. The three bolts highlighted by the balloon "C", in the mid-left...
-
Page 25: Troubleshooting
Troubleshooting Problem Possible Cause Solution Machine does not run when switched Power cord not properly fixed/ Check that the machine is properly plugged in connected to the power supply Power cord defective Have the power cord checked, re- place if necessary Main power switch defective Have the main power switch checked and replace if necessary by a quali-... - Page 26 R1048 • Owner’s Manual Problem Possible Cause Solution Insufficient flow of cooling water or The pump draws air Fill the container with water no cooling water at all Filter clogged Clean the filter of the pump Pump wheel of the immersion pump...
- Page 27 Problem Possible Cause Solution Saw blade is blunt Saw blade type is unsuitable for the Use appropriate type of saw blade material being cut Saw blade type is unsuitable for the machine performance Saw blade too hard Diamond segments are blunt Sharpen the diamond saw blade Appearance of cut is not optimal Poor tension in the blade material...
-
Page 28: Notes
R1040 • Owner’s Manual Note... -
Page 29: Warranty
For a period of one (1) year from the original date of pur- SawMaster shall not be responsible for or obligated to pay chase, if the product is determined to be defective, Saw- for freight or other transportation related costs or expenses... -
Page 30: How To Order
All customer service (e.g. technical questions, reordering on date of shipment. Prices may change to reflect market of parts, etc.) will be provided by SawMaster. All spare trends in the industry, so that our products remain competi- parts for after sales service will be stocked and shipped tive in quality and pricing. -
Page 31: Contact Us
In some cases we may even refer you to a local sales representative that can better service you. You can call us at the contact information listed below: CUSTOMER SERVICE Phone: 888-688-6899 / 951-352-8887 Fax: 951-352-2118 Email: sales@sawmaster.com Web: www.sawmaster.com...
Need help?
Do you have a question about the R1048 and is the answer not in the manual?
Questions and answers