
Related Manuals for Prio Expert MO Series

Summary of Contents for Prio Expert MO Series
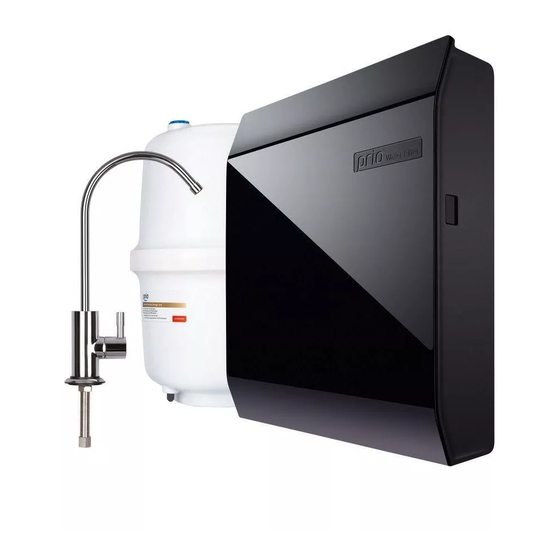
- Page 1 Prio Expert ® MO530 MO520 MO510 MO___ Reverse Osmosis Filtration System (Storage Tank, Main Filtration Unit Set) User’s Guide...
- Page 2 Before operating this appliance, please read the instructions carefully. You may want to save this guide for your future reference. Failure to follow the instructions or meet the operating requirements may lead to the product’s failure, malfunction, property damage or personal injury. Safety Warning Do not place the storage tank near the sources of heat, radiators, etc.
- Page 3 Description Congratulations on your purchase of the Prio® Expert R.O. filtration system! With proper installation and maintenance, it will provide you with high quality drinking water for many years. This R.O. system removes odor and most harmful substances such as heavy metal ions and total dissolved solids from tap water making it tasty, fresh and vital.
- Page 4 How It Works: This Prio® Expert reverse osmosis system is a multi-stage automatic filtration machine. Reverse Оsmosis (R.O.) is a water purification technology that uses a semipermeable mem- brane to remove ions, molecules and larger particles from drinking water. R.O. can remove many types of dissolved and suspended species from water, including bacteria, and is used in both industrial processes and the production of potable water.
-
Page 5: Specification
Faucet: Designer faucet for filtered water is included and usually mounted on the sink deck or counter- top for dispensing the clean, filtered water from the filtered water storage tank. Water Storage Tank: Air pressurized storage tank is used for filtered water storage. Drain saddle: Fits a standard 1.5”... - Page 6 Performance: Performance of the appliance such as filtered water delivery rate, rejection rate, etc. is highly dependent on local conditions (inlet water pressure, temperature, TDS and degree of contam- ination, tank air pressure, etc.) and R.O. system use pattern. Actual performance may vary. Filtered water production rating: 75 gpd (270 lpd) maximum ■...
-
Page 7: Installation
Installation Notes: 1. Shut off the cold water supply under the sink or the location where the system will be installed. If the existing valve is inoperable, the water supply to the house must be shut off. Then, relieve the water pressure by opening the cold water tap. Do not connect the system to hot water source. - Page 8 General connection scheme: filtered water faucet inlet valve filtration unit inlet tank to drain or waste water collection container waste water outlet check valve drain permeate outlet to the tank (optional) saddle...
- Page 9 ImPORTANT: Cut Tubing At 90° to ensure a Watertight Seal: No skewed cut! To Connect the Tubing to a Fitting: 1. Remove the lock if present (not present in self-locking fittings). 2. Push. Insert the tube firmly until full stop. 3.
- Page 10 Installation Steps: G1/2” UNEF 9/16”-24 G3/8” 1. Install adapter ball valve (included) to the cold water supply. Adapter Adapter Use some Teflon or plumbers sealing tape to prevent leaks. Use three included threaded UNEF 9/16”-24 adapters to make different connection con- figurations (see chart for details).
- Page 11 Drill a ¼” hole in the drain pipe above the trap and on the ver- mount drain tical or horizontal tail piece. Lo- saddle here never cate the drain connection away mount from the garbage disposal to here prevent potential contamination never mount and system fouling.
- Page 12 Initial Washing: After installation it is recommended to perform the initial washing of the system. For this: shut off the tank open cold water open the filtered ■ ■ ■ valve supply valve water faucet open the inlet ■ valve 15-30 min wait for water to arrive at the faucet (it may take a while, especially first time, water foam ■...
- Page 13 Regular Use To get clean water just open the filtered water faucet. The filtered water stored in the tank will be delivered. R.O. water filtration system will refill the tank gradually even after you shut off the faucet. The system will shut off automatically when the tank will become full again. Please note that R.O.
- Page 14 times time To prevent leakage or cracks and ensure the safety of operation and top performance do not 15-30 min disassemble the filters or try to regenerate them. To change filter(s) or membrane: shut-off the inlet shut off the tank relieve the water ■...
- Page 15 Note: For a pre- or post-filter you only need to connect its inlet and outlet. For the membrane you have to connect the third outlet – to the waste water line. This outlet is located off the center of the membrane housing. Elbow check valve fitting (with the arrow) has to be con- nected to the central (permeate) outlet of the membrane housing.
- Page 16 Check to see if there is still water in the ■ and your system needs a new tank. storage tank. If the tank feels heavy, Prio, Prio logo are the trademarks of DWT Deutsche Wassertechnologien GmbH, Germany. As used herein, ® denotes registered trademark status in Germany only.