Table of Contents
Advertisement
Quick Links
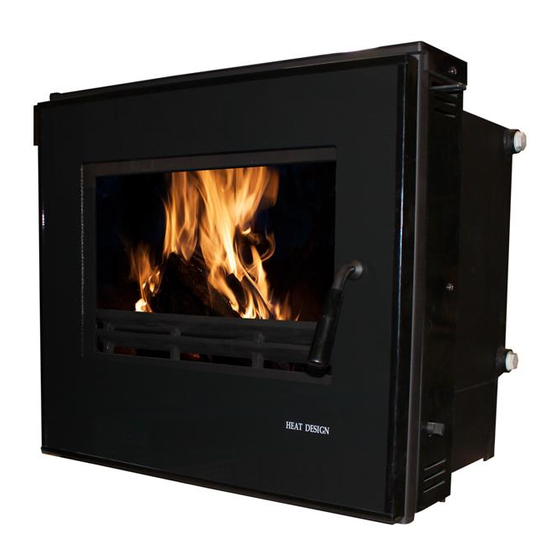
Vitae25Bi
High Output
Insert Boiler Stove
Please fix label with serial number and stove
type here before putting manual into stove
Installation and Operating
Instructions
Please hand these instructions to the stove user when the installation is complete. Leave the stove ready for
operation and instruct the user in the correct use of the appliance and operation of controls.
Important: – This product must be installed by a suitably qualified installer.
Heat Design Ltd.
30-60 Hawthorn Road
Western Industrial Estate,
Naas Road,
Dublin 12
www.heatdesign.ie
PLEASE READ ALL THESE INSTRUCTIONS CAREFULLY!
For safety reasons it is essential that your stove is correctly installed and operated. Heat Design
cannot accept responsibility for any fault or consequential problems arising through incorrect
installation or operation.
Advertisement
Table of Contents

Related Manuals for Heat Design Vitae25Bi

Summary of Contents for Heat Design Vitae25Bi
- Page 1 Dublin 12 www.heatdesign.ie PLEASE READ ALL THESE INSTRUCTIONS CAREFULLY! For safety reasons it is essential that your stove is correctly installed and operated. Heat Design cannot accept responsibility for any fault or consequential problems arising through incorrect installation or operation.
-
Page 2: Table Of Contents
Refuelling onto a Low Firebed Fuel Overloading Shutting down Maintenance Seasonal Use Replacing Door Rope and Glass 7. Safety Notes for your Guidance 8. Stove Dimensions 9. Frequently Asked Questions 10. Vitae25Bi Spare Parts List & Codes Vitae- 25Bi 15/11/15... -
Page 3: List Of Components
Fig 2 – Insert Boiler Stove Assembly and controls 1. Component Identification and Installation Your Heat Design Stove is shipped securely packed and strapped. Carefully remove any straps and remove all wood, cardboard and any plastic packaging, open the door and remove all the contents. -
Page 4: Installation Instructions
3 Installation Instructions WARNINGS AND IMPORTANT SAFETY INFORMATION READ THESE INSTRUCTIONS CAREFULLY BEFORE INSTALLATION! These instructions cover the basic principles to ensure satisfactory installation of the stove, although detail may need slight modification to suit particular local site conditions. In all cases the installation must comply with current local regulations including Building Regulations, Local Authority Byelaws and other specifications or regulations including Ireland, UK or EU standards referred to as they affect the installation of the stove. - Page 5 Health And Safety Precautions Handling Adequate facilities must be available for unloading and site handling. Heat Design Stoves are very heavily built so always ask for assistance when lifting and siting the stoves. Fire Cement Some types of fire cement are caustic and should not be allowed to come into contact with the skin. In case of skin contact, wash immediately with plenty of water.
-
Page 6: Installation Information
If the problem persists seek the advice of a chimney sweep. Material Clearances Safety Distances from Combustible Surfaces: Model Back Side Shelf Vitae25Bi 150mm 150mm 550mm In addition ensure that any furniture or other combustible materials are kept at least 1000mm clear from the front of the stove. Vitae-... -
Page 7: Hearths
Hearths: Heat Design stoves require a 125mm thick non-combustible constructional hearth beneath them to protect the building, this can include any solid non-combustible floor. A non-combustible superimposed hearth forming an apron of at least 225mm at the front of the stove and 150mm on either side must also be provided. -
Page 8: Plumbing
4.0 Plumbing This appliance must be plumbed in accordance with all regulations and practices and plumbing must be carried out by a suitably qualified professional. The plumbing circuit must include a gravity circuit with an expansion pipe open to the atmosphere. Below are several diagrams representing different plumbing circuits. These are not working drawings and are for example only. - Page 9 The manufacturers cannot be held responsible for any losses due to incorrect specification or connection of the heating system. This Heat Design Boiler Stove must always be connected with the flow and return connections on opposite sides of the appliance (cross-flowed) to an indirect hot water system. Fernox or a similar corrosion inhibitor should be used to prevent corrosion or formation of limescale in the heating system.
- Page 10 The gravity circuit should connect to a domestic indirect hot water cylinder of minimum 135lt capacity, using 28mm flow and return pipes, rising continuously from the boiler to the cylinder. Any nominally horizontal runs of gravity pipework should slope upwards at not less than 1:30. The base of the hot water cylinder should be located at least 150mm above the top of the stove.
-
Page 11: Operating Instructions
Secondary Air (Air Wash) This Heat Design boiler stove has a powerful “air wash” system. This secondary air supply to the stove is controlled via a sliding air control located on the top right of the stove. If you want clean glass, always leave this control open some way whilst burning unless the stove is being shut right down for a long period. -
Page 12: Cleaning
Fig 6b – Back and front Fig 6a – Full grate assembly bars on grate Fig 6c – Replace middle three bars and then remove front and back bars The grate bars also need to be checked periodically for any signs of extreme wear and may need to be replaced as necessary. - Page 13 does not have much effect before being burnt off. Steel and cast iron liners are resilient firebox materials and will give reliable service without major cleaning or work on the firebox. Baffle: It is essential to check the top of the baffle for build-up of soot and ash regularly when in use and after a long period of no use.
-
Page 14: Fuels
Ash Removal Slots Fuels The appliance is fitted with a versatile multifuel grate and has been tested using dry wood (less than 20% moisture) and coal (Manufactured smokeless nuggets, Ecobrite or similar). Notes on Wood burning With a full load of wood, the stove will need to be refuelled approximately every hour depending on burn rate. -
Page 15: Refuelling Onto A Low Firebed
the flames disappear and there are still lumps of solid wood left this indicates excessive moisture in the wood or insufficient air supply/flue draught. Note: To eliminate unwanted smoke emission, after loading new logs on to the fire, open the air wash control up fully for 1-2 minutes to boost the fire and get flames issuing from the top of the fuel as soon as possible. -
Page 16: Replacing Door Rope And Glass
Carefully replace the broken glass. Ensure the sealing rope behind the glass is fully intact, replace if necessary. Replace the glass with genuine high quality stove glass from Heat Design and refit all components the opposite way you disassembled. Vitae- 25Bi 15/11/15... -
Page 17: Safety Notes For Your Guidance
6.0 Safety Notes for your guidance FIRES CAN BE DANGEROUS – Always use a fireguard in the presence of children, the elderly or the infirm. DO NOT perform modifications to the appliance as this could seriously compromise safety in operation. DO NOT OVERFIRE –... -
Page 18: Stove Dimensions
8.0 Stove Dimensions Fig. 7 – Heat Design Insert Boiler Stove All dimensions in mm unless otherwise stated. Dimensions are approximate and are subject to change without prior notice. Vitae- 25Bi 15/11/15... -
Page 19: Frequently Asked Questions
A call out charge will apply if our engineer attends any stove problem that is not related to product failure. 6 Where can I get spare parts? Your local Heat Design Stove retailer will be pleased to supply spare parts and to provide any other information you require. -
Page 20: Vitae25Bi Spare Parts List & Codes
Ashpan Tool Y1HDI18B31A Thermostat Y1HDI18B72A Door Y1HDI18B32A thermostat knob Y1HDI18B73A Side Right Y1HDI18B36A Front Damper Plate Y1HDI18B74A Heat Design, 30-60 Hawthorn Road, Western Industrial Estate, Naas Road, Dublin 12. T: 01 408 9192 F: 01 408 9193 Vitae- 25Bi 15/11/15...
Need help?
Do you have a question about the Vitae25Bi and is the answer not in the manual?
Questions and answers