Gastroback Design Espresso Advanced Barista Operating Instructions Manual
Hide thumbs
Also See for Design Espresso Advanced Barista:
- Operating instructions manual (36 pages) ,
- Operating instructions manual (144 pages)
Table of Contents
Advertisement
Quick Links
Advertisement
Table of Contents

Related Manuals for Gastroback Design Espresso Advanced Barista


Summary of Contents for Gastroback Design Espresso Advanced Barista
- Page 1 DESIGN ESPRESSO ADVANCED BARISTA OPERATING INSTRUCTIONS Art.- No. 62619 » Design Espresso Advanced Barista « Read all provided instructions before first usage! Deutsch Deutsch Model and attachments are subject to change English English For household use only! www.gastroback.co.uk...
-
Page 2: Table Of Contents
We attach a certain importance to your safety. Thus, we ask you to read all provided instructions and information in this booklet carefully and completely, before you start running the appliance. This will help you to know all functions and properties of your Before First Use .................. - Page 3 Cleaning the Housing and Warming Plate .......... 139 If you have any questions about GASTROBACK® products, if your unit is not wor- Descaling the Appliance ..............139 king properly straight away or if you need any accessories or spare parts for your Storage ....................
-
Page 4: Important Safeguards
DEAR CUSTOMER! IMPORTANT SAFEGUARDS Via the Design Espresso Advanced Barista you will get a lot of freshly brewed cof- Carefully read all instructions given in this booklet before ope- fee drinks without time-consuming preparations: Espresso, Long Black, cappuccino, ration of this appliance. Save all instructions for further refe- or latte. -
Page 5: Important Safeguards For Electrical Appliances
heating, mechanical or electric shock), or if there are any perceptible on or in the appliance or any of its parts (e.g. water tank, warming damages or leakages, or if the appliance is not working properly. If plate, or cup tray), to avoid damage. For operation, only fill cold, one of these cases occurs during operation, immediately unplug the clear tap water or low-mineral, non-carbonated bottled water in the appliance. -
Page 6: High Temperatures - Risk Of Burns
HIGH TEMPERATURES – RISK OF BURNS • In various foreign countries, the specifications for power supplies are Your new Design Espresso Advanced Barista is designed for extracting subject to incompatible norms. Therefore it is possible that power sup- coffee and producing hot water and hot steam under high pressure. Thus, plies in foreign countries do not meet the requirements for safe opera- some parts (e.g. -
Page 7: Technical Specifications
• Always wait until the appliance cooled down to room temperature, before cleaning or moving the appliance. TECHNICAL SPECIFICATIONS Model: 62619 Design Espresso Advanced Barista Power supply: 220 - 240 V AC, 50-60 Hz Power consumption: 1600 W Length of power cord: approx. -
Page 8: Knowing Your New Espresso Machine
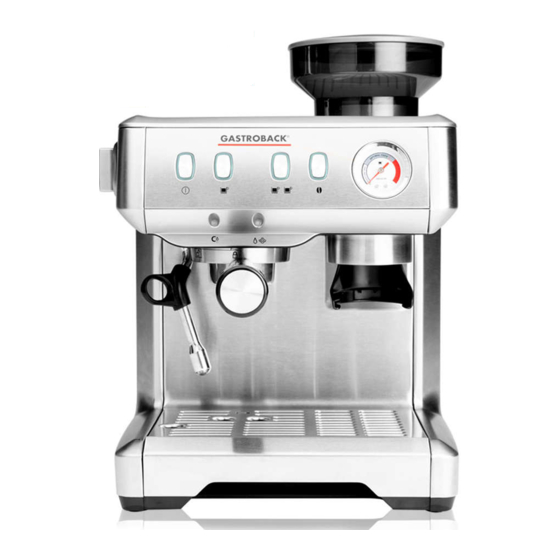
KNOWING YOUR NEW ESPRESSO MACHINE BEAN HOPPER LID tightly closing the bean hopper. BEAN HOPPER for up to 220g fresh, whole coffee beans. HEATED WARMING PLATE for pre-heating and keeping warm cups and glasses. WATER TANK LID AND HANDLE: simply pull the water tank lid up and use it as a handle for conveniently pulling out the water tank. Fold it back for filling the water tank. -
Page 9: Properties Of Your New Espresso Machine
PROPERTIES OF YOUR NEW ESPRESSO MACHINE This chapter provides an overview on the functions and features of your new Design Feature Useful for … Espresso Advanced Barista. Via this feature, steam and hot water may be given off. Feature Useful for … •... -
Page 10: Adjustable, Automatically Controlled Grinder
Optimum extracted zone: With the gauge pointer positioned in the grey central zone during extraction, the espresso will be extracted at the perfect pressure. The »Design Espresso Advanced Barista« is equipped with a program-controlled grin- der. It is best to use this feature for grinding fresh, whole coffee beans just before •... -
Page 11: Error Messages
Preparing delightful coffee is an art you will learn quite easily using your new the settings in small steps to reach the desired optimum. It is normal that a few »Design Espresso Advanced Barista«. In this chapter, various useful tips for getting attempts are needed for finding the correct grind size. -
Page 12: The Water Quality
When using the POD filter basket: always use only one single coffee pad. • Try to achieve an extraction time of approx. 20-40 seconds. • Press the rim of the coffee pad onto the side walls of the POD filter basket. For •... -
Page 13: Tips For Texturing Milk
• If your espresso does not meet your requirements, you should only change one • Always start with refrigerated, fresh milk (4-7°C). Low-fat milk will give the best of the essential parameters mentioned above at a time. Then check, if you have results (approx. -
Page 14: Inserting The Water Filter
5. Thereafter, place the filter cartridge in the water filter housing and, without vio- CAUTION – Please, do not forget to fill the water tank, before switching on lence, push the water filter down as far as possible onto the valve in the centre the appliance. -
Page 15: Operation
IMPORTANT - While performing the following procedure, ensure that the filling IMPORTANT - Before each use of the machine, check the filling level in the water level in the water tank does not drop below the MIN filling line. Additionally, ensu- tank. -
Page 16: Emptying The Drip Tray
EMPTYING THE DRIP TRAY cal standby position. Press the power button. The power button flashes and the machine starts heating. Wait until all buttons illuminate. The required temperature If required, empty the drip tray, before starting a extraction cycle. for performing extractions will be reached within approx. 1 minute. IMPORTANT - When the appliance has been in operation just before, the water in the drip tray may be hot. -
Page 17: Pre-Heating
PRE-HEATING USING THE GRINDER You can grind the coffee powder directly into the filter basket via the integrated grin- WARNING – The steam wand gets hot, when hot water or steam is relea- der of the machine. With every start of the grinding action, the correctly measured sed. -
Page 18: Filling In Coffee Powder Manually
12. Wait until the grinder stops automatically or stop the grinder manually by pres- NOTE sing the grinder button again. Then pull the portafilter out of the grinder cradle Tamp down firmly, applying a force of approx. 5 kg. When pressing too hard, the and use the tamper for pressing the coffee powder into the filter basket (see: water flows too slowly and the espresso gets bitter and dark. -
Page 19: After The Extraction
ply press the 1 cup button to give off hot water via the group head. NOTE 4. Empty the filter basket by turning the portafilter upside down and hitting out the You can adapt the extraction volumes programmed for each espresso button (1 coffee powder. - Page 20 5. Remove the vessel from the steam wand. WARNING – Risk of Burns! The hot water jet is given off under pressure and may splash. Even after operation, hot steam and hot water could escape from 6. In the case, you diluted an already prepared drink, wipe the steam wand, using the steam wand and the steam wand will be hot.
-
Page 21: Changing The Default Settings
7. When using a metal vessel: hold your hand at the bottom of the You can adapt your new »Design Espresso Advanced Barista« to your likings by milk vessel for feeling the temperature, which must get lukewarm. -
Page 22: Setting Up The Grinder
ADJUSTING THE AMOUNT NOTE 16. The first time you use the appliance, we recommend using the factory settings The espresso machine comes with useful factory settings already programmed. For (approx. 7g for a single espresso and approx. 14g for a double shot). If you your first tries, you should use these settings. -
Page 23: Recalling The Factory Settings
3. As soon as the espresso button is released, the appliance memorizes the Problem Possible Reasons The Easy Solution amount, given off up to this point. The filter basket is dama- Replace the filter basket. Do not use violence when ged. - Page 24 Problem Possible Reasons The Easy Solution Problem Possible Reasons The Easy Solution A severe problem occur- If an unpleasant smell persists after thoroughly purging Water or steam escape The appliance heats up During heating, water and steam may escape in small red.
- Page 25 Problem Possible Reasons The Easy Solution Problem Possible Reasons The Easy Solution Water or splashes given Even when the selection dial is in the central stand- Not enough water in the Fill the water tank at least up the the MIN filling line and off by the steam wand by position (off), water and steam may escape.
- Page 26 Problem Possible Reasons The Easy Solution Problem Possible Reasons The Easy Solution Too much coffee powder Ensure to leave sufficient space between the tamped Too much coffee powder Leave at least 2-3mm of free space between the tamped in the filter basket. coffee powder and the rim of the filter basket (2-3mm).
- Page 27 Problem Possible Reasons The Easy Solution Problem Possible Reasons The Easy Solution The extraction volume Adapt the extraction volume accordingly (see: ‘Changing The water tank is not Push the water tank down at the back of the appliance programmed for the used the Default Settings / Adjusting the Extraction Volume’).
- Page 28 Problem Possible Reasons The Easy Solution Problem Possible Reasons The Easy Solution Impurities are merged Press the grinding button for turning off the grinder. The steam wand is Even an obstacle that is only narrowing down the steam with the coffee beans and clogged.
-
Page 29: Care And Cleaning
CARE AND CLEANING WARNING Problem Possible Reasons The Easy Solution – Always ensure that the appliance and all its parts and accessories are out of reach of young children. The lower part of the group The milk has a stale taste. The milk is not fresh and/ Use refrigerated and really fresh milk for texturing (see: head, as well as the portafilter, filter basket, and steam wand will get very hot or not cold enough. -
Page 30: Removing Blockages Of The Grinder
REMOVING BLOCKAGES OF THE GRINDER 1. Switch off and unplug the appliance. Leave the appliance cool down completely. 2. Remove the water tank and the drip tray. Remove the bean hopper lid. Rarely, foreign objects merged with the coffee beans may block the grinder. Try the following procedure to make the grinder work again. - Page 31 IMMEDIATELY AFTER USE 3. Empty the water tank. Pull out the water filter. 4. Wash the water tank with warm dishwater and a soft nylon brush. IMPORTANT - After texturing milk, always immediately wipe off residues of milk from the steam wand. Otherwise, the texturing performance may be affected due 5.
- Page 32 THOROUGH CLEANING OF THE PORTAFILTER AND FILTER BASKET 4. Wipe the stainless steel tube of the steam wand using a clean cloth moistened with warm dishwater. Thereafter, wipe with clear water. We recommend to perform thorough cleaning of the filter baskets regularly (every 5.
- Page 33 CAUTION Empty and clean the drip tray daily after switching off the appliance. – Only use the Gastroback Descaler to avoid damage to your health and/or damage to the machine due to harmful chemicals. There is no lia- IMPORTANT - The water in the drip tray may be hot. Handle with care. Carefully bility claim of the purchaser for any damage caused by excessive lime deposits pull out the drip tray to avoid spilling water onto the base of the appliance.
- Page 34 (see above). 12. Take out the water tank and rinse and fill the water tank as described in step 7. 2. Prepare approx. 2800 ml descaling solution (approx. 300 ml Gastroback® Pre- mium descaler + 2500 ml water). 13. With any odour of descaling solution still noticeable, flush the water system manually (see: ‘Before First Use / Flushing the Water System’).
- Page 35 Do not attempt to use this appliance in any other way or for any other purpose than the intended use, described in these instruc- For technical support, please contact Gastroback Customer Care Center by phone: tions. Any other use is regarded as unintended use or misuse, and can cause +49 (0)4165/22 25-0 or e-mail info@gastroback.co.uk.
- Page 36 GASTROBACK GmbH Gewerbestraße 20 . 21279 Hollenstedt / Germany Telefon + 49 (0) 41 65 / 22 25 - 0 Telefax + 49 (0) 41 65 / 22 25 -29 • info@gastroback.de www.gastroback.co.uk •...
Need help?
Do you have a question about the Design Espresso Advanced Barista and is the answer not in the manual?
Questions and answers