Viessmann Vitotronic 200 Operating Instructions Manual
Heating system and mechanical ventilation system with heat pump control unit
Hide thumbs
Also See for Vitotronic 200:
- User manual ,
- Service instructions manual (336 pages) ,
- Installation and service instructions for contractors (136 pages)

Subscribe to Our Youtube Channel
Related Manuals for Viessmann Vitotronic 200


Summary of Contents for Viessmann Vitotronic 200
- Page 1 VIESMANN Operating instructions for the system user Heating system and mechanical ventilation system with heat pump control unit Vitotronic 200, type WO1C VITOTRONIC 200 Please keep safe. 5790940 GB 1/2017...
- Page 2 Safety instructions For your safety Please follow these safety instructions closely to prevent accidents and material losses. Safety instructions explained Danger Note This symbol warns against the risk of injury. Details identified by the word "Note" contain additional information. Please note This symbol warns against the risk of material losses and environmental pollution.
-
Page 3: For Your Safety
Safety instructions For your safety (cont.) Conditions for siting Danger Please note Easily flammable liquids and materials (e.g. Unsuitable ambient conditions can lead to sys- naphtha, solvents, cleaning agents, paints or tem damage and can put safe operation at risk. paper) can cause deflagration and fire. - Page 4 Index Index 1. Introductory information Symbols ....................Intended use ..................Appliance description ................Heat pump control unit ............... ■ Heat pump types ................■ Equipment and functions ..............10 ■ Mechanical ventilation systems ............10 ■ Permissible ambient temperatures in the installation room ....11 ■...
- Page 5 Index Index Energy saving function "Holiday program" ......... 31 Setting the "Holiday program" for central heating/central cooling, ■ ventilation ................... 31 Changing "Holiday program" ............32 ■ Cancelling or deleting the "Holiday program" ........32 ■ 5. DHW heating DHW temperatures ................33 Setting the standard DHW temperature ..........
- Page 6 Index Index Setting the display brightness ..............48 Setting names for heating/cooling circuits ..........48 Setting the preferred heating/cooling circuit for the standard menu ..49 Setting the time and date ............... 49 Language selection ................49 Setting the temperature unit (°C/°F) ............49 Restoring factory settings ..............
- Page 7 Index Index (cont.) System version ................... 85 ■ Operating program ................85 ■ Operating status ................. 85 ■ Pressure imbalance ................85 ■ Utilisation of power generated on site ..........85 ■ Electric booster heater ................ 86 ■ Enthalpy heat exchanger ..............86 ■...
-
Page 8: Intended Use
Introductory information Symbols Appliance types Symbol Meaning Symbol Meaning Reference to other document containing further information Content only applies to brine/water heat pumps. Step in a diagram: Content only applies to air/water heat The numbers correspond to the order in pumps. -
Page 9: Appliance Description
Introductory information Appliance description Heat pump control unit The Vitotronic 200 heat pump control unit, type WO1C The heat pump control unit may be installed in different controls all functions of your heating system with heat locations depending on the type of heat pump: see pump and mechanical ventilation. - Page 10 Mechanical ventilation systems provide controlled ven- Vitovent 300-C tilation of detached houses or apartments. If your Viessmann system includes mechanical ventila- Vitovent 300-C is suitable for detached houses or tion, the central ventilation unit can be controlled and apartments with up to 90 m of living space.
- Page 11 Introductory information Appliance description (cont.) Vitovent 300-W meets the requirements for passive To ensure good air quality in your building, the ventila- house use. tion unit adjusts the air changes automatically, depend- ing on the relative humidity and/or carbon dioxide con- This ventilation unit is mounted on a wall.
-
Page 12: Your System Is Preset At The Factory
The terms are marked as follows: Your system is preset at the factory Your heating system is preset at the factory and is Mechanical ventilation with Viessmann ventilation therefore ready for operation: unit From 00:00 to 24:00 h: Mechanical ventilation in the ■... -
Page 13: Energy Saving Tips
Introductory information Energy saving tips Central heating/central cooling ■ Thermostatic valves Ensure that thermostatic valves are properly adjus- Standard room temperature ("Set room tempera- ted. Ask your contractor about this if necessary. ■ ture"): see page 26. Radiators ■ Do not overheat your home. Every degree of room Never cover radiators or thermostatic valves. - Page 14 Introductory information Tips for greater comfort Central heating/central cooling DHW heating Standard room temperature ("Set room tempera- Time program: see pages 33 and 35. ■ ■ ture"): see page 17. Use the time program for DHW heating. Adjust the Select your individual preferred temperature in the DHW heating to suit your requirements, so that more standard menu at any time.
-
Page 15: Opening The Control Unit
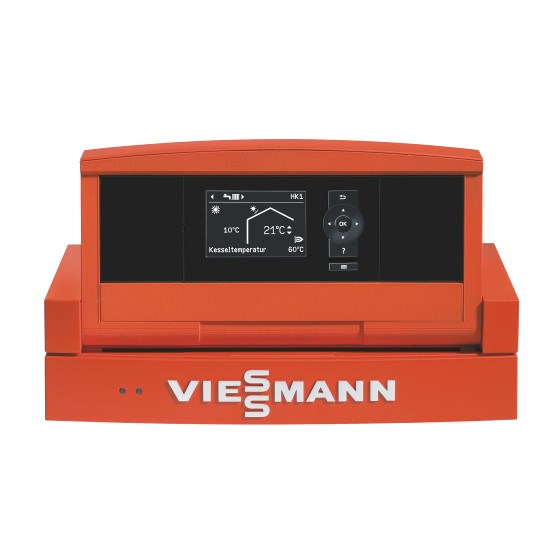
Operation Opening the control unit The heat pump control unit may look different depend- ing on the type of heat pump. Control unit at the front of the heat pump 21°C 14°C Fig. 1 Control unit at the top of the heat pump Control unit as a separate enclosure on the wall Fig. -
Page 16: Symbols On The Display
Operation Programming unit (cont.) 2 control levels are available: ■ The standard menu: see page 17. The extended menu: see page 18. ■ Note 21°C The screensaver is activated if you have not made 14°C any adjustments on the programming unit for a few minutes: see page 18. -
Page 17: Standard Menu
Operation Programming unit (cont.) Ventilation levels (in conjunction with a ventilation Messages: see page 54. unit): Fault No ventilation Warning Note Minimum air flow rate Reduced air flow rate Standard air flow rate Maximum air flow rate Frost protection for the ventilation unit is active. Symbol using ventilation level 2 as an example Preheating coil for the ventilation unit, if installed, is switched on. -
Page 18: How To Use The Controls
Operation Extended menu In the extended menu, you can adjust and call up all the settings from the heat pump control unit range of Menu functions, e.g. holiday program and time programs. Heating/cooling You can find the menu overview from page 77. System Call up the extended menu as follows: Manual mode... -
Page 19: Operating Program
Operation How to use the controls (cont.) 21 °C 14 °C Flow temperature 40 °C Menu Heating/cooling System Manual mode Continue with Heating circuit 1 Ù Ú Htg circuit selection Ù Ú Ù Ú Party mode ê Ú Economy mode Heating circuit 2 ê... - Page 20 Operation Operating program (cont.) Central heating and central cooling Heat/cooling circ System version with DHW heating System version without DHW heating Symbol Operating program Symbol Operating program Heating/cooling cir- "Standby mode" "Standby mode" cuit "Only DHW" — — "HC1", "HC2", "Heating/cooling and DHW"...
-
Page 21: Time Program
Operation Operating program (cont.) Frost protection Symbol Operating program Function "Standby mode" No central heating/central cooling ■ No DHW heating ■ Frost protection for the heat pump, DHW cylinder, heating/cooling cir- ■ cuits and heating water buffer cylinder (if installed) is active. Operating programs for ventilation Operating program Operating status... - Page 22 Operation Time program (cont.) You can set up a time program for the following func- ■ You can set the time program individually, to be the tions: same, or different, for every day of the week. Central heating/central cooling: see page 27. You can select up to 8 time phases per day.
- Page 23 Operation Time program (cont.) Setting the time program effectively Example: you want to set the same time program 2. Then select "Monday" and adjust the time pro- for every day except Monday: gram for that day. 1. Select the period "Monday Sunday"...
- Page 24 Start-up/shutdown Starting the heat pump The heat pump control unit may look different depend- ing on the type of heat pump. Control unit at the front of the heat pump 21°C 14°C Fig. 14 Fault indicator (red) ON indicator (green) ON/OFF switch At the top of the heat pump Fig.
-
Page 25: Starting The Heat Pump
Start-up/shutdown Starting the heat pump (cont.) 2. Turn the ON/OFF switch ON. After a short time, the standard menu is displayed: see page 17. The green ON indicator illuminates. Your heat pump and remote control units (if available) are now ready for operation. Shutting down the heat pump With frost protection For every heating/cooling circuit, select the operating... -
Page 26: Room Temperature
Central heating/central cooling Room temperature Further information can be found in chapter "Terminology" in the appendix. Setting the standard room temperature for central heating/central cooling Factory setting: 20 °C 4. "Set room temperature" For the preferred heating/cooling circuit 5. Set the required value. 1. - Page 27 Central heating/central cooling Operating program (cont.) 3. If applicable, use / to select the required heating/ 5. Select the required operating program, e.g. "Heat- cooling circuit ing and DHW" 4. "Operating program" For further possible operating programs: see page 19. Time program Further information can be found in chapter "Terminology"...
- Page 28 Central heating/central cooling Heating system with heating water buffer… (cont.) ■ The time phases for charging the heating water buf- "Reduced" fer cylinder must cover all time phases for central ■ The entire volume in the heating water buffer cylin- heating (for all heating circuits).
- Page 29 Central heating/central cooling Heating curve/cooling curve (cont.) 6. Set the required value. Set flow temperatures are assigned to the different outside temperatures. Outside temperatures are Note shown on the horizontal axis. Set flow temperatures for You will be provided with tips on when and how to the heating circuit are highlighted in white.
-
Page 30: Flow Temperature
Central heating/central cooling Comfort function "Party mode" (cont.) 5. Set the required room temperature for "Party For the preferred heating circuit: display in the mode". standard menu Party mode 23°C 21°C 14°C 21°C 14°C Change with Flow temperature 40°C Flow temperature 40°C Fig. -
Page 31: Holiday Program
Central heating/central cooling Energy saving function "Economy mode" (cont.) For the preferred heating circuit: display in the Note standard menu ■ The display of the set room temperature in the stand- ard menu does not change. In "Economy mode", cooling via a heating/cooling ■... - Page 32 Central heating/central cooling Energy saving function "Holiday program" (cont.) ■ Central cooling: Display in the extended menu No cooling via a heating/cooling circuit; a separate cooling circuit continues to be cooled. In the extended menu, you can call up the set holiday DHW heating: program under "Information": see page 51.
-
Page 33: Dhw Heating
DHW heating DHW temperatures Setting the standard DHW temperature Factory setting: 50 °C 3. "Set DHW temperature" 1. Extended menu: 4. Set the required value. 2. "DHW" Setting the higher DHW temperature Factory setting: 60 °C 2. "DHW" The DHW will be heated to the higher DHW tempera- 3. - Page 34 DHW heating Time program (cont.) Setting the time program for DHW heating Factory setting: one time phase from 00:00 to 24:00 h "Temp. 2" for every day of the week with the "Top" operating sta- ■ The top section of the DHW cylinder is heated to the "Set DHW temperature 2": see page 33.
- Page 35 DHW heating Time program (cont.) Setting stop optimisation The stop optimisation ensures that the DHW cylinder is 2. "DHW" always fully heated at the end of the time phase in accordance with the time program. 3. "Stop optimisation" 1. Extended menu: Setting a time program for the DHW circulation pump No time phases are factory set for the DHW circulation Operating status for the DHW circulation pump...
- Page 36 DHW heating Stopping DHW heating (cont.) 3. If applicable, use / to select the required heating/ 5. "Standby mode" (frost protection) cooling circuit 4. "Operating program" You do not want to heat DHW, but do want to provide central heating: 1.
- Page 37 Heating system with electric booster heater Heating system with electric booster heater Note Further information can be found in chapter Constant operation of an electric booster heater results "Terminology" in the appendix. in high electricity consumption. Enabling or blocking the electric booster heater for central heating Factory setting: Blocked 2.
- Page 38 Active cooling mode Enabling and blocking active cooling mode Further information can be found in chapter "Terminology" in the appendix. Note 2. "Heating/cooling" ■ The cooling function must be set by a qualified con- tractor. 3. If necessary, press / for the required heating/ ■...
- Page 39 Air/water heat pumps Air/water heat pumps Setting the time program for quieter operation Operating status for quieter operation Further information can be found in chapter "Terminology" in the appendix. "Stage1" ■ The max. fan speed and, if necessary, that of the Factory setting: no time phase from 00:00 to 24:00 h compressor, are reduced by a small amount.
- Page 40 Mechanical ventilation Starting ventilation Display in the standard menu Further information can be found in chapter "Terminology" in the appendix. Your contractor commissions the ventilation unit. ■ ■ Set the operating program for mechanical ventilation: see page 41. Note 21°C 14°C In order to remove naturally occurring humidity from rooms, the ventilation unit must always be operated...
-
Page 41: Mechanical Ventilation
Mechanical ventilation Stopping ventilation (cont.) Stopping ventilation to change the filters Vitovent 200-C, Vitovent 200-W, Vitovent 300-C ■ and Vitovent 300-W: Pull the mains plug of the ventilation unit from its socket: see page 65 onwards. Vitovent 300-F: ■ Turn off the ventilation unit at the ON/OFF switch: see page 71. - Page 42 Mechanical ventilation Ventilation without heat recovery (cont.) Setting the minimum temperature for ventilation Applies to Vitovent 200-C and Vitovent 300-F only. 1. Extended menu: Factory setting: 16 °C As soon as the outdoor air temperature at the inlet to the ventilation unit exceeds the minimum temperature 2.
- Page 43 Mechanical ventilation Comfort function "Intensive operation" Setting "Intensive operation" for ventilation 1. Extended menu: Display in the standard menu 2. "Ventilation" 3. "Intensive operation" Mechanical ventilation with maximum air flow rate 21°C 14°C Flow temperature 40°C Fig. 25 Ending "Intensive operation" You have switched on "Intensive operation"...
- Page 44 Mechanical ventilation Energy saving function "Economy mode" (cont.) Ending "Economy mode" "Economy mode" ends automatically if mechanical ■ ventilation with the minimum air flow rate ( ) is started in the time program, i.e. between the set time phases. ■ Set "Economy mode"...
- Page 45 Mechanical ventilation Energy saving function "Holiday program" (cont.) Cancelling or deleting the "Holiday program" 1. Extended menu: 3. "Holiday program" 4. "Delete program" 2. "Ventilation"...
- Page 46 Power from a photovoltaic system Utilisation of power generated on site 4. Set the required temperature increase or tempera- Further information can be found in chapter ture reduction. E.g. 10 Kelvin (10 K) for "Set DHW "Terminology" in the appendix. cyl.
-
Page 47: Smart Grid
Smart Grid Utilising excess power 1. Extended menu: Further information can be found in chapter "Terminology" in the appendix. 2. "Smart Grid" If your contractor has connected and activated Smart Grid, operation of the heat pump will be matched to the 3. -
Page 48: Setting The Display Brightness
Further adjustments Setting the display contrast 1. Extended menu: 3. "Contrast" 4. Set the required contrast. 2. "Settings" Setting the display brightness You would like to be able to read the text in the menu 2. "Settings" better. Change the brightness level of the "Control" display. -
Page 49: Language Selection
Further adjustments Setting names for heating/cooling circuits (cont.) The menu shows "Apartment" for "Heating circuit 2". Apartment Ù Ú Party mode 22°C Economy mode ß Set room temperature Set reduced room temp Select with Fig. 33 Setting the preferred heating/cooling circuit for the standard menu 1. - Page 50 Further adjustments Restoring factory settings You can restore the factory settings of all modified val- 2. "Settings" ues for every heating/cooling circuit, DHW heating and other system settings separately. 3. "Standard setting" 1. Extended menu: 4. Select the required system setting, e.g. "DHW". System setting Settings and values that are reset "System"...
-
Page 51: Calling Up Information
Calling up information Calling up information You can call up current temperatures, set values, time Note programs and operating states. If names have been given to the heating/cooling cir- cuits, these are shown: see chapter "Setting names for In the extended menu, information is split into groups: heating/cooling circuits". -
Page 52: Daily Log
Calling up information Calling up information (cont.) The following energy statements can be called up: Energy statement Meaning of symbols in the chart "Energy statemnt heating" ("Energy Electrical energy used for operating the heat pump in heat- statement htg 1", "Energy statement htg ing mode. - Page 53 Calling up information Calling up information (cont.) ■ Central heating for all heating/cooling circuits takes Remaining screed drying time place according to a set time program. Your settings for central heating/central cooling have no effect for Screed drying lasts up to 32 days. The value displayed the duration of screed drying.
-
Page 54: Calling Up Messages
Calling up information Calling up messages In the case of special events or operating states in 2. You can scroll through the list of messages. The connection with your heat pump or heating system, the header of each message shows whether it is a heat pump control unit displays notes, warnings or note, warning or fault message. - Page 55 Calling up information Calling up messages (cont.) Display in the extended menu Note ■ If you have connected an alarm to alert you to fault messages (e.g. a buzzer), this is deactivated when Menu the fault message is acknowledged. ■ If the fault cannot be rectified until later, the fault Fault message will reappear at 7:00 h the following day.
- Page 56 Manual mode Manual mode In manual mode, central heating and DHW heating Manual mode operate independently of the time programs: Uncontrolled heating with a set flow temperature of ■ 45 °C ■ DHW heating with "Set DHW temperature 2": see page 33.
- Page 57 Special system versions Special system versions Standard menu with "External control" Further information can be found in chapter "Terminology" in the appendix. External control The displays in the standard menu and the extended menu differ depending on the system version. At both control levels, only those functions that are rel- evant for your system version are available to you.
-
Page 58: Rooms Are Too Cold
What to do if... Rooms are too cold Cause Remedy The heat pump is off. Turn on the ON/OFF switch: see diagrams on ■ page 24 onwards. Switch ON the mains isolator (if installed, outside the ■ boiler room). Set the MCB in the power distribution board (main do- ■... -
Page 59: Rooms Are Too Hot
What to do if... Rooms are too hot Cause Remedy Settings made at the heat pump control unit have been Central heating/central cooling must be enabled. changed or are incorrect. Check the following settings and correct if required: Operating program: see page 26. ■... -
Page 60: "External Hook-Up" Is Displayed
What to do if... " " is flashing and "Note" is displayed Cause Remedy Reference to a particular event or operating state of the Proceed as described on page 54. heat pump, heating system or connected ventilation unit " " is flashing and "Warning" is displayed Cause Remedy Warning due to a particular event or operating state of... -
Page 61: Doors/Windows Bang When Opened
What to do if... "A0 Vent.: check filter(s)" is displayed Cause Remedy The filters in your ventilation unit and/or in your ex- Clean or replace the filters: see page 63 onwards. ■ tract air vents are severely contaminated. The time interval for changing the filters has expired. ■... - Page 62 Maintenance Cleaning the heating system Brine/water or water/water heat pumps You can clean the appliance surfaces with a commer- cially available domestic cleaning agent. Never use scouring agents. Air/water heat pumps Please note Commercially available domestic cleaning agents and special cleaning agents for the heat exchanger (evaporator) can damage the heat pump.
-
Page 63: Maintenance
If there is damage to the connecting cables or lines of the appliance or externally installed accessories, these must be replaced with special cables or lines. Only use Viessmann cables / lines as replacement. For this, notify your qualified contractor. Cleaning the mechanical ventilation system ■... -
Page 64: Cleaning Or Replacing Filters
Maintenance Cleaning the mechanical ventilation system (cont.) 1. Undo the supply air/extract air vents (bayonet fit- ting). 2. Clean the vents with a damp cloth. 3. Refit the vents. Note Never alter the setting of annular gap ■ If the filters in the extract air vents are dirty, replace ■... - Page 65 Maintenance Cleaning or replacing filters (cont.) Vitovent 200-W, Vitovent 300-C and Vitovent 300-W Dispose of contaminated filters through household waste. In the case of light contamination, clean filters inside the ventilation unit with the aid of a vacuum cleaner. Note The number of days remaining to the next filter check Note can be called up from the "Information"...
- Page 66 Maintenance Cleaning or replacing filters (cont.) Replacing the filters with ceiling installation Fig. 49 Outdoor air filter Extract air filter...
- Page 67 Maintenance Cleaning or replacing filters (cont.) Replacing the filters with wall mounting Fig. 50 Outdoor air filter Extract air filter Filters in the Vitovent 200-W ventilation unit Please note Operating the open ventilation unit without filters will lead to dust being deposited in the unit. These dust deposits can result in malfunctions.
- Page 68 Maintenance Cleaning or replacing filters (cont.) Opening the ventilation unit Fig. 51 Extract air filter Outdoor air filter...
- Page 69 Maintenance Cleaning or replacing filters (cont.) Cleaning the filters and replacing if required Note Prior to removing filters, note their installation position. If necessary, mark positions with a pen. Fig. 52 Extract air filter Outdoor air filter Filters in the Vitovent 300-C ventilation unit Please note Operating the open ventilation unit without filters will lead to dust being deposited in the unit.
- Page 70 Maintenance Cleaning or replacing filters (cont.) Removing the filter boxes from the unit Fig. 54 Inserting the filter boxes into the unit Fig. 53 Extract air filter box Outdoor air filter box Cleaning the filters and replacing if required Note If you use a fine filter: before removing the filter from the filter box, make a note of which is the top and which is the bottom.
- Page 71 Maintenance Cleaning or replacing filters (cont.) Filters in the Vitovent 300-F ventilation unit Please note Opening the ventilation unit Operating the open ventilation unit without filters will lead to dust being deposited in the unit. Remove the left or right side panel These dust deposits can result in malfunctions.
- Page 72 Maintenance Cleaning or replacing filters (cont.) Replacing the filters Fig. 58 Extract air filter Outdoor air filter Filters in the Vitovent 300-W ventilation unit Please note Operating the open ventilation unit without filters will lead to dust being deposited in the unit. These dust deposits can result in malfunctions.
- Page 73 Maintenance Cleaning or replacing filters (cont.) Opening the ventilation unit Fig. 59...
- Page 74 Maintenance Cleaning or replacing filters (cont.) Cleaning the coarse filters and replacing if required Note Prior to removing filters, note their installation position. If necessary, mark positions with a pen. Fig. 60 Extract air filter Outdoor air filter...
- Page 75 Maintenance Cleaning or replacing filters (cont.) Cleaning the filters and replacing if required Note Prior to removing filters, note their installation position. If necessary, mark positions with a pen. Fig. 61 Extract air filter Outdoor air filter Replacing filters in the extract air valves Please note Dust will settle inside the ductwork if the mechanical ventilation system is operated with-...
- Page 76 Maintenance Cleaning or replacing filters (cont.) Fig. 62 Resetting the service display 1. Start the ventilation unit after changing the filters. 3. Extended menu: Please note Dust deposits in the appliance can result in 4. "Ventilation" malfunctions Never start the appliance without supply air 5.
-
Page 77: Overview Of Extended Menu
Appendix Refrigerant The appliance contains fluorinated hydrocarbons Refrigerant Global warming poten- (refrigerant) included in the Kyoto Protocol. tial The type plate indicates the type of refrigerant used in R410A 2088 the appliance. R407C 1774 The global warming potential (GWP) of the refrigerant is expressed as a multiple of the GWP of carbon diox- R417A 2350... - Page 78 Appendix Overview of extended menu (cont.) "DHW" "Set DHW temperature" "Operating program" "Time program" "Standby mode" "1x DHW heating" "Time program DHW" "Time prog DHW circ" "DHW with electr.heating" "Start optimisation" "Stop optimisation" "Set DHW temperature 2" "Ventilation" "Intensive operation" "Economy mode"...
- Page 79 Appendix Overview of extended menu (cont.) "Smart Grid" "DHW cylinder heating" "Heating htg water buff cyl" "Raise room temperature" "Room temp. cooling" Note Subject to the features of your heating system, not all of the call-up options may be available under "Infor- mation".
- Page 80 Appendix Overview of extended menu (cont.) "Information" "Heating circuit" HC1/HC2 "Operating program" "Heating and DHW" "Heating/cooling and DHW" "Only DHW" "Standby mode" "Party mode" "Economy mode" "Holiday program" "Screed function" "External hook-up" "External program" "Manual mode" "Operating status" "Standby" "Reduced" "Standard"...
- Page 81 Appendix Overview of extended menu (cont.) "Information" "Cooling circuit SKK" "Operating program" "Cooling and DHW" "Only DHW" "Standby mode" "Operating status" "Standby" "Standard" "Set room temp." "Room temperature" "Mixer" "Flow temperature" "Cooling curve" "Slope" "Level" "Active cooling" "Natural cooling" "DHW" "Operating program"...
- Page 82 Appendix Overview of extended menu (cont.) "Information" "Ventilation" "Operating program" "Ventilation program" "Standard operation" "Standby mode" "Intensive operation" "Economy mode" "Holiday program" "Frost protection" "Operating status" "Background ventilation" ( "Reduced ventilation" ( "Standard ventilation" ( "Intensive ventilation" ( "Standby mode" ( "Time prog ventilation"...
- Page 83 Appendix Overview of extended menu (cont.) "Information" "Heat pump" "Compressor" or "Compressor 1" "Primary pump/Fan" or "Primary pump/Fan 1" "Alternative source" "Secondary pump" or "Secondary pump 1" "Valve heating/DHW" or "Valve heating/DHW 1" "Hours run compressor" or "Hours run compressor 1" "No.
- Page 84 Appendix Overview of extended menu (cont.) "Settings" "Time / Date" "Language" "Contrast" "Brightness" "Control" "Screen saver" "Temperature unit" "Name for heating circuit" "Standard menu" "Standard setting" "System" "Compressor 1" "Compressor 2" "Heat management" "DHW" "Solar" "Electr booster heater" "Internal hydraulics" "Buffer cylinder"...
- Page 85 Appendix Terminology (cont.) As in active cooling mode, defrosting involves reverse operation of the heat pump. This is why the hours run for defrosting are logged with the "AC" hours run in the daily log. Active cooling mode ("Active cooling") Active cooling mode: see "Cooling functions".
- Page 86 Appendix Terminology (cont.) Energy fed into the grid (power supply utility): In the time program you have set the time phases dur- ■ The electricity meter shows the output without a plus/ ing which DHW heating is enabled. In order to use as minus sign in front of it.
-
Page 87: Underfloor Heating
Appendix Terminology (cont.) The enthalpy heat exchanger is able to obtain not only heat from the extract air, but also a large proportion of the moisture it contains. This enables the humidity heat exchanger to create a more pleasant indoor ambi- ence, particularly during colder times of year, as it pre- vents the indoor air becoming too dry. - Page 88 Appendix Terminology (cont.) Heating curve/cooling curve Heating and cooling curves represent the relationship You can also adjust the cooling curve for cooling between the outside temperature, set room tempera- mode. ture and heating circuit flow temperature. In order to guarantee sufficient heat at any outside temperature, the conditions of your building and your heating system must be taken into consideration.
- Page 89 Appendix Terminology (cont.) Slope Outside temperature in °C Fig. 64 For outside temperature 14 °C: Note − Underfloor heating system: slope 0.2 to 0.8 Setting the slope or level of the heating curve too high Low temperature heating system: slope 0.8 to 1.6 or too low will not result in damage to your heating sys- tem.
- Page 90 Appendix Terminology (cont.) Heating/cooling circuits A heating or cooling circuit is a sealed unvented circuit In these operating instructions, the heating circuits, the between the heat pump and the consumers (e.g. radia- heating/cooling circuit and the separate cooling circuit tors), in which the heating water or coolant circulates. are generally referred to as the heating/cooling cir- A separate cooling circuit is a separate sealed unven- cuits.
- Page 91 Depending on the outside temperature and room tem- If a Viessmann ventilation unit is connected to the heat perature, when the bypass is active, cooler or warmer pump control unit, all ventilation functions can be set at outdoor air is channelled into the rooms.
-
Page 92: Cooling Mode
Appendix Terminology (cont.) Note Note With the Vitovent 200-W, Vitovent 300-C and With frost protection, the indicated ventilation level Vitovent 300-W, passive heating is not possible. may deviate from the ventilation level selected. The ventilation level displayed is adjusted to reflect the Air flow rates reduced air flow rate brought about by the frost protec- tion function. -
Page 93: Cooling Functions
Appendix Terminology (cont.) Cooling functions The natural cooling and active cooling functions are Air/water heat pumps: supported depending on the heat pump type and the ■ "Natural cooling" installed accessories. is not available. ■ "Active cooling" Brine/water heat pumps: Cooling takes place by reversing the heat pump "Natural cooling"... -
Page 94: Central Cooling
Appendix Terminology (cont.) Mixer Central heating Central cooling A mixer mixes the heated heating water with the The flow temperature is also set via a mixer with cen- cooled water returning from the heating circuit. The tral cooling. water, thus brought to the right temperature, is pumped In addition, the flow temperature is kept above the con- to the heating circuit by the heating circuit pump. - Page 95 Appendix Terminology (cont.) Example: utilisation of excess power for DHW The DHW will be heated to the maximum possible heating temperature. This temperature has been set by your contractor. Cheap excess power Standard DHW temperature: ■ 50 °C The heat pump is operated with the excess power from ■...
- Page 96 Appendix Terminology (cont.) Drinking water filter A device that removes solids from the water. The drinking water filter is installed in the cold water pipe upstream of the DHW cylinder or the instantaneous water heater. Evaporator The evaporator is a heat exchanger that transfers ther- In air/water heat pumps, cooling of the supplied air can mal energy to the heat pump.
- Page 97 Appendix Terminology (cont.) DHW circulation pump The DHW circulation pump transports the DHW around a ring pipeline between the DHW cylinder and the draw-off points (e.g. hot tap). This ensures that hot water is rapidly available at the draw-off point. Two-stage heat pumps Two-stage heat pumps have 2 compressors.
-
Page 98: Information On Disposal
(Altstoff Recycling Austria AG, licence num- ber 5766). Final decommissioning and disposal of the heating system Viessmann products can be recycled. Components and fluids from your heating systems are not part of ordinary domestic waste. Please contact your heating contractor in connection with the correct disposal of your old system. - Page 99 Keyword index Keyword index Cleaning Absence – Air/water heat pumps..........62 – Central heating............13 – Air/water heat pumps with plastic surface....62 – Mechanical ventilation..........13 – Brine/water heat pumps.......... 62 Acknowledging – Casing..............63 – Note, warning, fault message........54 – Filters..............63 Active cooling mode..........
- Page 100 Keyword index Keyword index (cont.) Delivered condition.............12 Ending – DHW heating............35 – Information.............. 51 – Economy mode, central heating......31 DHW circulation pump......... 13, 97 – Economy mode, ventilation........44 – Factory setting...........12, 35 – Intensive operation..........43 – Operating status............35 – Party mode..............30 –...
- Page 101 Keyword index Keyword index (cont.) Filter service display...........76 Hours run..............52 Frost protection How to use controls............18 – Factory setting............12 Humidity..............92 – Operating program..........21 Hydraulic reheating coil..........92 Frost protection functions...........92 Frost protection monitoring......25, 29, 35 Functions..............97, 98 Imbalance..............85 Individual preferred temperature........
- Page 102 Keyword index Keyword index (cont.) Noise level..............14 Programming unit............15 Note................17 Pump – Calling up..............55 – Cylinder heating............95 – Calling up/acknowledging........54 – DHW circulation............97 – Display..............60 – Heating circuit............90 – Power-OFF..............60 – Secondary circuit.............95 – Solar circuit............. 95 ON/OFF switch............25 Once-only DHW heating..........
- Page 103 Keyword index Keyword index (cont.) Setting Starting – Active cooling mode..........38 – Electric booster heater..........37 – Brightness............... 48 – Frost protection monitoring........25 – Contrast..............48 – Heat pump...............24 – Date/time..............49 – Ventilation..............40 – DHW temperature........... 33 Start optimisation..........14, 34 –...
- Page 104 Keyword index Keyword index (cont.) Time phases...............22 Ventilation level............92 – Central heating/central cooling........27 Ventilation unit..........10, 11, 92 – DHW circulation pump..........35 – Opening............68, 71, 73 – DHW heating............34 Vitovent 200-C............10 – Electric booster heater..........37 – Filter replacement........... 65 –...
-
Page 108: Your Contact
Your contact Contact your local contractor if you have any questions about your system or wish to arrange maintenance or repair work. You can find local contractors on the internet at www.viessmann.de. Viessmann Werke GmbH & Co. KG Viessmann Limited...
Need help?
Do you have a question about the Vitotronic 200 and is the answer not in the manual?
Questions and answers