Table of Contents
Advertisement
Quick Links
Advertisement
Table of Contents

Related Manuals for KaVo INTRA 3610 N2


Summary of Contents for KaVo INTRA 3610 N2
- Page 1 Instructions for use INTRA surgical handpiece 3610 N2 - REF 0.524.5610...
- Page 2 Distributed by: Manufacturer: KaVo Dental Corporation Kaltenbach & Voigt GmbH 11729 Fruehauf Drive Bismarckring 39 Charlotte, NC 28273 USA D-88400 Biberach Tel.: 847 550 6800 www.kavo.com Fax: 847 550 6825...
-
Page 3: Table Of Contents
Contents Contents 1 User instructions ............................... 4 2 Safety ................................6 2.1 Description of safety instructions ......................6 2.2 Safety instructions ............................ 8 3 Product description ............................12 3.1 Purpose – Proper use ..........................13 3.2 Technical data ............................15 3.3 Transportation and storage conditions .................... - Page 4 Contents 5.2 Remove the medical device ........................21 5.3 Insert the milling cutters or diamond grinders ..................22 5.4 Removing the milling tool or diamond grinder ..................25 5.5 Conversion for short handpiece cutters or grinders ................25 6 Preparation methods according to ISO 17664 ....................27 6.1 Preparations at the site of use ........................
- Page 5 6.6 Drying ..............................36 6.7 Care products and systems - Servicing ....................37 6.7.1 Care products and systems - Servicing: Care with KaVo Spray ..........38 6.7.2 Care products and systems - Servicing: Care with KaVo QUATTROcare ......... 39 6.8 Packaging ............................... 41 6.9 Sterilization .............................
-
Page 6: User Instructions
User instructions 1 User instructions Dear user, KaVo hopes that you enjoy your new high-quality product. Following the instructions below will allow you to work smoothly, economically and safely. © Copyright by KaVo Dental GmbH Symbols See the section Safety/Warning Symbols... - Page 7 User instructions Thermodisinfectable Sterilizable with steam up to 135 °C (275 °F) CE mark (Communauté Européenne). A product with this mark meets the requirements of the applicable EC directive. Action request Target group This document is intended for dentists and their assistants. The section on starting up is also intended for service technicians.
-
Page 8: Safety
Safety 2 Safety 2.1 Description of safety instructions Warning symbol Structure DANGER The introduction describes the type and source of the danger. This section describes the possible consequences of misuse. ▶ The optional step contains necessary measures for avoiding haz‐ ards. - Page 9 Safety Description of hazardous steps The safety instructions cited herein with the three levels of danger will help avert property damage and injury. CAUTION CAUTION indicates a hazardous situation that can lead to property damage or minor to moderate injury. WARNING WARNING indicates a hazardous situation that can lead to serious injury or death.
-
Page 10: Safety Instructions
Safety DANGER DANGER indicates a maximum hazardous situation that can directly cause serious injury or death. 2.2 Safety instructions CAUTION Premature wear and malfunctioning from improper storage during long periods of nonuse. Reduced production time. ▶ The instrument must be cleaned, serviced and stored dry if it has not been used for a long period. - Page 11 Safety WARNING Hazard to the care provider and patient. Damage, irregular noise during operation, excessive vibration, unusual build-up of heat or if the cutter or grinder cannot be firmly held. ▶ Stop work and seek service support. CAUTION Hazard from improperly putting away instruments. Injury and infection caused by chucked cutters or grinders.
- Page 12 ▪ Technicians specially trained by KaVo To ensure proper function, the medical device must be set up according to the methods described in the KaVo instructions for use, and the care prod‐ ucts and methods described therein must be used. KaVo recommends specifying a service interval at the dental office for a licensed shop to clean, service and check the functioning of the medical device.
- Page 13 Safety Service may only be provided by repair shops that have undergone training by KaVo and that use original KaVo replacement parts.
-
Page 14: Product Description
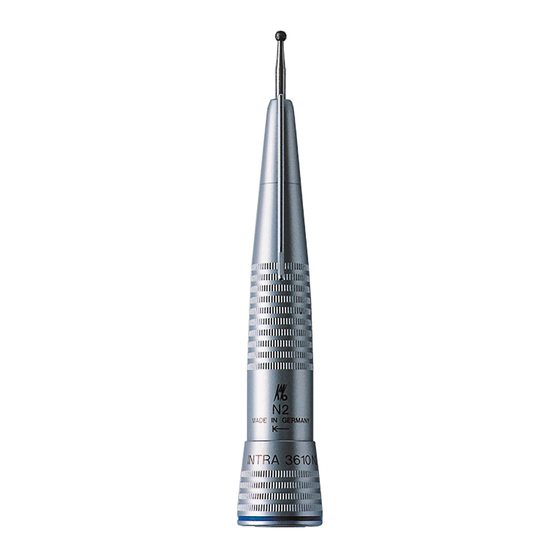
Product description 3 Product description INTRA surgical handpiece 3610 N2 (Mat. no. 0.524.5610) -
Page 15: Purpose - Proper Use
Product description 3.1 Purpose – Proper use Purpose: This medical device is ▪ only for dental treatment by a dental professional. The product may not be changed or used for any other purpose since this may be hazard‐ ous. The medical device is intended for the following use: Surgery. ▪... - Page 16 Product description Proper use: According to these provisions, this medical device may only be used for the described application by a knowledgeable user. The following must be ob‐ served: ▪ the applicable health and safety regulations ▪ the applicable accident prevention regulations ▪...
-
Page 17: Technical Data
Product description 3.2 Technical data Drive speed max. 40,000 rpm Identification 1 blue ring Transmission Maximum speed max. 40,000 rpm The INTRA surgical handpiece 3610 N2 can be disassembled. See also: 4 First use, Page 18 Handpiece cutters or grinders can be inserted. After conversion, short handpiece cutters or grinders can be inserted. -
Page 18: Transportation And Storage Conditions
Product description The handpiece can be mounted on all INTRAmatic Lux motors, and motors with a connection in accordance with ISO 3964 / DIN 13940. 3.3 Transportation and storage conditions CAUTION Starting up the medical device can be hazardous after it has been stored in an excessively cold location. - Page 19 Product description Temperature: -20°C to 50°C (-4°F to 122°F) Relative humidity: Non-condensing Air pressure: 700 hPa to 1060 hPa (10 psi to 15 psi) Protect from moisture.
-
Page 20: First Use
First use 4 First use WARNING Hazard from nonsterile products Infection danger to the care provider and patient. ▶ Before first use and after each use, sterilize the medical device. 4.1 Cooling medium supply CAUTION Hazard of air embolism and skin emphysema The insufflation of irrigation in open wounds in the surgical area can cause air embolisms and skin emphysema. - Page 21 First use ▶ Turn off the spray air and spray water supply on the treatment unit. ▶ Cool the cutter or grinder using an external supply. ▶ During surgery, observed the necessary guidelines concerning cool‐ ing. ▶ Use physiological sterile cooling liquid. ▶...
-
Page 22: Operation
Operation 5 Operation 5.1 Attach the medical device CAUTION Connection with the drive motor. Lock the handpiece. ▶ Only start the hand piece when the chuck is closed. CAUTION Removing and attaching the handpiece while the device is rotating. Damage to the catch. ▶... -
Page 23: Remove The Medical Device
Operation ▶ Place the medical device on the motor coupling and lock it into place. ▶ Pull on it to make sure that the medical device is securely affixed to the coupling. 5.2 Remove the medical device ▶ Unlock the medical device from the motor coupling and remove it, or pull it off by twisting it slightly on its axis. -
Page 24: Insert The Milling Cutters Or Diamond Grinders
Operation 5.3 Insert the milling cutters or diamond grinders Note Only use carbide cutters or diamond grinders that correspond to ISO 1797-1 type 3, are made of steel or hard metal and meet the following criteria: - shaft diameter: 2.334 to 2.350 mm with drill stop - Overall length: max. - Page 25 Operation CAUTION Injury from using worn cutters or grinders. Cutters or grinders can fall out during treatment and injure the patient. ▶ Never use cutters or grinders with worn shafts. CAUTION Injury hazard from cutters or grinders. Infections or cuts. ▶...
- Page 26 Operation CAUTION Hazard from defective chucking system. The cutter or grinder can fall out and cause damage. ▶ Pull on the cutter or grinder to check if the chucking system is okay and the cutter or grinder is securely held. Fur checking, inserting and removing, use gloves or a fingerstall to prevent an injury or infection.
-
Page 27: Removing The Milling Tool Or Diamond Grinder
Operation 5.4 Removing the milling tool or diamond grinder ▶ After the cutter or grinder has stopped rotating, turn the grip sleeve all the way in the direction of the arrow, and remove the cutter or grinder. ▶ Turn the grip sleeve back into its initial position. 5.5 Conversion for short handpiece cutters or grinders Note The handpiece must be converted when short cutters or grinders are used. - Page 28 Operation ▶ Remove the drill stop using the accompanying hook.
-
Page 29: Preparation Methods According To Iso 17664
Preparation methods according to ISO 17664 6 Preparation methods according to ISO 17664 6.1 Preparations at the site of use WARNING Hazard from nonsterile products. An infection hazard exists from contaminated medical devices. ▶ Observe suitable personal protective measures. Note After each operation, immediately disassemble the medical device and clean it thoroughly to prevent malfunctions. -
Page 30: Disassemble The Medical Device
Preparation methods according to ISO 17664 ▶ The medical device must be dry when transporting it to be prepared. (Do not place it in a solution or the like). ▶ Prepare the medical device directly before treatment. ▶ Remove cutters or burs from the medical device. 6.2 Disassemble the medical device ▶... -
Page 31: Assembling The Medical Device
Preparation methods according to ISO 17664 6.3 Assembling the medical device ▶ Place the grip sleeve ① on the sleeve ② and snap it into place. 6.4 Cleaning CAUTION Malfunctions from cleaning in the ultrasonic unit. Defects in the product. ▶... -
Page 32: Cleaning: Automated External Cleaning
For a medical device with KaVo CLEANspray and KaVo DRYspray. ▶ Cover the medical device with the KaVo CLEANpac bag, and place it on the corresponding care adapter. Press the spray button three times for 2 seconds each time. Remove the medical device from the spray attachment and let the cleaner work for one minute. -
Page 33: Cleaning: Automated Internal Cleaning
Preparation methods according to ISO 17664 Note KaVo CLEANspray and KaVo DRYspray for manual interior cleaning are only available in the following countries: Germany, Austria, Switzerland, Italy, Spain, Portugal, France, Luxem‐ bourg, Belgium, Netherlands, United Kingdom, Denmark, Sweden, Fin‐ land and Norway. - Page 34 Z" and rinse "neodisher ® ® ® mielclear") and only refers to material compatibility with KaVo products.) ▶ The program settings, cleaners and disinfectants that must be used can be found in the instructions for use of the thermodisinfector. ▶...
-
Page 35: Disinfection
Preparation methods according to ISO 17664 6.5 Disinfection CAUTION Malfunctioning from using a disinfectant bath or chlorine-containing dis‐ infectant. Defects in the product. ▶ Only disinfect in a thermodisinfector or manually. -
Page 36: Disinfection: Manual Disinfection - External
Preparation methods according to ISO 17664 6.5.1 Disinfection: Manual disinfection - external KaVo recommends the following products based on material compatibility. The microbiological efficacy must be ensured by the disinfectant manufac‐ turer. ▪ CaviCide by Metrex Required tools: ▪ Cloths for wiping down the medical device. -
Page 37: Disinfection: Manual Disinfection - Internal
Preparation methods according to ISO 17664 ▶ Spray the disinfectant on a cloth, then thoroughly wipe down the med‐ ical device and leave the disinfectant to soak in according to the in‐ structions from the disinfectant manufacturer. disinfectant manufacturer. . Note Observe the instruction for use for the disinfectant. -
Page 38: Disinfection: Machine Disinfection - External And Internal
Preparation methods according to ISO 17664 6.5.3 Disinfection: Machine disinfection - external and internal KaVo recommends thermodisinfectors in accordance with ISO 15883-1 e.g. Miele G 7781/G 7881. ▶ The program settings and cleansers and disinfectants that need to be used can be found in the instructions for use for the thermodisinfector. -
Page 39: Care Products And Systems - Servicing
The drying process is usually part of the cleaning program of the thermo‐ disinfector. 6.7 Care products and systems - Servicing Note KaVo only guarantees that its products will function properly when the care products are used that are listed as accessories since they were tested for proper use on our products. -
Page 40: Care Products And Systems - Servicing: Care With Kavo Spray
Preparation methods according to ISO 17664 6.7.1 Care products and systems - Servicing: Care with KaVo Spray Chuck care KaVo recommends cleaning and maintaining the chucking system every evening. ▶ Remove the cutter or grinder, place the spray nipple tip in the opening... -
Page 41: Care Products And Systems - Servicing: Care With Kavo Quattrocare
TROcare Cleaning and care unit with expansion pressure for thorough cleaning and care. KaVo recommends servicing the project twice daily (at noon and in the evening after hours), after each time the machine is cleaned, and before each sterilization. ▶... - Page 42 Preparation methods according to ISO 17664 ▶ Servicing the product. Chuck care KaVo recommends cleaning and maintaining the chucking system once a week. See also: Instructions for use KaVo QUATTROcare. ▶ Remove the cutter or grinder, place the spray nipple tip in the opening...
-
Page 43: Packaging
Preparation methods according to ISO 17664 ▶ Subsequently treat with the care products and systems listed below. 6.8 Packaging Note The sterilization bag must be large enough for the instrument so that the bag is not stretched. The quality and use of the sterilized product packaging must satisfy ap‐ plicable standards and be suitable for the sterilization procedure. -
Page 44: Sterilization
Preparation methods according to ISO 17664 6.9 Sterilization Sterilize in a steam sterilizer (Autoclave) EN 13060/ISO 17665-1 CAUTION Premature weary and malfunctions from improper servicing and care. Reduced production time. ▶ Before each sterilization cycle, treat the medical device with KaVo care products. - Page 45 Preparation methods according to ISO 17664 CAUTION Contact corrosion from moisture. Damage to product ▶ After the sterilization cycle, immediately remove the product from the steam sterilizer . The medical device has a maximum temperature resistance up to 138℃ (280.4°F). Autoclave with a pre-vacuum for least four minutes at 134°C ±...
-
Page 46: Storage
Preparation methods according to ISO 17664 Autoclave using the gravitational method: sterilize for at least 10 min. at 134°C ± 1°C (273°F ± 1.8°F) Drying time: 30 min. Autoclave using the gravitational for at least 60 min. at 121°C ± 1°C (250°F ±... -
Page 47: Tools
Available from dental and medical suppliers Material summary Mat. no. Instrument stand 2151 0.411.9501 Cleanpac 10 units 0.411.9691 Cellulose pad 100 units 0.411.9862 Nozzle needle 0.410.0931 Spray hose, sterilisable 0.065.5188 Drill stop 0.524.0892 Hook 0.410.1963 KaVo CLEANspray 1.007.0579 KaVo DRYspray 1.007.0580... - Page 48 Tools Only for the USA Material summary Mat. no. KAVOspray America 2113 A 0.411.9660 QUATTROcare plus Spray America 1.005.4524 2141 P...
-
Page 49: Warranty Terms And Conditions
24 months from data of invoice, subject to the following conditions: In case of justified complaints, KaVo will honour its warranty with a repair or free replacement. Other claims of any nature whatsoever, in particular with respect to compensation, are excluded. - Page 50 Defects or their consequences that can be attributed to interventions on or changes made to the product by the customer or a third party not authorised by KaVo are excluded from the warranty. Service warranty claims will only be accepted if the product is submitted along with proof of purchase in the form of a copy of the invoice/delivery note.
Need help?
Do you have a question about the INTRA 3610 N2 and is the answer not in the manual?
Questions and answers