Dexter Laundry T-30 Operator's Manual
Commercial dryer vended c-series control, natural gas/lp heated
Hide thumbs
Also See for T-30:
- Operators manual installation & operation instructions (187 pages) ,
- Operator's manual (64 pages) ,
- Original instructions manual (31 pages)
Table of Contents
Advertisement
Available languages
Available languages
Quick Links
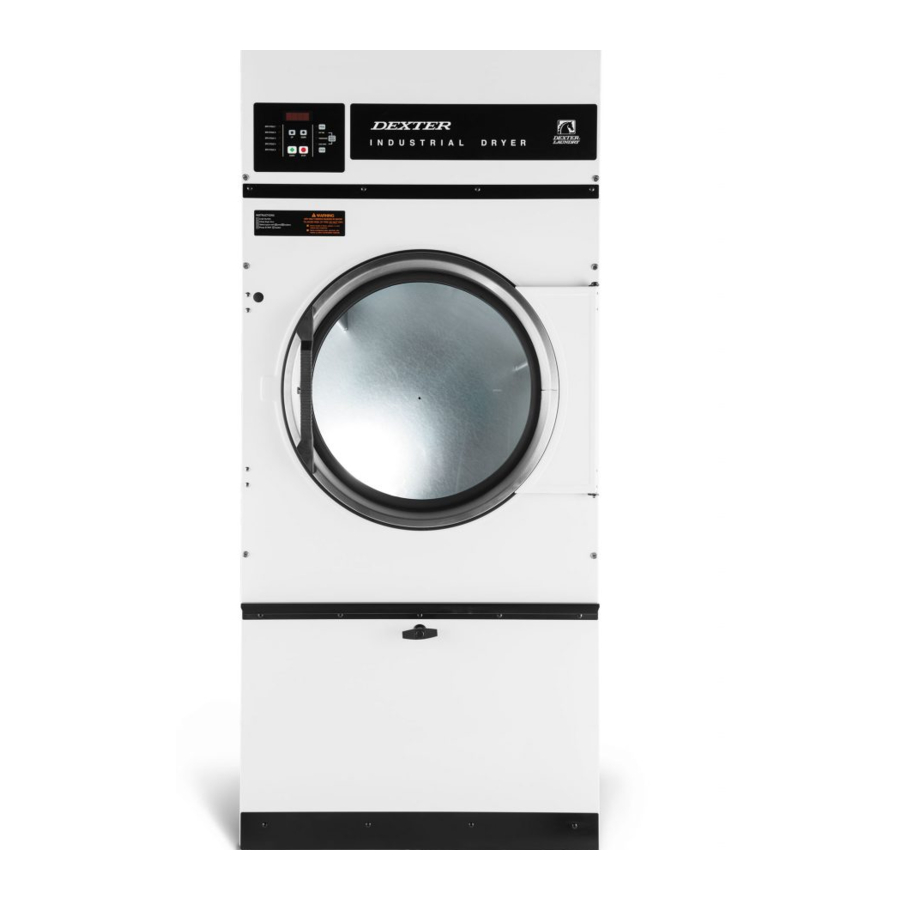
COMMERCIAL DRYER
MODEL T-30, T-50, T-80, T-120 VENDED
C-SERIES CONTROL, NATURAL GAS/LP HEATED
The dryer must not be stored or installed where it will be exposed to water and/or weather.
WARNING:
FIRE OR EXPLOSION HAZARD
Failure to follow safety warnings exactly could
result in serious injury, death or property damage.
– Do not store or use gasoline or other flammable vapors and
liquids in the vicinity of this or any other appliance.
– WHAT TO DO IF YOU SMELL GAS
• Do not try to light any appliance.
• Do not touch any electrical switch; do not use any phone
in your building.
• Clear the room, building or area of all occupants.
• Immediately call your gas supplier from a neighbor's
phone. Follow the gas supplier's instructions.
• If you cannot reach your gas supplier, call the fire
department.
– Installation and service must be performed by a qualified
installer, service agency or the gas supplier.
Post the following "For Your Safety" caution in a
prominent location:
FOR YOUR SAFETY
Do not store or use gasoline or other flammable
vapors or liquids in the vicinity of this or any other
appliance.
You, the purchaser, must post in a prominent location
instructions to be followed in the event the user smells
gas. Consult your local gas supplier for procedure to
be followed if the odor of gas is present.
THIS MACHINE IS FOR DRYING ONLY FABRICS CLEANED IN WATER.
To avoid possibility of fire, including spontaneous combustion, do not dry oiled floor mops, items containing
foam rubber or similarly textured rubberlike materials or any material on which you have used a cleaning
solvent or which contains flammable liquids or solids (such as petrol, kerosene, waxes, etc.) Fabric
softeners, or similar products, should be used per the fabric softener instructions. Remove all objects from
pockets such as lighters and matches.
This appliance can be used by children aged from 8 years and above and persons with reduced physical, sensory
or mental capabilities or lack of experience and knowledge if they have been given supervision or instruction
concerning use of the appliance in a safe way and understand the hazards involved. Children shall not play with
the appliance. Cleaning and user maintenance shall not be made by children without supervision. Children of less
than 3 years should be kept away unless continuously supervised.
8514-234-001 REV N
page 1
OPERATOR'S MANUAL
INSTALLATION & OPERATION INSTRUCTIONS
FOR YOUR SAFETY
Dexter Laundry, Inc.
2211 West Grimes Avenue
Fairfield, Iowa 52556
AVERTISSEMENT: Assurez-vous de bien suivre
les instructions données dans cette notice pour
réduire au minimum le risque d'incendie ou
d'explosion ou pour éviter tout dommage matérial,
toute blessure ou la mort.
– Ne pas entreposer ni utiliser d'essence ni d'autres vapeurs
ou liquides inflammables dans le voisinage de cet appareil ou de
tout autre appareil.
– QUE FAIRE SI VOUS SENTEZ UNE ODEUR DE GAZ:
• Ne pas tenter d'allumer d'appareil.
• Ne touchez à aucun interrupteur. Ne pas vous servir des
téléphones se trouvant dans le bâtiment où vous vous
trouvez.
• Évacuez la pièce, le bâtiment ou la zone.
• Appelez immédiatement votre fournisseur de gaz depuis
un voisin. Suivez les instructions du fournisseur.
• Si vous ne pouvez rejoindre le fournisseur de gaz,
appelez le service des incendies.
– L'installation et l'entretien doivent être assurés par un
installateur ou un service d'entretien qualifié ou par le
fournisseur de gaz.
POUR VOTRE SÉCURITÉ
Ne pas enteposer ni utiliser d'essence ni d'autres
vapeurs ou liquides inflammables dans le voisinage
de cet appareil ou de tout autre appareil.
It is important that you read this Manual and retain it
for future reference. For service or replacement parts,
contact
the
distributor
manufacturer.
in
your
area
or
the
Advertisement
Table of Contents

Related Manuals for Dexter Laundry T-30


Summary of Contents for Dexter Laundry T-30
- Page 1 COMMERCIAL DRYER MODEL T-30, T-50, T-80, T-120 VENDED C-SERIES CONTROL, NATURAL GAS/LP HEATED OPERATOR’S MANUAL INSTALLATION & OPERATION INSTRUCTIONS The dryer must not be stored or installed where it will be exposed to water and/or weather. WARNING: AVERTISSEMENT: Assurez-vous de bien suivre les instructions données dans cette notice pour...
-
Page 2: Warnings About Use And Operation
TABLE OF CONTENTS Page No. Warnings about use and operation Dryer Specifications Dryer Dimensions 7-18 Installation and Operating Instructions 19-23 Dryer Shutdown Operating Instructions Programming the Dryer Control 24-37 Servicing and Troubleshooting Preventative Maintenance Instructions WARNINGS ABOUT USE AND OPERATION DO NOT MODIFY THIS APPLIANCE. -
Page 3: Specifications
SPECIFICATIONS 30 lb. Commercial Dryer: T-30 DC0030N_-(10/11/15)EC_X (60 Hz), DC0030N_-39AC_X (50 Hz) Cabinet Height 72 1/4” 1835 mm. (Assumes minimum leveling leg adjustment) Cabinet Width 31 1/2” 800 mm. Cabinet Depth 41 3/4” 1058 mm. Floor to Bottom of Door 28 3/4”... - Page 4 SPECIFICATIONS 50 lb. Commercial Dryer: T-50 DC0050N_-(10/11/15)EC_X (60 Hz), DC0050N_-39AC_X (50 Hz) Cabinet Height 72 1/4” 1835 mm. (Assumes minimum leveling leg adjustment) Cabinet Width 34 1/2” 875 mm. Cabinet Depth 48” 1218 mm. Floor to Bottom of Door 27 1/4” 691 mm.
- Page 5 SPECIFICATIONS 80 lb. Commercial Dryer: T-80 DC0080N_-(10/11/15)EC_X (60 Hz), DC0080N_-39AC_X (50 Hz) Cabinet Height 75 3/4” 1924 mm. (Assumes minimum leveling leg adjustment) Cabinet Width 38 1/2” 978 mm. Cabinet Depth 51 3/4” 1313 mm. Floor to Bottom of Door 29 1/4”...
- Page 6 SPECIFICATIONS 120 lb. Commercial Dryer: T-120 Reversing Tumbler DC0120N_-10EC_R (60 Hz), DC0120N_-39AC_R (50 Hz) Cabinet Height 85 5/16” 2167 mm. Cabinet Width 46 3/4” 1187 mm. Cabinet Depth 60 3/16” 1528 mm. Floor to Bottom of Door 34” 864 mm. Door Opening 30”...
- Page 7 T-30 DRYER DIMENSIONS- FRONT VIEW 8514-234-001 REV N page 7...
- Page 8 T-30 DRYER DIMENSIONS- SIDE VIEW 8514-234-001 REV N page 8...
- Page 9 T-30 DRYER DIMENSIONS- TOP VIEW 8514-234-001 REV N page 9...
- Page 10 T-50 DRYER DIMENSIONS- FRONT VIEW 8514-234-001 REV N page 10...
- Page 11 T-50 DRYER DIMENSIONS- SIDE VIEW 8514-234-001 REV N page 11...
- Page 12 T-50 DRYER DIMENSIONS- TOP VIEW 8514-234-001 REV N page 12...
- Page 13 T-80 DRYER DIMENSIONS- FRONT VIEW 8514-234-001 REV N page 13...
- Page 14 T-80 DRYER DIMENSIONS- SIDE VIEW 8514-234-001 REV N page 14...
- Page 15 T-80 DRYER DIMENSIONS- TOP VIEW 8514-234-001 REV N page 15...
- Page 16 T-120 DRYER DIMENSIONS- FRONT VIEW 8514-234-001 REV N page 16...
- Page 17 T-120 DRYER DIMENSIONS- SIDE VIEW 8514-234-001 REV N page 17...
- Page 18 T-120 DRYER DIMENSIONS- SIDE VIEW 8514-234-001 REV N page 18...
-
Page 19: Dryer Installation
INSTALLATION AND OPERATING INSTRUCTIONS UNCRATING AND PLACING DRYER Tools Required: 3/4" (19 mm) hex socket & ratchet driver, wood block 4" (100 mm) or 5" (125 mm) thick, a knife and a groove joint pliers, which will open to 1 3/8" (35 mm). 1. -
Page 20: Vertical Clearance Dimensions
The inlet gas connection to the unit is 1/2-inch [12.7] pipe thread for T-30 and T-50 and 3/4-inch [19.1] for T-80 and T-120. However, the size of the piping to supply the dryer should be determined by reference to the National Fuel Gas Code ANSI Z223.1A and consultation with the local gas supplier. -
Page 21: Exhaust Installation
An individual gas shutoff valve is recommended for each dryer and may be required by local code (not supplied). A joint compound resistant to the action of liquefied petroleum gases should be employed in making pipe connections. All pipe connections should be checked for leakage with soap solution. Never check with an open flame. A drip tee should be provided in the gas piping entering the unit to catch dirt and other foreign articles. - Page 22 Exhausting the dryer into a chimney or under a building is not permitted. In either case there is a danger of lint buildup, which can be highly combustible. For T-30/50/80 only: Installation of several dryers, where a main discharge duct is necessary, will need the following considerations for installation (see Figure 3). Individual 8” (200 mm) exhaust ducts from each dryer should enter main discharge duct at a 45-degree angle in the direction of discharge airflow.
-
Page 23: Dryer Shutdown
For T-30/50/80: the exhaust duct clean-out panel (as shown below) must be closed while the dryer is in service: Keep closed while in service Slide open for routine cleaning 7. DRYER IGNITION (SOLID STATE IGNITION): The solid-state ignition system lights the main burner gas by spark. -
Page 24: Starting The Dryer
NOTE: The installer must test the dryer for operation and instruct the user before leaving the installation. OPERATING INSTRUCTIONS STARTING THE DRYER 1. The display on the dryer control will show the required vend amount when in idle mode. Once the door is opened it will prompt the user to add money. -
Page 25: Manual Programming
2. USB download of a pre-programmed User File. For instructions on using the USB download feature, please contact your local Dexter distributor. MANUAL PROGRAMMING: The dryer must be in idle mode for the manual programming menus to be accessed. Idle mode is when the dryer is not actively running a drying cycle and the vend price is displayed on the screen. - Page 26 1 second. The control should display “DRYER PROGRAMMING”. See the figures below for the location of the programming button on the dryer control. Please note, for T-30, T-50 and T-80 this is the control as viewed from the underside of the lifted service door: 8514-234-001 REV N...
- Page 27 For T-120 this is the location of the programming button on the control tray: When manual programming mode is entered, the “Start”, “High”, “Medium” and “Low” buttons perform alternate functions. Button Name Alternate Function in Programming Mode Becomes the action to accept the displayed option or the “Enter” Start Becomes the action to move UP through displayed options (Press High...
- Page 28 The figure below shows the top level menu. Choosing an option from the top level menu will then display the next level of options (the sub menu). Quick Test Option: When the Quick Test Option is chosen, the dryer will begin a shortened dry cycle without the displayed vend price being met.
- Page 29 Prices Option: This option allows the user to set values for coin acceptor inputs, vend price & time and extend dry price & time. It also allows the user to return the values to factory defaults. After changing prices using the “Up” or “Down” buttons, the “Enter”...
- Page 30 The figure below shows the sub menu options for Prices: 8514-234-001 REV N page 30...
- Page 31 Cycles Option: This option allows the user to set temperature and cooldown information for the drying cycle. It also allows the user to return the values to factory defaults. 1. “TEMP SETTINGS” allows the user to make adjustments, within a designated range, to the cycling temperature for each of the “Low”, “Medium”...
- Page 32 The figure below shows the sub menu options for Cycles: 8514-234-001 REV N page 32...
- Page 33 Temperature Pricing Option: This option allows the user to require additional vend amounts be added based on the drying temperature chosen by the customer. This pricing adder is effective only for the Base Vend Price (it does not affect the Extend Dry Price). It allows a pricing adder separate for “Medium” and “Hot” temperature settings. Example- A store owner has programmed the control for the following: Vend Price $1.00...
- Page 34 prompts, such as Manual Programming, USB Programming and any Error Codes will still display in English. 7. “Shift Hours”: This feature allows the user to shift the time used by the control from the time kept internally by the control. The control uses a Real Time Clock (RTC) to internally track the time and date. The RTC continues operation even if the control loses external power.
- Page 35 The figure below shows the sub menu options for Settings: 8514-234-001 REV N page 35...
- Page 36 Usage Menu: The Usage menu allows for the user to track data about machine usage. See below for detailed information on each sub menu option. 1. “Coin Audit”: The coin audit field shows the accumulation of coin pulses that were sent to the control over each of the left and right coin inputs.
- Page 37 Control Menu: The Control menu allows for the user to observe important technical information for the control. No changes can be made at this menu. See below for detailed information on each sub menu. 1. “Serial Number”: This is the control serial number. 2.
-
Page 38: Servicing And Troubleshooting
T-120 REVERSING OPTIONS The T-120 dryer can be set to reverse at different intervals dependent on owner’s preference. The style of operation is determined by the location of the BROWN jumper wire located in the rear control box, on the frequency drive. (see image for jumper location) BROWN JUMPER WIRE Dryer... - Page 39 ATTENTION. Lors des opérations d'entretien des commandes, étiqueter tous les fils avant de les déconnecter. Toute erreur de câblage peut être une source de danger et de panne. If any of the following symptoms occur on this dryer, check the suggested remedies listed below. If all probable causes have been eliminated and the symptom still exists, contact your local Dexter agent for further troubleshooting assistance.
-
Page 40: Preventive Maintenance Instructions
For service and parts information, contact your local Dexter agent. To find your local Dexter agent, use the Distributor Locator at the website shown below. If a Dexter agent is not available, contact Dexter Laundry, Inc. directly as listed below:... -
Page 41: Pour Votre Sécurité
SÉCHEUSE COMMERCIALE MODÈLE T-30, T-50, T-80, T-120 PAYANT COMMANDE DE LA SÉRIE C, CHAUFFAGE AU GAZ NATUREL/GPL MANUEL DE L’UTILISATEUR INSTRUCTIONS D’INSTALLATION ET D’UTILISATION La sécheuse ne doit pas être entreposée ni installée dans des endroits où elle risque d’être exposée à... -
Page 42: Avertissements Relatifs À L'utilisation Et Au Fonctionnement
TABLE DES MATIÈRES Nº de page Avertissements relatifs à l’utilisation et au fonctionnement Caractéristiques techniques de la sécheuse 43-46 Dimensions de la sécheuse 47-58 Instructions d’installation et d’utilisation 59-63 Arrêt de la sécheuse Instructions d’utilisation Programmation des commandes de la sécheuse 66-77 Entretien et dépannage Instructions d’entretien préventif... -
Page 43: Caractéristiques Techniques
CARACTÉRISTIQUES TECHNIQUES Sécheuse commerciale de 30 lb (13,6 kg) : T-30 DC0030N_-(10/11/15)EC_X (60 Hz), DC0030N_-39AC_X (50 Hz) Hauteur du châssis 72 1/4 po 1 835 mm (En considérant un ajustement minime des pattes de mise à niveau) Largeur du châssis... - Page 44 Sécheuse commerciale de 50 lb (13,6 kg) : T-50 DC0050N_-(10/11/15)EC_X (60 Hz), DC0050N_-39AC_X (50 Hz) Hauteur du châssis 72 1/4 po 1 835 mm (En considérant un ajustement minime des pattes de mise à niveau) Largeur du châssis 34 1/2 po 875 mm Profondeur du cylindre 48 po...
- Page 45 Sécheuse commerciale de 80 lb (13,6 kg) : T-80 DC0080N_-(10/11/15)EC_X (60 Hz), DC0080N_-39AC_X (50 Hz) Hauteur du châssis 75 3/4 po 1 924 mm (En considérant un ajustement minime des pattes de mise à niveau) Largeur du châssis 38 1/2 po 978 mm Profondeur du châssis 51 3/4 po...
- Page 46 Sécheuse commerciale de 120 lb (22,68 kg) : T-120 à tambour réversible DC0120N_-10EC_R (60 Hz), DC0120N_-39AC_R (50 Hz) Hauteur du châssis 85 5/16 po 2 167 mm Largeur du châssis 46 3/4 po 1 187 mm Profondeur du châssis 60 3/16 po 1 528 mm Distance entre le sol et la porte 34 po...
-
Page 47: Raccordement Au Gaz
DIMENSIONS DE LA SÉCHEUSE T-30 - VUE DE FACE RACCORDEMENT AU GAZ (À L’ARRIÈRE DE LA MACHINE) PATTES DE MISE À NIVEAU MONTRÉES EN HAUTEUR MINIMUM - POUR UNE HAUTEUR MAXIMUM, AJOUTER 1 PO [25 MM] 8514-234-001 RÉV N page 47... - Page 48 DIMENSIONS DE LA SÉCHEUSE T-30 - VUE DE CÔTÉ ÉLECT 8514-234-001 RÉV N page 48...
-
Page 49: Raccordement Électrique
DIMENSIONS DE LA SÉCHEUSE T-30 - VUE DE DESSUS RACCORDEMENT ÉLECTRIQUE RACCORDEMENT AU GAZ 8" [203] CONDUIT D’ÉVACUATION 8514-234-001 RÉV N page 49... - Page 50 DIMENSIONS DE LA SÉCHEUSE T-50 - VUE DE FACE RACCORDEMENT AU GAZ (À L’ARRIÈRE DE LA MACHINE) PATTES DE MISE À NIVEAU MONTRÉES EN HAUTEUR MINIMUM - POUR UNE HAUTEUR MAXIMUM, AJOUTER 1 PO [25] 8514-234-001 RÉV N page 50...
- Page 51 DIMENSIONS DE LA SÉCHEUSE T-50 - VUE DE CÔTÉ ÉLECT 8514-234-001 RÉV N page 51...
- Page 52 DIMENSIONS DE LA SÉCHEUSE T-50 - VUE DE DESSUS RACCORDEMENT ÉLECTRIQUE RACCORDEMENT AU GAZ 8" [203] CONDUIT D’ÉVACUATION 8514-234-001 RÉV N page 52...
- Page 53 DIMENSIONS DE LA SÉCHEUSE T-80 - VUE DE FACE RACCORDEMENT AU GAZ (À L’ARRIÈRE DE LA MACHINE) PATTES DE MISE À NIVEAU MONTRÉES EN HAUTEUR MINIMUM - POUR UNE HAUTEUR MAXIMUM, AJOUTER 1 PO [25] 8514-234-001 RÉV N page 53...
- Page 54 DIMENSIONS DE LA SÉCHEUSE T-80 - VUE DE CÔTÉ ÉLECT 8514-234-001 RÉV N page 54...
- Page 55 DIMENSIONS DE LA SÉCHEUSE T-80 - VUE DE DESSUS RACCORDEMENT AU GAZ RACCORDEMENT ÉLECTRIQUE 8" [203] CONDUIT D’ÉVACUATION 8514-234-001 RÉV N page 55...
- Page 56 RACCORDEMENT AU GAZ (À L’ARRIÈRE DE LA MACHINE) DESSUS RETIRÉ DIMENSIONS DE LA SÉCHEUSE T-120 8514-234-001 RÉV N page 56...
- Page 57 RACCORDEMENT ÉLECTRIQUE DIMENSIONS DE LA SÉCHEUSE T-120 8514-234-001 RÉV N page 57...
- Page 58 RACCORDEMENT ÉLECTRIQUE RACCORDEMENT AU GAZ 10" (254) CONDUIT D’ÉVACUATION DIMENSIONS DE LA SÉCHEUSE T-120 8514-234-001 RÉV N page 58...
- Page 59 INSTRUCTIONS D’INSTALLATION ET D’UTILISATION DÉBALLAGE ET MISE EN PLACE DE LA SÉCHEUSE Outils requis : Douille hexagonale de 3/4 po (19 mm) et clé à cliquet, bloc de bois de 4 po (100 mm) ou 5 po (125 mm) d’épaisseur, couteau et pince multiprise disposant d’une ouverture de 1 3/8 po (35 mm). 1.
- Page 60 Caractéristiques techniques de ce manuel. Le raccord de gaz d’alimentation à l’unité dispose d’un filetage de 1/2 po (12.7 mm) pour les modèles T-30 et T-50 et de 3/4 po (19.1 mm), pour le modèles T-80 et T-120. Toutefois, la taille du tuyau d’alimentation de la sécheuse doit être...
- Page 61 déterminée conformément au National Fuel Gas Code ANSI Z223.1A et aux recommandations du fournisseur de gaz local. Il est conseillé d’installer un robinet d’arrêt de gaz individuel pour chaque sécheuse, ce qui peut être requis par le Code local (non fourni). Un mastic de jointement résistant à...
- Page 62 REMARQUE : La CONTRE-PRESSION STATIQUE maximum doit être de 0,3 à la sortie arrière de l’évacuation de la sécheuse. Si plusieurs sécheuses sont raccordées au conduit commun, assurez-vous de l’installation correcte du registre antirefoulement. T-30/50/80 8514-234-001 RÉV N page 62...
- Page 63 Pour T-30/50/80: le panneau de nettoyage du conduit d'évacuation (comme illustré ci-dessous) doit être fermé pendant que la sécheuse est en service: Gardez fermé pendant le service Ouverture pour un nettoyage de routine 7. ALLUMAGE DE LA SÉCHEUSE (ALLUMAGE TRANSISTORISÉ) : Le système d’allumage transistorisé enflamme le gaz du brûleur principal à...
-
Page 64: Arrêt De La Sécheuse
ARRÊT DE LA SÉCHEUSE Pour mettre la sécheuse hors service, fermez le robinet de gaz principal et débranchez l’alimentation électrique de la sécheuse. REMARQUE : Il est conseillé à l’installateur de tester le fonctionnement de la sécheuse et d’informer l’utilisateur avant de quitter l’installation. 8514-234-001 RÉV N page 64... -
Page 65: Instructions D'utilisation
INSTRUCTIONS D’UTILISATION DÉMARRAGE DE LA SÉCHEUSE 1. L’affichage de la commande de la sécheuse affiche le montant requis en mode veille. Une fois la porte ouverte, il invite l’utilisateur à ajouter de l’argent. Chargez les vêtements dans la sécheuse. Fermez complètement la porte. - Page 66 Reportez-vous à la figure ci-dessous pour trouver l’emplacement du bouton de programmation sur la commande de la sécheuse. Notez qu’il s’agit de la commande vue du dessous de la porte de service levée. T-30, T-50, T-80 : BOUTON DE PROGRAMMATION...
- Page 67 T-120 : BOUTON DE PROGRAMMATION Lorsque vous êtes en mode de programmation manuelle, les boutons « Start », « High », « Medium » et « Low » exécutent des fonctions alternatives. Nom des boutons Fonction alternative en mode de programmation Start Action pour accepter l’option affichée ou la touche «...
- Page 68 Option Quick Test : Lorsque vous choisissez l’option Quick Test, la sécheuse démarre un cycle de séchage raccourci, sans que le montant affiché soit réglé. L’objectif de ce cycle est de tester tous les composants majeurs pour voir s’ils fonctionnent correctement. Tous les codes d’erreur doivent fonctionner normalement pendant ce test.
- Page 69 Journal de l’historique des codes d’erreur : Les quinze derniers codes d’erreur, ainsi que la date et l’heure de leur apparition sont stockés dans la commande. Cette option permet d’examiner uniquement l’historique des occurrences de ces codes (aucun changement ne peut être apporté).
- Page 70 La figure ci-dessous affiche les options de sous-menu pour les prix : 8514-234-001 RÉV N page 70...
- Page 71 Option Cycles : Cette option permet de définir la température et la valeur de refroidissement pour le cycle de séchage. Elle permet également à l’utilisateur de rétablir les valeurs par défaut. 1. « TEMP SETTINGS » permet à l’utilisateur d’ajuster, dans une plage désignée, la température de cycles pour chacune des options «...
- Page 72 La figure ci-dessous montre les options de sous-menu pour l’option Cycles : 8514-234-001 RÉV N page 72...
- Page 73 Option Temperature Pricing : Cette option permet à l’utilisateur d’ajouter des montants supplémentaires en fonction de la température de séchage sélectionnée par le client. Ce supplément ne peut être appliqué que sur le prix de vente de base et n’a aucune incidence sur le prix de séchage supplémentaire.
- Page 74 italien. Toutefois, tous les autres messages, tels que la programmation manuelle, la programmation USB et tous les codes d’erreur sont en anglais. 7. « Shift Hours » : Cette fonction permet à l’utilisateur de passer de l’heure utilisée par la commande en heure conservée en interne par la commande.
- Page 75 La figure ci-dessous indique les options de sous-menu pour le menu Settings : 8514-234-001 RÉV N page 75...
- Page 76 Menu Usage : Le menu Usage permet à l’utilisateur de surveiller les données sur l’utilisation de la machine. Voir ci-dessous pour des renseignements détaillés sur chaque option du sous-menu. 1. « Coin Audit » : le champ de vérification de la monnaie indique l’accumulation de chaque pièce de monnaie insérée qui est envoyée vers la commande pour chaque entrée de monnaie à...
- Page 77 Menu Control : Le menu Control permet à l’utilisateur d’étudier les renseignements techniques importants concernant la commande. Aucune modification ne peut être effectuée dans ce menu. Voir ci-dessous pour des renseignements détaillés sur chaque sous-menu. 1. « Serial Number » : il s’agit du numéro de série de la commande. 2.
- Page 78 T-120 OPTIONS D’INVERSION T-120: La sécheuse peut être réglée en inversion à différents intervalles en fonction de la préférence du propriétaire. Le style de fonctionnement est déterminé par l’emplacement du fil de raccordement MARRON, qui se trouve dans le boîtier de commande arrière, sur l’entraînement à...
-
Page 79: Entretien Et Dépannage
ENTRETIEN ET DÉPANNAGE MISE EN GARDE : Au moment de l’entretien des commandes, étiquetez tous les fils avant de les débrancher. Des erreurs de câblage peuvent entraîner un fonctionnement inadéquat et dangereux. Assurez-vous que l’appareil fonctionne adéquatement une fois l’entretien terminé. ATTENTION. -
Page 80: Instructions D'entretien Préventif
Pour obtenir des renseignements relatifs à l’entretien et aux pièces, communiquez avec votre agent Dexter local. Pour trouver votre agent Dexter local, utilisez la fonction de localisation des revendeurs du site Web affiché ci-dessous. Si aucun agent Dexter n’est disponible, communiquez directement avec Dexter Laundry, Inc. par l’un des moyens énumérés ci-dessous :...
Need help?
Do you have a question about the T-30 and is the answer not in the manual?
Questions and answers