BendPak LR-60 Installation And Operation Manual
Hide thumbs
Also See for LR-60:
- Installation and operation manual (32 pages) ,
- Service manual (12 pages)
Table of Contents
Advertisement
Quick Links
Installation and Operation Manual
Manual P/N 5900337 — Manual Revision F — December 2020
Models:
• LR-60
• LR-60P
Designed and engineered by BendPak Inc. in Southern California, USA. Made in China.
⚠
DANGER
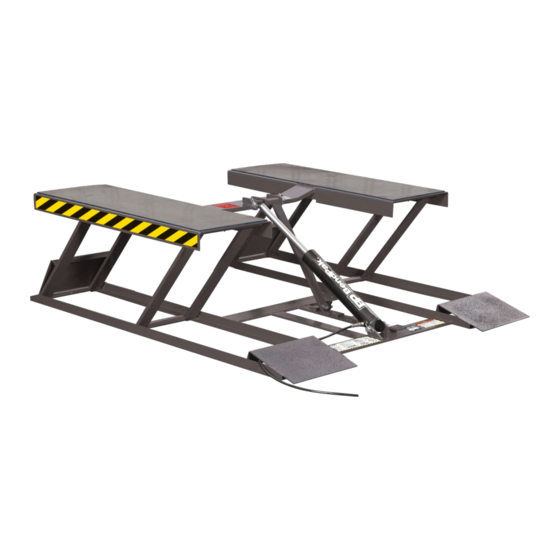
Low-Rise Scissor Lift
entire
Read the
product. Failure to follow the instructions and safety precautions in
this manual can result in serious injury or death. Make sure all other
operators also read this manual. Keep the manual near the product
for future reference. By proceeding with setup and operation,
you agree that you fully understand the contents of this
manual and assume full responsibility for product use .
contents of this manual
1645 Lemonwood Dr.
Santa Paula, CA, 93060 USA
Toll Free (800) 253-2363
Tel: (805) 933-9970
bendpak.com
LR-60 shown.
before
using this
Advertisement
Table of Contents

Related Manuals for BendPak LR-60


Summary of Contents for BendPak LR-60
- Page 1 Installation and Operation Manual Manual P/N 5900337 — Manual Revision F — December 2020 Models: • LR-60 • LR-60P LR-60 shown. Designed and engineered by BendPak Inc. in Southern California, USA. Made in China. ⚠ entire before Read the contents of this manual using this product.
- Page 2 Copyright. Copyright © 2020 by BendPak Inc. All rights reserved. You may make copies of this document if you agree that: you will give full attribution to BendPak Inc., you will not make changes to the content, you do not gain any rights to this content, and you will not use the copies for commercial purposes.
-
Page 3: Table Of Contents
LR-60P. Low-rise, portable, frame-engaging scissor Lift that supports Vehicles up to 6,000 lbs (2,722 kg). More information about the full line of BendPak products is available at bendpak.com. This manual is mandatory reading for all LR-60/60P users, including anyone who sets up, operates, maintains, or repairs them. ⚠... -
Page 4: Shipping Information
Make a visual inspection of the product before using it each time. Check for damage or missing parts. Do not use the product if you find any issues. Instead, take it out of service, then contact your dealer, email support@bendpak.com, visit bendpak.com/support, or call (800) 253-2363. - Page 5 Make a thorough inspection of the product at least once a year. Replace any damaged or severely worn parts, decals, or warning labels. • BendPak recommends referring to the ANSI/ALI ALIS Standard (R2015) Safety Requirements for Installation and Service for more information about safely installing, using, and servicing your Lift. Symbols Following are the symbols that may be used in this manual: ⚠...
-
Page 6: Components
Platforms are raised. Located opposite the Fixed Ramps. • Base. The bottom of the Lift. Has the holes for the Anchor Bolts for the LR-60. • Hydraulic Cylinder. Pushes the Platforms up to raise a Vehicle, down to lower a Vehicle. -
Page 7: Faqs
Frequently Asked Questions Question: How much weight can the LR-60/60P raise? Answer: The LR-60/60P can raise Vehicles up to 6,000 pounds (2,722 kg). Q: What if I want to raise a Vehicle that is slightly over the weight capacity of the Lift? A: Do not do this! This is an intended use of the product;... -
Page 8: Specifications
~35 seconds Power Unit 115 VAC*, 50/60 Hz, 1 Ph * Power Unit comes configured for 115 VAC; is reconfigurable to 230 VAC. Specifications subject to change without notice. LR-60/60P Low-Rise Scissor Lifts P/N 5900337 — Rev. F — December 2020... -
Page 9: Installation Checklist
☐ 6. Unpack and locate the Lift. ☐ 7. Assemble the Portable Stand (LR-60 only). ☐ 8. Attach the Power Unit to the Portable Stand (LR-60 only). ☐ 9. Assemble the Tow Cart (LR-60 only). ☐ 10. Raise the Platforms Off the Base (LR-60 only). -
Page 10: Installation
Installation This section describes how to install your LR-60/60P. Perform the steps in the order listed. Some installation steps are the same for both Lift models, but some are different. ⚠ Only use the factory-supplied parts that came with your Lift WARNING . - Page 11 Operators must always have a full, unobstructed view of the Lift. • Hose Cover. The LR-60 comes with a Hose Cover that you can anchor to the ground; it is 54 in / 1,372 mm long. If you plan to use the Hose Cover, make sure to leave enough room between the Power Unit and the Lift.
- Page 12 Instead, the geometry of the scissor arms moves the Platforms up at an angle (called longitudinal shift), towards the Hinged Ramp end of the Lift. The amount of longitudinal shift for the LR-60 and the LR-60P is approximately 14 in / 356 mm.
- Page 13 Using an appropriate lifting device (Shop Crane or Forklift, for example), move the Lift off of the bottom of the shipping container and to its permanent location (in the case of the LR-60) or its starting location (in the case of the LR-60P).
- Page 14 Do not connect the Power Unit to the Hydraulic System or power source at this point of the installation; those connections will be made later. Not drawn to scale. Not all components shown. LR-60/60P Low-Rise Scissor Lifts P/N 5900337 — Rev. F — December 2020...
- Page 15 The Tow Handle, which is used only with the LR-60P, lets you move the Lift to other locations. The following drawing shows how to set up the Tow Cart. Raise the Platforms Off the Base (LR-60 only) You need to raise the Platforms off the Base to access two of the three Anchor Bolt holes (see Anchor the Bases for Anchor Bolt locations).
- Page 16 For example: • 4.75 in / 120 mm Anchor Bolts are stamped with a G. • 6.3 in / 160 mm Anchor Bolts are stamped with a J. LR-60/60P Low-Rise Scissor Lifts P/N 5900337 — Rev. F — December 2020...
- Page 17 The Lift has three holes in the Base for anchoring it. Anchoring provides stability for the Lift. before once the Lift is Give a lot of thought to where you want the LR-60 anchoring it: anchored, it is extremely difficult to move...
- Page 18 Wrenching the Nut forces the wedge up, pushing out the Expansion Sleeve and pressing it tightly against the Concrete. Important: use an impact wrench to torque the Anchor Bolts. LR-60/60P Low-Rise Scissor Lifts P/N 5900337 — Rev. F — December 2020...
- Page 19 Anchor the Power Unit Stand (LR-60 only) The LR-60 comes with a Power Unit Stand to hold the supplied Power Unit; it can be on either side of must the Lift. The Power Unit Stand be anchored. Not necessarily to scale. Not all components shown.
- Page 20 6. Repeat Steps 3 through 5 for the other Wheel Assembly. 7. Use an appropriate tool to securely tighten all of the Nuts and then lower the Hinged Ramp end of the Lift back down to the ground. LR-60/60P Low-Rise Scissor Lifts P/N 5900337 — Rev. F — December 2020...
- Page 21 Hydraulic Fluid leaks, slow operation, and so on. strongly Your Lift is shipped from the factory with clean components; however, BendPak recommends that you give the hydraulic components an extra cleaning. Even a small grain of debris introduced into the Hydraulic System is enough to make the Lift unusable.
- Page 22 If you put too much, the excess liquid will be pushed out when the Fitting is tightened; use a rag to wipe the excess. 3. Tighten the Fitting into the connector; do over tighten the Fitting. 4. Allow the manufacturer-recommended curing time before pressurizing the system. LR-60/60P Low-Rise Scissor Lifts P/N 5900337 — Rev. F — December 2020...
- Page 23 Unit) once. To move your LR-60P later, just disconnect the Power Unit from the Hydraulic Hose using the Quick-Connect Fittings. The following drawing shows the Hydraulic connections for the LR-60. Drawing not to scale. Some components not shown. The following drawing shows the Hydraulic connections for the LR-60 Drawing not to scale.
- Page 24 2. Remove the Shipping Plug from one of the two Hydraulic Power Out ports on the Power Unit. The Hydraulic Power Out Ports are commonly labeled P1/P2 on the Power Unit. 3. For the LR-60, attach the 06 ORB connector of the Elbow Hydraulic Fitting (06 ORB – 04 JIC) to the Hydraulic Power Out Port.
- Page 25 You can also take off the Electrical Panel Cover (around the Raise button); wiring information is on the inside of the Cover. 3. Plug the Power Cord in to a grounded 230 VAC outlet. LR-60/60P Low-Rise Scissor Lifts P/N 5900337 — Rev. F — December 2020...
- Page 26 230 VAC operation. Contact the Electrician or your Supervisor before proceeding. 3. Plug the 230 VAC plug into a grounded 230 VAC outlet. 4. Begin using the Lift. LR-60/60P Low-Rise Scissor Lifts P/N 5900337 — Rev. F — December 2020...
- Page 27 If the Vehicle is stable and balanced, it could fall, which could damage the Vehicle, damage the Lift, or injure or kill anyone under the Vehicle. LR-60/60P Low-Rise Scissor Lifts P/N 5900337 — Rev. F — December 2020...
- Page 28 Make sure that the Safety Locks are cleared and free. • Leave the Manual with the Owner/Operator so that it is available for anyone who needs to read it. LR-60/60P Low-Rise Scissor Lifts P/N 5900337 — Rev. F — December 2020...
-
Page 29: Operation
Lift Operation Safety BendPak recommends referring to the ANSI/ALI ALIS Standard (R2015) Safety Requirements for Installation and Service, available from the Automotive Lift Institute store (autolift.org/ali-store), for more information about safely installing, using, and servicing your Lift. - Page 30 If the Vehicle is stable and balanced, it could fall, which could damage the Vehicle, damage the Lift, or injure or kill anyone under the Vehicle. LR-60/60P Low-Rise Scissor Lifts P/N 5900337 — Rev. F — December 2020...
- Page 31 5. Release the Lowering Handle when the Lift is fully lowered. 6. Move the Safety Lock Release Handle back to the Lowered position. 7. Carefully drive the Vehicle off. LR-60/60P Low-Rise Scissor Lifts P/N 5900337 — Rev. F — December 2020...
- Page 32 Moving the LR-60P The LR-60 is portable; you can move it between locations as needed. The LR-60 is portable. ⚠ DANGER move the Lift or perform any maintenance to the Lift without first confirming that electrical power has been disconnected and cannot be re-energized.
- Page 33 Using the LR-4A Arm Kit There is an Arm Kit optional accessory available for LR-60/60P, the LR-4A Arm Kit, which lets you hit the lifting points on wider Vehicles by allowing Lift Pads to extend past the sides of the Lift’s Platforms.
- Page 34 13. Once the Lift Blocks are in the right positions (under the Vehicle’s Lifting Points) and making good contact, and the Vehicle is stable and engaged on Safety Locks, you can begin work. LR-60/60P Low-Rise Scissor Lifts P/N 5900337 — Rev. F — December 2020...
-
Page 35: Maintenance
DANGER cannot from power and be re-energized until all maintenance is complete. BendPak strongly recommends using your Power Disconnect Switch during maintenance. If your organization has Lockout/Tagout policies, make sure to implement them during all maintenance. To maintain your Lift: •... -
Page 36: Troubleshooting
• Use lifting equipment to raise the Vehicle off the Platforms. If you are still unable to raise your Vehicle, contact BendPak Technical Support for assistance. LR-60/60P Low-Rise Scissor Lifts P/N 5900337 — Rev. F — December 2020... -
Page 37: Wiring Diagram
All electrical work, such as reconfiguring the unit for 230 VAC operation, done by a licensed, certified Electrician in accordance with all applicable local electrical codes. Damage caused by improper electrical installation may void your warranty. LR-60/60P Low-Rise Scissor Lifts P/N 5900337 — Rev. F — December 2020... -
Page 38: Labels
Labels LR-60/60P Low-Rise Scissor Lifts P/N 5900337 — Rev. F — December 2020... - Page 39 LR-60/60P Low-Rise Scissor Lifts P/N 5900337 — Rev. F — December 2020...
-
Page 40: Parts Diagrams
Parts Diagrams LR-60/60P Low-Rise Scissor Lifts P/N 5900337 — Rev. F — December 2020... - Page 41 LR-60/60P Low-Rise Scissor Lifts P/N 5900337 — Rev. F — December 2020...
- Page 42 LR-60/60P Low-Rise Scissor Lifts P/N 5900337 — Rev. F — December 2020...
-
Page 43: Ali Store
The ALI Store is your trusted source for workplace safety! Visit today and get the training and materials you need to work safely: http://www.autolift.org/ali-store/. LR-60/60P Low-Rise Scissor Lifts P/N 5900337 — Rev. F — December 2020... - Page 44 1645 Lemonwood Drive Santa Paula, CA 93060 USA Copyright © 2020 by BendPak Inc. All rights reserved. bendpak.com...
Need help?
Do you have a question about the LR-60 and is the answer not in the manual?
Questions and answers