Table of Contents

Related Manuals for Magnetek CPA HPV 900 Axial Flux PM Series


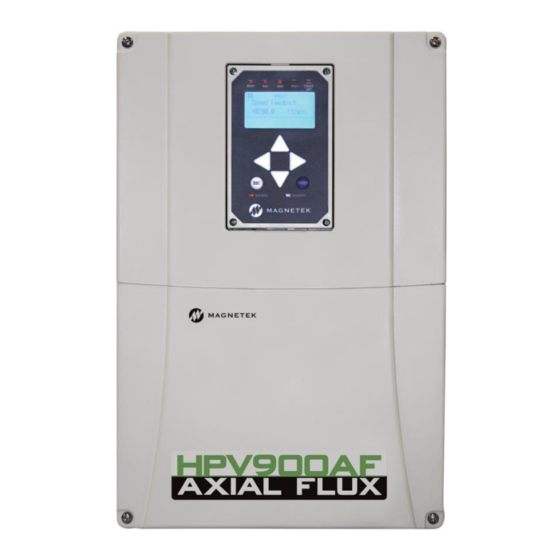
Summary of Contents for Magnetek CPA HPV 900 Axial Flux PM Series
- Page 1 Axial Flux PM Technical Manual NOTE: This is a supplementary manual for the PM Axial Flux. If any detail about the HPV900 Series 2 is needed, please refer to the technical manual TM7333 TM7354 Rev 20 © 2017 Magnetek Elevator...
- Page 2 WARRANTY OF MECHANTIBILITY OR OF FITNESS FOR A PARTICULAR PURPOSE AND BUYER HEREBY WAIVES ANY AND ALL CLAIMS THEREFORE. LIMITATIONS IN NO EVENT SHALL MAGNETEK BE LIABLE FOR LOSS OF PROFIT, OF LIABILITY INDIRECT, CONSEQUENTIAL OR INCIDENTAL DAMAGES WHETHER ARISING OUT OF WARRANTY, BREACH OF CONTRACT OR TORT.
- Page 3 IMPORTANT Grounding Considerations It is very important to make proper ground connections to the drive. The drive has a common ground bus terminal connection. All grounds need to land at this common point including building, motor, transformer, and filter grounds. This will limit the impedance between the grounds and noise will be channeled back to building ground.
-
Page 4: Table Of Contents
Table of Contents Start Up Guideline ........................... 1 Drive Model Number ..........................2 HPV 900 Series 2 Drive Ratings ....................... 2 HPV900 S2 Axial Flux Drive Application Kits .................... 3 Mechanical Mounting Instructions ......................6 Encoder Electrical Connection......................... 8 Proximity Sensor Electrical Connection....................8 PM Drive Setup Procedure ........................ -
Page 5: Start Up Guideline
Start-Up Guideline Start Up Guideline 1. Mechanically mount all the parts as explained in Mechanical Mounting Instructions on page 6. Connect the encoder and proximity sensor to the drive as explained in Encoder Electrical Connection on page 8 and Proximity Sensor Electrical Connection on page 8. 2. -
Page 6: Drive Model Number
Axial Flux Drive Models Drive Model Number HPV900 software program drive input voltage 1 = Standard Software 2 = PM Axial Flux 2 = 230 volt operator style 4 = 460 volt E = Elevator continuous N = no operator output current HPV 900 Series 2 Drive Ratings Continuous... -
Page 7: Hpv900 S2 Axial Flux Drive Application Kits
Axial Flux Drive Application Kits HPV900 S2 Axial Flux Drive Application Kits Kits to Order for Axial Application Description Items in the Kits Flux Application For all Axial Flux application. Based on motor voltage, amperes, and incoming HPV900-_ _ _ _-2E1-02 HPV900 Series 2 Axial Flux PM drive volt 5m cable for encoder, 5m cable for proximity sensor,... - Page 8 Axial Flux Specific Parameters Parameters additional to standard HPV900 Series 2 C0 Menu Submenu Parameters Units Range Default Site Setting User Switches C1 Submenu Encoder None -Axial Flux -Axial Flux Select U0 Utility Submenu Parameters Units Range Default Site Setting Drive Info U6 Submenu Drive Version None...
- Page 9 Interconnections input logic input 1 logic output 1 power HPV 900 logic input 2 logic output 2 logic input 3 logic output 3 Axial Flux logic input 4 logic output 4 logic input 5 logic output common logic input 6 encoder +12 VDC logic input 7 encoder common...
-
Page 10: Mechanical Mounting Instructions
Installation Mechanical Mounting Instructions The following parts need to be mounted on to the motor: proximity sensor (red device with 3 wires coming out of it as shown in Figure 3), incremental encoder, rider wheel, sensor bracket, target, sticky pad, and hex nuts. Figure 2: Axial Flux Assembly Kit encoder shaft has a keying slot, do NOT place any of the set screws in the keying... - Page 11 Installation 4. Ascertain the correct location on the rotor where the target is to be fitted and prepare 2. The proximity sensor should be loosely the surface by cleaning using the alcohol fitted to the bracket with 2x M12 nut with pad provided.
-
Page 12: Encoder Electrical Connection
Installation Proximity Sensor Electrical bracket Connection NOTE: The proximity sensor should ONLY be used on TerMag board number 46S04284- 1020. The proximity sensor cable should be wired up prox. sensor to the drive as shown in Figure 12. When connecting the cable to the proximity sensor, gap tool latch the coupling ring on the female (cable target... -
Page 13: Pm Drive Setup Procedure
Installation because the encoder shaft is mounted on a rider wheel that sits on the rotor; 1 revolution of the rider wheel doesn’t equate to 1 revolution of the motor a. Ropes off PPR (preferred): i. with ropes removed from/off sheave, perform an Open Loop Alignment on page 12. - Page 14 Installation NOTE: skip step 8 if the motor was running at high speed with ropes off PM Motor Frame Encoder Pulses (A1) / 8. After the motor can run up/down the Types Enc PPR Low (A1) hoist at high speed, fine tune the MX05/10 14395 PPR Encoder Pulses (A1) and Enc PPR...
-
Page 15: Pm Alignment Procedure
Appendix – PM Alignment Procedure PM Alignment Procedure Before the motor can run, a rotor alignment to find the motor poles needs to be performed. 4. Press the DOWN arrow until ALIGNMENT The 3 method to find the poles are: High is displayed. -
Page 16: Open Loop Alignment
Appendix – PM Alignment Procedure During the Alignment, a loud high pitch beep will come out of the motor and the RUN LED will be READY USER FAULT TORQUE lit for the duration of the procedure. LIMIT 10:00 Open Loop Alignment ALIGNMENT ENABLE Open Loop Alignment is a function that will... -
Page 17: Auto Alignment Procedure
Appendix – PM Alignment Procedure c. Drive asserts SPD_REG_RLS and 8) Run motor at 20% contract speed and CLOSE_CONTACT (all other outputs verify alignment is correct. will operate as programmed and have If ropes are not attached, set INERTIA no special status or benefit during the (A1) to 0.25 seconds Alignment Procedure) - Page 18 Appendix – PM Alignment Procedure 4) If ON RUN is selected, the drive expects READY USER FAULT TORQUE LIMIT the following sequence to occur: 10:00 f. Car Controller asserts DRIVE ENABLE Alignment Method g. Car Controller issues RUN Command AUTO ALIGN h.
-
Page 19: Auto-Tune Procedure
Appendix – AutoTune Procedure Auto-Tune Procedure Auto-Tune is a function used only on PM (U9) that will automatically calculate the D and Q READY USER FAULT TORQUE LIMIT Axis Inductances and the Stator Resistance 10:00 based on the calculated value of the motor’s Autotune Select Base Impedance. -
Page 20: Troubleshooting
Appendix – Troubleshooting Troubleshooting This is just a short list of faults/alarm/difficulties NOTE: A more detailed fault list can be found that can come up when starting up a HPV900 in the HPV900 Series 2 Technical Manual Series 2 Axial Flux drive ONLY. TM7333. - Page 21 Appendix – Troubleshooting Faults/Alarms/Difficulties Description Solutions HIT TORQUE LIMIT The drive has reached its Incorrect Encoder Phasing Verify that the encoder (alarm) torque limit as defined in the A1 menu. phasing is correct. Swap the A and /A wires in TB1-1 and TB1-2 ...
- Page 22 Appendix – Troubleshooting Faults/Alarms/Difficulties Description Solutions Once Per Revolution Bump The motor would jerk every Parameter Setting Verify that the Encoder time the target sensor goes pass the proximity sensor Pulses (A1) matches the number for Measured PPR NOTE: for MRL setup, use (D1) while the motor is the Z Edge Count (D1) to see rotating at high speed...
- Page 23 Appendix – Troubleshooting Faults/Alarms/Difficulties Description Solutions Spd Dev Flt The speed feedback is failing Encoder Cable not properly grounded to properly track the speed Spd Dev Alm reference Verify encoder cable is properly grounded Encoder Hardware Verify encoder operation Motor Runaway Condition –...
- Page 24 Appendix – Troubleshooting Faults/Alarms/Difficulties Description Solutions Z Marker Lost The drive is expecting a Proximity Sensor Verify that the target sensor signal back from the proximity sensor but doesn’t see any is being seen by the within the expected window. proximity sensor every time the target is lined up with the proximity sensor using...
-
Page 25: Timing Diagram
Appendix – Timing Diagram Timing Diagram DRIVE ENABLE (logic input) Motor Contactor RUN or RUN UP or RUN DOWN (logic input) Speed Command UP/DWN & S-CURVE SEL (logic inputs) Mechanical Brake READY TO RUN (logic output) RUN COMMANDED (logic output) Speed Regulator Release (logic output) FAULT... -
Page 26: Spare Parts List For Hpv900 Series 2 Axial Flux
Appendix – Spare Parts Spare Parts List for HPV900 Series 2 Axial Flux Part Numbers Description Detailed Description FRU,HPV900 Series 2, Ctl PCB, HPV9-CTL0030-01 Includes control PCB with Axial Flux software Axial Flux FRU,HPV900 Series 2 Axial Flux, Includes Axial Flux Terminal Board with HPV9-TER0010 terminal blocks TerMag Brd... - Page 27 Index Index Mechanically mount ............ 1, 6 Model Number ..............2 Motor data ..............9 Alignment ............10, 11, 19 Auto Alignment .............. 13 Auto-Tune ..............10, 15 Once Per Revolution Bump ........... 18 Open Loop Alignment ..........12 Bracket ..........See Sensor bracket Parts ............
- Page 30 HPV 900 Series 2 Axial Flux PM Data subject to change without notice. HPV 900 S2 and Series 2 is a trademark of Magnetek, Inc. Magnetek Elevator Products Magnetek Elevator Products - Europe N50 W13775 Overview Dr Unit 3, Bedford Business Centre Mile Road...
Need help?
Do you have a question about the CPA HPV 900 Axial Flux PM Series and is the answer not in the manual?
Questions and answers