
Related Manuals for Apera Instruments TN480


Summary of Contents for Apera Instruments TN480
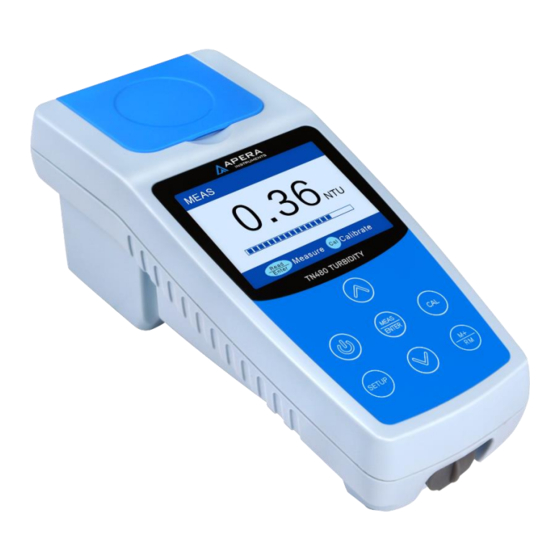
- Page 1 TN480 Portable Turbidity Meter Instruction Manual APERA INSTRUMENTS, LLC aperainst.com...
-
Page 2: Table Of Contents
Table of Content ....................- 1 - Overview ................- 2 - Technical specifications ................- 3 - Instrument description Instrument Overview ......................- 3 - Configuration ......................... - 4 - Display Mode .......................... - 4 - Keypad ............................ - 5 - Power Supply ......................... -
Page 3: Overview
The instrument uses infrared light emitting diode (LED 860±30nm) as the light source and 90° scattering method, which is compliant with ISO7027 and DIN EN 27027 standards for the determination of the turbidity for water solutions. TN480 allows you to measure turbidity in a reliable and simple manner wherever you are. -
Page 4: Technical Specifications
TECHNICAL SPECIFICATIONS Measuring Method ISO 7027 and DIN EN 27027 compliant nephelometric method (90°) Light Source Infrared light emitting diode (860±30nm) 0 – 1000 NTU, automatic range selection: 0.01 – 19.99 NTU Measuring Range 20.0 – 99.9 NTU 100 – 1000 NTU Accuracy ≤... -
Page 5: Instrument Description
INSTRUMENT DESCRIPTION 3.1 Instrument Overview ① ② ③ ④ ⑥ ⑤ ⑩ ⑦ ⑨ ⑧ Diagram-1 Flip cover of the sample cuvette holder Battery cover ① ⑥ (Close the cover when measuring) Dust-proof plug (Take off the plug when Housing ②... -
Page 6: Configuration
3.2 Configuration Calibration Solutions: ① 0.0, 20.0, 100, 400, 800 NTU Carrying case ② TN480 Turbidimeter ③ ⑪ Microfiber cloth ④ Screwdriver (to remove battery ⑤ cover) ① Software flash drive ⑥ ② AA Alkaline battery×4 ⑦ ⑩ ③ Silicone oil (10 ml) ⑧... -
Page 7: Keypad
① Calibration mode ② Standard values Calibration ③ Operation guide Menu ④ Finished calibration indicator ① Parameter Setup Parameter ② Menu Setup ③ Operation guide ① ① Data Recall ② ② Saved data numberings ③ ③ Saved data Data Recall ④... -
Page 8: Power Supply
Keypad Functions ⚫ Power on/off ⚫ In measurement mode, press to enter or exit calibration mode ⚫ In calibration mode, press to exit calibration mode ⚫ In parameter setup and data recall mode, press to return to measurement mode ⚫ In measurement mode, short press to perform single measurement; long press (>3s) to perform continuous measurement. - Page 9 measurement mode, one serial number corresponds to multiple measurements (according to user’s setting) in the measurement interface. The data, as shown in Diagram 5, has 10 measurements. Obviously, for one measurement interface, the memory storage of the normal measurement is different to that of TruRead measurement.
-
Page 10: Calibration
CALIBRATION Preparation for Calibration Calibration point The instrument has 5 calibration points: 0 NTU, 20 NTU, 100 NTU, 400 NTU, and 800 NTU. Among them, 0 NTU point uses AMCO 0.0 NTU calibration solution or laboratory distilled water, and the remaining 4 calibration points use AMCO polymer solutions. Note that the cap of the 0.0 NTU solution cuvette can be unscrewed. -
Page 11: Calibration Procedure (Take 0 Ntu And 20 Ntu As An Example)
Be careful not to shake the solution vigorously, as this will create air bubbles which will destabilize the measurement; For 0.0 NTU calibration solution, do NOT shake or flip. If using Formazin calibration solution, as it tends to precipitate easily, each time users must flip and shake the cuvette to make the solution even. -
Page 12: Notes For Calibration
6) If you want to continue to calibrate 100, 400 and 800 NTU, place the 100 NTU calibration cuvette in the sample cuvette holder and press to calibrate. After calibration is done, press to confirm; repeat the steps to calibrate 400 NTU and 800 NTU. After calibration is done, press to return to measurement mode. -
Page 13: Turbidity Measurement
impact on the measurement accuracy of low turbidity solutions. When the reading is displayed as 0.00 NTU, if a positive error occurs, a 0.0 NTU calibration solution can be used for verification test. If a negative error occurs, it cannot be verified. For this instrument, there is a Zero Turbidity Error Reminder function. -
Page 14: Measurement Mode
c) Make sure the surface of the cuvette is dry, clean and free of stains. Apply a small drop of silicone oil on the surface of the cuvette and wipe it off with a micro-fiber cloth. Then wipe again with filter paper or high-quality tissue paper. -
Page 15: Notes For Measurement
5.4 Notes for Measurement Keep the sample stable: After the cuvette is placed into the sample cell, it is recommended to wait for 1 to 2 minutes before calibration, as the solution will experience some shaking when the cuvette moves, which may result in inaccurate measurements. Sample Cuvette cleaning requirement: Sample cuvette must be rigorously cleaned and free from smudges and scratches. -
Page 16: Parameter Setup Reference Table
6.2 Parameter Setup Reference Table Symbol Parameter Content Last calibration date and time View Continuous measurement 5-10-15-20 Measurement unit NTU-FTU Data logging mode manual-automatic Delete saved data No-Yes Auto-power off timer 10-20-30-OFF Select language English-Spanish-Chinese Date setting Time setting 6.3 Parameters Description P1 ─... -
Page 17: Data Output Via Usb Port
DATA OUTPUT VIA USB PORT 7.1 Display Interface ① ② ③ Diagram 10 ①— Display area for saved data To display numberings, date, time, measurement method (normal measurement or continuous measurement), measured values, and measurement unit. For continuous measurement, average, maximum, and minimum values will also be displayed. -
Page 18: Install Software
AMCO 0.0 NTU calibration T500-2 0.0 NTU/100mL 1 bottle solution 20/100/400/800 NTU Compatible with T200-1 4 bottles AMCO polymer solutions TN400&TN480 T500-3 Sample cuvettes with lid Φ25×60mm,1# to 6# 6 pcs TN400-S3 Silicone oil 10mL 1 bottle - 16 -... -
Page 19: Warranty
We warrant this instrument to be free from defects in material and workmanship and agree to repair or replace free of charge, at the option of APERA INSTRUMENTS, LLC, any malfunctioned or damaged product attributable to the responsibility of APERA INSTRUMENTS, LLC for a period of TWO YEARS for the instrument from the delivery. - Page 20 APERA INSTRUMENTS, LLC Address: 6656 Busch Blvd, Columbus Ohio 43229 Tel: 1-614-285-3080 Email: info@aperainst.com Website: aperainst.com - 18 -...
Need help?
Do you have a question about the TN480 and is the answer not in the manual?
Questions and answers